Acutronic Medical Systems
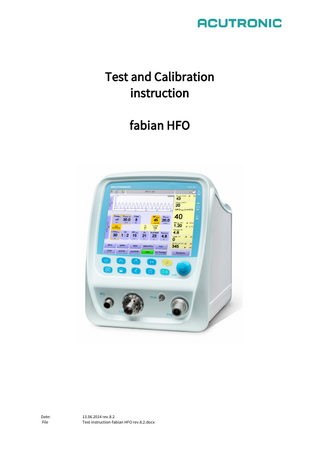
fabian Ventilator Systems
fabian HFO Test and Calibration Instruction Rev 8.2 June 2014
Test and Calibration Instruction
24 Pages
Preview
Page 1
Test and Calibration instruction fabian HFO
Date: File
13.06.2014 rev.8.2 Test instruction-fabian HFO rev.8.2.docx
Configuration ... 4 Visual inspection... 5 2.1 Rear Panel V1 ... 5 2.2 Rear Panel V2 ... 6 2.3 Front ... 7 3) Start up / Self test ... 7 4) Blender / purge flow ... 8 4.1 Blender tightness ... 8 4.2 Tightness calibration valves ... 9 4.3 Purge flow ... 10 5) Calibration ... 11 5.1 Calibration pressure regulator ... 11 5.2 Calibration blender ... 12 5.2.1 Calibration AIR valve / Flow sensor ... 13 1) 2)
5.2.2
Calibration O2 valve / Flow sensor ... 13
5.3 Sensor Inspiration ( p insp.) ... 14 5.4 Proximal Sensor ... 15 5.5 Calibration Touch screen ... 16 5.6 Calibration Exhalation valve ... 17 5.7 Calibration pressure relief valve nCPAP ... 18 5.8 O2 Sensor calibration ... 19 5.9 Flow Sensor Calibration ... 19 6) Functional test ... 20 7) Trigger Check ... 20 8) Volume guarantee Check ... 20 9) O2 / Air blender ... 20 10) HFO ... 21 11) Patient alarms ... 21 11.1 Tube leak ... 21 11.2 Apnoea ... 22 11.3 Pressure high ... 22 12) nCPAP Mode... 23 13) System Alarms ... 24 14) End test ... 24 15) EN62353 Protocol ... 24
Date: File
13.06.2014 rev.8.2 Test instruction-fabian HFO rev.8.2.docx
page 2 of 24
Test set
Tube set
HFO bridge
Test lung
Date: File
Test lung small
13.06.2014 rev.8.2 Test instruction-fabian HFO rev.8.2.docx
page 3 of 24
1) Configuration Info Screen:
From Main screen press 2x INFO • • • • • •
then
Device ID Version Software Language Version Blender PIC Conductor / Controller PIC Monitor PIC
In Service mode – open Accuboard screen •
Accu PIC
Label on rear panel or Serial no.: •
Date: File
fabian HW Revision
13.06.2014 rev.8.2 Test instruction-fabian HFO rev.8.2.docx
Serialnumber: ( from unit 00355 ) xxyyxx-nnnnn yy = Hardware Revision
page 4 of 24
2) Visual inspection 2.1
Rear Panel V1
Figure 1 a 1 2 3 4 5 6 7 8 9 10 11 12 13
Date: File
Connector for 24V DC external power supply (no charging!) Network jack for data management , PDMS, Aculink USB port for data output and update RS232 port for CO2 Option or PDMS, Aculink Flow sensor connector Nurse call connector Loudspeaker Fan Optional ports Power Connector ( fuse 1 AT ) Pin for potential equalisation O2 supply connector 2.0 – 6.5 bar / 40 l/min Pressurised air connector 2.0 – 6.5 bar / 40 l/min
13.06.2014 rev.8.2 Test instruction-fabian HFO rev.8.2.docx
page 5 of 24
2.2
Rear Panel V2
Figure 1b 1 2 3 4 5 6 7 8 9 10 11 12 13 14 15
Date: File
Connector for 24V DC external power supply (no battery charging !) Network jack for data management , PDMS, Aculink USB port for data output, Software update RS232 port for PDMS, Aculink Flow sensor connector Nurse call connector Video In , VGA ( option ) Loudspeaker Fan CO2 sensor ( option ) Nebulizer, ultrasonic ( option ) O2 supply connector 2.0 – 6.5 bar / 40 l/min Pressurised air connector 2.0 – 6.5 bar / 40 l/min Power Connector ( fuse 1.25 AT ) Pin for potential equalisation
13.06.2014 rev.8.2 Test instruction-fabian HFO rev.8.2.docx
page 6 of 24
2.3
Front 1
2 3 4
Figure 1
Inspiratory port. Centre port for connecting the nCPAP system Expiratory port. Pressure measuring port Prox. HFO port
3) Start up / Self test Use the ON / OFF button on fabian to power on the equipment. When the device is powered on the start-up screen will appear and the equipment will perform a selftest. The SOFTWARE REVISION, the CHECK SUMS and the status of the interfaces will be checked.
Figure 2
(ok ≙ no error)
Date: File
13.06.2014 rev.8.2 Test instruction-fabian HFO rev.8.2.docx
page 7 of 24
4) Blender / purge flow 4.1
Blender tightness • • • •
Connect fabian to gas supply. fabian is switched OFF Connect a tube to the nCPAP connector and close prox. port. See picture below. Place the other end in a drinking glass filled with approx. 100 - 200 ml tap water.
OR •
Connect to your flow meter or Respirator tester NO bubbles coming out of the tube
OR 0.00 l/min on your Respirator tester.
Date: File
13.06.2014 rev.8.2 Test instruction-fabian HFO rev.8.2.docx
page 8 of 24
4.2
Tightness calibration valves • • • •
Connect fabian to gas supply. fabian is switched OFF Connect a tube to the Oxygen sensor calibration outlet. ( see picture below ) Place the other end in a drinking glass filled with approx. 100 - 200 ml tap water.
OR •
Connect to your flow meter or Respirator tester NO bubbles coming out of the tube
OR 0.00 l/min on your Respirator tester.
Date: File
13.06.2014 rev.8.2 Test instruction-fabian HFO rev.8.2.docx
page 9 of 24
4.3
Purge flow • • •
Connect fabian to gas supply. Connect a tube to the proximal sensor port. ( see picture below ) Switch ON fabian
Settings: Mode I - Flow E - Flow PEEP P Insp Frequency I - Time Oxygen
IPPV 8 l/min 5 l/min 5 mbar 30 mbar 30 bpm 1.00 sec. 21 Vol.%
•
Connect your flow meter or respirator tester to the prox. port. ( see picture below ) Gas standardisation: 20 oC / 1013 mbar Gas type: Air
• •
Start manual inspiration by pressing: Reading on the tester: 0.200 l/min ( tolerance: - 50 ml / +150 ml )
Date: File
13.06.2014 rev.8.2 Test instruction-fabian HFO rev.8.2.docx
page 10 of 24
5) Calibration 5.1
Calibration pressure regulator • • • • • •
Connect Air and O2 supply Start fabian in mode IPPV with standard settings (paediatric mode) . Set. O2 value :60 Vol.% Service menu -> Monitor PIC -> compare values P-AIR and P Oxy. ( Fig. 3 ) Adjust pressure regulator to 2300 ± 100 ( Fig. 4 ). Lift cap from the pressure regulator to adjust the value. Check the values after 5 minutes again to be sure the regulator is working properly.
Figure 3
O2
AIR
Figure 4
Date: File
13.06.2014 rev.8.2 Test instruction-fabian HFO rev.8.2.docx
page 11 of 24
5.2
Calibration blender
Calibration must be done by a calibrated mass flow meter. The measurement unit must set to the following setting: Gas standardisation: Gas type:
20 oC / 1013 mbar Air
Supply Air and O2 connection with compressed air !
Connect flow meter to nCPAP outlet. • Switch ON fabian Settings: Model Mode I - Flow E - Flow PEEP P Insp Frequency I - Time Oxygen
Date: File
fabian HFO IPPV 10 l/min 5 l/min 5 mbar 30 mbar 30 bpm 1.00 sec. 60 Vol.%
13.06.2014 rev.8.2 Test instruction-fabian HFO rev.8.2.docx
O2 Therapy Mode 10 L/min O2 = 21 %
page 12 of 24
• •
Let the fabian run for 5 minutes ± 1 minute You can Switch OFF all Alarms by pressing Simultaneously
and
and hold for approx. 5 sec.
In the upper right corner the symbol
will appear.
From now on ALL alarms are disabled until restart of the Unit. 5.2.1
Set O2:
Calibration AIR valve / Flow sensor
21 %
Start manual inspiration by pressing:. Be sure that the man. Insp. Time is set to max. Reading: 9.5 ± 0.1 l/min Adjust with pot 21% ( see fig. 5 ) 5.2.2 Set O2:
Calibration O2 valve / Flow sensor
100 %
Start manual inspiration by pressing: Reading: 9.5 ± 0.1 l/min Adjust with pot 100% ( see fig. 5 )
.
Figure 5
• • •
Switch OFF fabian Switch ON fabian Compare the values 9.5 l/min for AIR and O2 .
•
Possibly recalibrate ( sometimes need 2 or 3 restarts )
Date: File
13.06.2014 rev.8.2 Test instruction-fabian HFO rev.8.2.docx
page 13 of 24
5.3
Sensor Inspiration ( p insp.)
Switch on fabian. Disconnect Air and O2. Quit all alarms
• •
fabian Service Mode Monitor PIC
Figure 6
•
No tube connected to Inspiration port.
•
value p-insp : 1480 ± 10 ( Fig. 7 ) adjust with Pot ( Fig. 8, mark 9 )
•
Figure 7
Figure 8
Date: File
13.06.2014 rev.8.2 Test instruction-fabian HFO rev.8.2.docx
page 14 of 24
5.4
Proximal Sensor
Figure 6
• • •
Service menu -> calibration Prox. Port „ open „ no tube connected Press - Calibrate -
Figure 7
•
Confirm 0 mbar
Figure 8
• • • •
Connect calibration set on prox port. ( Fig. 9 ) Set 60 mbar on prox. port Confirm 60 mbar button Sensor is calibrated Figure 9
Datum: File
28.04.2014 rev.8.1 Test instruction-fabian HFO rev.8.2.docx
page 15 of 24
5.5
Calibration Touch screen • • • •
Datum: File
Service menu Display Calibration Follow messages on the screen ( possibly you must perform the calibration more than one time ! )
28.04.2014 rev.8.1 Test instruction-fabian HFO rev.8.2.docx
page 16 of 24
5.6
Calibration Exhalation valve • •
Service mode - > calibration Connect test tube set
Figure 10
•
Exhalation valve calibration
Figure 11
•
Follow messages on the screen
Figure 12
• •
Remove test lung from the Y Piece. Hold Y Piece tight. When the values shows p peak 50 ±1 mbar and PEEP 5 ±0.5 push the “Home button” to store the calibration data. Figure 13
Datum: File
28.04.2014 rev.8.1 Test instruction-fabian HFO rev.8.2.docx
page 17 of 24
5.7
Calibration pressure relief valve nCPAP • •
Start fabian in nCPAP mode Set CPAP 5 mbar Set P manual 15 mbar
•
Connect pressure gauge ( range 0 - 1 bar ) directly to the nCPAP port .( Fig. 17 )
•
Figure 14
• • •
Apply manual breath Safety valve opens at 450 mbar ± 50 mbar Adjust safety valve by turning the calibration screw ( allen key 8 mm ). Clockwise will increase pressure (Fig. 18) REMARK: The screw can be very strong, because it is secured with Loctite 480
•
Secure Screw with Loctite 480 or similar.
Figure 15 Datum: File
28.04.2014 rev.8.1 Test instruction-fabian HFO rev.8.2.docx
page 18 of 24
5.8
O2 Sensor calibration
Access the calibration menu directly via the calibration key: Press O2 21% after successful calibration press O2 100%
Figure 16
5.9
Flow Sensor Calibration
Access the calibration menu directly via the calibration key: Ensure no gas will flow through the flow sensor during calibration.
Following successful calibration, the date of the last calibration will be displayed in the corresponding field.
Datum: File
28.04.2014 rev.8.1 Test instruction-fabian HFO rev.8.2.docx
page 19 of 24
6) Functional test Connect test tube set and test lung „ small „
7) Trigger Check At Expiration phase pull the test lung to initiate a trigger. If a trigger is applied the breathing curve will turn green. 8) Volume guarantee Check Connect test tube set and test lung „ small „ More information in “ Test protocol “
9) O2 / Air blender • •
Connect test tube set. NO test lung connected. You can Switch OFF all Alarms by pressing simultaneously
•
Datum: File
and
and hold for approx. 5 sec.
In the upper right corner the symbol will appear. From now on ALL alarms are disabled until restart of the Unit. Connect your O2 measurement device to the insp. Connector of the fabian.
28.04.2014 rev.8.1 Test instruction-fabian HFO rev.8.2.docx
page 20 of 24