Instructions for Use
54 Pages
Preview
Page 1
Gebrauchsanweisung/Technische Beschreibung ACCULAN-Dermatom GA 643
Istruzioni per l’uso/Descrizione tecnica Dermatomo ACCULAN GA 643
Instructions for use/Technical description ACCULAN dermatome GA 643
Instruções de utilização/Descrição técnica Dermátomo ACCULAN GA 643
Mode d’emploi/Description technique Dermatome ACCULAN GA 643
Gebruiksaanwijzing/Technische beschrijving ACCULAN-dermatoom GA 643
Instrucciones de manejo/Descripción técnica Dermátomo ACCULAN GA 643
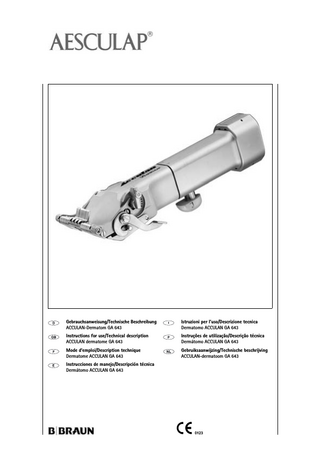
ACCULAN dermatome GA 643
Legend
Contents
1 ACCULAN dermatome 2 Rotational speed control button 3 Safety catch 4 Cover release button 5 Cover 6 Sterile funnel 7 Rechargeable battery 8 Dermatome blade 9 Clamp lever 10 Blade cover 11 Sliding surface 12 Sliding surface 13 Flaps 14 Pusher dog 15 Blade guide peg 16 Surface 17 Scale ring 18 Setting lever 19 Lock of the setting lever 20 Roll pin 21 Guide slots 22 Flap rod 23 Flap noses 24 Nut
1. 2. 2.1 2.2 2.3 2.4 3. 4. 4.1 4.2 4.3 4.4 5. 5.1 5.2 5.3 5.4 6. 7. 8. 9. 10. 11.
Symbols on the product
¾ Prior to use, check for proper condition and functioning of the product. ¾ In order to avoid damaging the device through improper assembly/operation and mitigating the manufacturer’s liability: – Use the product only according to these instructions for use. – Follow the safety instructions and maintenance advisories. – Only combine Aesculap products with each other. ¾ Products and accessories may be operated and used only by qualified or trained and experienced personnel. ¾ Keep the instructions for use accessible to all operating room staff. ¾ Observe the instructions for use of the ACCULAN battery charger and of the rechargeable battery. ¾ Adhere to applicable norms.
Attention, see instructions for use
Type B application component
Rotational speed control
Safe handling... 9 Product description... 10 System components... 10 Necessary components for the use... 10 Intended use... 10 Mode of operation... 10 Preparation... 10 Working with the device... 10 System set-up... 10 Attaching the accessories... 11 Function check... 11 Operation... 12 Care and handling... 12 Disposable products... 12 Cleaning and disinfecting... 12 Care and checking for damage... 13 Sterilization method and parameters... 13 Maintenance... 13 Recognizing and remedying errors... 14 Technical Service... 15 Accessories and spare parts... 15 Technical specifications... 15 Disposal... 15
1. Safe handling
Marking of electric and electronic devices according to directive 2002/96/EC (WEEE), see Disposal.
9
ACCULAN dermatome GA 643 2. Product description
4. Working with the device
2.1 System components
4.1 System set-up
Designation
Art. no.
ACCULAN dermatome
GA 643
Cover
GA 624
Sterile funnel
GA 625
Rechargeable battery
GA 646
Storage tray
GB 509 R
WARNING
Risk of infection and contamination! The device is delivered in an unsterile condition. ¾ Do not sterilize the rechargeable battery. ¾ Sterilize the device before use.
Inserting the rechargeable battery
2.2 Necessary components for the use
7 Designation
Art. no.
ACCULAN dermatome
GA 643
Cover
GA 624
Sterile funnel
GA 625
Dermatome blades
GB 228 R
ACCULAN battery charger
GA 627 M
Rechargeable battery
GA 646
Changing funnel
GA 644
6
1
2.3 Intended use The ACCULAN dermatome is used in dermatology/traumatology for obtaining skin grafts.
2.4 Mode of operation In the ACCULAN dermatome, the rotational speed of the motor is converted, through an eccentric-tappet drive, directly and with minimum loss into back-and-forth movement of the dermatome blade.
3. Preparation Non-compliance with these rules will result in complete exclusion of Aesculap liability. ¾ Prior to use, inspect the ACCULAN dermatome and its accessories for visible damage. ¾ Use ACCULAN dermatomes and accessories only if they are in perfect condition.
10
Fig. 1 ¾ Hold the ACCULAN dermatome 1 in a way that the battery compartment is at the top. ¾ Set the sterile funnel 6 in place. ¾ Have the unsterile rechargeable battery 7 inserted by another person, through the sterile funnel 6 into the battery compartment (note the coding). ¾ Remove the sterile funnel 6 and put it down in an unsterile room. ¾ Insert the sterile cover 5, making certain that it clicks into place.
ACCULAN dermatome GA 643
Removing the rechargeable battery
Securing the ACCULAN dermatome
¾ If the rechargeable battery needs to be changed during operation, carry out the battery change in sterile conditions only, using the changing funnel GA 644 for the removal and re-insertion of batteries, see instructions for use GA 644. ¾ The rechargeable battery 7 always has to be taken out after operation and before processing. ¾ Push down both release buttons 4 on the cover 5 simultaneously. ¾ Remove the cover 5. ¾ Prior to battery removal, make sure that the rotational speed control button 2 is in the front position (rest position). The ACCULAN dermatome will be damaged through knocking it against hard surfaces! ¾ Only tap the ACCULAN dermatome on the palm CAUTION of your hand.
In order to avoid that the ACCULAN dermatome is unintentionally turned on during a change of blades, the rotational speed control button 2 can be secured with a safety catch. During normal operation, the safety catch remains in the ON position. ¾ Rotate the safety catch 3 to the OFF position. The button is locked and the ACCULAN dermatome cannot be turned on. ¾ To deactivate the safety catch 3 turn it back to the ON position.
¾ Tap the ACCULAN dermatome 1 on the palm of your hand until the rechargeable battery 7 comes loose, and remove the battery.
Fig. 2
Inserting a dermatome blade Disassembling the flap rod of the ACCULAN dermatome For disinfecting and cleaning, the head of the ACCULAN dermatome has to be disassembled. ¾ Disassemble the flap rod 22 and the flaps 13: – Loosen the nut 24 by turning it clockwise (left-handed thread). – Turn the nut 24 back to the end of the visible surface. – Push the flap rod 22 sideways by approx. 4 mm and twist it until it can be removed. – Remove the flap rod 22. ¾ Slide off the flaps 13 from the flap rod 22.
Assembling the flap rod of the ACCULAN dermatome ¾ Before assembling the flaps 13, lightly spray all components with Sterilit M. ¾ Position the flaps 13 on the flap rod 22 against the edge of the rear surface, taking note of the symbol on the face of the thread. ¾ Screw the nut 24 counterclockwise onto the thread of the flap rod 22 (left-handed thread). ¾ Turn the nut 24 up to the edge of the visible surface. ¾ Insert and twist the complete flap rod 22 in its guide slots 21 on the side surfaces. ¾ Push the flap rod 22 sideways as far as it goes, so that the cross pin of the flap rod comes to lie in the guide slot 21. ¾ Tighten the nut 24 counterclockwise.
4.2 Attaching the accessories
WARNING
WARNING
¾ Push both clamp levers 9 in the direction of the arrows. The blade cover 10 is now unlocked. ¾ Open the blade cover 10 in the direction of the arrows. ¾ Insert the dermatome blade 8 in the pusher dog 14 and the blade guide peg 15. ¾ Close the blade cover 10. ¾ Tighten both clamp levers 9 until the roll pin 20 snaps into the notch of the clamp lever 9.
Removing the dermatome blade ¾ Release both clamp levers 9. ¾ Open the blade cover 10. ¾ Remove the dermatome blade 8 from the pusher dog 14 and the blade guide peg 15.
4.3 Function check Always perform a test run before using the ACCULAN dermatome: ¾ Make certain that a rechargeable battery has been installed. ¾ Use only devices that are in perfect condition. ¾ Operate the ACCULAN dermatome for a short while, at a blade stroke number of approx. 6 300–6 800 strokes/min. ¾ Note the instructions in chapter ”Care and checking for damage”. Note Each intraoperative battery change has to be followed by a function check!
Risk of infection or contamination if surgical gloves are damaged! ¾ Avoid contact with the cutting edge when inserting the dermatome blade. Risk of injury and material damage through unintentionally putting the ACCULAN dermatome into operation while inserting the blade! ¾ Before inserting the blade, activate the safety catch.
11
ACCULAN dermatome GA 643 4.4 Operation
5. Care and handling
Adjusting the cutting thickness Note Consider the skin condition (e.g. with regard to the age of the patient)! ¾ Note the instructions in chapter ”Recognizing and remedying errors”. ¾ Adjust the cutting thickness with the setting lever 18. The lock 19 of the setting lever prevents any unintentional change to the setting of the cutting thickness. ¾ Read the cutting thickness on the scale ring 17 (scale gradations 1/10 mm).
5.1 Disposable products
CAUTION
Possible damage or destruction of disposable products through reprocessing! These products are intended for single use only! ¾ Do not prepare these products for reuse.
Designation
Art. no.
Dermatom blades
GB 228 R
Adjusting the cutting width
CAUTION
Risk of injury through improper opening of the flaps. Risk of cuts by the dermatome blade. ¾ Always use the flap noses for turning up the flaps.
¾ Turn up the number of flaps 13 according to the desired cutting width, until they click into place (1 flap width = 8 mm). Note The width of the skin graft cut out will be 2 mm less than the cutting width set by means of the flaps.
Using the ACCULAN dermatome Note The low beep sound just before the ACCULAN dermatome starts up is a regular design feature of the device. ¾ Press the rotational speed control button 2 for the continuous adjustment of the rotational speed.
Taking skin grafts Before using the ACCULAN dermatome for the first time, the user should carry out some test cuts on a specimen in order to make himself familiar with the device. ¾ Stretch flabby skin. ¾ With the cutting surface lying upon the skin being cut, push the ACCULAN dermatome 1 forward in an even movement, applying gentle pressure and making certain that the ACCULAN dermatome 1 does not cant. ¾ If the graft is extremely thin, use tweezers to lay the detached graft up on the surface 16 from time to time. ¾ Turn off the motor and pull the freshly cut graft out of the device. - or Lower the handle and cut off the graft with the dermatome.
12
5.2 Cleaning and disinfecting
CAUTION
Damage to the ACCULAN dermatome by penetrating fluids! ¾ Do not submerge the device in any fluid. ¾ Do not use pressurized air on the device. ¾ Allow any fluid that has penetrated the device to drain out immediately.
¾ Open the clamp lever 9 and remove the dermatome blade 8. ¾ Take out the flap rod 22 of the ACCULAN dermatome, see Disassembling the flap rod of the ACCULAN dermatome.
Manual cleaning and disinfecting ¾ Wipe off the device with a clean, lint-free cloth that has been soaked in cleaning and disinfectant solution. - or In order to avoid formation of sticky or encrusted residues, spray the components with a disinfectant spray. ¾ Wipe off the component surfaces with a clean, lint-free cloth. ¾ Follow the disinfectant manufacturer's instructions.
ACCULAN dermatome GA 643
Mechanical cleaning and disinfecting
CAUTION
Improper mechanical cleaning will damage the ACCULAN dermatome! ¾ Clean the ACCULAN dermatome in a suitable storage tray only. ¾ Use a suitable cleaning and disinfecting cycle for mechanical cleaning. ¾ Do not use alkaline cleaning agents.
¾ Perform mechanical cleaning immediately after the operation. ¾ Place storage tray GB 509 R in a suitable wire basket (e.g. JF 214 R). ¾ Position the ACCULAN dermatome properly in storage tray GB 509 R immediately after the operation. ¾ To avoid abrupt changes in temperature, use a single-chamber washer disinfector. ¾ Select a cleaning and disinfecting cycle according to the following criteria: – Neutral cleaner – Cleaning temperature ≤ 50 °C – Final rinse with simultaneous thermal disinfection in demineralized water. Example: Miele Vario TD process. ¾ Follow the instructions for use of the Aesculap ECCOS storage system TA 009 721.
5.4 Sterilization method and parameters The ACCULAN dermatome can be sterilized in the storage tray.
CAUTION
Damage to the rechargeable battery and its integrated electronic components due to sterilization! ¾ Remove the rechargeable battery from the device prior to sterilization. ¾ Do not heat the rechargeable battery to a temperature higher than 65 °C. ¾ Do not sterilize the rechargeable battery.
¾ Sterilize the ACCULAN dermatome immediately after cleaning it. ¾ Remove the rechargeable battery 7 from the device, see Removing the rechargeable battery. ¾ Prior to sterilization, lightly spray the sliding surfaces 11 and 12 with Sterilit M. ¾ Rest the ACCULAN dermatome 1, the cover 5 of the battery compartment and the sterile funnel 6 in a suitable wire basket (e.g. JF 214 R). ¾ Sterilize using steam sterilization, taking note of the following: The sterilization must be carried out following a validated steam sterilization procedure (e.g. in a sterilizer according to EN 285/ANSI/AAMI/ISO 11134-1993, ANSI/AAMI ST46-1993 and validated according to EN 554/ISO 13683). In case of application of the fractionated vacuum procedure the sterilization has to be done using the 134 °C/2 bar program with a minimal holding time of 5 minutes.
5.3 Care and checking for damage ¾ Each time the device is processed and a function check is carried out, check for: – damage, atypical sounds when the device is operated, or excessive vibration or heating-up – damage to the battery compartment seal – damaged or missing silicone seal on the cover ¾ If any irregularities are found, do not make further use of the device. ¾ Prior to an extended period of non-use, always store the device cleaned and dried according to the instructions.
6. Maintenance To ensure reliable operation, the manufacturer recommends that maintenance be performed after 300 reprocessing cycles, at least once per year. ¾ For service, maintenance and repairs, please contact the Aesculap/B. Braun representative in your country, see Technical Service.
13
ACCULAN dermatome GA 643 7. Recognizing and remedying errors
Error
Cause
Finding
Remedy
The motor does not run
Corrosion on motor connectors after infrequent and brief usage
No beep sound when the rotational speed control button is pressed
Have device repaired by the manufacturer
Rechargeable battery defective Motor bearing defective
Test battery charger and replace rechargeable battery if necessary
Beep sounds when rotational speed control button pressed
Have device repaired by the manufacturer
Rechargeable battery nearly or completely discharged
Faint running noise
Charge battery
Rechargeable battery defective
Faint or no running noise
Replace the rechargeable battery
Friction between sliding surface and blade
Faint running noise
Spray the sliding surfaces lightly with Sterilit M
Loud noise
Gearing worn
Loud noise/heating-up
Have device repaired by the manufacturer
Blade does not move
Defective gearing
Motor runs without gearing engaged
Have device repaired by the manufacturer
Lack of cutting performance
Blunted blade
Cutting edge worn
Insert a new blade
Insufficient drive power; motor runs too slowly
See above (error: motor runs too slowly)
See above (error: motor runs too slowly)
Skin graft shows perforations after removal
Components of the dermatome head are damaged
Scratches, grooves, or dents on the dermatome head
Have device repaired by the manufacturer
Varying graft thickness (over the width of the graft)
Dermatome is out of adjustment (damage after knock or drop)
Light slit at the blade is not parallel
Have device repaired by the manufacturer
Varying graft thickness (over the length of the graft)
Dermatome is out of adjustment (damage after knock or drop)
Dents
Have device repaired by the manufacturer
Varying pressure and operating angle during the removal of the skin
Uneven bleeding from the skin
Perform test cuts to determine the graft thickness
Gear or gear bearing defective Motor runs too slowly
14
ACCULAN dermatome GA 643
8. Technical Service
10. Technical specifications
For service, maintenance or repairs contact your Aesculap/B. Braun representative. All guarantees and warranty rights as well as licenses will be void if modifications on the device are performed.
DC voltage
9.6 V
Rated capacity of rechargeable battery
0.5 Ah
Service addresses
Rated current
2A
Aesculap Technischer Service Am Aesculap-Platz 78532 Tuttlingen / Germany Phone: +49 7461 95-2700 Fax: +49 7461 16-2887 E-mail: [email protected] Other service addresses can be obtained from the address indicated above.
Max. mechanical output
45 W
9. Accessories and spare parts
Designation
Art. no.
ACCULAN dermatome
GA 643
Cover
GA 624
Sterile funnel
GA 625
Dermatom blades (pack of 10)
GB 228 R
ACCULAN battery charger
GA 627 M
Rechargeable battery
GA 646
Changing funnel
GA 644
Storage tray (for GA 624)
GB 504 R
Storage tray (for GA 643)
GB 509 R
Storage tray (for GA 644)
GB 506 R
Max. motor torque
20 Ncm
Rotational speed of motor
0–8 000 1/min
Dimensions (L x W x H)
285 mm x 115 mm x 50 mm
Weight incl. rechargeable battery
1 480 g
Type as per IEC 601
B
Blade travel
3.1 mm
Blade stroke number
6 300–6 800 strokes/min
Cutting width
max. 78 mm, adjustable with 10 flaps of a width of 8 mm each
Cutting thickness
0.2 mm to 1.2 mm, Scale gradations of 1/10 mm
Electromagnetic tolerance
IEC 601-1-2
Norms applied
IEC 601-1
11. Disposal Note The user institution is obliged to process the product before its disposal, see Care and handling. Always adhere to national regulations when disposing of or recycling the product or its components! Products carrying this symbol are subject to separate collection of electric and electronic devices. Within the European Union, disposal is carried out without fees by the manufacturer.
If you have any questions concerning the disposal of the product, please contact your national B. Braun/Aesculap agency, see Technical Service.
15