Service Manual
10 Pages
Preview
Page 1
0-12
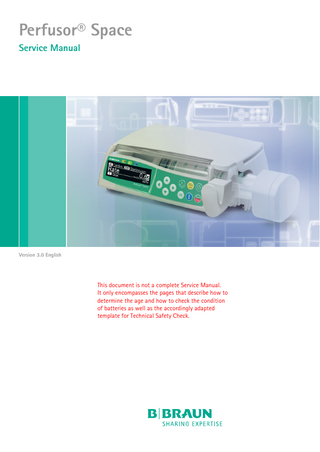
Perfusor® Space Service Manual
Version 3.0 English
This document is not a complete Service Manual. It only encompasses the pages that describe how to determine the age and how to check the condition of batteries as well as the accordingly adapted template for Technical Safety Check.
0-
Disassembly / Assembly
3.2
Battery Module
Designation
3
Ord. No.
Battery compartment cover PSP, cpl... 3452 0872
1
Battery module SP (NiMH) without fixing pin... 3452 0856 with fixing pin... 3452 0856A Battery module SP (Li-Ion) with WLAN and fixing pin... 8713182A 2
Note Users have been informed as follows: If a Perfusor® Space pump used on battery only and showing full battery charge stops during syringe change and alarms, users should remove the pump from use and return it to the Medical Engineering Department for replacement of the battery. In this case the battery has to be replaced regardless of its age or any further test.
Fig.: 3 - 8 Legend of fig. 3 - 8: ItemDesignation 1
Battery compartment cover
2
Battery compartment cover lock
Disassembly Note Move the drive head to the extended end position before starting disassembly (see “General“ ➨ pg. 3 - 1). 1.
Press the lock (Fig.: 3 - 8 / Item 2) on the battery compartment cover (Fig.: 3 - 8 / Item 1) and remove the battery compartment cover.
Note The battery compartment cover of more recent devices is shorter and can only be unlocked using a pointed object.
EN Perfusor® Space, 3.0
3- 9
5-4
5-
Technical Safety Check (TSC)
Perfusor® Space
Index g (Master – to be added to the documentation)
Checklist for Technical Safety Check – Every 24 Months Unit: Perfusor®Space Manufacturer: B. Braun Melsungen AG
User
Observe the Service Manual and the instructions for use. All measured values are to be documented. Accessories used should be included in testing. Make exclusive use of calibrated measuring equipment. Article No. Visual Inspection
Unit No.
Year of Procurement Electrical Safety
Stock No. Functional Inspection
According to IEC / EN 60601-1 or VDE 0750 and VDE 0751 ❒ Perfusor® Space: The patient and housing leakage current of ❒ Locking with second unit Cleanliness, completeness, damage and the Perfusor® Space is caused exclusively by ❒ Operating unit magnets defects affecting safety, damage and the operating voltage supply (Power Supply ❒ Battery compartment cover SP or SpaceStation). readability of the labels. Particularly: The Technical Safety Checks of the power Determine age of battery ❒ Syringe holder with blade supply SP (drawing No. M001321005 F04) ❒ If older than 4 years: ❒ Syringe fastening or of the SpaceStation (drawing No. recommend replacement of battery M690000046 F04) serve to check whether ❒ Membrane in drive head or perform battery check both limit values are met. ❒ Axial clearance of drive (refer to ➨ “Procedural Instructions ❒ Screw covers on the TSC“) ❒ Connectors “P2” and “P3” ❒ Protection cap at drive head Switch on unit with power supply ❒ Self-test ❒ Accessories: ❒ Indicator lamps (LEDs) Cleanliness, completeness, damage and ❒ Audible alarm faults affecting safety, damage and ❒ Visual alarm readability of the label ❒ Status display ❒ Check the unit and the accessories for ❒ Lighting compatibility ❒ Battery alarm
M688 70 01 05 F04 / 3891 7319 (GB)
EN Perfusor® Space, 3.0
Sheet 1 of 3
5- 1
1-
Technical Safety Check (TSC) Index g (Master – to be added to the documentation)
Visual Inspection
Electrical Safety
Functional Inspection
According to IEC / EN 60601-1 or VDE 0750 and VDE 0751 Operation ❒ Syringe fastening ❒ Syringe recognition ❒ Infusion ❒ Buttons on the operating unit ❒ Staff call ❒ Trigger bolus at the device ❒ Trigger bolus by pressing the PCA button ❒ PCA lock (bottom side of pump) with inserted 50/60 ml syringe ❒ PCA lock Syringe Anti Removal CAP PSP with inserted 50/60 ml syringe Switch on unit without power supply ❒ Self-test ❒ Magnetic function of the battery compartment cover Pressure cut-off Syringe type: “#LehreOPS50” Delivery rate: 200 ml/h - Strain gauge pressure measurement ❒ Pressure stage 1 (9…15N)________N ❒ Pressure stage 3 (25…33N)_______N ❒ Pressure stage 8 (63…76N)_______N ❒ Error message “Alarm / pressure too high” at every pressure stage - Motor power limitation ❒ Pressure stage 1 (11…28N)________N ❒ Pressure stage 3 (30…49N)________N ❒ Pressure stage 6 (58…80N)________N ❒ Error message “Alarm / drive blocked” at every pressure stage
M688 70 01 05 F04 / 3891 7319 (GB)
5- 2
Sheet 2 of 3
Perfusor® Space, 3.0
EN
1-
Technical Safety Check (TSC) Index g (Master – to be added to the documentation)
Mechanical Aids and Measuring Equipment Used ❒ Syringe gauge, serial No.__________ Calibrated until_________________ ❒ Service connector SP ❒ __________________________ ❒ __________________________
Accessories Used
❒ ❒ ❒ ❒ ❒ ❒
Power Supply SP Battery module Staff call lead Space PCA Kit (PCA button) Syringe Anti Removal Cap PSP ___________________________
Test result:
Inspection performed by:
Defects found which could endanger patients, users or third parties: Yes No Measures to be taken:
Special features / documentation:
Repair Replacement of battery recommended _________________________
Unit handed over on:
To: Date / Signature: Next deadline for TSC:
M688 70 01 05 F04 / 3891 7319 (GB)
EN Perfusor® Space, 3.0
Sheet 3 of 3
5- 3
Procedural Instructions on the TSC
Functional Inspection Perfusor® Space
6
Mechanical Inspection 1.
Fit the unit to be tested on top of another Space device and check the proper functioning of the lock.
2.
Fit the unit to be tested under another Space device and check the proper functioning of the lock.
3.
Hold the device with the operating unit downwards. The operating unit must not open.
4.
Check the battery compartment cover lock for proper operation.
Functional Check 1.
Determine age of battery Open battery compartment cover and remove battery. Read the batch number printed on the type plate of the battery and determine the age of the battery. a) For NiMH batteries, see Fig.: 6 - 2 b) For Li-Ion batteries, see Fig.: 6 - 3
Example: Produced in week 42/2008
Example: Produced in week 41/2011
D 2003 E 2004 F 2005 G 2006 H 2007 I
2008
... N 2013
Second two digits: year of production
Two digits: calender week
First two digits: calender week
Letter: year of production according to left table
Fig.: 6 - 2 NiMH batteries
Fig.: 6 - 3 Li-Ion batteries Note If the battery is older than 4 years recommend the replacement of the battery or perform the battery check.
EN Perfusor® Space, 3.0
6- 3
6
Procedural Instructions on the TSC
2. Battery check Use the battery maintenance mode to discharge the battery to battery pre-alarm (the battery status indicator displays no bar). Perform 5 syringe changes with emptied syringe. -
Replace the battery if a battery alarm occurs during the syringe changes.
3. Switch on unit with the power supply connected and check the following details: -
Self-test Display on the LC display
-
Indicator lamps LEDs (yellow, green, blue) light up for a short moment LED changes from green to red Changed order for units from SW J on: LEDs (yellow, red, blue) light up for a short moment LED changes from red to green
-
Audible alarm A deep and a high sound
-
Status display Battery capacity, mains operation (service connector SP)
-
Lighting Illumination of syringe compartment, LC display and buttons
4. Syringe fastening a) Axial fastening holds syringe wing b) Syringe holder blade fixes syringe piston c)
Both claws in drive head catch the syringe piston plate
5. Check syringe recognition. a) Insert approved 2 ml / 3 ml syringe. The syringe size is recognized. b) Insert approved 50 ml / 3 ml syringe. The syringe size is recognized. 6. Carry out infusion and bolus with any syringe and press all buttons at least once. Infusion and bolus are performed and all buttons trigger the function desired.
6- 4
Perfusor® Space, 3.0
EN
Procedural Instructions on the TSC
6
7.
Trigger bolus by pressing the PCA button. For this purpose, select a PCA drug from the database, fit the PCA button to P2, and trigger bolus. Confirm that the green LED on the PCA button lights up. Bolus is delivered.
8.
Staff call a) Plug service connector SP on connector “P2”. b) Open syringe holder while the infusion is administered. The red LED on the service connector SP lights up.
9.
PCA lock on the Perfusor® Space a) Check the PCA lock with an approved 50/60ml syringe.
10. PCA lock of the Syringe Anti Removal Kit PSP a) Place on the drive head and lock. b) Check the Syringe Anti Removal Kit PSP with an approved 50/60ml syringe. c) Unlock and remove from the drive head. Battery Alarm
EN Perfusor® Space, 3.0
1.
Switch device off.
2.
Pull off the power supply.
3.
Switch on unit. Self-test is carried out.
4.
Open battery compartment cover during operation. An alarm is activated.
5.
Remove battery. An alarm sounds with the piezo buzzer for at least 3 minutes.
6- 5
9
Revision Documentation
Version 3.0
9- 2
-
Changed TSC of the unit
-
Revised procedural instructions on the TSC
-
Release date: 25.10.2013
Perfusor® Space, 3.0
EN
B. Braun Melsungen AG | Carl-Braun-Strasse 1 | 34209 Melsungen | Germany Tel +49 (0) 5661 71-0 | Fax +49 (0) 5661 71-4567 | www.bbraun.de
Mat. No. M688_001152, Doc. No. 8713 9020, Version 3.0, Effective 25.10.2013