Instructions for Use
15 Pages
Preview
Page 1
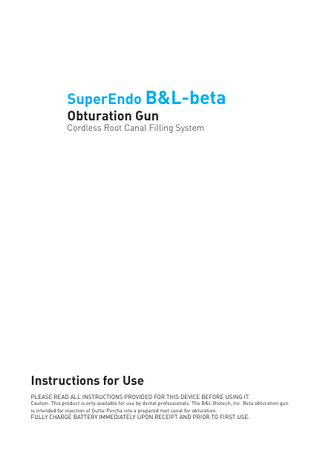
SuperEndo B&L-beta Obturation Gun
Cordless Root Canal Filling System
Instructions for Use PLEASE READ ALL INSTRUCTIONS PROVIDED FOR THIS DEVICE BEFORE USING IT.
Caution: This product is only available for use by dental professionals. The B&L Biotech, Inc. Beta obturation gun is intended for injection of Gutta-Percha into a prepared root canal for obturation.
FULLY CHARGE BATTERY IMMEDIATELY UPON RECEIPT AND PRIOR TO FIRST USE.
Table of Contents 3 Package Contents 3 Standard Symbols 4 Product Description 8 Instructions for Use 9 Removing / Changing the Needle 10 Changing the Battery 10 Cleaning & Sterilization 11 Troubleshooting 12 Miscellaneous 13 Warranty
CAUTION – Do not operate the Beta in close proximity to electrosurgical instruments, cellular phones, radio, or HDTV/Satellite-TV as these devices may interfere with the proper operation of the Beta. CAUTION – Risk of Fire. Keep the heated tip/needle or plunger away from flammable gasses or liquids. 2
Package Contents • Obturation Gun • Charging Base • AC Adapter with Cord and Plug • Pack of Thermal Protectors (3 Caps per pack) • Plunger • Cleaning Brush • Box of Gutta-Percha (100 per box) • Needle Bender/Wrench • Instructions for Use • Battery • Needles Available Needles Include (Gauge / Length): • 20 ga / 24 mm • 23 ga / 24 mm • 25 ga / 24 mm
• 20 ga / 28 mm • 23 ga / 28 mm
Standard Symbols Class II Equipment
Type B Applied Part
Date of Manufacture
Serial Number
CE Mark
Consult Intructions for Use
Caution
Authorized Representative
Source: 100~240V / 50~60Hz; DC 12V, 850mA Medical Device Operating Temperature: 0 to 45ºC. Storage Temperature: -20 to 60ºC.
3
Product Description
Temperature Control Switch Numeric LED Temperature Display Power Switch Pellet Loading Slot Thermal Protector Cap Needle
Plunger
LED Battery Indicator
Charging Base
Power Adapter Jack
POWER SWITCH (left button) On/Off Switch. The Beta automatically turns off its heating element after 10 minutes of non-use. 4
TEMPERATURE CONTROL SWITCH (right button) Changes the temperature for melting the pellet* from 150ºC→180ºC →200ºC→230ºC and then back to 150ºC. * Recommended Temperature Setting Gutta-Percha 25G
180ºC ~ 230ºC
23G
180ºC ~ 200ºC
20G
180ºC ~ 200ºC
PLUNGER The stainless steel plunger can be reused many times, however eventually it will need to be replaced. Call authorized dealer to purchase replacements.
LED BATTERY INDICATOR Indicates remaining battery power in 25% increments. A blinking red LED light indicates that the battery power level is low and the battery should be recharged. Charge unit by inserting the Beta into the charging base and plugging the AC Adapter into a standard electrical outlet. When charging, red LED light will not blink. When charging is complete, the red LED light will turn off and three (3) green LED lights will turn on. After complete charging, the gun may be left in place on the charging unit or removed as needed. Level of Battery in Use
Level of Battery in Charge
100%
25%
75%
70%
25%
50%
75%
100% Finish
A blinking red light in the battery charge-indicator indicates a low battery state and full recharging of the battery is recommended. After the Beta is completely charged, the available continuous usage time is approximately 90 minutes. Caution: If the Beta is not used for more than a month, the battery may need to be recharged. When not in use, charge the battery once/month to maintain battery lifespan. Activating the Beta in a low battery state or leaving the unused unit uncharged for an extended time will result in shortened battery life. 5
NUMERIC LED TEMPERATURE DISPLAY Temperature Display shows temperature of pellet inside the chamber (±10ºC). PELLET LOADING SLOT Insert only one pellet at a time into the loading slot. THERMAL PROTECTOR CAP The Protector Cap is designed to protect the soft tissue and lips from burns. It is recommended that this item be sterilized (autoclave only) between patients and before each use. NEEDLE The needle must be connected so that the copper ring is held tight against the unit to prevent leakage of obturation material. Be careful not to overtighten needle. Several sizes of needles (20 ga, 23 ga, and 25 ga / 24 mm and 28 mm) are available which can be bent to suit individual preferences. (Notice: Please store unused needles in an airtight environment; the needle is coated with silver which may tarnish with long-term exposure to ambient air). Please use the needle bender/wrench provided to connect, disconnect and bend the needle.
WARNING: Properly sterilize the needle before first use and between patients. B&L Biotech, Inc. recommends following sterilizer manufacturer’s written instructions for cycle parameters or sterilization per ANSI/AAMI ST46:2002; Sterilization Steam and Sterilization Assurance in Health Care Facilities. Steam sterilization of lumened instruments requires that they be flushed with water just prior to wrapping and sterilization to generate steam within the lumen. DISCONNECT NEEDLES AND STERILIZE THEM WITHOUT THE GUN. DO NOT AUTOCLAVE THE GUN OR THE CHARGING BASE OR PLACE IN COLD (CHEMICAL) DISINFECTANT. Do not attempt to change the needle while the needle is hot.
6
NEEDLE BENDER / WRENCH The needle bender/wrench is used to tighten the needle into the nose of the Beta barrel. Once the needle is securely in place, the needle bender is then used to bend the needle to the desired angle. The needle is not intended to be bent with any device other than the Beta needle bender. CHARGING BASE Connect the Charging Base to the provided power cord and plug cord into a standard electrical outlet. Place the Beta in the Charging Base so that the connector on the bottom of the Gun engages securely with the connector in the Charging Base. The Gun is properly connected when the LEDs illuminate. If no light on the Gun is visible, check all connections.
BATTERY CHARGING: FULLY CHARGE BATTERY IMMEDIATELY UPON RECEIPT OF THIS DEVICE AND PRIOR TO FIRST USE. The Beta is fully charged when all three (3) of the green charging indicator lights are displayed. Allow a minimum of three (3) hours to fully recharge a dead battery. CLEANING BRUSH When cleaning the barrel of the Beta with the cleaning brush, insert the brush at the back of the gun and push it through. Be certain to remove the brush via the tip of the barrel using hemostats. Do NOT remove brush via back of the gun.
7
Instructions for Use When handling the Beta, do not touch the front tip area of the Gun as it is extremely hot. Always use the protective cover to prevent burning user or patient.
1. Select the desired needle gauge (20 ga, 23 ga or 25 ga) and use the needle
bender/wrench provided to securely attach the needle to the front of the Gun (do not over-tighten). Note that the 23 ga and 25 ga swivel-type needles can be swiveled in a clockwise (when looking at the nose of the gun) direction. Also use the needle bender provided to provide a smooth transition when bending the needle as desired. CAUTION: Make sure the Gun is turned off and the nose is cool to the touch before connecting the needle (approximately 5 minutes after Gun is turned off).
2. The Gutta-Percha pellets supplied by B&L have been
optimized for the Beta. Pellets from other manufacturers may not be the proper size or may require different melting temperatures. To insert the pellet into the Beta, pull the plunger back (but not out of the Gun) to clear the loading slot. Tilt the front of Gun down so that the needle is pointing at an angle towards the floor. Place the pellet inside the loading slot, then use the Plunger to push the pellet forward until it enters the heating chamber (only insert one pellet at a time). Advance the plunger to push the pellet fully into the heating chamber up to a point approximately half-way between the two red indicator bands on the Plunger. Failure to fully insert the Plunger will result in the trigger-advance mechanism not operating properly.
3. Turn on the Power Switch (left button). The temperature will automati-
cally default to the previous temperature setting used before the Beta was turned off. To change the desired temperature, continue pressing the Temperature Control Switch (right-hand button) until the desired temperature is displayed. Each press of the Temperature Control Switch (right button) will incrementally change the temperature display as follows: 150ºC→180ºC →200ºC→230ºC and then back to 150ºC ( For recommended temperature setting, please refer to the table in page 4). After selecting the desired temperature, the temperature display will begin to show the actual temperature* which will continue to change until it reaches the desired temperature. Pump the trigger to further advance the Plunger until a small amount of material extrudes from the needle tip. NOTE: The Temperature display will show the temperature inside the pellet chamber within ±10ºC.
8
4. Load another pellet ONLY once the Gun has had time to cool AND when all material from the previous pellet has been extruded through the needle (the thick red line on the Plunger will be up against the back of the Gun).
5. Place the Thermal Protector Cap over the needle and front cone of the Beta prior to intraoral use. Wipe off any excess material from the needle tip using gauze and rubbing alcohol before introducing the needle into the canal but be careful as the needle is warm. Always fill a canal from the “bottom up” to minimize the creation of air pockets (voids). Place the needle into the canal as far as possible without going so far that it does not move freely. While pumping the trigger to inject material, slowly retract the needle tip until reaching the coronal orifice. CAUTION: There is a possibility of needle breakage when squeezing the trigger forcefully without retracting the needle tip backwards toward the coronal orifice while injecting material. While the material is still warm, pack the material further down into the canal with an endodontic hand Plugger. If you experience voids, try filling the canal in several small increments, each time filling the canal with more material and packing it down with a Plugger.
6. After use, express any residual material remaining in the heating chamber, then turn off the Power Switch (left button) on the Beta. Pull the plunger backwards and out of the gun, and remove any residual material from the Plunger tip.
Removing/Changing the Needle CAUTION: To reduce the risk of burn when changing the needle, make sure the Beta has been off for a minimum of five (5) minutes and the nose is cool to the touch before changing the needle.
1. Turn off the Power Switch and wait 5 minutes to let the Gun cool. Remove
the needle using the needle bender/wrench in the counter-clock wise direction.
2. Discard the used needle in a biohazard container. 3. Select desired needle (20, 23 or 25 gauge). Connect the new needle using
the needle bender/wrench to secure the needle while turning it in a clockwise direction. Do not over-tighten.
4. Use needle bender to bend needle as desired. 9
Changing the Battery When changing the battery, unscrew the screw to remove the battery cover from the handle of the Beta. When replacing the battery, please pay close attention to the positioning of the battery wire. There are three lines that are connectors to the battery – black line (left), white line (middle), and red line (right). Please position the wire accordingly prior to inserting the battery connector to the Beta unit.
Cleaning & Sterilization CHARGING BASE AND GUN Surfaces can be cleaned with soft towel and a mild detergent or rubbing alcohol. THERMAL PROTECTOR CAP Sterilize before first use and between patients. B&L Biotech, Inc. recommends following sterilizer manufacturer’s written instructions for cycle parameters or sterilization per ANSI/AAMI ST46:2002; Steam Sterilization and Sterility Assurance in Healthcare Facilities. NEEDLE It is recommended that the needle be changed after each patient and when damage is detected or suspected. Discard used needles in biohazard container. CLEANING CHAMBER INTERIOR To remove remaining material from inside the heating or loading slot, set the temperature to 200ºC, express any remaining material and then turn off gun. Insert cleaning brush through the back of the Gun, and then pull it out through the nose of the Gun. Do not put any cleaner or chemicals on the cleaning brush before inserting it into the chamber. PLUNGER Wipe off the plunger using rubbing alcohol and gauze to remove any visible residual material.
10
Troubleshooting 1. Gun does not power on when Power Switch is pressed.
(a) Check that the battery is charged. Recharge as needed. (b) If the battery cannot be recharged, a new battery may be ordered from B&L Biotech, Inc.
2. Material does not flow from the needle.
(a) When the Plunger advances up to the 2nd red indicator band, it is fully advanced. Pull it back and insert a new pellet in loading chamber. (b) Check the Plunger head O-ring. If worn or damaged, call B&L to order a new Plunger. (c) Replace the needle.
3. Power turns off. It is normal for the power to turn off automatically after 10 minutes of nonuse to conserve the battery. Press the Power Switch (left button) to power up the Gun.
4. Plunger cannot be retracted.
If the plunger cannot be retracted, it is most likely due to cooling and firming of material in the chamber with the Plunger left in. To remove Plunger, turn on the Gun and set temperature at 200ºC. Wait for Gun to reach selected temperature and then retract the plunger. If the Plunger will still not retract, allow the Gun to cool and remove the needle. With the needle removed, pull the Gun’s trigger several times to advance the Plunger tip out the FRONT of the Gun. Clean excess material off the tip of the Plunger then the Plunger should be easy to retract. If not, call B&L Biotech, Inc. for technical support.
11
Code Description or possible causes
Recommended action for the user
Er0
Defective Microprocessor
If this error code is displayed on the screen please contact authorized dealer’s customer service department.
SHR
Desired temperature not reached in 200 seconds: defective plugger or low battery power.
Recharge the battery or replace the plugger. If the code does not disappear, return the unit to authorized dealer for replacement.
HD1
Temperature does not change within 5 seconds after activation: Defective plugger.
Replace the plugger. If the code does not disappear, return the unit to authorized dealer for replacement.
Miscellaneous 1. With the Plunger inside the Gun, do not push or pull the Plunger forcefully.
Once the pellet material has been warmed up to the desire temperature, the Plunger should advance by pumping the trigger several times. If not, try advancing the Plunger manually with light pressure and try again. DO NOT ADVANCE THE PLUNGER PAST THE SECOND (WIDE) RED LINE.
2. Please refer to the table in page 4 for the recommended temperature setting for Gutta-Percha.
3. To empty the Gun of all remaining material, remove the needle and express any residual material by pumping the trigger to push the Plunger out the front of heated gun. BE CAREFUL NOT TO TOUCH THE FRONT NOSE AND PLUNGER UNTIL IT HAS BEEN GIVEN A CHANCE TO COOL.
4. Remove the Plunger after the Beta has been turned off and cooled slightly, but before it is at room temperature. CAUTION: Plunger may still be hot! Wipe off any material remaining on Plunger tip using rubbing alcohol and gauze. Use the provided brush by pushing in the back of the gun and through the exit at the tip (where the plunger first enters the gun) to clean it as necessary. Proper maintenance of the Beta will prevent backflow or leakage of material and extend the life of the device.
5. When changing the needle, there is a risk of finger/hand burn. B&L recom-
mends allowing the Beta to cool for at least five (5) minutes before attempting to change the needle.
12
Warranty B&L Biotech, Inc. warrants the Beta Obturation Gun against defects in material and workmanship for 12 months from the date of purchase with proper usage. During that twelve-month period, B&L Biotech will repair or replace a defective unit. Defects caused by misuse, neglect, accident or abuse are not covered by this warranty. B&L Biotech, Inc. assumes no liability resulting from improper use, damage or breakage due to misuse of the Beta Obturation Gun product by the purchaser. The manufacturer is not responsible for breakage of any component of the Beta obturation gun, including the plunger or plunger head resulting from forceful extrusion of Gutta-Percha or use of the plunger outside of the methods noted in this Instruction for Use. The battery in the Beta Obturation Gun as well as the needles and plungers are replaceable. New batteries, needles and plungers can be ordered from B&L Biotech, Inc. B&L Biotech, Inc. assumes no liability for damage to the Beta Obturation Gun, injuries to patients or users or other problems resulting from use of accessories or other materials not supplied by B&L Biotech, Inc.
13
Manufactured by: B&L Biotech, Inc. 502, Gungjun tower, 727-3 Gojan-dong, Danwon-gu, Ansan-si, Gyeonggido, Korea 425-906 www.bnlbio.com EMERGO EUROPE Molenstraat 15, 2513 BH, The Hague, The Netherlands tel. +31 70 345 8570 tel. +31 70 346 7299
14
UM-B1-01 Rev.002 | Rev. Date 2009.12.1