Blease
Blease Anesthesia Devices and Accessories
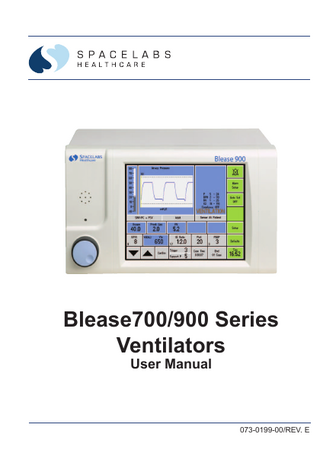
Model 700 and 900 Series Ventilators User Manual Rev E June 2013
User Manual
151 Pages

Preview
Page 1
Blease700/900 Series Ventilators User Manual
073-0199-00/REV. E 1
2
Blease700/900 Series Ventilators User Manual
Blease700/900 Series Ventilators User Manual MODIFICATIONS LABEL REV
A
REV
B
REV
C
REV
D
REV
E
PR023020
PR023541
PR023860
PR033850
PR034395
REV
REV
REV
REV
REV
F
G
H
I
J
Spacelabs Healthcare Ltd. (Anesthesia Delivery and Ventilation Division) 1 Harforde Court • John Tate Road • Hertford • SG13 7NW • United Kingdom Tel: +44 (0)1992 507700 Fax:
+44 (0)1992 501213
Part Number: 073-0199-00 Rev. E/ June 2013
e-mail (enquiries): [email protected] e-mail (technical): [email protected] www.spacelabshealthcare.com This manual applies from the following software versions or later: Front Panel Software V10.03 Control Board Software V9.61 (See section 2.1.28.9 for instructions on how to access information on which software version you are currently running).
Blease700/900 Series Ventilators User Manual
3
4
Blease700/900 Series Ventilators User Manual
IMPORTANT The user must be familiar with the machine and its various functions before using it on a patient. Federal law restricts this device for sale by or on the order of a physician. Incorrect use of the equipment described herein may result in injury to the patient. Read this manual before operating the machine. You must be familiar with the machine and its functions before using it on a patient. Be sure to pay special attention to warnings, cautions and notes within the manual. A full list of these notices can be found in Section 4 of this manual. Warning Notices Warning notices denote a potential hazard to the health and safety of users and/or patients. These notices clearly state the nature of the respective hazard and the means by which it can be avoided. Warning notices appear in full in the preliminary pages and are repeated at their points of application in the manual. Caution Notices Cautionary notices denote a potential hazard to the physical integrity of equipment/software, but NOT a danger to personnel. These notices clearly state the nature of the hazard and the means by which it can be avoided. Relevant or helpful
Blease700/900 Series Ventilators User Manual
5
Indications for Use The Blease 700/900 Series Ventilators are advanced, microprocessor controlled, pneumatically driven ventilators, which have been designed specifically for the mechanical ventilation of adult and pediatric patients under general anesthesia.
6
Blease700/900 Series Ventilators User Manual
Contents Chapter 1 Introduction......................................................................... 17 Symbols Used.............................................................................................18
1.1
Introduction ...................................................................................21 1.1.1 Identify your Ventilator .....................................................................21
1.2
Description of the Ventilator ........................................................22 1.2.1 Overview ..........................................................................................22 1.2.2 Features ...........................................................................................23 1.2.3 Operating Modes .............................................................................25 1.2.4 Principles of Operation.....................................................................30 1.2.5 Parameters ......................................................................................32 1.2.6 User Interface ..................................................................................35 1.2.7 Battery Status LEDs.........................................................................40 1.2.8 Menu Tree ........................................................................................41
Chapter 2 Using the Ventilator ............................................................ 43 2.1
Using the Ventilator ......................................................................45 2.1.1 Powering Up the 700/900 Ventilator ................................................45 2.1.2 Starting the Ventilator.......................................................................45 2.1.3 Stopping the Ventilator .....................................................................46 2.1.4 Activating and Monitoring the Alarms...............................................46 2.1.5 End of Case .....................................................................................46 2.1.6 Powering down the Ventilator ..........................................................46 2.1.7 Pre-use Testing ................................................................................47 2.1.8 Pre-use Test Error Messages ..........................................................52 2.1.9 Absorber Not Fitted ..........................................................................54 2.1.10 Fresh Gas ........................................................................................55 2.1.11 Standby/Bag/Run .............................................................................55 2.1.12 I:E Ratio Setting ...............................................................................58 2.1.13 Oxygen Calibration ..........................................................................59
Blease700/900 Series Ventilators User Manual
7
Table of Contents 2.1.14 The Measurements Menu ................................................................60 2.1.15 Adult and Pediatric Modes ..............................................................61 2.1.16 Types of Flow Sensors.....................................................................61 2.1.17 Sensor Placement............................................................................62 2.1.18 Patient Airway Flow Sensor .............................................................65 2.1.19 The Waveform Select Menu.............................................................67 2.1.20 Spirometry........................................................................................67 2.1.21 Airway Pressure ...............................................................................71 2.1.22 Mode Selection Menu .....................................................................72 2.1.23 Setting Parameters ..........................................................................73 2.1.24 Alarms ..............................................................................................74 2.1.25 User Defined Alarms ........................................................................79 2.1.26 Auto Set Alarms ...............................................................................81 2.1.27 The Alarms Setup Menu ..................................................................81 2.1.28 The Defaults Menu .........................................................................84
Chapter 3 3.1
Installation .....................................................................................91 3.1.1 Connections .....................................................................................91 3.1.2 Ventilator Fitting ...............................................................................92
3.2 3.3 3.4 3.5 3.6
Cautions ........................................................................................94 Pre-Use Checks ............................................................................95 Discharged Battery .......................................................................98 Installing the Adult Bellows .......................................................100 Pre-use Test ................................................................................100 3.6.1 Fresh Gas ......................................................................................100 3.6.2 Compliance ....................................................................................101
8
Blease700/900 Series Ventilators User Manual
Table of Contents
Chapter 4 Routine User Maintenance .............................................. 103 4.1
Routine User Maintenance.........................................................105 4.1.1 Weekly Checks ..............................................................................105 4.1.2 Six-Month Checks ..........................................................................105 4.1.3
Other Maintenance .......................................................................106
4.1.4 Methods of Sterilization..................................................................106 4.1.5 Cleaning and Sterilization .............................................................107
Chapter 5 Troubleshooting & Data ................................................... 111 5.1 5.2
Troubleshooting..........................................................................113 Performance Data .......................................................................115 5.2.1 Factory Default Settings................................................................. 116
5.3 5.4
Associated Equipment and Accessories..................................118 External Communication Specification ....................................119 5.4.1 Data Transmission Settings ........................................................... 119 5.4.2 Protocol .......................................................................................... 119 5.4.3 Pin Connections .............................................................................120 5.4.4 Set Messages ................................................................................120 5.4.5 Breathing Modes ............................................................................121 5.4.6 Breathing Control ...........................................................................121 5.4.7 Measured Value Messages ............................................................121 5.4.8 Event Message ..............................................................................121
5.5 5.6
Alarm Messages .........................................................................122 Error Codes .................................................................................123
Blease700/900 Series Ventilators User Manual
9
Table of Contents
Chapter 6 Notices & Important Information..................................... 125 6.1 6.2 6.3 6.4 6.5 6.6 6.7 6.8 6.9
10
Product Improvement.................................................................126 Responsibilities of the User ......................................................126 Responsibilities of the Manufacturer........................................126 Disclaimer....................................................................................127 Technology Disclaimer / Tamper Proof Seal ...........................127 Note to Service Personnel .........................................................127 Copyright .....................................................................................128 CE Mark .......................................................................................128 Hazard Notices ...........................................................................129
Blease700/900 Series Ventilators User Manual
List of Figures
List of Figures Figure 1 - Blease700/900 Series Ventilator .................................................. 22 Figure 2 - Low Battery Indicator ................................................................... 24 Figure 3 - Volume & Precision Control Mode Waveforms ............................ 26 Figure 4 - Inspiratory Pause Waveform ........................................................ 28 Figure 5 - Pressure/Flow/Volume Waveform ................................................ 29 Figure 6 - Pneumatic System ....................................................................... 31 Figure 7 - PEEP Waveform .......................................................................... 32 Figure 8 - Front Panel................................................................................... 35 Figure 9 - Normal Screen ............................................................................. 36 Figure 10 - Activity Display Area ................................................................... 36 Figure 11 - Parameter Display Area ............................................................. 37 Figure 12 - Setup Menu Tree ........................................................... 41 Figure 13 - Defaults Menu Tree .................................................................... 42 Figure 14 - Alarm Setup Menu Tree ............................................................. 42 Figure 15 - End of Case Options .................................................................. 46 Figure 16 - Pre-Use Start-up Screen ............................................................ 48 Figure 17 - Compliance Screen OFF............................................................ 48 Figure 18 - Set Absorber to VENT Screen ................................................... 48 Figure 19 - Pre-Use Occlusion Tests Screens.............................................. 49 Figure 20 - Leak Test Screens...................................................................... 49 Figure 21 - System Check Screens .............................................................. 50 Figure 22 - Gas Machine Test Instructions ................................................... 50 Figure 23 - Compliance Check Passed Message ........................................ 51 Figure 24 - Pre-use Test Error Message (01) ............................................... 52 Figure 25 - Pre-use Test Error Message (02) ............................................... 52 Figure 26 - Pre-use Test Error Message (03) ............................................... 53 Figure 27 - Pre-use Test Error Message (04) ............................................... 53 Figure 28 - Pre-use Test Error Message (05) ............................................... 53 Figure 29 - Pre-use Test Error Message (06) ............................................... 53 Figure 30 - Pre-use Test Error Message (07) ............................................... 54 Figure 31 - Pre-use Test Error Message (08) ............................................... 54 Figure 32- Absorber Not Fitted Screen (01) ................................................. 54 Figure 33 - Absorber Not Fitted Screen (02) ................................................ 55 Figure 34 - Set Absorber to VENT ................................................................ 55 Figure 35 - Set Absorber to BAG .................................................................. 56 Figure 36 - Standby Screen.......................................................................... 57
Blease700/900 Series Ventilators User Manual
11
List of Figures Figure 37 - Fresh Gas Too High (01) ............................................................ 57 Figure 38 - Reduce Fresh Gas (02).............................................................. 57 Figure 39 - Fresh Gas Too High (03) ............................................................ 58 Figure 40 - Fresh Gas Too High (04) ............................................................ 58 Figure 41 - Fresh Gas Too High (05) ............................................................ 58 Figure 42 - Parameters................................................................................. 60 Figure 43 - Configuration Menu .................................................................... 60 Figure 44 - Measurements Selection Menu.................................................. 60 Figure 45 - Patient Mode Menu .................................................................... 61 Figure 46 - Adult Flow Sensor (L) and Pediatric Flow Sensor (R) ................ 61 Figure 47 - Standby Screen.......................................................................... 62 Figure 48 - Sensor Placement Menu ............................................................ 62 Figure 49 - Airway Sensor Placement with Absorber with Sensor at Patient and Sensor at Absorber .......................................................... 64 Figure 50 - Adult Patient Airway Flow Sensor .............................................. 65 Figure 51a - Incorrect Filter Set Up .............................................................. 66 Figure 51b - Filter Set Up ............................................................................. 66 Figure 51c - Correct Filter Set Up................................................................. 66 Figure 52 - Airway Pressure Bar................................................................... 67 Figure 53 - Store Loop Button ...................................................................... 67 Figure 54 - Current Loop & Save Loop Key ................................................. 68 Figure 55 - Recall a Loop ............................................................................. 68 Figure 56 - Turn Loop OFF ........................................................................... 68 Figure 57 - Save a Loop ............................................................................... 68 Figure 58 - PEEP Loop................................................................................. 69 Figure 59 - Spontaneous Breathing Loop..................................................... 69 Figure 60 - Bronchospasm Loop .................................................................. 69 Figure 61 - Kinked Tube Loop ...................................................................... 69 Figure 62 - Patient breathing with Vent (e.g. Lack of relaxation) Loop ......... 69 Figure 63 - Cuff or Laryngeal Mask Leak Loop and Kinked Tracheal Tube Loop ........................................................................................ 69 Figure 64 - Intro-abdominal CO2 Insufflation Loop ....................................... 70 Figure 65 - Pneumothorax Occurs Loop ...................................................... 70 Figure 66 - PEEP Treatment Loop ............................................................... 70 Figure 67 - Zero Graticule ............................................................................ 71 Figure 68 - Expired Flow from and Inspired Flow to Patient......................... 71 Figure 69 - Mode Selection Menu ................................................................ 72 Figure 70 - Pause Options............................................................................ 72 Figure 71 - Change Ventilation Mode Prompts............................................. 72 Figure 72 - Alarm Screen.............................................................................. 74 12
Blease700/900 Series Ventilators User Manual
List of Figures Figure 73 - Auto Set Alarms.......................................................................... 81 Figure 74 - Alarms Setup and Limits Screens .............................................. 82 Figure 75 - Setting Mute Time ..................................................................... 82 Figure 76 - Set Apnea Time .......................................................................... 83 Figure 77 - PAW <-10cmH2O Selected ......................................................... 83 Figure 78 - Defaults Menu ............................................................................ 84 Figure 79 - Defaults Menu ............................................................................ 85 Figure 80 - Change Names Menu ................................................................ 85 Figure 81 - Save Current Settings Menu ...................................................... 86 Figure 82 - Configuration Menu .................................................................... 87 Figure 83 - Example System Information Screen ......................................... 88 Figure 84 - Pneumatic Connections ............................................................. 91 Figure 85 - Electrical Connections................................................................ 92 Figure 86 - Exchanging Bellows Units .......................................................... 99 Figure 87 - Compliance .............................................................................. 101 Figure 88 - Removing the Pop-off Valve ..................................................... 108
Blease700/900 Series Ventilators User Manual
13
List of Figures Notes:
14
Blease700/900 Series Ventilators User Manual
Blease700/900 Series Ventilators How to Use This Manual This manual is intended for use as a guide for learning to operate the Blease700/900 Series Ventilators. Use it as a reference once you are familiar with the system.
Keep this manual with the system to refer to should any questions arise about the system’s operation, maintenance or, if necessary, repair. All pictures shown in this manual are of or relate to the Blease700/900 Series Ventilator.
Blease700/900 Series Ventilators User Manual
15
16
Blease700/900 Series Ventilators User Manual
Blease700/900 Series Ventilators Chapter 1 Introduction
Blease700/900 Series Ventilators User Manual
17
Chapter 1 - Introduction
Symbols Used Electrostatic Device ESD Warning: Potential danger of personal injury to the patient and/or user Caution: Consult Instructions for use
Consult Instructions for Use
Additional helpful or relevant information
IEC Symbol denoting type B applied part
Caution: Possible damage to the machine or machine components.
Confers approval under the European Medical Device Directive and the notified body number.
Power On
Manufacturer
Power Off
Date of Manufacture
Alternating Current
Serial Number
Equi-potential
Oxygen Flush
End of Case
Latex Free Material(s)
Exhaust
Dangerous Voltage
This way up
Patient Flow Sensor Tubing Connection
Bellows Drive Gas
18
Indicates that the waste of electrical/electronic equipment must not be disposed as unsorted municipal waste and must be collected separately. Contact an authorized representative of the manufacturer for information about decommissioning the equipment.
Turn the control in the direction of the thickening line to increase the parameter setting.
Blease700/900 Series Ventilators User Manual
Chapter 1 - Introduction
Abbreviations Used APL
Airway Pressure Limiting
Psi
Pounds Per Square Inch
bpm/BPM
Breaths Per Minute
Psig
Pounds Per Square Inch Gauge
cmH2O
Gauge pressure expressed in centimeters of water
LCD
Liquid Crystal Display
CO2
Carbon Dioxide
LED
Light Emitting Diode
CPAP
Continuous Positive Airway Pressure
L
Liters
ECG
Electrocardiogram
ML/ml
Milliliters
l/m, lpm
Liters Per Minute
hPa
hectoPascal
MV
Minute Volume
PEEP
Positive End Expiratory Pressure
PSV
Pressure Support Ventilation
TV
Tidal Volume
Ptot
Total Pressure set including PEEP
SIMVVC+PSV
Synchronized Intermittent Manditory Ventilation-Volume Control + Pressure Support Ventilation
I:E Ratio
A Ratio of Inspiratory to Expiratory Time
SIMVPC+PSV
Synchronized Intermittent Manditory Ventilation-Pressure Control + Pressure Support Ventilation
Pplat
Plateau Pressure
O2
Oxygen
Pedi Sensor
Pediatric Sensor
N 2O
Nitrous Oxide
Blease700/900 Series Ventilators User Manual
19
Chapter 1 - Introduction Electrostatic Sensitive Devices. The Blease700/900 range of ventilators use semiconductors which are susceptible to damage by electrostatic discharge. During normal use the ventilators must be provided with a ground to earth. Always transport the ventilator in a conductive bag or container. Never place the ventilator on ungrounded surfaces - avoid synthetic (non-conductive) carpeting and cellophane wrappers etc. In addition to ESD, the Blease700/900 range of ventilators are susceptible to damage by overloading, excessive heat or radiation. Avoid hazards such as reversal of batteries, strong RF fields or other forms of radiation and excessive pipeline pressures. The ventilator must only be connected to a gas pipeline supply that is fitted with pressure relief valves that limit the supply pressure to less then 500kPa / 72.5psi / 5Bar The pipeline connections are gas-specific and not interchangeable. Lethal voltages are present within the ventilator when it is connected to the mains electrical supply. Do not remove any of the ventilator covers. Refer all repairs and servicing to an authorized technical engineer.
Additional Mandatory Equipment The following equipment is mandatory, please refer to the relevant manuals for instruction in usage: Blood oxygen monitor, CO2 alarm, Blood pressure alarm, ECG alarm, anesthesia agent concentration monitor and a CO2 monitor complying with ISO 9918 shall be used when the ventilator is in use.
20
Blease700/900 Series Ventilators User Manual
Chapter 1 - Introduction
1.1
Introduction
1.1.1
Identify your Ventilator
Use the table below to identify your ventilator model, then refer to the appropriate sections of the manual. 700 Series Model Number
720
730
900 Series 750
950
970
990
Screen Size
8.4”
8.4”
8.4”
8.4”
8.4”
8.4”
Display
Mono
Mono
Mono
Color
Color
Color
Interface
Touch & Trak
Touch & Trak
Touch & Trak
Touch & Trak
Touch & Trak
Touch & Trak
Fresh Gas Compensation
Optional for OEM/ stand alone
Configurable preset or measured compliance
ü
ü
ü
ü
ü
ü
ü
ü
Tidal Volume Compensation
Vent Mode Volume Control Pressure Control SIMV + PSV (Volume & Pressure Mode options)
ü
ü
ü
ü
ü
ü
ü
ü
ü
ü
ü
ü
ü
ü
ü
Precision Pressure Support Vent Monitoring Oxygen
ü
ü
ü
ü
ü
ü
Exhaled Volume Monitoring
ü
ü
ü
ü
ü
ü
Airway Pressure
ü
ü
ü
ü
ü
ü
Pressure Waveform
ü
ü
ü
ü
ü
ü
ü
ü
ü
ü
ü
ü
ü
Flow Waveform Spirometry Loops Data Output
ü ü
ü
Blease700/900 Series Ventilators User Manual
ü
21
Chapter 1 - Introduction
1.2
Description of the Ventilator
1.2.1
Overview
The Blease700/900 series ventilator is an advanced, microprocessor-controlled, pneumatically driven ventilator, which has been designed specifically for the mechanical ventilation of adult and pediatric patients under general anesthesia. The control unit houses the electronic and pneumatic control systems. It sets the desired ventilatory parameters and generates alarm, warning and status messages. The control unit also calculates and implements the functions necessary to drive the bellows pneumatically. The bellows assembly consists of a base and a bellows housing. The Blease700/900 series ventilator is designed for use with a circle-type absorber and is ideally suited to both low-flow and high-flow applications. The patient flow sensor(s) and its associated tubing are an important part of the ventilator. This gives the ventilator the inspired and expired flow and patient airway pressure measurements. The ventilator may also be used with either a Bain-type coaxial circuit or a Jackson-Rees/Ayres T-piece type pediatric circuit by using an adaptor. Variations are based on the drive gas used (MED AIR or oxygen) and the drive gas connector type (depending on the eventual country of use). See 5.3 Associated Equipment and Accessories for ordering information for the various types.
Figure 1 - Blease700/900 Series Ventilator
22
Blease700/900 Series Ventilators User Manual
Chapter 1 - Introduction
1.2.2 1.2.2.1
Features Controls and Indicators
The operating parameters of the ventilator are set by using a combination of touch screen and Trak Wheel™. Parameter values are shown on the touch screen.
1.2.2.2
Microprocessor Control
The built-in microprocessor control system makes it easy to upgrade and customize the unit.
1.2.2.3
Dual Mode Ventilation
The ventilator can be used as either a flow generator or a pressure generator and, in both cases, it is time cycled. Therefore, ventilation can be tailored to meet all patient requirements as each mode has an adult and pediatric application. In addition to this feature, the ventilator can be triggered by patient flow.
1.2.2.4
Pressure Limit Control
This feature prevents barotrauma and gives maximum safety by ensuring accurate, safe ventilation to a pre-set pressure limit.
1.2.2.5
Built-in Ventilator Pre-use Test
A ventilator Pre-use Test System ensures accurate ventilator delivery irrespective of system back-pressure.
1.2.2.6
Comprehensive Pressure Monitoring and Alarms
Selectable functions allow Airway, Peak and Mean Pressure monitoring spirometry, together with high, low and built-in airway flow detected Apnea alarms. Alarms activate to warn of possible disconnection, circuit leakage and set volumes not achieved. The alarms are audible and visible. When activated, the alarms are listed on the display. The mains and battery alarms also have light emitting diode (LED) indication. Do not block the drive gas exhaust. Blocking the drive gas exhaust may impede ventilator function.
The features available for your ventilator depend on the operating mode.
Blease700/900 Series Ventilators User Manual
23
Chapter 1 - Introduction
1.2.2.7
Spirometry
The Blease700/900 series ventilator offers a simple, accurate and userselectable display of set and monitored tidal volumes. You also have a choice of one of the following on-screen waveforms: 1. Airway Pressure 2. Pressure/Volume 3. Flow/Volume 4. Airway Flow Note: Not all types of waveforms are available on certain models.
1.2.2.8
Battery Back Up
The internal battery is automatically charged when the ventilator is connected to the mains electrical supply. If the ventilator is in the ‘ON’ position and the mains electrical power fails, the battery provides continued operation of the ventilator for a minimum of 30 minutes, if it is fully charged. Typical operating time is a minimum of 60 minutes. A discharged battery takes approximately 8 hours to fully charge. 1.2.2.8.1 Low Battery Indicator The mains fail alarm will be activated and a battery symbol will appear in the alarms panel. Symbol indicates how much charge is left in the battery.
Figure 2 - Low Battery Indicator Improper connection of equipment or any power sources to the calibration port may permanently damage the ventilator. Only a qualified technician should connect monitoring equipment to the recorder output. Such equipment must be compatible with Spacelabs machines and meet the regulatory standards of the countries in which the ventilator is used.
24
Blease700/900 Series Ventilators User Manual
Chapter 1 - Introduction
1.2.3
Operating Modes Some features are only available in certain ventilatory models.
There are five ventilation modes: • Volume Control • Precision Pressure Control™ • Advanced Pressure Support™ • SIMV-VC + PSV • SIMV-PC + PSV The differences between the Adult and Pediatric modes are: •
The ventilator sustained pressure requires a greater pressure ‘movement’ in adult mode to avoid being activated.
•
Setting alarms and limits are, in general, optimized for lower pressures and volumes to be used in pediatric mode. Short inspiratory times may result in inconsistent breath delivery. Avoid control combinations which may produce very short inspiratory times (<150 ms). Pressure limiting is a safety feature. It should not be used for any other purpose, such as creation of micro-breaths or emulation of specialized high frequency/low volume ventilation systems, otherwise injury to the patient may result.
Blease700/900 Series Ventilators User Manual
25
Chapter 1 - Introduction
1.2.3.1
Volume Control Mode
Volume Control Ventilation is a time-cycled mode that delivers a set volume into the circuit within a set time. The Blease700/900 series ventilator ensures that the delivered volume is independent of any compression losses in the absorber, bellows and associated tubing. Changes to fresh gas do not cause a permanent change to the delivered volume, the ventilator automatically readjusts the delivered tidal volume within the next few breaths. When the tidal volume limit is reached, the ventilator immediately cycles into expiration.
1.2.3.2
Precision Pressure Control Mode
Precision Pressure Control Ventilation is a time-cycled mode where the ventilator maintains the set inspiration pressure for the inspiratory period. The user sets the required pressure. The ventilator delivers volume until the set pressure limit is reached, then it maintains the pressure until the end of the inspiratory time. The effect of Volume and Pressure modes on the pressure and flow waveforms is shown below: Volume Control Mode
Precision Pressure Control Mode (PCV)
Figure 3 - Volume & Precision Control Mode Waveforms
26
Blease700/900 Series Ventilators User Manual
Chapter 1 - Introduction
1.2.3.3
SIMV-PC + PSV and SIMV-VC + PSV Modes
SIMV-PC+PSV and SIMV-VC+PSV are extensions of the PSV mode that allow the patient to take breaths on demand with optional pressure support, but includes some mandatory breaths. The mandatory breaths can be delivered by either volume (SIMV-VC mode) or pressure (SIMV-PC mode). For Pressure Support, the user must set a Trigger threshold and Support Pressure. Volume/ Pressure and a breath rate must also be set. To prevent hyperventilation, any changes in the breathing rate are only allowed to take place slowly. If the patient fails to make any effort to breathe, the SIMV function automatically defaults to the ventilation function, identical to Volume Control Mode/Pressure Control Mode at the set SIMV rate. The SIMV modes use a flow trigger to sense the patient’s attempt to breathe. Therefore, SIMV modes cannot work with the patient sensor placed at the absorber. 1.2.3.3.1 SIMV Interlock A software interlock ensures that, when the ventilator is switched to an SIMV mode, realistic inspired times are set so that patient breathing continues in as normal a manner as possible. When the software switches to an SIMV mode, the rules are as follows: 1. Continue with the I:E ratio that was already set. If this ratio is possible, then the breathing pattern should remain unchanged. 2. If, however, this switch puts the inspired time at greater than 2 seconds in adult or greater than 1 second in pediatric, then you should limit the inspired time to that figure. When actually in an SIMV mode: 1. When increasing the BPM, limit the highest BPM value to a point where the I:E ratio becomes 2:1. 2. When increasing Inspired Time, limit the Inspired Time to a point where the I:E ratio becomes 2:1.
Blease700/900 Series Ventilators User Manual
27
Chapter 1 - Introduction
1.2.3.4 Inspiratory Pause (in Volume Mode) When pause is activated, a percentage of the inspiratory time is used as a plateau prior to the start of the expiratory phase. The I:E ratio is maintained irrespective of the duration of the pause. The Pause feature is found under the Mode Selection menu and is also available in the Volume Control and SIMV-VC+PSV (Volume) modes. Inspiratory Pause is user selectable from 0 to 50%.
Figure 4 - Inspiratory Pause Waveform
1.2.3.5
Sigh
When Sigh is activated, the delivered tidal volume in Volume Control Mode is increased by the set percentage of the duration of one breath at the set frequency. The default percentage is 10% and default frequency is once every tenth breath.
28
Blease700/900 Series Ventilators User Manual
Chapter 1 - Introduction
1.2.3.6
Advanced Pressure Support
In Advanced Pressure Support mode, the patient controls when the ventilator starts to deliver and when the ventilator cycles into expiration. The start in inspiration is set by the flow trigger. After the patient has made an attempt to breathe that exceeds the set flow trigger, the ventilator delivers at the support pressure, until the flow is reduced to 25% of the peak flow. The ventilator then goes into expiration. In Pressure mode, bpm, tidal volume and I:E ratio are all monitored values. The user must set two parameters: • the Trigger Threshold (1 L/min to 15 L/min), • the Support Pressure which is referenced to the PEEP level (3 to 20cmH2O).
Figure 5 - Pressure/Flow/Volume Waveform
Blease700/900 Series Ventilators User Manual
29
Chapter 1 - Introduction
1.2.4
Principles of Operation
For active inspiration, the flow control valve is opened to provide a specific gas flow into the bellows assembly. Simultaneously, the expiratory solenoid closes and pressure is generated in the bellows assembly, producing an inspiratory flow to the patient. The flow and pressure are measured and monitored by the microprocessor feedback system. Expiration occurs when the flow control valve is closed and the expiratory solenoid opens and releases the gas from the bellows assembly. In the Pressure Control Mode, the set pressure is achieved during inspiration and maintained at that level by allowing a controlled bypass through the expiratory valve. This allows the required pressure level to be maintained while compensating for any fresh gas flow into the patient circuit. For expiration, the expiratory solenoid is opened, which releases the gas from the bellows assembly. During all modes of ventilation, an autozero is periodically applied to the flow sensors just prior to a breath being delivered. At this point, there is no flow through the sensors. This ensures that the measured values are maintained as accurately as possible, regardless of environmental variations.
A safety valve is present in the drive pressure exhaust. Its function is to protect the patient against pressures exceeding 75cmH2O ± 2cmH2O by relieving the drive pressure on the bellows. NEEP is not supported by this machine, but patient generated pressures may be measured to - 10cmH2O, at which point an alarm will sound.
30
Blease700/900 Series Ventilators User Manual
Chapter 1 - Introduction
Figure 6 - Pneumatic System Blease700/900 Series Ventilators User Manual
31
Chapter 1 - Introduction
1.2.5
Parameters
The following parameters can be set and/or monitored when the ventilator is in operation.
1.2.5.1
PEEP
The Blease 700/900 series ventilator continuously monitors and displays the Positive End Expiratory Pressure (PEEP). By default, a PEEP of 2 to 4cmH2O is introduced to the circuit, caused by the bellows assembly, which is shown as OFF. A PEEP value between 3 and 20cmH2O can be set from the panel, with an automatic PEEP HIGH alarm at 10cmH2O above set PEEP.
Figure 7 - PEEP Waveform
For best operation of the PEEP function, avoid the use of high gas flows.
A minimum difference of 8cmH2O in adult and 5cmH2O in pediatric is enforced between the set PEEP level and the pressure controls shown below. MODE
PRESSURE CONTROL
Volume Control
Pressure Limit
Precision Pressure Control
Set Pressure
Advanced Pressure Support
Support Pressure
SIMV-PC + PSV
Support Pressure + Set Pressure
SIMV-VC + PSV
Support Pressure + Set Volume
When the user changes a value such that it does not comply with the required difference, the box surrounding the feature being adjusted and the value of the feature causing limiting to be enforced is highlighted in red. The value being adjusted could either be the PEEP level or the relevant pressure control. The user can then: • Accept the value being adjusted, in which case it will be set to the nearest acceptable value. • • 32
Adjust the value to a non-conflicting value. If the user does not make the change before end of time allowed for adjustment, the value will set to the nearest acceptable value. Blease700/900 Series Ventilators User Manual
Chapter 1 - Introduction
1.2.5.2
Trigger
The level of negative flow caused by the patient’s attempt to breathe before the ventilator initiates flow to assist the patient with the spontaneous breath. Range: 1 to 15L/min all modes (SIMV + PSV and Pressure Support).
1.2.5.3
Support Pressure
Breathing circuit pressure level for assistance with patient’s spontaneous breath. Range: 5cmH2O to 30cmH2O SIMV-PC + PSV and Precision Pressure Support modes (PEEP referenced).
1.2.5.4
Fresh Gas Compensation
0 l/m to 30 l/m of fresh gas can be compensated for and displayed on screen. A new system of measuring fresh gas has been incorporated to allow quicker and more accurate fresh gas compensation.
1.2.5.5
Oxygen
A fuel cell sensor can be connected to allow monitoring of 0% to 110% O2, with alarms of 18% to 110%. The sensor can be calibrated.
1.2.5.6
Tidal Volume
Volume to be delivered by the ventilator in each breath. Range: 20ml to 1500ml all modes.
1.2.5.7
Minute Volume
Measured volume delivered by the ventilator per minute. Range: 0.3L/m to 25L/m all modes.
1.2.5.8
Expired Tidal volume
Expired tidal volume is measured by the sensor in the breathing circuit, in either mechanical ventilator spontaneous breathing mode. The measured value is displayed in the tidal volume window.
1.2.5.9
BPM (Frequency Control)
The mechanical frequency of the ventilator in breaths per minute (BPM). Range: 2bpm to 99bpm all modes.
1.2.5.10
I:E Ratio
The ratio of the inspiratory time to the expiratory time. Range: 2.0:1 to 1:5.0 all modes in steps of 0.1.
Blease700/900 Series Ventilators User Manual
33
Chapter 1 - Introduction
1.2.5.11
Pressure Limit
The breathing system maximum pressure limit. Range: 10cmH2O to 50cmH2O Pediatric. 10cmH2O to 70cmH2O Adult.
1.2.5.12
Ptot
1.2.5.13
Peak Pressure
Range: 10 cmH2O to 50 cmH2O Range: 0cmH2O to 100cmH2O.
1.2.5.14
Mean Pressure
Range: 0cmH2O to 100cmH2O.
1.2.5.15
Plateau Pressure (Pplat)
Range: 0cmH2O to 100cmH2O.
1.2.5.16
Compliance
System compliance in ml/ cmH2O. Patient compliance in ml/ cmH2O.
1.2.5.17
Volume Measurement
Accuracy of Delivered Gas at 25ºC 101.3kPa/14.6psi (Volume mode)
= ± 10% or 10ml from 50ml to 1 liter,
Volume Monitoring Accuracy
= ± 10% or 10ml, which ever is the
which ever is the greater.
greater. Controlled Patient Pressure
= ± 10% or 2cmH2O, which ever is the greater.
Monitored Patient Pressure
= ± 5% or 1cmH2O, which ever is the greater.
Delivered PEEP
= ± 1.5cmH2O
from 4 to 20cmH2O, which ever is the greater.
Fresh Gas Flow
= ± 10% or 0.2L from 0.3L to 15 liters, which ever is the greater.
34
Blease700/900 Series Ventilators User Manual
Chapter 1 - Introduction
1.2.5.18 • • •
Oxygen Measurement Oxygen Concentration accuracy = ± 3%. Drift < 1% over 8 hours at constant temperature. Response time < 30 seconds for 90% change.
1.2.6
User Interface
1.2.6.1
Front Panel
The front panel of the Blease700/900 series ventilator has the following controls and indicators.
1
2
3
Figure 8 - Front Panel
Figure 8 Key 1
LCD Touch Screen (Blease700 monochrome, Blease900 Color)
2
Battery-Status LEDs
3
Trak Wheel
Blease700/900 Series Ventilators User Manual
35
Chapter 1 - Introduction
1.2.6.2 Normal Screen The normal screen is divided into three display areas: Activity, Alarms and Parameters. Alarms Activity
Parameters
Figure 9 - Normal Screen 1.2.6.2.1 Home Key
Pressing the Home Key (when shown) will take you back to the normal run screen. The Home Key is not shown in all menu options, only when appropriate.
1.2.6.3 Activity Display Area The activity area includes a graphical display updated in real time to show the breathing cycle. The graph is auto-scaled to fit on the y-axis and to show a minimum of three cycles on the x-axis. Status Line
High Pressure Alarm Setting
Graphical Display
Peak Marker
Zero Baseline
Figure 10 - Activity Display Area 36
Blease700/900 Series Ventilators User Manual
Chapter 1 - Introduction When the waveforms are autoscaled, the high pressure alarm setting line is not displayed on the screen.
Below the waveform, the status line shows: • The current ventilator mode (Volume Control, Precision Pressure Control, Advanced Pressure Support, SIMV-PC+PSV or SIMV-VC+PCV) • Adult or Pediatric mode • Pause (when selected) • Sigh (when selected)
1.2.6.4
Alarms Display Area
The alarm display lists any active alarms, with the most recent at the top of the list. The alarm settings for the current mode of operation are shown at the bottom of the alarm display area. •
High level alarms are displayed as a red banner and white text in the alarm list.
•
Medium level alarms are displayed in a yellow banner and white text in the alarm list
•
Low level alarms are only displayed in yellow text in the alarm list.
•
The current selection of Sensor type and position is displayed below the Alarm area. Periodically check that VTE measurements match expected delivery.
Blease700/900 Series Ventilators User Manual
37
Chapter 1 - Introduction
1.2.6.5
Parameter Display Area
The parameters display consists of an array of windows, each of which displays a parameter that has been selected for monitoring, or a level that has been set for the current function. If a parameter has a pre-set level as well as a monitored value, the pre-set level is indicated at the bottom left of the parameter window and the monitored value is shown in the larger font to the right of the window. Parameter Monitored Value
Pre-set Level
Figure 11 - Parameter Display Area
1.2.6.6 Trak Wheel & Touch Screen The Trak Wheel is a rotary encoder, incorporating a switch, which functions in a similar way to a computer mouse when turned left or right. It allows control of the on-screen cursor and the option to vary numerical data. 1.2.6.6.1 Trak Wheel 1.2.6.6.1.1 Selecting a Parameter 1. Turn the Trak Wheel in either direction until the required parameter is highlighted. 2. Press the Trak Wheel to select the item. The selection is cancelled if the Trak Wheel is not moved for approximately 5 seconds.
1.2.6.6.1.2 Editing a Parameter 1. When a parameter is selected, turn the Trak Wheel clockwise to increase the numerical value or counterclockwise to decrease the value. 2. Press the Trak Wheel when the required value is displayed to confirm election.
38
Blease700/900 Series Ventilators User Manual
Chapter 1 - Introduction 1.2.6.6.1.3 Selecting a Menu Item 1. Within a menu, turn the Trak Wheel clockwise to descend the menu or counterclockwise to ascend the menu. If a menu item is displayed in white, it is not selectable at this time. 2. Press the Trak Wheel to confirm selection. 1.2.6.6.1.4 Setting Parameters User adjustable parameters can be set from the normal screen. 1. Turn the Trak Wheel until the desired parameter is highlighted. When the cursor reaches the end of one row it will move to the next row 2. Press the Trak Wheel. The parameter is highlighted, indicating that it can be edited. 3. Rotate the Trak Wheel until the required value is indicated. 4. Press the Trak Wheel again to confirm the new value. 1.2.6.6.2 Touchscreen 1.2.6.6.2.1
Setting a Parameter
Be sure to use your fingertip to activate the touchscreen, do not use pens or pencils or any other sharp instruments as these will damage the touchscreen.
To set a parameter: 1. Touch the box for the parameter you want to change. The up/down and confirm buttons are now active. 2. Press the up or down button to display the desired setting. 3. Press Confirm to approve the selected setting. 1.2.6.6.2.2
Changing Settings
To change a setting: 1. The Menu keys are located on the right of the screen. 2. Press appropriate Setup or Alarm button. Another menu box will appear. 3. Select the desired parameter. 4. Press Return until the normal screen is displayed. If the Confirm button is not pressed, the original value will be restored. Combination of both touchscreen and Trak Wheel can be used.
Blease700/900 Series Ventilators User Manual
39
Chapter 1 - Introduction
1.2.7
Battery Status LEDs Icon
Color
Function
RED
Mains Failure - the mains power supply has failed and the ventilator is running from its internal battery.
AMBER
Battery Low - the battery is running low and the mains supply should be connected to recharge the battery immediately.
GREEN
Mains power supply is available. The battery charging circuit is active. This indicator glows green whenever mains power is connected to the ventilator
The green light will show whenever the charge unit is active and should not be interpreted as a direct indication of battery status.
Additional battery status information (Volts) may be obtained from the ‘System Information’ screens - See section 2.2.28.9.
40
Blease700/900 Series Ventilators User Manual
Chapter 1 - Introduction
1.2.8 1.2.8.1
Menu Tree Setup Menu
Figure 12 - Setup Menu Tree
Blease700/900 Series Ventilators User Manual
41
Chapter 1 - Introduction
1.2.8.2
Defaults Menu
Figure 13 - Defaults Menu Tree
1.2.8.3
Alarm Setup
Figure 14 - Alarm Setup Menu Tree 42
Blease700/900 Series Ventilators User Manual
Blease700/900 Series Ventilators Chapter 2 Using the Ventilator
Blease700/900 Series Ventilators User Manual
43
Chapter 2 - Using the Ventilator
The equipment must be periodically checked and maintained to ensure proper operation. We recommend that you refer to recommendations of your local professional association regarding checklists.
44
Blease700/900 Series Ventilators User Manual
Chapter 2 - Using the Ventilator
2.1
Using the Ventilator
This section describes how to: • • •
switch on the ventilator. select the operating mode and functions. set the operating parameters. Short inspiratory times may result in inconsistent breath delivery. Avoid control combinations which may produce very short inspiratory times (<150 ms). Pressure limiting is a safety feature and is also used in adult and pediatric mode to provide ventilation (Precision Pressure Control). It should not be used for any other purpose, such as creation of micro-breaths or emulation of specialized high frequency/low volume ventilation systems, otherwise injury to the patient may result. Patient circuit disconnection is a hazard to the patient. Take extreme care to prevent such an occurrence. Monitored values require a few minutes to stabilize after initial activation. Despite this, the ventilator and set values will function correctly.
2.1.1
Powering Up the 700/900 Ventilator
For standalone ventilators: To power up a standalone Blease700/900 series Ventilator, press and hold in the Trak Wheel for 4 seconds. The screen turns ON and displays the Pre-Use Test. The ventilator powers up in Standby, with monitoring in Standby. For integrated ventilators: If your ventilator is integrated into a BleaseSirius or BleaseFocus system, the ventilator powers on when the system is powered on.
2.1.2
Starting the Ventilator
The ventilator is started by either turning the BAG/VENT switch to VENT on the absorber (if fitted) or by pressing the RUN/STANDBY button (if displayed) on screen.
Blease700/900 Series Ventilators User Manual
45
Chapter 2 - Using the Ventilator
2.1.3
Stopping the Ventilator
The ventilator is stopped by turning the BAG/VENT switch to BAG on the absorber (if fitted) or by pressing the RUN/STANDBY button (if displayed) on screen.
2.1.4
Activating and Monitoring the Alarms
Monitoring and monitoring alarms are activated with breath detection.
2.1.5
End of Case
With the ventilator stopped and in Bag mode, the End of Case button is active. When you select End of Case, the following options are shown on the screen.
Figure 15 - End of Case Options Select the desired option to stop the case timer and end the case.
2.1.6
Powering down the Ventilator
For standalone ventilators: To power down the Blease700/900 series Ventilator, press the End Of Case button. Select Power Down, then select Yes. The ventilator turns OFF. For integrated ventilators: If your ventilator is integrated into a BleaseSirius or BleaseFocus system, the ventilator will power down when the system is powered down.
46
Blease700/900 Series Ventilators User Manual
Chapter 2 - Using the Ventilator
2.1.7
Pre-use Testing Please read the following instructions in conjunction with the information on Compliance compensation contained in the Installation section 3.6.2 of this manual. We recommend that you refer to recommendations of your local professional association regarding checklists. At the end of the pre-use test, you are given the option to do a full system test. Although not necessary to do each time the machine is turned on, we recommend it be done daily. Keep this manual readily available for reference while operating the ventilator. The patient airway flow sensor must be fitted in the patient breathing circuit (see Section 2.1.17) and the associated sensor tubing must not be trapped, kinked, split or damaged in any way to ensure correct performance. Whenever the ventilator is in Standby mode, the last successful leak and compliance check is displayed on the screen. During a case, you can view the date of the last system check on the System Information screen. See section 2.1.28.12 for instructions on how to display the System Information screen.
Blease700/900 Series Ventilators User Manual
47
Chapter 2 - Using the Ventilator
The option to skip the Pre-Use Test for Compliance Compensation is displayed on the Startup menu. (Note that model numbers shown on this screen vary, depending on configuration).
Figure 16 - Pre-Use Start-up Screen
Figure 17 - Compliance Screen OFF. This screen is displayed if you choose not to perform the compliance check.
Figure 18 - Set Absorber to VENT Screen
At this stage, 1 of 2 screens may appear depending on how the gas analyzer is set-up. In Figure 19 on the next page, the left screen is displayed if the analyzer is scavenged. The right screen is displayed if the analyzer exhaust is returned to the circle. There is no gas sampling port on the Pedi Sensor. If you are performing the Pre-Use Testing with the Pedi Sensor in the Pediatric mode, connect a circuit extension with a gas sampling port before proceeding.
48
Blease700/900 Series Ventilators User Manual
Chapter 2 - Using the Ventilator
Figure 19 - Pre-Use Occlusion Tests Screens The instructions given are the preparation for performing 3 ventilator tests: 1. PEEP Valve calibration 2. Calculation of system dead space (compliance), 3. Leak Test. During the pre-use test, the second stage pressure rises from 10cmH2O to 40cmH2O.
Figure 20 - Leak Test Screens Having measured the dead space, at the start, the leak test displays the upper left screen and concludes with the upper right screen after 20 seconds. Next, set the Absorber to ‘Bag’ to complete the Compliance Test. Blease700/900 Series Ventilators User Manual
49
Chapter 2 - Using the Ventilator
2.1.7.1 System Check After the leak check is completed, the user is offered the system check. Select Yes to perform the test or No to skip it (Figure 21). Always perform the pre-use check procedures for volume sensing functions after cleaning or replacing the volume sensor.
If NO is selected, you will see the warning screen shown on the right.
If YES is selected, you will see the Gas Machine Test instructions.
Figure 21 - System Check Screens
Figure 22 - Gas Machine Test Instructions 50
Blease700/900 Series Ventilators User Manual