Technical Training Workbook
20 Pages
Preview
Page 1
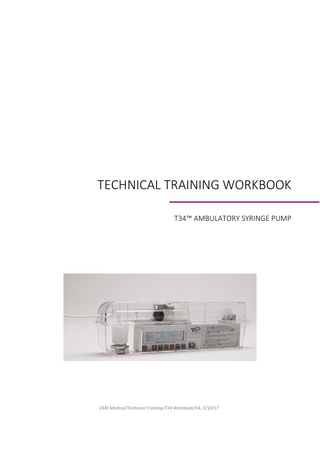
TECHNICAL TRAINING WORKBOOK T34™ AMBULATORY SYRINGE PUMP
CME Medical/Technical Training/T34 Workbook/V4, 3/10/17
Name: …………………………………………………………………………………….……………………..… Job title: …………………………………………………………………………………………………………… Company: ………………………………………………………………………………………………………… Training venue: ………………………………………………………………………………………………… Date: …………………………………………………………………………………………………………………
CONTENTS INTRODUCTION………………………………………………………………………………………… 3 TRAINING AIM AND LEARNING OUTCOMES……………………………………………… 3 CLINICAL USER OPERATION OF THE INFUSION DEVICE……………………………… 3 CLINICAL USER OPERATION QUESTIONS…………………………………………………… 5 TECHNICAL ASPECTS………………………………………………………………………………… 7 PPM PROCEDURE: ACCEPTANCE TESTING, FUNCTIONAL TESTING AND CALIBRATION PROCEDURE………………………………………………………………… 8 PPM DATASHEET EXAMPLE……………………………………………………………………….. 16 TECHNCIAL TRAINING QUESTIONS………………………………………………………………17
2
INTRODUCTION This workbook is intended to be used as a resource during CME Medical T34 technical training. The guidance on PPM procedure, acceptance testing, functional testing and calibration included in this workbook is adapted from the pump operation manual and service manual. Use this workbook in conjunction with the latest service manual and follow local policy and procedures for carrying out service tasks.
TRAINING AIM AND LEARNING OUTCOMES CME Medical Ltd supplies the latest in infusion device technology, and we understand the importance of the biomedical engineer in supporting and maintaining these sophisticated devices. The main emphasis of the training is to develop knowledge and skills to be able to service, maintain and repair CME Medical infusion pumps. By the end of this training you will be able to: o
Demonstrate a working knowledge of the pump as described in the service manual.
o
Understand the mechanical, electrical, operational and clinical end user features.
o
Carry out disassembly and re-assembly tasks.
o
Perform acceptance testing and PPM routines as described in the service manual.
CLINICAL USER OPERATION OF THE INFUSION DEVICE The T34 syringe pump is designed for infusion of medications or fluids requiring continuous or intermittent delivery at precisely controlled infusion rates Through all clinically acceptable routes of administration.
Modes of operation There are four common modes of operation for the T34 syringe infusion pump. Infusion Type Duration infusion
o o
Common pump configurations: Lock On mode - fixed duration Lock Off mode - adjustable duration
Rate infusion (mL/hour)
o o
Rate mode (Lock On) - fixed mL/hour rate Rate mode (Lock Off) - adjustable mL/hour rate
3
Batteries 9V PP3 batteries are available with different chemical and constructive compositions, which can result in different performance. The following are some common 9V battery types and considerations when selecting a battery. TYPE - 6LR61 Alkaline This battery type has cylindrical cell construction and has a low internal impedance value which is designed to provide a constant power output, this is ideal for use with the T34™. TYPE - 6LF22 or 6LP3146 alkaline This battery type has flat “tablet” cell construction and has a higher internal impedance value, this could produce fewer infusions than expected, an increase in occlusions or end battery alarms. TYPE - Lithium This battery commonly has a three-cell construction and has a low internal impedance, they are high power and can commonly last up to five times longer than alkaline batteries. As performance is greater consideration must be made to ensure batteries are replaced at an appropriate interval. TYPE - Rechargeable NiMH, Lithium. These types have varying construction and performance they are designed for repeated use. Rechargeable batteries commonly have what is known as a “steep discharge curve” when nearing depletion this can result in a very short interval between battery alarms and depletion which users should be aware of. Consideration should also be given how to manage rechargeable batteries and when they should be replaced, battery chargers that cycle a battery and measure its capacity can help to identify batteries that should be replaced. Calibration If a plastic case battery is used for calibration of the T34™ the unit may only be used in general service with a plastic cased battery, therefore it is recommended that the calibration of the T34™ within technician’s mode should be carried out with a metal cased battery as this negates any battery selection issues enabling all battery types to be used. Dimensions 9V PP3 battery dimensions vary by +/-2mm this can result in movement within the battery housing with a possible loss of connection, alternatively never try to force a battery into the T34™ as this may damage the contacts. If a battery within the T34™ housing appears loose this may be due to wear or malformation of the battery contacts which could need repairing or replacing. We advise that as part of a regular maintenance regime the T34TM battery connectors are checked for signs of wear or loss of connection. Battery performance may vary from manufacturers and with battery composition, the above is to identify considerations when selecting a battery for use with a T34™.
4
T34™ Technical Training Questions Clinical user operation of the infusion device Tick the answer(s) you think are correct or write correct answer. 1 Name the syringe sensors: a) b) c) 2
The actuator can only be moved with the FF/Back keys with: a) Power on and a syringe in place b) Power on, Barrel Clamp Arm down and no syringe in place c) When an infusion is running
3
With all default syringe sizes enabled, the range of sizes that can be used in the pump is: a) 2mL to 50/60mL b) 10mL to 30mL c) 2mL to 30mL
4
How does the user know that an infusion is in progress? a) Green LED light flashes b) The infusion running screen is visible (Time remaining/mL/hour rate/ “Pump Delivering” alternating with syringe brand/size confirmed by the user) c) Both (a and b)
5
When the INFO key is pressed during an infusion, what information is available to the user? (Tick any that apply) a) Volume infused (VI) b) Volume to be infused (VTBI) c) Battery % level
6
Re program protection with screen prompt “Press YES to Resume, NO for New Syringe/Program, if the user presses NO: a) The current program is deleted allowing a new infusion to be programmed b) User can access the Event Log c) The mL/hour rate is protected and the program restarts
7
Re program protection with screen prompt “Press YES to Resume, NO for New Syringe/Program, if the user presses YES: a) The current program is deleted allowing a new infusion to be programmed b) User can access the Event Log c) The mL/hour rate is protected and the program restarts
5
8
What happens when an alarm activates? (Tick any that apply) a) Pump stops and alarms continuously b) LED light changes from green to red c) Screen message displays, indicating the alarm cause d) Alarm is recorded in the Event Log
9
Battery status can be accessed by pressing which key? a) INFO key b) FF key c) STOP/NO key
6
TECHNICAL ASPECTS Simplified Block Diagram
Motor Control of T34™ o
o o
Motor rotation is monitored by an optical shaft encoder and a rotating magnet. The microprocessor uses data from both components to confirm the motor speed. The rotating magnet on the motor shaft operates a reed switch positioned just below the shaft end of the motor. A slotted disc on the end of the lead screw, together with an IR LED and photodiode, form a shaft encoder to monitor lead screw position. Two more reed switches, one at each end of the lead screw, slow the motor as the actuator approaches each end stop. The motor can be stopped, started or reversed by means of an H Bridge driving circuit.
Pressure Occlusion Detection o
o o
To keep battery weight & size down, the T34™ does not utilise a strain gauge to measure occlusion force. Instead, the motor current is monitored by a linear amplifier. The resulting voltage is roughly proportional to force. While this system is not as accurate as a strain gauge in a bridge configuration, it is adequate for the intended application of the pump. The system specification for a nominal occlusion alarm of 540mmHg is 380mmHg - 700mmHg.
Variations in friction of the syringe will affect the occlusion pressure, so it is important to use a new syringe when verifying performance. Syringe friction rapidly increases after only a few occlusion measurements.
7
PPM: PREVENTIVE MAINTENANCE AND FUNCTIONAL TEST PROCEDURES NOTE. Please refer to the latest service manual before carrying out the PPM procedure so the latest process flow and test specifications can be followed.
1. Print Input Pump Settings & Events Logs Print pump settings and download the event log using BodyComm software.
2. Visual Check Check the pump housing for physical damage. Using a brass pencil brush, clean the drive screw and the slide rails to clear debris or contaminates.
3. Syringe Recognition, volume and alarm test Equipment: o Syringe pump o 5mL and 50mL Luer lock syringe Method for syringe recognition, volume and alarm test 1) Switch the pump on and allow Pre-loading too complete. With the barrel clamp arm down, use the FF or Back key to move the actuator to the desired position to load a syringe. FF key movement is limited for safety reasons so repeated presses may be necessary (default settings 5mm). 2) The LCD screen will show the” LOAD SYRINGE” message.
Lift the barrel clamp arm and turn the arm 90°. Place the syringe on the pump ensuring the collar and plunger are positioned correctly. Place the barrel clamp arm down on top of the syringe barrel. NOTE: If this screen remains with parts of the syringe graphic flashing (or a message is shown) check the loading of the corresponding syringe part or follow the message to complete correct placement of the syringe.
3) When the syringe is loaded correctly, a syringe brand and size will display. Match the syringe brand being used to the syringe brand displayed on screen. Use the arrow keys to scroll through the list of syringe brand if necessary. Press Yes to confirm. 8
4) Read the actual volume in the syringe and compare it with the displayed volume on the pump. These results should be within +/-2%. Note. Refer to latest service manual for test result specification. 5) The alarm test can be carried out by either of the methods described below. Method to check syringe displacement alarm Start an infusion and take the syringe off the pump with infusion running. The alarm is activated and a screen message describes the cause. Method to check 2-minute pump unattended alarm Leave the pump on a setting screen when no infusion is running and do not press any key for 2 minutes. The pump should alarm after two minutes.
4. Check the Voltage of the internal PCB Battery Note. This step should not be carried out if the pump is still within the warranty period. Equipment: o Multi-meter o Screwdriver Method: 1) Check the actuator is not overlapping with the case at the minimum and maximum travel position. If the actuator does overlap, turn the pump on and move the actuator using the FF or Back key. 2) Unscrew the six screws on the rear case and remove the rear seal. 3) Open the pump by pulling the front and rear case apart 4) Check the voltage of the PCB battery on the motor PCB at the positive and negative terminals using a multi-meter.
5) The battery will need to be replaced if the voltage is below 3.0 V or if the battery is over 4 years old. Note. Refer to latest service manual for test result specification. Note. When reassembling the case ensure a calibrated torque screwdriver is used to tighten the screws. Refer to the latest service manual for the correct torque settings. 9
5. Main Self-Test The ‘Main Self-Test’ routine will verify all the systems are functioning correctly. Method a. Go to the Technician Menu. b. Scroll to “Main Self-Test”. Follow screen prompts and carry out tests. NOTE: If the any of these tests fail, the pump will need to be repaired or calibrated. 1) Keypad Test - Press each key displayed on screen.
2) Display Test - The LCD will flash, press ‘Yes’ to continue. 3) Acoustic Alarm Test - Buzzer will sound, press ‘Yes’ to continue. 4) Syringe Sensors Test - Follow instructions on pump display to test the three syringe sensors. 5) Syringe Diameter test - Insert each of the diameter calibration tools and read the measurement on screen. The pass tolerance is ± 0.2 mm for 3 point diameter calibration or ± 0.5 mm for 2 point diameter calibration. 6) Syringe Travel Test - The actuator will run the length of the lead screw to check its condition and the function of the motor. 7) Battery Voltage - Measure battery voltage across the battery terminals (tolerance ± 0.1 V). NOTE: When you exit the Technician menu after this test, you must always allow the pump to PreLoad, this is to ensure the device reads the correct volume on the syringe.
10
6. Syringe Travel Calibration Calibration of the actuators position 1)
Enter Technician Mode by pressing INFO key and the power ON/OFF key down simultaneously. After a few seconds, the access code prompt will appear.
2)
Using the arrow keys, set code 123 (default Technician mode access code) and confirm by pressing the YES/START key.
3)
Use the arrow keys to scroll to ‘Syringe Travel’. Press YES/START to select this option.
Syringe Travel
Follow the prompt and press the FF key. (If a syringe is loaded, you will be prompted to remove it first).
Press FF Key
4)
5)
6)
The actuator will move forwards indicating ‘Locating min travel’. When it reaches the end and the display changes to ‘Confirm min. travel’, check that the actuator is touching the housing. Press YES/START and following the prompt press the BACK key. After locating maximum travel, wait until the actuator reaches the other end completely and then press YES/START to confirm and continue. Another prompt to press the FF key will display and after the actuator reaches the front once again, confirm the min. travel to continue. The travel information at the end, which is applicable to the specific pump, serves as a confirmation that the syringe travel calibration completed successfully. The travel should be between 67 mm to 68.5 mm to pass the test. Press YES/START to exit the procedure.
Enter Tech Code 123 Change ↑/↓, Press YES
Confirm max travel Press YES to continue
Travel 67.8mm Press YES to continue
Note. The travel measurement of 67 mm – 68.5 mm is to be used as a guide and may be slightly below 67 mm as the thickness of the rear seal will affect the result.
7. Diameter Calibration The pump recognizes syringes by their outer diameter, measuring the diameter with a slide potentiometer and matching this to the closest syringe. Three diameter points (8mm, 19mm and 30mm) are calibrated to ensure the correct syringe size and brand is recognised.
1)
Enter Technician Mode by pressing INFO key and the power ON/OFF key down simultaneously. After a few seconds the access code prompt will appear.
11
2)
Using the arrow keys, set code 123 (default Technician mode access code) and confirm by pressing the YES/START key.
3)
Use the arrow keys to scroll to ‘Diameter Calibration’. Press YES/START to select this option.
Enter Tech Code 123 Change ↑/↓, Press YES Technician options:
Diameter Calibration Select↑/↓, Press YES
4)
Follow the prompt to set the barrel clamp to down position. Press YES/START to continue.
Locate barrel clamp to down Position 0 Press YES to continue
5)
Follow the prompt to set the barrel clamp to the upper position (255). Press YES/START to continue.
Locate barrel clamp to upper Position 255 Press YES to continue
6)
Follow the prompt and load diameter jig 1 which is 8 mm. The displayed measurement should be 8 mm ± 0.2 mm. Press YES/START to confirm, or use the arrow keys to change to the syringe diameter measurement and then confirm.
Load 2-5ml syringe Diameter 8mm Change ↑/↓, Press YES
7)
Follow the prompt and load diameter jig 2 which is 19 mm. The displayed measurement should be 19 mm ± 0.2 mm. Press YES/START to confirm, or use the arrow keys to change to the syringe diameter measurement and then confirm.
Load 10-20ml syringe Diameter 19mm Change ↑/↓, Press YES
8)
Follow the prompt and load diameter jig 3 which is 30 mm. The displayed measurement should be 30 mm ± 0.2 mm. Press YES/START to confirm, or use the arrow keys to change to the syringe diameter measurement and then confirm.
Load 35 - 50ml syringe Diameter 30mm Change ↑/↓, Press YES
9)
Check the measurement of each of the diameter tools at the test screen that is displayed (without pressing any keys). If each of the measurements is within tolerance (± 0.2 mm) press YES to complete the test. If any measurement is out of tolerance, press no and the pump will enter the calibration screen. Repeat steps 6 – 9 until each diameter tool measurement is within tolerance.
Syringe Diameter Test 30mm Press YES to continue
Note. This procedure calibrates only one syringe; the pump adjusts the dimensions automatically for all the others. Note: The number of diameter calibration steps depends on the software version; there are versions which require two diameter calibrations and not three. If only 2 diameter calibration tools are required the tolerance of the diameter is ± 0.5 mm.
12
8. Occlusion Test Equipment: o New 5mL BD Plastipak luer lock syringe o Pressure meter with tubing o Three - way tap Method 1) Set occlusion alarm to 540mmhg in change set up menu. 2) Fill the 5mL syringe with water and attach the three - way tap at the end of the pressure meter tubing. 3) Go to the Technician Menu and scroll to “Pressure Test”. 4) Connect the syringe to the pressure meter assembly (as shown below).
5) Position the actuator to fit the syringe. 6) Press ‘YES’ to confirm the syringe size and brand and start the test. With the tap open let a few drops out, then close the three - way tap. 7) The pressure will be displayed on the LCD and can be seen rising. 8) The pump will display the pressure that it has alarmed at on the LCD. Check occlusion pressure displayed on the pressure meter. This value should be ± 160 mmHg to be within tolerance. 9) Repeat the above procedure using a 50mL syringe. If the unit is out of specification, please refer to Section 9 or the service manual for calibration. Note. Refer to latest service manual for test result specification. Note: When doing an occlusion pressure test, use a new syringe every time. CME Medical recommends not using IDA devices to test our syringe pumps as results can be erratic. 13
9. Pressure Calibration Equipment: o New 5mL BD Plastipak luer lock syringe o Pressure meter Method for pressure calibration 1) Enter technician mode 2)
Scroll down to Factory Pressure Test press YES. Fill a 5 ml BD Plastipak syringe with water and set up as described in Section 8, Step 4. Select correct syringe size and brand, press YES.
Factory pressure, Test Load Syringe 5ml BD Plastipak
Wait a few seconds and when the pumps display shows “Connect & Press Yes”, close the three – way tap and press YES.
Zero Level 0mmHg Connect & Press Yes Zero level might not always be 0, due to the drag coefficient of the syringe; a small pressure value may be displayed.
3)
The pump will drive the syringe and the pressure can be seen to rise on the pressure meter and on the pump display.
540mmHg
4)
When the pump display 540 mmHg it will alarm and the screen shown to the right will display. Take the reading off the pressure meter when the unit bleeps, this is the peak occlusion value.
540mmHg Zero Level Sensitive 5 (4) 60
5)
The Zero Level can be adjusted by pressing UP/DOWN keys. This is the course adjustment and is used to adjust the pressure by large amounts. If the pressure reading on the meter is too high the Zero Level needs to be reduced. If the pressure on the meter is too low the Zero Level needs to be increased.
7)
Press the Yes key once.
8)
Sensitive level can then be adjusted. This is the fine adjustment and is used to increase / decrease the pressure by a small amount. If the pressure on the meter is high, decrease sensitivity. If the pressure on the meter is low, increase sensitivity.
9)
Press NO to exit and repeat Section 8. If the pressure is still outside tolerance (540 mmHg ± 160 mmHg) repeat Section 9.
14
10. Volume Test Equipment needed: o New 5mL BD Plastipak luer lock syringe o Digital Vernier Calliper Method 1) Go to the Technician Menu. 2) Scroll to “Volume Test”. 3) Load a 5mL BD Plastipak luer lock syringe with 4.5 ml of air onto the pump. Using the FF key, move the actuator so the volume in the syringe is reduced to 4.0 ml. 4) Select 5mL BD Plastipak. 5) Using Vernier callipers measure the distance between Point A and Point B (see photo below).
6) Set the rate to 10mL/h. 7) Set the volume to 2mL. 8) Allow the pump to deliver the 2mL. 9) When the pump has stopped (12 minutes) measure the distance between Point A and Point B again. 10) Subtract the second measurement from the first measurement. 11) To pass the test the result should be 17.4mm, ±2% (17.05mm and 17.75mm). Example. 1st measurement 36.95mm. After 2mL volume delivery 2nd measurement was 19.45mm. 36.95 – 19.45 = 17.50 mm ((17.50 / 17.40) x 100 ) – 100 = 0.57 % Note. Refer to latest service manual for test result specification. NOTE: Only use luer lock syringes, using luer slip will result in volume delivery error. 15
PPM data sheet example:
16
T34™ Technical Training Questions PPM Tick the answer you think is correct. 1 What is the default occlusion pressure setting? a) 720mmHg b) 540 mmHg c) 1180 mmHg
2
What is the baud rate setting for the T34™ BodyComm™ software? a) 7600 b) 19200 c) 3840
3
How many reed switches are thee on the motor PCB? a) One b) Three c) Two
4
If a plastic case battery is used for T34 calibration, can clinical users use a metal case battery? a) Yes b) No
5
When measuring a battery voltage across the battery terminals, what is the tolerance? a) +/-0.1v b) +/-0.2v c) +/-0.3v?
6
If the pump fails syringe travel test, what is the possible cause? a) Clean rails b) Reed switch c) Both
7
If an “End Battery” failure message displays and Pre-Loading fails, what is the possible cause? a) Clean rails b) Reed switch c) Both
8
What is the occlusion pressure for pressure calibration? a) 540mmHg b) 720mmHg 17
c) 840mmHg
9
If you replace the main board. What is one of the first things you should do? a) Clean leadscrew b) Perform Syringe Travel Test c) Check internal battery
10 When performing a ‘Syringe Travel’ test in Technician Mode. What should you do prior to the test itself? a) Clean leadscrew b) Clean rails c) Check internal battery
11 What the meaning of error code 66? a) Send for service b) Main PCB malfunction c) Motor PCB malfunction
12 How many events does the T34™ hold? a) 2044 b) 1024 c) 512
13 To change settings/configuration in the pump Technician Menu, what is the default access code? a) 99 b) 123 c) 5
14 To change settings/configuration in BodyComm™, what is the default access code? a) 99 b) 123 c) 5
15 What is the warranty period of the T34™? a) 1 year b) 2 years c) 3 years 16
On BodyComm™, can you change the parameters of the syringe data? a) Yes b) No 18
This page is intentionally blank
19
CME Medical UK Limited Kincraig Business Park Kincraig Road Blackpool FY2 0PJ
Tel: 01253 206700 Fax: 01253 896648 [email protected] cmemedical.co.uk