Instructions for Use
12 Pages
Preview
Page 1
Ezi-flow flowmeter manual
30/3/17
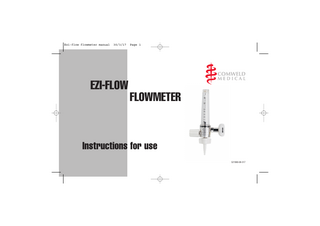
EZI-FLOW
Page 1
FLOWMETER
Instructions for use 521969-08-317
Ezi-flow flowmeter manual
30/3/17
Page 2
Contents
Page
1. INTRODUCTION
2
2. INTENDED USES
3
3. GENERAL DESCRIPTION
3
4. PARTS IDENTIFICATION
4
5. SAFETY PRECAUTIONS
4
6. EQUIPMENT USE
5
7. CHECKS AND INSPECTIONS BY THE USER
7
8. SERVICE RECOMMENDATIONS
8
9. ACCESSORIES AND REPLACEMENT PARTS
9
10.SPECIFICATIONS
9
11.WARRANTY
10
EZI-Flow Flowmeter
2
1. INTRODUCTION These instructions are intended to provide users with information on the features, use and care of an EZI-flow Oxygen and Respiratory therapy flowmeter. The instructions should be read carefully by every intended user of an EZI-flow flowmeter in any of its applications before attempting to use it to ensure that they are fully conversant with all the information on the features, use and care of the flowmeter.
Warning Read and understand the entire Instructions for Use before operating this medical device. Keep them always with the device. Failure to do so may cause clinical damage to a patient or damage to the device.
521969-08-317
Ezi-flow flowmeter manual
30/3/17
Page 3
2. INTENDED USES
The medical gas source (gas cylinder and pressure regulator, or pipeline system) should be clearly identified as matching the intended gas of the flowmeter. Colour coding and sleeve indexing to SIS in AS 2896 is used for the inlet connections to prevent accidental connection to an incorrect gas. The control knob and outlet connections are also colour coded for easy gas recognition (Medical Oxygen is colour coded White, and Medical Air coded Black).
The intended purpose of the EZI-flow flowmeter is flow adjustment and measurement of medical gases for delivery to devices and/or patients in applications like Oxygen and Respiratory therapy. It should only be supplied from pressure regulated medical gas systems. It should be used only in accordance with clinical or medical advice and by persons instructed and familiar with basic medical gas handling. Details of the performance of each EZI-flow model is given in Section 10 Specifications.
The flowmeter may be connected by the user to downstream therapy equipment using suitable soft plastic tubing inserted over the plastic barbed nipple included with the product. Alternatively the barbed nipple can be removed to access a standard 1/4” BSP connection.
3. GENERAL DESCRIPTION The EZI-flow flowmeter is a pressure compensated flowmeter suitable for most types of respiratory therapy. Flowmeters are available for Oxygen (including models intended for low flows, e.g. paediatric applications) and respiratory air. Flow control is achieved via an adjustment control knob, and flow measurement indication is by way of a graduated scale marked on the flow tube. Use of the EZI-flow flowmeters should always be undertaken with clinical or medical advice.
The design features a captive control knob which prevents accidental disassembly. The flowmeter uses a ball (or bobbin) float which rides on the gas stream inside the flow tube. The flow tube is marked with a graduated flow scale and is calibrated for a supply (inlet) pressure of 400 kPa from either a pressure regulator connected to a gas cylinder or from the wall outlet of a medical gas pipeline system. The flow is controlled by a needle valve downstream of the calibrated flow tube, therefore changes in downstream back pressure do not affect the accuracy of flow measurement, although a change in flow may occur. A flow limiting orifice protects the patient against excessive unintended flow. The calibrated flow tube is protected by an outer tube (shroud) which incorporates a safety blowout against overpressure.
The flowmeters are intended to be connected by the user only to a source of regulated pressure supplying medical gas at 400 kPa, i.e. medical pressure regulators or medical gas pipeline systems, fitted with SIS outlets to AS 2896 for the intended gas.
521969-08-317
3
EZI-Flow Flowmeter
Ezi-flow flowmeter manual
30/3/17
Page 4
4. PARTS IDENTIFICATION
5. SAFETY PRECAUTIONS
4.1 Contents of Package: Item Description 1 2 3
EZI-flow flowmeter assembly Outlet Nut and Nipple assembly Instructions for Use
Warning Quantity
- Use the flowmeter only for the purpose for which it is intended (see above) and in accordance with clinical or medical advice. Failure to do so may result in clinical damage to the patient.
1 1 1
- Use the flowmeter only for the gas for which it is marked and colour-coded, always ensuring that the medical gas supply labels on gas cylinder and pressure regulator or medical pipeline system match the flowmeter intended gas label (Medical Oxygen is colour coded White, and Medical Air colour coded Black).
4.2 Pictorial Description:
- Use the correct model for the patient and intended maximum flow, e.g. a low flow model for some paediatric applications. - Never allow oil or grease near oxygen equipment or in contact with the flowmeter as an explosion and/or fire may result. - Never allow any source of ignition or naked flame near the equipment or patient during oxygen administration and for a reasonable period afterwards. - Do not allow the flowmeter outer tube (shroud) to come in contact with any chemical agents like solvents, aggressive cleaning media or disinfectants - failure of the outer tube is likely to occur.
EZI-Flow Flowmeter
4
521969-08-317
Ezi-flow flowmeter manual
30/3/17
Page 5
- Never use excessive force when attempting to close the flow control valve as seat damage may occur.
2. Check that the sealing O-ring on the inlet connection is in place and in good condition (i.e. no cuts, deformation or dirt). Check for loose fittings.
- No repair should ever be undertaken by personnel not trained in the servicing procedures of medical gas equipment.
3. Check that the flowmeter flow control knob is turned off (i.e. fully clockwise). If the flowmeter is connected to a pressure regulator fitted to a gas cylinder, ensure that the cylinder valve is closed.
- Use only manufacturer approved spare parts when servicing the flowmeter. - Remove the red coloured plastic protection caps from a new flowmeter just prior to installation.
4. Fit the flowmeter to the gas supply. Only a source of regulated pressure supplying the correct medical gas at 400 kPa should be used, e.g. medical pressure regulators or medical gas pipeline systems, fitted with SIS outlets to AS 2896 for the intended gas.
- When connected to a pressure regulator fitted to a gas cylinder, always open the cylinder valve SLOWLY. Rapid opening of the cylinder valve may damage the equipment.
CAUTION
Warning
Equipment connected to high pressure gas cylinders must be handled with care and in accordance with the recommendations from the gas supplier.
The flowmeter must be held at the base whilst tightening the handwheel connection to the gas supply outlet. The flowmeter must not be tightened or vertically aligned by leverage of the outer tube (shroud) component.
- If the outer tube appears crazed or cracked, immediately remove the flowmeter from use and subject it to service. 6. EQUIPMENT USE
5. If the flowmeter is connected to a pressure regulator fitted to a gas cylinder, open the cylinder valve SLOWLY.
6.1 Installation 1. Remove the red coloured plastic protection caps (if fitted) from the inlet and outlet connections.
521969-08-317
5
EZI-Flow Flowmeter
Ezi-flow flowmeter manual
30/3/17
Page 6
8. Perform the Operational Check and Inspection procedure (Section 7.1) before using the equipment on each patient. If the unit fails any part of this checkout procedure, the flowmeter must be removed from service and repaired before use on a patient. Units subject to Preventative maintenance programs should be within test date. (Refer to Section 8.0 Service Recommendations).
Warning Do not check the gas cylinder contents by opening the cylinder valve until downstream equipment has been connected to the pressure regulator outlet. 6. Flowmeters connected to pressure regulators fitted to gas cylinders should be well protected against knocks and impacts, especially to the outer tube (shroud).
6.2 Disconnecting the flowmeter 1. Check that the flowmeter flow control knob is turned off (i.e. fully clockwise).
7. Connect any downstream equipment to the flowmeter. The flow can be adjusted to the desired level using the flow control knob – rotate anti-clockwise to increase flow, clockwise to decrease flow.
2. Disconnect any downstream equipment from the flowmeter outlet. 3. If the flow meter is connected to a pressure regulator fitted to a cylinder valve:
NOTE: The flow rate in litres per minute is indicated by the position of the CENTRE of the ball, or the TOP of the bobbin in the flow tube depending on the model in use.
a. Shut off the cylinder valve supply to the regulator. b. Open the flowmeter flow control valve until all residual pressure is bled from the system (ie the ball/bobbin should fall to the bottom indicating zero flow).
Warning
c. Turn off the flow control knob (i.e. fully clockwise).
The specified accuracy from the flowmeter may be achieved only when: The flow is set with the flowmeter in a VERTICAL position The supply (inlet) pressure is 400 kPa
EZI-Flow Flowmeter
4. Disconnect the flowmeter via the inlet connector handwheel connection. Do not loosen the handwheel connection by leverage of the outer tube (shroud) component.
6
521969-08-317
Ezi-flow flowmeter manual
30/3/17
Page 7
secure place to prevent accidental knocks and impacts and to prevent the ingress of dust or contamination to its gas passages.
Warning USE OF CHEMICAL CLEANING MEDIA AND DISINFECTANTS MAY RESULT IN DAMAGE TO THE OUTER TUBE (SHROUD).
7. CHECKS AND INSPECTION BY THE USER 7.1 Operational Check and Inspection A flowmeter is a critical link in the gas supply to a patient. The following checks should be performed each time the flowmeter is connected to the gas supply:-
Care should be taken to ensure that none of the cleaning solution enters the gas passages of the flowmeter. Do not attempt to clean the inside of the flowmeter. If internal contamination is apparent, the flowmeter should be removed from use and inspected by trained personnel.
1. The O-ring on the inlet connection should be in place and in good condition. (i.e. no cuts, deformation or dirt). A damaged O-ring may be replaced, when a correct replacement is available, by removing it with a pointed object (e.g. small precision flat screw driver), taking care not to damage the inlet nipple, and inserting the replacement O-ring in place.
6.3 Cleaning after use If the exterior of the flowmeter requires cleaning, use a dry cloth only. For difficult to remove residues and contaminants, wipe over with soapy water containing fully dissolved mild soap, then dry. An isopropyl alcohol wipe may also be used, in which case more frequent inspection of the flow tube is recommended..
2. The flowmeter outer tube should be in good condition and free from crazing or cracking (irregular scratch marks). 3. The gas specific inlet connector handwheel and the plastic outlet nut/barbed nipple assembly should be in good, working condition.
6.4 Storage after use
4. The inlet connection fitting is tight and secure.
If the flowmeter is not going to be used immediately following removal from the gas supply, it should be stored in a clean, dry,
521969-08-317
7
EZI-Flow Flowmeter
Ezi-flow flowmeter manual
30/3/17
Page 8
Outer tube crazing or cracking: Caused by contact with chemical agents, or solvents and most cleaning and disinfecting media immediately remove from use and service the flowmeter.
5. When connected to a gas supply, the flow control knob should be adjusted through it’s entire range to check for smooth operation. The ball/bobbin should move smoothly up and down the scale. Check that the maximum flow is available, that is that the ball/bobbin reaches the top of the scale. When the flow control knob is turned off (fully clockwise) the ball/bobbin should fall to the bottom indicating zero flow.
8. SERVICE RECOMMENDATIONS
6. If the flowmeter satisfies the above requirements, it may be used.
An EZI-flow flowmeter is a critical link in the gas supply to a patient. To ensure that the flowmeter is always in a safe, reliable, useable condition it is recommended that the unit be placed on a preventive maintenance program.
7. If the unit fails any part of this checkout procedure, the flowmeter must be removed from service and repaired before use on a patient. (Refer to Section 8.0 Service Recommendations).
The preventative maintenance program should include as a minimum fixed yearly servicing. Depending on usage, an additional more frequent service (e.g. six monthly, quarterly or monthly is recommended.
7.2 Trouble Shooting
Frequent Inspection Program - Operational Check and Inspection (Section 7.1)
Difficulty Obtaining Flow: Caused by a depleted gas supply, obstructed supply, obstructed outlet, sticking float or a blocked inlet filter.
Fixed Yearly Servicing (Note: to be performed by trained service personnel only. Contact your nearest Comweld Medical service provider for further information)
Inaccurate Flow Readings: Caused by poor quality repairs, leakages, sticking ball or bobbin, incorrect inlet pressure or the flowmeter is not in a vertical position.
- Frequent Inspection (Section 8) - Inlet O-ring replacement
Flow registers when control valve is closed (fully clockwise): Caused by a damaged needle valve and/or seat, loose valve seat, worn O-rings, dirt or other contamination.
EZI-Flow Flowmeter
- Flow Calibration Check For repairs or service to your EZI-flow flowmeter, contact your nearest Comweld Medical service provider. 8
521969-08-316
Ezi-flow flowmeter manual
30/3/17
Page 9
9. SPARES AND ACCESSORIES 9.1 EZI-flow flowmeter Accessories
9.2 User Replacement Parts Listed below are the items considered to be user replaceable parts. It is recommended that the user keep stock of such items to ensure that the EZI-flow flowmeter is always ready for use.
Listed below are some of the accessories suitable for use with an EZI-flow flowmeter. It is recommended that if any other accessories are intended to be used with an EZI-flow flowmeter, your nearest authorised distributor should be contacted to check the compatibility of the accessory.
Kit Description
Part No.
Available for
Inlet Handwheel O-ring (20 pack)
552018
All handwheel models
Description
Part No.
Series-O Oxygen Regulator - Type 10 Handwheel inlet, SIS Outlet
518800
10. SPECIFICATIONS
Series-O Oxygen Regulator - Pin Index Yoke inlet, SIS Outlet
518804
Part No.
Gas
515800
Oxygen 0-15L/min.
Series-O Air Regulator
Humidifier
- Pin Index Yoke inlet, SIS Outlet - 1/4” BSP female inlet
Outlet wingnut/nipple assy (10 pack) 515830 515849
@ 400 kPa
518809 TM11
Therapy Tubing
521969-08-317
Oxygen (white) Air (black)
9
Flow Range
Maximum Flow
Inlet Connection
20 L/min.
SIS Handwheel
515820
Air
0-15 L/min.
20 L/min.
SIS Handwheel
515824
Oxygen 0-2.5L/min.
6 L/min.
SIS Handwheel
515852
Oxygen 0-15 L/min.
20 L/min.
3/8”-26W (for permanent connection)
EZI-Flow Flowmeter
Ezi-flow flowmeter manual
30/3/17
Page 10
NOTES:
products as stated below, CIGWELD shall, upon notification thereof and substantiation that the product has been stored, installed, operated, and maintained in accordance with CIGWELD's specifications, instructions, recommendations and recognized standard industry practice, and not subject to misuse, repair, neglect, alteration, or accident, correct such defects by suitable repair or replacement, at CIGWELD's sole option, of any components or parts of the product determined by CIGWELD to be defective.
SIS - Sleeve Indexed System inlet connections from AS 2896 for the nominated gas. Outlet Connection: All flowmeters include a plastic barbed nipple to which soft plastic tubing may be connected. The barbed nipple can be removed to access a standard 1/4” BSP connection.
CIGWELD MAKES NO OTHER WARRANTY, EXPRESS OR IMPLIED. THIS WARRANTY IS EXCLUSIVE AND IN LIEU OF ALL OTHERS, INCLUDING, BUT NOT LIMITED TO ANY WARRANTY OF MERCHANTABILITY OR FITNESS FOR ANY PARTICULAR PURPOSE.
Accuracy: All flowmeters have an accuracy of ±5% of FULL SCALE READING. Inlet Pressure: All flowmeters are calibrated for an inlet pressure of 400 kPa.
LIMITATION OF LIABILITY: CIGWELD SHALL NOT UNDER ANY CIRCUMSTANCES BE LIABLE FOR SPECIAL, INDIRECT OR CONSEQUENTIAL DAMAGES, SUCH AS, BUT NOT LIMITED TO, LOST PROFITS AND BUSINESS INTERRUPTION.
Inlet filter: All flowmeters are fitted with a 66 micron inlet filter. 11. WARRANTY
The remedies of the Purchaser set forth herein are exclusive and the liability of CIGWELD with respect to any contract, or anything done in connection therewith such as the performance or breach thereof, or from the manufacture, sale, delivery, resale, or use of any goods covered by or furnished by CIGWELD whether arising out of contract, negligence, strict tort, or under any warranty, or otherwise, shall not,
LIMITED WARRANTY: CIGWELD Pty Ltd, An ESAB Brand, hereafter, “CIGWELD” warrants to customers of its authorized distributors hereafter “Purchaser” that its products will be free of defects in workmanship or material. Should any failure to conform to this warranty appear within the time period applicable to the CIGWELD
EZI-Flow Flowmeter
10
521969-08-317
Ezi-flow flowmeter manual
30/3/17
Page 11
except as expressly provided herein, exceed the price of the goods upon which such liability is based. No employee, agent, or representative of CIGWELD is authorized to change this warranty in any way or grant any other warranty.
CIGWELD or our Accredited Distributor must be notified in writing of its claim within seven (7) days of becoming aware of the basis thereof, and at its own expense returning the goods which are the subject of the claim to CIGWELD or nominated Accredited Distributor/Accredited Service Provider This warranty is given.
PURCHASER'S RIGHTS UNDER THIS WARRANTY ARE VOID IF REPLACEMENT PARTS OR ACCESSORIES ARE USED WHICH IN CIGWELD'S SOLE JUDGEMENT MAY IMPAIR THE SAFETY OR PERFORMANCE OF ANY CIGWELD PRODUCT. PURCHASER'S RIGHTS UNDER THIS WARRANTY ARE VOID IF THE PRODUCT IS SOLD TO PURCHASER BY NON-AUTHORIZED PERSONS.
Cigweld Pty Ltd A.B.N. 56007226815 71 Gower Street, Preston Victoria, Australia, 3072 Phone: 1300 654 674 Email: [email protected] Website: www.cigweld.com.au
The warranty is effective for the time stated below beginning on the date that the authorized distributor delivers the products to the Purchaser. Notwithstanding the foregoing, in no event shall the warranty period extend more than the time stated plus one year from the date CIGWELD delivered the product to the authorized distributor.
This warranty is provided in addition to other rights and remedies you have under law: Our goods come with guarantees which cannot be excluded under the Australian Consumer Law. You are entitled to replacement or refund for a major failure and to compensation for other reasonably foreseeable loss or damage. You are also entitled to have the goods repaired or replaced if the goods fail to be of acceptable quality and the failure does not amount to a major failure.
Any claim under this warranty must be made within the warranty period which commences on the date of purchase of the product. To make a claim under the warranty, take the product (with proof of purchase from a Cigweld Accredited Seller) to the store where you purchased the product or contact Cigweld Customer Care 1300 654 674 for advice on your nearest Service Provider. CIGWELD reserves the right to request documented evidence of date of purchase.
521969-08-317
Cigweld Pty. Ltd. warrants this product for a period of two years from the date of purchase.
11
EZI-Flow Flowmeter
Ezi-flow flowmeter manual
30/3/17
Page 12
CIGWELD Pty Ltd A.B.N. 56 007 226 815 71 Gower Street, Preston VIC 3072 Australia
Customer Service Centre and Technical Support Ph: +61 3 9474 7314 Fax : +61 3 9474 7391
In the interest of continuous improvement, CIGWELD Pty Ltd ABN 56 007 226 815 reserve the right to change the specifications or design on any of its products without prior notice.