Quick Card
2 Pages
Preview
Page 1
LOGIQ S6 Quick Card
Direction 5161384-100 Rev. 1
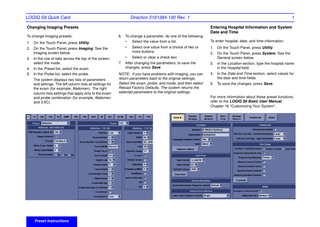
Changing Imaging Presets To change imaging presets:
1 Entering Hospital Information and System Date and Time
6. To change a parameter, do one of the following:
1. On the Touch Panel, press Utility.
•
Select the value from a list.
To enter hospital, date, and time information:
2. On the Touch Panel, press Imaging. See the Imaging screen below.
•
Select one value from a choice of two or more buttons.
1. On the Touch Panel, press Utility.
3. In the row of tabs across the top of the screen, select the mode.
•
Select or clear a check box.
2. On the Touch Panel, press System. See the General screen below.
7. After changing the parameters, to save the changes, press Save.
3. In the Location section, type the hospital name in the Hospital field.
NOTE: If you have problems with imaging, you can return parameters back to the original settings. Select the exam, probe, and mode, and then select Reload Factory Defaults. The system returns the selected parameters to the original settings.
4. In the Date and Time section, select values for the date and time fields.
4. In the Preset list, select the exam. 5. In the Probe list, select the probe. The system displays two lists of parameters and settings. The left column lists all settings for the exam (for example, Abdomen). The right column lists settings that apply only to the exam and probe combination (for example, Abdomen and 3.5C).
Preset Instructions
5. To save the changes, press Save.
For more information about these preset functions, refer to the LOGIQ S6 Basic User Manual, Chapter 16 “Customizing Your System”.
LOGIQ S6 Quick Card
Direction 5161384-100 Rev. 1
2
Defining Annotation Libraries To define annotations: 1. On the Touch Panel, press Utility. 2. On the Touch Panel, press Comments. 3. On the Comments tab, specify format information such as text color and pointer size.
6. To change or add an annotation, place the cursor to the desired field and press Set, then do one of the following: •
Select the annotation in the Copy from Existing list, and press Set.
•
Type the annotation.
4. Select the Libraries tab. See the Libraries screen below.
7. To save the changes, press Save.
5. In the Library field, select the library you want.
To create a new annotation library:
The system displays all annotations for the library. You can have two Touch Panels of annotations for each library (Page1 and Page2). The annotations are listed in the order they are shown on the Touch Panel when you use annotations.
1. In the User Defined Library field, type a name for the library, then select Create. The system creates a new library. 2. Enter annotations as described in step 6 above. 3. To save the changes, press Save.
To specify which libraries belong to an application: 1. Select Utility --> Applications --> Comments. 2. In the Preset field, select the application. 3. In the Tabs fields, select the libraries for this application. You can select up to six libraries. 4. In the Default Tab field, select the default library you want the system to display when you use annotations. 5. To save the changes, press Save. For more information about these preset functions, refer to the LOGIQ S6 Basic User Manual, Chapter 16 “Customizing Your System”.