User Manual
52 Pages

Preview
Page 1
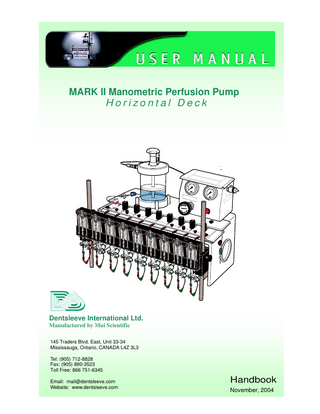
MARK II Manometric Perfusion Pump Horizontal Deck
Dentsleeve International Ltd. Manufactured by Mui Scientific 145 Traders Blvd. East, Unit 33-34 Mississauga, Ontario, CANADA L4Z 3L3 Tel: (905) 712-8828 Fax: (905) 890-3523 Toll Free: 866 751-6345 Email: [email protected] Website: www.dentsleeve.com
Handbook November, 2004
In
Index
Section In
Index
Section A
Overview
A-1 A-2
Schematic of pump Major pump components
Section B
Precautions & Warnings
Section C
Normal Use
C-1 C-2
Assembly & filling of perfusate reservoir Check, connect & set air supply
C-3 C-4 C-5 C-6 C-7
Connection & flushing of water manifold Check flow values of each hydraulic resistor Turn on water perfusion to fill each transducer Transducer calibration (if required) Connect catheter to transducers
C-8 C-9 C - 10 C - 11
Water injection procedure - each channel Check flow value for air perfusion manometry Observation & refilling of perfusate reservoir Maintain correct perfusate reservoir pressure
C - 12
Prevention, recognition and correction of hydraulic resistor blockage
C - 13
Compressor
Section D D-1 D-2 D-3 Section E
Steps on completion of measurements Perfusate reservoir Water manifold Air supply Set Up Procedures & Connection of Components
E-1 E-2 E-3
Air supply/compressor Perfusate reservoir prior to first use Installation of pressure transducers
E-4
Water perfusion manifold – removal
E-5 E-6 E-7
Standard hydraulic resistors Compact resistors Air perfusion circuit
2
In
Index
Section F
Cleaning & Disinfection
F-1 F-2
Cleaning of plastic parts Sterilization of perfusate reservoir
F-3 F-4 F-5
Sterilization of manifolds Hydraulic resistors Cleaning of compressor
Section G
Regular Maintenance
G-1
Every 3 months (or as needed) : perfusate water filter
G-2
Every year (or as needed): gas filters
G-5 G-6
Service of control box by Dentsleeve Compressor dessicant
Section H
Problem Solving
H-1
Diagnosis of abnormal Air consumption
H-2
Abnormal Air consumption - perfusate reservoir leakage
Section I
○
○
○
Specifications, Support, Spart Parts & Accessories
I-1
Specifications
I-2
Support
I-3 I-4 I-5
Spare parts Parts List Regulatory information
○
○
○
○
○
○
○
○
○
○
○
○
○
○
○
○
○
○
○
○
○
○
○
○
○
○
○
○
○
○
○
○
○
○
○
○
○
○
○
○
○
○
○
○
○
○
○
○
○
○
○
Notes on the use of this manual • References within the manual are shown in brackets eg (C – 4.2) = section C, part 4, instruction 2 • Part numbers (#) given in the text are unique for Dentsleeve • The technical information and illustrations in this manual reflect specifications and operating procedures at the time of drafting. Some specifications and operating procedures differ from earlier manuals for Mark II perfusion pump models. Dentsleeve reserves the right to vary specifications and operating procedures as part of its continuous product improvement process.
3
May 2003
○
○
Overview
Schematic of pump
100 kpa or 15 psi
A A–1
Regulated Air Supply to perfusate reservoir
Water Perfusate
Air Supply
Pump control box Perfusate Manifold
Manifold Purge Clamp
Manifold side-arm pinch valves or pinch clamps
Hydraulic resistors
3 Way stop cocks Pressure transducers Catheter connector tubes
Catheter
Note: Schematic diagram of water perfusion circuit. Only critical components are shown.
May 2003
4
A
Overview
Major pump components
A–2
Perfusate reservoir Pump control box Reservoir pressurization line
Reservoir outflow control device
Air supply gauge Manifold cover Air inlet
Pinch valves
Compressor connection plug
Compressor on/off switch
Main deck
Pinch valve or pinch clamp deck
Pressure transducer rack
Manifold flush pinch clamp Standard hydraulic resistors Transducer rack slide
Note: Pump length, channel numbers and spacings vary according to individual specifications. Compact deck version shown. Transducer types vary.
5
May 2003
!
B
Precautions & Warnings
B–1
!
Only pressurise reservoir with this line (C – 3.1).
! Air perfusion channel. Only use for pharyngeal swallow monitoring.
!
!
Never drop. Do not use if visible damage.
!
Air Pressures never more than 300 kpa (45psi).
Water level never less than 2cm (C – 10).
May 2003
6
C
Normal Use
Assembly & filling of perfusate reservoir C – 1
Note: See E – 2 for Dentsleeve part #’s Fill with particle free, degassed, distilled H20
1
2
Add water, then place perfusion float barrier on top
Blow-off valve
Perfusate outlet hole
‘O’ ring
Reservoir outflow control device
! !
Always use diffusion float barrier
○
○
○
3
7 May 2003
○
○
○
○
○
○
○
○
○
○
○
○
○
○
○
○
○
○
○
○
○
○
○
○
○
○
Tighten firmly to seal
May 2003
○
C
Normal Use
For set-up and first use see E – 1 to E – 9
C–2
Check, connect & set air supply
1
Push together
Pull back to release
Click!
Air ○
○
○
○
○
○
○
○
○
○
○
○
○
○
○
○
○
○
○
○
○
○
○
○
○
○
○
○
○
○
○
○
○
○
○
○
○
○
2
Air Set to 100 kPa - 15 psi
3
At least 1000 kpa (150 psi) in high pressure Air supply cylinder
○
○
○
○
○
○
○
○
○
○
○
○
○
○
○
○
○
○
May 2003 8
Normal Use
Connection & flushing of water manifold
1
Push to seal onto reservoir
Part #: ZP1FIT/SW/B-QM2-B-200ZN
2
Connect to water manifold
Reservoir support posts
3
Air line from control box
Open outflow control
4
Open to vent bubbles
Manifold venting pinch clamp
9
May 2003
C C–3
C C–4
Normal Use
Check flow values of each hydraulic resistor
1
Flow ml/min
1
Standard resistor shown: flow is colour coded
Tube Colour
Screw Colour
Part #
0.01
Black
White
R01HRE/ST/1(2)
0.02
Black
Black
R01HRE/ST/2(2)
0.04
Red
Red
R01HRE/ST/4(2)
0.08
Red
White
R01HRE/ST/8(2)
0.15
Red
Black
R01HRE/ST/15(2)
0.3
Green
White
R01HRE/ST/30(2)
0.45
Green
Red
R01HRE/ST/45(2)
0.6
Green
Black
R01HRE/ST/60(2)
Alternative: Compact hydraulic resistor
Water flow on case
2
The flow value is...
• Correct, go to
C–5
• Changed, go to
E–5 or 6 May 2003
10
Normal Use
C
Turn on water perfusion to fill each transducer
1
Open pinch valve or clamp
2
Fill transducers
2
Fill transducers
Prefered position for 3 way stopcock - other than PVB DPT-6100 Note: PVB DPT-6100 Transducer shown
11 May 2003
Note: Abbott Transpac 42582-10 Transducer Shown
C–5
C
Normal Use
C–6
Transducer calibration (if required)
1
Turn perfusion off - (C – 5)
2
Set tranducer gain by applying standard external pressure
Shows AP1CMA/TR/2
Connect to transducers Note: Shows Dentsleeve calibration manifold; made according to channel numbers and spacings Part #’s AP1CMA/TR/1to5
Pressurise with syringe
C–7
Connect catheter to transducers
1
Select correct channel
2
Twist & push on firmly
Note: Catheter detail is for Dentsleeve product
May 2003
12
Normal Use
C
Water injection procedure - each channel
1
H2O - no bubbles
3
Inject 5ml of H2O
13 May 2003
2
Open side-port
C–8
C C–8
Normal Use
Water injection procedure - each channel (cont)
4
Close side-port then remove syringe
Note: Arrangement for PVB DPT-6100 transducer shown
May 2003 14
C
Normal Use
Check flow value for air perfusion manometry
1
C–9
Identify air perfusion channel
Red Band
! Only use air perfusion for detection of swallowing in pharynx
2
Ensure resistor for air perfusion channel is correct
!
Air flow rate through hydraulic resistor is x100 water flow rate.
Water flow ml/min
Part #
0.02
Black
Black
R01HRE/ST/2(2)
0.04
Red
Red
R01HRE/ST/4(2)
0.08
Red
White
R01HRE/ST/8(2)
Suitable compact resistors give airflow on case
! Must be installed between manifold and transducer to limit air flow into catheter to less than 10ml/min
15
May 2003
Air flow ml/min
Water Flow ml/min
Part #
2
0.02
R01HRE/CO/2
4
0.04
R01HRE/CO/4
8
0.0
R01HRE/CO/8 8
C
Normal Use
C – 10
Observation & refilling of perfusate reservoir
If perfusate exhausted, large volumes of gas may be perfused down catheter
1
Refill when at 2cm
2
Release pressure
Pull Back
3
Refill
Particle free, degassed, distilled H 20
4
Restart perfusion
Tighten
Repressurise
May 200316
Normal Use
C
Maintain correct perfusate reservoir pressure
C – 11
Monitor air pressure. Maintain at 100kPa/15psi.
1
150
100 15
20 25
10 50
0
2
200
30 35
5 psi kPa
250
Check if air pressure drops
3
Check that air supply is adequate
300 200
400 40 60 20
100
500 80
0
psi kPa
600
OR At least 130 kPa/ 20psi
At least 1000 kPa/ 150psi
17 May 2003
C C – 12
Normal Use
Prevention, recognition and correction of hydraulic resistor blockage
1
Prevention of blockages - Always use perfusate filter
2
Minimise perfusate particle load
Double-distilled or de-ionised water
No particles in reservoir (E-2) Perfusate filter Part # AP1FIL/WA/1
3
4
Replace water perfusate filter regularly - (G-1)
Check perfusate flow rates - assemble 1ml syringe barrel on transducer
1ml syringe
5
Start perfusion - (C-5)
6
Measure time to deliver water
Female/Female adapter Part # ZP1FIT/VP/FTLLC-9
Transducer on rack
Note: for resistor flow rates < 0.15ml/min use 0.25 - 0.50 ml syringe barrels
May 2003
18
C
Normal Use
Prevention, recognition & correction of hydraulic resistor blockage (cont.)
7
Flushing of blocked resistors - remove resistor from circuit
Transducer end
8
Backflush forcibly
9
Observe water flow
OR 11
Remove resistor from circuit
12
Insert flush support tool - (E – 6)
13
Same steps as C – 12.7 to 12.10 above
19 May 2003
10
Re-install - (E – 5)
C – 12
C
Normal Use
C – 13
Compressor
1
Always earth
2
Turn on power switch. Power is on when switch is illuminated
3 4
5
Connect compressor air outlet to pump control box
Plug in compressor to pump control
Press compressor on/off switch. Functioning normally when switch is illuminated
May 2003 20
Steps On Completion of Measurements
D
Perfusate reservoir
1
2
Depressurise
3
Remove lid
5
Remove float & air dry
Close and disconnect from manifold
4
Drain Reservoir
Lint & particle free surface
! Do not transfer particles to internal surfaces of reservoir
21 May 2003
D–1
D D–2
Steps On Completion of Measurements
Water manifold
1
D–3
Close
Air supply
1
Turn off compressor
OR 2
Close cylinder valves
May 2003
22
E
Set Up Procedures & Connection of Components
Air supply/Compressor
! ○
○
○
○
○
Installation only by an approved, qualified biomedical engineer ○
1
○
○
○
○
○
○
○
○
○
○
○
○
○
○
○
○
○
○
○
○
○
○
○
○
○
○
○
○
○
○
○
○
○
○
○
○
○
○
○
○
○
○
○
○
○
Use Air
Note: Air chosen as: 1. Air dissolution in perfusate prevented by perfusate float barrier. 2. More suitable for gas perfusion manometry than N2 . 3. Usually more available and cheaper than N 2 . 4. Available from wall supply and simple compressors.
2
23
E–1
May 2003
Set up for compressor, wall or air bottle supply
Compressor
E – 1.3
Wall
E – 1.4
Air bottle
E – 1.6 or 1.9
○
○
○
○
○
E E–1
3
Set Up Procedures & Connection of Components
Air supply/Compressor Install under pump deck
Air Compressor Unit
4
Identify air line
OR Black
Connects to pump Air/N2 inlet (C – 1.1)
5
Ensure air source is suitable: • 130 - 240 kPa or 20 - 35 psi no oil or moisture • filtered to 0.5 micron •
Short Air Link Lead – 65 cm
6
Make appropriate connection to supply
May 2003
24
E
Set Up Procedures & Connection of Components
Air supply/Compressor
7
E–1
Identify air line with Dentsleeve supplied regulator Factory set by Dentsleeve to deliver maximum 300 kPa or 45 psi
Part # ZP1REG/HP/1
Cylinder pressure gauge Black
Connect to pump air inlet (C – 1.1)
Air Bottle Regulator & Supply Lead Medical international air pin index (Size C cylinders only)
!
8
Install C size cylinder under main deck
9
Install regulator on cylinder pin index
Maximum cylinder pressure 25,000 kPa or 3,700 psi.
Note: International pin-index is only available on C size medical air cylinders. (3 Litres volume on hydrostatic test). Index must be specified for air.
10
Identify air line if no high pressure regulator supplied
Black
Long Air Link Lead – 3 meters
!
11
Connect to suitable locally sourced high pressure regulator with lockable outlet pressure control
!
12
Adjust regulator to deliver outlet pressure no greater than 300 kPa or 45 psi
25 May 2003
E E–2
Set Up Procedures & Connection of Components
Perfusate reservoir prior to first use
1
Check correct assembly of perfusate reservoir
Blow-off valve Part # ZP1FIT/SW/SS-4CPA2-3
Closure Knob Part# AP1FAS/PR/1 Part # FAS/PR/1
‘O’ ring Part # ZP1SEA/OR/1
Reservoir outflow control device
Gasket under lid Part # ZP1SEA/GA/1
! Part # ZP1FIT/SW/SS-QM2-S-2PM
Always use water filter (C – 2.2) Part # AP1FIL/WA/1
! Always use diffusion float barrier Part # FLO/PR/1
Gasket in channel Part # ZP1SEA/GA/1
Outlet ‘O’ ring Part # ZP1SEA/OR/2
2
Flush reservoir with water to remove any particles
May 2003
26
Set Up Procedures & Connection of Components
Installation of pressure transducers
1 PVB DPT-6100
2
27
May 2003
Remove cable cover
Abbott Transpac 42582-01
E E–3
E E–3
Set Up Procedures & Connection of Components
Installation of pressure transducers (continued)
3
Remove transducer rack
4
Attach transducers
May 2003
28
Set Up Procedures & Connection of Components
Installation of pressure transducers (continued)
29
5
Replace transducer rack
6
Replace cable cover
May 2003
E E–3
E
Set Up Procedures & Connection of Components
E–4
Water perfusion manifold removal
1
Unscrew manifold cover thumbscrews and slide off
2
Remove manifold luer clamps and pull plate off
Water perfusion manifold
!
Air perfusion (C – 9 and E – 7)
May 2003
30
Set Up Procedures & Connection of Components
Water perfusion manifold removal (continued)
3
Pinch valve
○
4
31
May 2003
E E–4
E
Set Up Procedures & Connection of Components
E–5
Standard hydraulic resistors
1
2
Identify standard resistor with correct flow value. (C – 4)
Prime resistor with water. Use 1 ml syringe for 0.6 - 0.15ml/min resistors 0.5ml syringe for lower flow rates
Particle-free water
3
Inject till water flows from other end
4
Fill resistor connector as syringe withdrawn
No bubbles trapped in luer
May 2003
32
Set Up Procedures & Connection of Components
Standard hydraulic resistors (continued)
5
Connect resistor to manifold side arm luer Ensure resistor connector remains water filled Manifold clamp
Part # ZP1FAS/RI/1
6
Push and rotate resistor firmly onto manifold luer
7
Open
33 May 2003
E E–5
E E–5
Set Up Procedures & Connection of Components
Standard hydraulic resistors (continued)
8
Debubble downstream resistor luer Inject particle-free water into bottom of luer
9
Ensure no bubbles are trapped
10
Connect to pressure transducer Preferred position for 3 way stopcock
11
Use special high pressure stopcock
12 Abbott transpac 42582-01 shown
Push and rotate resistor firmly onto 3 way stopcock
Part # ZP1STO/HP/2
Water filled
Note PVB DPT-6100 transducer has integral stop-cock at transducer outlet
13
Final setup: Follow instructions from (C – 7.1)
May 2003
34
Set Up Procedures & Connection of Components
Compact resistors
1 ○
○
○
○
E E–6
Check flow values for each hydraulic resistor
○
○
2
○
○
○
○
○
○
○
○
○
○
○
○
○
○
○
○
○
○
○
○
○
○
○
○
○
○
○
○
○
○
○
○
○
○
○
○
Prime resistor with water - Use flush tool
Flush tool - Part # AP1FTO/CR/1
Flush tool holder on top of control box – Part# AP1FTO/CR/2
3
35
Place flush tool on silicone rubber connector
4
Use 1 ml syringe for 0.6 – 0.15 ml/min resistors 0.25 – 0.5 syringe for lower flow rates
5
Inject until water flows from other end
6
Fill resistor connector as syringe withdrawn
May 2003
7
Remove flush tool
E E–6
Set Up Procedures & Connection of Components
Compact resistor set-up (continued)
8
Connect as shown
To water manifold
Note: Connectors are self-debubbling. PVB DPT-6100 transducer shown.
May 2003 36
Set Up Procedures & Connection of Components
Compact resistors (continued)
9
Connect resistor to manifold sidearm
Manifold clamp
Part # ZP1FAS/RI/1
10
11 37
Open
Final set-up - follow from (C – 5.2).
E E–6
E
Set Up Procedures & Connection of Components
E–7
Air perfusion circuit N2 perfusion into pharynx may dilute inspired oxygen - use only Air for perfusate reservoir pressurisation in small children, as this gas also used for gas perfusion circuit
!
1
Identify circuit. To remove manifold cover see E - 4.1 to 4.2
red fitting red
Air manifold Part #’s Compact AP1MAN/AI/1 Wide AP1MAN/AI/2
Note: Shows Compact version 37mm channel spacings
3
2
Locate air manifold and check correctly connected
Resistor must always be installed Pinch valve
To transducer
Pinch clamp
red
May 2003
38
E
Set Up Procedures & Connection of Components
Air perfusion circuit (continued)
4
E–7
Select resistor that controls airflow to less than 10ml/min
Air flow Waterflow ml/min ml/min
!
5
Airflow is x100 waterflow
Part #
2
0.02
Black
Black
R01HRE/ST/2(3)
4
0.04
Red
Red
R01HRE/ST/4(3)
8
0.08
Red
White
R01HRE/ST/8(3)
Appropriate compact resistors show airflow on case
Air 2mL/min WATER 0.02mL/min
Air 4mL/min WATER 0.04mL/min
Air = 2ml/min
Air = 4ml/min
Air = 8ml/min
To manifold luer
6
Install air flow resistor between air manifold luer and transducer
No 3 way stopcock
7 ! 39
No water prime required
Air perfusion to be used only for pharyngeal manometry
Cleaning & Disinfection
Cleaning of plastic parts
1
Clean with cloth and mild detergent
2
F–1
Wipe with isopropyl alcohol
Sterilization of perfusate reservoir
1
F
F–2
Gas sterilize only
Sterilization of manifolds
F–3
Water manifold Air manifold
1
Autoclavable
Hydraulic resistors
!
1
Not autoclavable
2
Autoclavable
Cleaning of compressor
1
F–4
F–5
Wipe with a dry cloth
40
G G–1
1
Regular Maintenance
Every 3 months (or as needed): perfusate water filter
Replace
Part # AP1FIL/WA/1
41
G
Regular Maintenance
Every year (or as needed): gas filters !
G–2
To be done only by an approved, qualified biomedical engineer
1
Disconnect gas supply then open control box (G – 3.2)
2
Use correct filter
Part # AP1FIL/GA/1
Gas (Black)
3
Replace each filter in turn
!
Do not cross connections Air
4
= Black
Black
Check for air-tightness
Note: Gas filter life depends on quality of air – always use medical grade
G–3
Service of control box by Dentsleeve
1
Undo 4 screws under main deck that hold control box legs
2
Send control box to Dentsleeve
42 May 2003
Regular Maintenance
G
Compressor
1
G–4
Check dessicant is orange. When it becomes colourless, replace.
Orange
✓ White
8
500
OR • Spread granules evenly onto tray, one granule deep. • Heat granules for approximately 15 mins. (or until it turns back to its original orange color) at 100oC (200oF) in a conventional oven. • Cool dessicant before replacing back into canister. 43
H
Problem Solving
Diagnosis of abnormal air consumption
1
H–1
Check compressor connection
For compressor malfunction, please contact Dentsleeve
○
○
○
○
○
○
○
○
○
○
○
○
○
○
○
○
○
○
○
○
○
○
○
OR ○
○
○
○
○
○
○
○
○
○
○
○
○
○
○
○
○
○
○
○
○
○
○
○
○
○
○
○
○
○
○
○
○
Check regulator/cylinder connection
Air Tighten ○
○
○
○
○
○
○
○
○
○
○
○
○
○
○
○
○
○
○
○
○
○
○
○
○
○
○
○
○
○
○
○
○
○
○
○
○
○
○
2
○
○
○
○
○
○
○
○
○
○
○
○
○
○
○
○
○
Pressurise air circuit - Turn on
Not connected
150
100 15
25
10 50
200
30 35
5 0
Air
20
psi kPa
Air
250
3
4
Adjust air pressure
Turn off
44
H H–1
Problem Solving
Diagnosis of abnormal air consumption (continued)
5
Recognise leakage - Wait 1 hour
either
or
6
Drop less than 33 kPa/5psi
No significant leak
7
Drop more than 33 kPa/5psi
Significant leak
8
45
Follow (H-1.9) below
H
Problem Solving
Diagnosis of abnormal air consumption (continued)
9
Check for leakage outside control box
150
100 20
15
Water
25
10 50
11
! ○
○
○
○
○
○
○
○
○
○
○
○
○
○
○
250
Consult approved, qualified biomedical engineer to do check (H-1.12 to H-1.17) below ○
○
○
○
○
○
○
○
○
○
○
○
○
○
○
○
○
○
○
○
○
○
○
○
○
○
○
○
○
○
○
○
○
○
○
○
○
○
○
○
○
12
Air
○
psi kPa
0
If there are bubbles, replace fitting Part # ZP1FIT/SW/B-QM2-B-200ZN
200
30 35
5
10
H–1
○
○
○
○
○
○
○
○
○
○
○
○
○
○
○
○
○
○
○
○
○
○
○
○
○
○
○
○
○
○
○
○
○
○
○
○
○
○
○
○
○
○
○
○
○
○
○
○
Leakage?
○
○
○
○
○
○
○
13
Open pump control box. Remove 2 screws on both sides
14
Remove control box lid/back
46
H H–1
Diagnosis of abnormal air consumption (continued)
15 16
47
H
Problem Solving
Check rest of air circuit
? Filter leakage - tighten or replace
H
H
Problem Solving
Abnormal air consumption - perfusate reservoir leakage
1 ○
○
○
○
First exclude air circuit leakage - (H – 1)
○
○
○
2
○
○
○
○
○
○
○
○
○
○
○
○
○
○
○
○
○
○
○
○
○
○
○
○
○
○
○
○
○
○
○
○
○
○
○
Set pressure
○
○
○
○
○
○
○
○
○
○
○
○
○
○
○
○
○
○
○
○
○
○
○
○
○
○
○
○
○
○
○
○
○
○
○
○
○
○
○
○
○
○
○
○
psi kPa
○
○
○
○
○
○
○
○
200
30 35
0
○
○
25
5
○
○
20
50
○
○
150 15
○
○
100
10
○
H–2
○
○
○
○
250
○
○
○
○
○
Tighten
3
Set up reservoir. Remove blow-off valve cap
4
No water
5
Pressurise
6
Locate site of leakage - observe underwater
Still pressurised
7
Locate site of bubbling
48
H
H
Problem Solving
Abnormal Air consumption - perfusate reservoir leakage (cont.)
H–2
ZP1FIT/SW/B-QM2-B-200ZN
8 ○
○
○
○
○
○
○
○
○
○
○
○
○
○
○
○
○
○
If leak elsewhere, dismantle reservoir
○
○
○
○
○
○
○
○
○
○
○
9
○
○
○
11
○
○
○
○
○
○
○
○
○
○
○
○
○
○
○
○
○
○
○
○
○
○
○
○
○
○
○
○
○
○
○
○
○
○
○
○
○
○
○
○
○
○
○
○
○
○
○
○
○
○
○
○
○
○
○
○
○
○
○
○
○
○
○
○
○
○
○
○
○
○
Underside
Flip
49
○
○
○
Gasket clean and intact?
Identify cause of leakage at top
Check ‘O’ ring Part # ZP1SEA/OR/1
○
Identify cause of leakage at base
10 ○
○
Gasket underneath clean and intact? Part # ZP1SEA/GA/1
○
○
○
○
Specifications, Support & Spare Parts
Specifications Air
Medical grade only
High pressure regulators Recommended first stage regulators (*if supplied)
CONCOA Medical Air (Air pin index)
Inlet pressure Pump inlet pressure (from gas supply first stage regulator)
Air 167 - 300kPa (25 - 45 psi) Compressor 130 - 240kpa (20 - 35 psi)
Supply lines (from gas bottles) Air (black) line
I I–1
Supplied with Swagelok female quick connects Air Male Inlet Swagelok Code
ZP1FIT/SW/B-QC4-DI-400KI Dentsleeve part #
Air female connector to perfusate reservoir Swagelok Code
ZP1FIT/SW/B-QM2-B-200ZN Dentsleeve part #
Air supply on pump Driving air supply (pump) Air flow rate ± 20%
Adjustable 0 -250 kPa (0 - 36psi) Flow restricted to 30ml/min at 100kPa (15psi)
Pressure relief valves Perfusate reservoir relief valve Control box inlet overpressure relief valve
Preset to 200 kPa (29psi) Preset to 300 kPa (45psi)
Filtration Air
0.5 micron male/female luer connection disposable disc filter
Technical Support
1
Contact Dentsleeve for advice
2
See contact details on front cover
I–2
50