Service Manual
9 Pages
Preview
Page 1
10 Kemp Drive · Chatham, IL 62629 (800) 334·4154 or (217) 483·2122 Phone (217) 483·4533 Fax www.micromedical.com Web
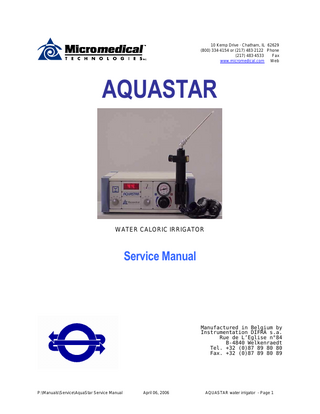
AQUASTAR
WATER CALORIC IRRIGATOR
Service Manual
Manufactured in Belgium by Instrumentation DIFRA s.a. Rue de L’Eglise n°84 B-4840 Welkenraedt Tel. +32 (0)87 89 80 80 Fax. +32 (0)87 89 80 89
P:ManualsServiceAquaStar Service Manual
April 06, 2006
AQUASTAR water irrigator - Page 1
Chapter I
General information
Introduction This document is the operation manual of the AQUASTAR hot water caloric irrigator manufactured by Instrumentation DIFRA in Belgium for Micromedical Technologies. Important note: For every person who will use the AQUASTAR hot water caloric irrigator, it is highly recommended you read this manual and to master this device, before using it clinically.
This manual is divided into VI sections : I II III IV V VI
General information Unpacking instructions General description of the device Installation procedure Operation mode Appendix
As with any piece of sophisticated equipment, maximum benefit will be derived if special attention is paid to the care and maintenance of the device as well as to thoroughly master its capabilities and functions.
Micromedical Technologies, Inc. 10 Kemp Drive Chatham, IL 62629 1-800-334-4154 or 217-483-2122.
Manufactured by: S.A. Instrumentation DIFRA N.V. 84, Rue de l'Eglise B-4840 WELKENRAEDT Belgium Tel : +32-87/89.80.80 Fax : +32-87/89.80.89
P:ManualsServiceAquaStar Service Manual
April 06, 2006
AQUASTAR water irrigator - Page 2
Chapter II
Unpacking instructions
Examination of the packing
Before opening the package, please inspect the packing for noticeable damage. In that case, immediately advise the carrier of the damages and keep the carton as proof. The AQUASTAR hot water irrigator is delivered in a package designed for transportation. Keep it for possible reshipment.
Standard contents of the packing Qty
Designation
Reference
1
AQUASTAR Multi-temperature ear irrigator
DI 090100
1
Supply cord IEC 15 Amps
X016 ALIM
1
Grey tubing for water inlet
X029 TUYAUPLAST
1
Flexible plastic tubing for water outlet
X029 EVAC
1
Irrigation handle for AQUASTAR
DI 140013
1
Users manual
AQ user’s manual
1
Accessories packing containing : 1
tip
DI 090011
1
deflector
DI 090010
2
silicon tube
X029 02x04 S
Examination of the device Neither the device nor its accessories must indicate any default of appearance at its reception. Carefully inspect the box in case the carton has been damaged during transportation! In case of damage, first contact the carrier and then Micromedical Technologies.
Complaint in case of damage Any missing part or malfunction should be immediately reported to Micromedical Technologies together with the invoice, serial number and a detailed report of the problem. The serial number is on the rear panel on the identification label. Neither Instrumentation DIFRA S.A. nor Micromedical Technologies takes responsibility for misuse of the device by the user.
P:ManualsServiceAquaStar Service Manual
April 06, 2006
AQUASTAR water irrigator - Page 3
Chapter III General description
Irrigation tip and handle
Temperature display Temperature selector Time selector
Pressure regulator with manometer
Figure 1a: Front Panel of AquaStar
Power Switch Power Input Overtemp Water Inlet Water Outlet
Figure 1b: Back panel of AquaStar
P:ManualsServiceAquaStar Service Manual
April 06, 2006
AQUASTAR water irrigator - Page 4
Chapter IV Installation procedure
Connection to the main water supply Following the legal rules in application in your city, it may be necessary to place an anti-reflow device between the main water and your AQUASTAR hot water irrigator. If in question, contact your water company. It is highly recommended to place a stop-cock (e.g. "quarter turn") before your AQUASTAR when plumbed directly in the copper water line. Use the supplied tubing to connect the AQUASTAR to the main copper water line (¾”) or to the faucet on your sink. This tubing is provided with two ¾” standard female ferrules. In case of need, you will find different hose adapters that are more suitable for your application in a plumbing supply store. To avoid any leakage, it's necessary to use the joints and washers delivered with the accessories. Take care to centre the washers. The straight ferrule must be connected to the tap after placing a washer on the flat part in the centre of the screw. Tighten (but not to strong) by means of a 24 mm flat wrench or adjustable crescent wrench. The angled ferrule must be connected to the INLET of the ear irrigator. Please refer to Figure 1 for the localisation of this coupling. Place similarly a washer in the inlet coupling and tighten the nut with a 24 mm flat wrench or crescent wrench. The ½” flexible tubing for draining off water from the irrigator is be screwed on by hand to the OUTLET ferrule (see Figure 1).
Electric connection
The AQUASTAR hot water irrigator must be connected to a 120 V 60 Hz wall outlet, with earth ground, by means of the supplied cable. The maximum consummation of the AQUASTAR is 1500 Watts, also about 12 Amperes. Connect to a 15 amp 120 VAC outlet using the power cord supplied. Do not use an extension cord or power strip between the irrigator and the power outlet due to the high current requirements of the irrigator. A 220V 50 Hz AquaStar consumes a maximum of 6.8 amps. Connect to a suitable power outlet. Ventilation of the device Do not place the AQUASTAR near a heat duct or near any other heating source. Provide a minimum of 10 centimetres (4 inches) free on each side of the device, to allow for good air circulation.
P:ManualsServiceAquaStar Service Manual
April 06, 2006
AQUASTAR water irrigator - Page 5
Chapter V Operation mode Preliminary instructions For safety reasons, it is recommended that you turn off the AC power switch on the irrigator after each caloric stimulation. Turn off the water to the irrigator between patients. First time use
The AQUASTAR is a thermal stimulation device and exclusively designed for the diagnosis of human vestibular function (caloric tests).
Open the inlet tap; carefully observe water lines to detect any water leakage, even small ones. In case of leakage, refer to the paragraph "Connection to the main water". Use the furnished washers that must be well centred and do not over tighten the connectors. Do not hesitate to replace any damaged washer. Use good rubber washers at each joint to provide a seal. See that the drain tubing is not damaged and that it ends in the sink.
Before you place the AQUASTAR into service, it is highly recommended you read the operator’s manual.
The irrigation hand piece must be placed in its support and its tubes properly well connected to the coloured corresponding ferrules. The hand piece is provided with a needle and a deflector. Deflector use is optional.
The AQUASTAR may not be used in rooms where there are explosive risks.
Turn on the main power switch (Figure 1). While the water expels the air out of the hoses, carefully observe there is no water leakage. If there is leakage, turn off the AC power switch and turn off the water then check all water connections. Stop the leaks before using. Selection of the temperature Your AQUASTAR hot water irrigator includes, on its front panel, a temperature selector. Following your work habits, you will select 27°C or 30°C for the "cold" irrigation, and 44°C for the "hot" one. 37°C will be suitable for external ear canal cleaning. Adjustment of the water pressure Your ear irrigator has been designed with a pressure reducer that allows you to regulate the pressure and the flow of the water following the desired operation: - A pressure of 2 to 3 bars will be suitable for ear cleaning at 37°C. - A regulation at 1.5 bar (20 psi) gives a flow of about 400 ml per minute, which is suitable for a normal caloric irrigation. In these optimal flow conditions, the AQUASTAR needs a maximum of 45 seconds to become precisely stable after a set point temperature modification.
P:ManualsServiceAquaStar Service Manual
April 06, 2006
AQUASTAR water irrigator - Page 6
Locking the pressure The pressure regulation button is only working when it is pulled out. When this button is pushed in, the regulator is locked, you can not turn left, nor right.
Selection of the irrigation time On the left side of the front panel, you will find the irrigation time selector. This timer allows you to monitor the elapsed time during irrigation.
Working with the irrigation clock The clock is driven by the irrigation time selector, and by the removal of the hand piece from the holder. With the selector in the "OFF" position, the clock remains in a reset condition and is hidden. Another position starts the counting at "t -9" seconds when you take up the hand piece. On passing at 0 second, a beep invites you to begin the irrigation. A second beep marks the end of the irrigation when the time is elapsed. After this second beep, the clock runs for one more minute after hanging up the hand piece. The clock doesn't influence the flow or the temperature of the water. Turn off the irrigator AC power switch between caloric irrigations to stop the flow of water (to the sink drain) and to conserve power.
Performing an irrigation The irrigation hand piece of your AQUASTAR device is a precision mechanical piece. It is highly recommended to manipulate it carefully and to avoid dropping it to a hard surface. Before use, your hand piece will be fitted with its calibrated tip and deflector. For the irrigation, use the furnished silicone tube to break the jet of water. To start the irrigation, firmly depress and hold the push button on the handle with your thumb. To stop the irrigation flow, release the button. Place the hand piece back in the holder after each use. At the time of the irrigation, check that the silicone tube at the tip is not crushed against the ear canal wall, otherwise it might block the water flow. Catch the water outflow from the ear canal with a small basin.
Sound and visual signals Your ear irrigator is designed with electronic protections including audible and visible warnings that offer security in case of user manipulation errors: - Taking up the hand piece before the desired temperature is reached will cause your AQUASTAR to emit an intermittent sound signal (beep-beep). - In case of absence of water, the temperature in the heating element will climb very fast; the heating is immediately cut off and the temperature display blinks and the "buzzer" utters beep-beep's. When the water is turned on at the tap, it causes a brutal fall of the temperature that brings the AQUASTAR back in normal working status. - If one of the maximal temperature limits is been passed (4°C and 49.4°C) for more than 5 seconds, the "buzzer" doesn't stop ringing and the display blinks with all "8's". The only response to this critical situation is to switch off the AC power to the device, correct the problem then switch power back on. The error circuit will then be reset. - As a last resort, a thermal switch will shut down the power supply of the heating element.
P:ManualsServiceAquaStar Service Manual
April 06, 2006
AQUASTAR water irrigator - Page 7
Maintenance Like any device that heats plumbed water, your AQUASTAR is subject to limestone build-up. If your city water is “hard” it is recommended you obtain water through an in-line water softener. The user must not service this device. Instead, contact Micromedical Technologies if you think the device is malfunctioning or needs service. A yearly preventative maintenance verification of your AQUASTAR function will assure you that it is properly calibrated and working correctly. Your sales/service representative should be contacted for preventative maintenance. The device can only be cleaned externally with a slightly damp cloth. Security On the backside of case you will find the overheating shut off security device. After two minutes, pushing the device button can reset the security device.
P:ManualsServiceAquaStar Service Manual
April 06, 2006
AQUASTAR water irrigator - Page 8
Chapter VI
Appendix
Technical characteristics Power supply ... 120 Volts/60 Hz Power supply (220V) ... 220 Volts/50 Hz Maximal supply current ... 12 Amperes Maximal supply current (220V) ... 7 Amperes Power input ...1500 Watts AC Circuit Breaker ...16 A Fuses (220V) ... 2 x 8A Inlet water pressure : minimal ... 3 bars (42 psi) maximal ... 6 bars (87 psi) Water pressure regulation ... from 0 to 4 bars Temperature precision : Intrinsic measure error ... ≤ +/- 0.1°C At constant water flow, stability at 27°C, 30°C and 37°C ... +/- 0.2°C stability at 44°C... +/- 0.3°C By a temperature set point modification, stabilisation time by optimal decrease...≤ 15 s stabilisation time by another decrease ...≤ 30 s Classification (IEC-601-1) ...Class I Type B device FDA Classification ... Class I (FDA approved for use)
P:ManualsServiceAquaStar Service Manual
April 06, 2006
AQUASTAR water irrigator - Page 9