Service Manual
21 Pages
Preview
Page 1
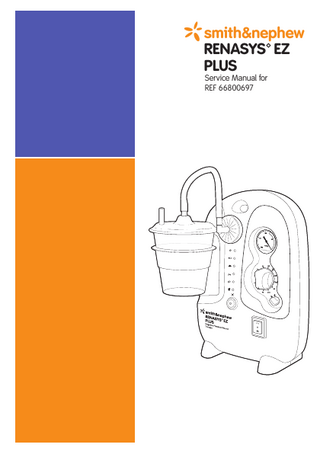
*smith&nephew RENASYS™ EZ PLUS Service Manual for REF 66800697
EN
*smith&nephew RENASYS™ EZ PLUS
Service Manual for REF 66800697
Negative Pressure Wound Therapy
Table of Contents Purpose
4
Cleaning and Packing
11
Introduction
4
Performance and Safety Check List
12
Device Control and Features
4
Repair
15
Exclusion of Liability
6
Fuses
15
Test Prodedure Schedule Equipment Required
6 6 6
Spare Parts
16
Technical Specification
16
Cleaning Instructions Cleaning of the RENASYS EZ PLUS outer casing
7
Glossary of Symbols
17
7
Electromagnetic Compatibility
18
Visual Inspection
8
Electrical Safety Checks
9
Functional Tests Mains Operation Battery Operation Alarms Operation low vacuum, leak and audio pause blockage/canister full Intermittent Vacuum Battery Charge
9 9 10 10 11 11 11
3
EN
Purpose
Device Controls and Features
This manual is intended for the use of biomedical engineers and service personnel responsible for the maintenance of the Smith & Nephew RENASYS™ EZ PLUS Negative Pressure Wound Therapy (NPWT) device (REF 66800697). This manual contains the information you need to maintain the Smith & Nephew RENASYS EZ PLUS NPWT device. It is essential that you read and understand all the information in this manual before conducting any of the test procedures described. This manual must be used in conjunction with the RENASYS EZ PLUS User Guide which includes information on the operation of the device.
Front view of device
Handle
Vacuum port Vacuum gauge Canister holder bracket Pressure selector
AC power and alarm indicators
Pressure selector lock
Audio pause button and indicator
Mode of operation switch
Warning No modifications of this equipment are allowed. Repairs and adjustments are to be performed only by Smith & Nephew authorized service centers. If repair becomes necessary, contact your local Smith & Nephew customer care representative, sales representative, or call Smith & Nephew Technical Support.
Rear view of device
Introduction
Handle
RENASYS EZ PLUS is a Negative Pressure Wound Therapy (NPWT) device. Smith & Nephew Wound Dressing Kits and Canisters are required for the proper and effective clinical use of the RENASYS EZ PLUS device.
IV pole lock knob
NPWT involves the application of a wound filler, sealing drape, port or drain to a wound, and the connection of the port or drain to the canister of a RENASYS EZ PLUS device. The RENASYS EZ PLUS device can then be used to apply a controlled vacuum to the wound and fluid from the wound is drawn into the canister attached to the pump. The primary function of the RENASYS EZ PLUS device is to provide a controlled vacuum either continuously or intermittently (5 minutes ON followed by 2 minutes OFF).
Bed hooks Specification badge
IV pole pad
RENASYS EZ PLUS can be operated with or without mains power. In battery mode, the internal rechargeable lithium ion battery provides the necessary power source. 12 pre-set vacuum levels are provided: 40, 50, 60, 70, 80, 90, 100, 120, 140, 160, 180 and 200mmHg. A number of alarms are provided on the RENASYS EZ PLUS device to alert the operator to situations which require user/operator interventions. 4
EN
Rear view with bed hooks extended
Left view of device
AC power inlet Fuse cover
Rear view with IV pole mount in use Underside of device
Air exhaust outlet Rubber feet
5
Rubber feet
EN
Exclusion of Liability
If the RENASYS EZ PLUS device has been placed in long-term storage, then the tests described in this section must be conducted before returning the device back to service.
Smith & Nephew disclaims any responsibility if: •
The device is used in accordance with the User Guide (Instructions for Use),
•
The electrical installation of the rooms in which RENASYS EZ PLUS is connected to a mains supply comply with the appropriate requirements,
•
Electrical Safety Analyser capable of conducting testing in accordance with IEC 62353, e.g. Rigel 288 Safety Analyser, Fluke ESA 620.
•
Testing and maintenance of the device is conducted at appropriate intervals as described in this document,
•
•
Any repair or part replacement activity, other than the maintenance steps described in this document, is carried out by Smith and Nephew or by persons authorized by Smith and Nephew.
Vacuum measurement gauge with a minimum range of 0 to 250mmHg vacuum, e.g. Extech HD750, 406800 or 407910, Digitron 2000P series, Dwyer series 475, or equivalent.
Equipment Required
Note: All measurement/test equipment must be calibrated and be in acceptable condition prior to use.
•
The procedures described in this document are conducted by appropriately trained personnel.
•
Digital Multimeter or continuity tester to test electrical continuity of fuses
•
Please see the device warranty for full details.
•
Disposable gloves
Test Procedure
•
Stopwatch
Schedule
•
Tube clamp
The test procedures described in this section are essential in order to ensure that the RENASYS EZ PLUS device is within its service life. An optional checklist and record sheet is provided at the end of the Test Procedure section of this document to record the results of the checks described.
•
Cotton swabs (e.g. Q-tip®)
•
Cleaning materials: A range of cleaning materials have been shown to be suitable for use with RENASYS EZ PLUS. The following are recommended options:
The recommended schedule is: After each use: • Cleaning • Visual Inspection Every 6 months: • Functional Tests
•
Chlorine-containing cleaning agents providing up to 1,000ppm available chlorine (always wipe dry immediately after cleaning)
•
70% Isopropyl alcohol wipes
•
High level disinfectant (e.g. Suprox®) wipes
•
Trionic (sporicidal/fungicidal) disinfectant wipes.
Note: If using Soft Port canisters (REF 66800912, 66800913, 66800937 or 66800938), in order to perform the vacuum test as part of the Functional Testing, you will need to acquire the 800ml canister kit REF 66800423 with T-connector. Please contact Smith & Nephew if you do not have this kit.
Yearly: • Electrical Safety Check If there is suspicion of a malfunction of the RENASYS EZ PLUS device, the test procedures in this document will be used to ascertain whether the RENASYS EZ PLUS device is performing correctly. If the RENASYS EZ PLUS device fails any of the tests described in this manual, has sustained obvious damage, has a missing or illegible label, or has any indication it may not be operating properly, the device should be returned to Smith & Nephew for repair (see the Repair section in this manual for further information).
6
EN
Cleaning Instructions (Recommended after each use) Before conducting the Visual Inspection and subsequent Electrical and Functional Testing described below, ensure that the RENASYS™ EZ PLUS device has been cleaned appropriately since its last use. If there is any doubt as to whether suitable cleaning has been conducted, undertake appropriate cleaning steps before proceeding further.
90
100
80
120
50
180
70
Note: The device should not be connected to AC mains power while being cleaned.
140 160
60
40
200
Adherence to facility directives concerning hygiene is of prime importance. Wear disposable gloves. If there is a used canister, or other disposables present, dispose of these in accordance with your facility protocol and/or local ordinances for the disposal of potentially infected or bio-hazardous materials. The following are guidelines for cleaning the RENASYS EZ PLUS device. Cleaning of the RENASYS EZ PLUS outer casing: •
Wipe down the device surface with a damp soft cloth.
•
Use a mild cleaning agent, disinfectant, or an antimicrobial agent and ensure its compatibility with plastics. Follow the cleaning/disinfectant agents manufacturer’s guidelines for use of such products.
•
Vacuum Port (device front)
For areas which are difficult to access with a wipe or cloth, e.g., the exhaust port on the case bottom or the vacuum port on the front of the device, use a cotton swab soaked in cleaning agent.
•
Dampen another soft cloth with clean water and wipe down all surfaces to remove any excess solution.
•
Dry with a separate soft cloth.
•
Do not use solvents or abrasives.
•
Do not immerse any part of RENASYS EZ PLUS in fluid or use an unnecessarily wet cloth. No fluids should be allowed to enter the device. If any liquids penetrate the device, contact your local distributor.
If a transit case is in use with the device this should be cleaned using the same steps as above on both the interior and exterior of the case. This includes the molded tray and pouch area of the interior and the handle and locks of the case.
Exhaust Port (case bottom)
7
EN
Visual Inspection (Recommended after each use)
10.
Following cleaning, conduct a visual Inspection as described below: 1.
Make sure the device is unplugged from electrical power and placed on a flat surface.
2.
Check the device for visible dents, cracks or missing pieces.
3.
Visually assess and physically confirm that the vacuum port, vacuum selector, vacuum selector lock, rocker switch, labeling, case and indicator gauges have no external damage and can be actuated.
4.
Visually confirm that the product fuse area is undamaged.
5.
Physically confirm that the three position rocker switch moves to each position and remains in place.
Inspect the rear of the RENASYS EZ™ PLUS device and confirm that the unit label is present and that the REF and SN number are clearly visible.
(Label information may vary from this example)
6.
Visually confirm that the switch printed symbols are legible.
7.
Check the bed hook operation. Confirm the ease of opening and closing and the detent feel of the bed hooks when closed against the case. Verify the ability of bed hooks to support the weight of the device by holding the device by the bed hooks.
8.
Confirm that the IV pole clamp knob can be freely rotated to the fully open position and then back to the fully closed position.
9.
Confirm that the vacuum selector knob can be freely rotated in both directions from 40mmHg to 200mmHg with detents at each setting. NOTE: the vacuum selector knob should not be able to be moved directly between 40 and 200mmHg (clockwise or counter clockwise) nor when the patient lock is in the LOCKED position. Confirm that the patient lock inhibits movement when it is in the locked position.
11.
Inspect both ends of the AC power cord for any frayed or missing insulation, any bent, loose or missing plug blades.
12.
Rotate the device through 360°. Confirm that the device does not have any rattles indicating loose internal or external components.
If any of the above checks are failed, the device is not suitable for use. Please follow the instructions in the Repair section to arrange repair.
8
EN
Electrical Safety Checks (Recommended annually)
Test 1: Normal polarity. Acceptance Criteria: Max: 500μA.
Perform the following electrical safety checks IN THE ORDER LISTED BELOW using the Electrical Safety Analyzer, in accordance with IEC 62353 for Class I Medical Electrical Equipment.
Precaution: Disconnect the Electrical Safety Analyzer before proceeding to the Functional Tests.
Test 2: Reversed polarity. Acceptance Criteria: Max: 500μA.
Functional Tests (Recommended every 6 months)
CAUTION: Electrical safety testing should be performed by a biomedical engineer or other qualified person.
Mains Operation
Protective Earth Resistance Tests
Connect the power cord to the device and to an AC power supply.
For measurement of protective earth resistance, the test equipment must be able to deliver at least 200mA into 500 mΩ. The open circuit voltage must not exceed 24 Volts.
Verify that the Alarm LEDs, the Audio Pause button indicator, and the audible alarm flash briefly as AC power is connected. An audible alert should chirp once. Note that the battery indicator has both a green LED and an amber LED. Both should be visible on close inspection.
First measure the protective earth resistance of the power cord alone. Acceptance criteria: <100mΩ. Second measure the protective earth resistance with the power cord connected to the device. Measure the resistance between the earth pin on the power cord plug and two points on the device: (i) the metal screw adjacent to the AC power inlet, and (ii) the audio pause button on the front face of the device (see photographs below). Acceptance criteria: <300mΩ.
Test probe on the metal screw adjacent to the AC power inlet.
The ON/OFF LED should remain off. Connect an 800ml waste canister from kit REF 66800423 to the vacuum port. Connect a tube set complete with T-piece (from kit with REF 66800423) in accordance with the instructions for use. It will be necessary to block flow within this tube for certain tests and to modify the terminal end of the tube to permit connection to your vacuum measurement equipment. Move the three position rocker switch to the CONTINUOUS therapy position (up). Verify that the device starts suction and that the ON/OFF LED is illuminated solid green.
Test probe on the audio pause button Equipment Leakage Current Tests Equipment leakage current measurement shall only be performed after the protective earth testing has been passed.
Move the three position rocker switch to the OFF position (center). Verify that the device stops and that the ON/OFF LED is no longer illuminated.
For the Equipment Leakage Tests, use the probe of the Electrical Safety Analyzer to touch the metal screw adjacent to the AC power inlet (note: the probe must touch the metal).
Move the three position rocker switch to the INTERMITTENT therapy position (down). Verify that the device starts suction and that the ON/OFF LED is illuminated solid green. 9
EN
Move the three position rocker switch to the OFF position (center). Verify that the device stops and that the ON/OFF LED is no longer illuminated.
With the vacuum selector still set to 200mmHg press the rocker switch to Continuous. Disconnect the device from AC power. Verify that the device continues to operate. Turn off the device.
Connect the distal end of the canister tube to a calibrated vacuum gauge.
Alarm Operation – Low Vacuum, Leak and Audio Pause
Set the vacuum selector to 40mmHg and position the rocker switch to CONTINUOUS mode (up). Verify that the vacuum measured on the calibrated vacuum gauge is 40mmHg ±10mmHg.
Reconnect the power cord to the device and connect to an AC power supply. Detach the canister from the device. With the vacuum selection knob set to 200mmHg move the rocker switch to Continuous mode. Verify that the Low Vacuum alarm LED flashes and an audible alarm asserts on and off. For reference, this should occur in less than 30 seconds.
Confirm that the RENASYS EZ Plus analog gauge displays 40mmHg ±10mmHg.
Immediately press and release audible alert pause (large button below the LEDs). Verify that the Audio alarm is no longer active and that the Audio Pause LED and Low Vacuum LED both flash.
Incrementally advance the vacuum selector to each set point up to 200mmHg confirming that the device controls to the target value ±10mmHg on both the analog gauge and the calibrated vacuum gauge. Turn off the device. Disconnect the distal end of the canister tube from the calibrated vacuum gauge. Battery Operation The RENASYS EZ PLUS device should be within its operating temperature range for this test. If the battery is deeply depleted it should be charged for a minimum of 2 hours prior to this test. (A battery is assumed to be deeply depleted when the device will not turn on when not connected to AC mains power, but will operate on AC power without a charge fault indication (battery status LED solid amber)). When charging the battery, the battery status indicator LED will flash green. If the battery status indicator LED is solid amber, or if there is no indication of battery charging, the device requires repair.
In less than 30 seconds, the High Flow alarm should assert. Verify that the High Flow alarm LED flashes and Audio alarm sounds on and off.
Connect the power cord to the device. The battery status indicator LED should be flashing green or solid green [full charge]. Any variation should be noted as a failure [flashing amber, solid amber or no LED illumination are all failures]. Please note – this should be observed after 5 seconds to permit the startup sequence to conclude. 10
EN
Intermittent Vacuum
Press audible alert pause (mute). Verify that the audible alarm is no longer active and that the alert pause (mute) button LED, Low Vacuum LED and High Flow LED all flash. Start a timer when actuating the audible alert pause.
Loosen the pinch clamp on the canister tubing. Plug the end of canister tube and move the rocker switch to INTERMITTENT mode (down). Verify that the device operates (pump runs) for 5 minutes ±30 seconds. Next, verify that the device does not operate (pump does not run) for 2 minutes ±20 seconds. Note the ON/OFF indicator LED should remain illuminated throughout this test. Turn off the device. Battery charge
The audible alert pause (mute) should expire between two (2) and four (4) minutes. The audible alert should reassert.
The battery should be prepared for shipment and/ or storage by charging to between 30% and 40% of its capacity. This may be achieved by first running the device until the battery alarm sounds and then recharging the unit for 1½ hours.
Turn off the device. Alarm Operation – Blockage/Canister Full Reattach the canister and tube set to the device.
If the device is to be stored for an extended period, it should periodically (every 6 months) be re-charged to the 30 % – 40 % level as described above.
With the device set to 120mmHg, move the three position rocker switch to CONTINUOUS mode (up). Clamp the canister tube between the T-piece and the canister. Allow the device to reach the set point; allow 1 minute. Start a timer and verify that within 3 minutes the blockage/full alarm asserts, with LED flashing and on/off sound.
Cleaning and packing After testing the device as described above, the device should be cleaned again as previously described. Set the vacuum selector knob to 80mmHg and ensure the Patient Lock is in the unlocked position.
Press audio pause. Verify that the audio alarm is no longer active, that the audio pause LED and the blockage/full alarm LED both flash.
Confirm that the IV pole clamp is closed (screwed fully into the device). Prior to returning the device for service, it should be packed in a polythene bag and if possible, either in the original packaging, or in a protective case (REF 66800587). The appropriate power cord and canister ring kit (REF 66800060) should be included.
Turn off the device. 11
EN
Performance and Safety Check List
UNIT SERIAL #
Steps
Yes
No
Comments
Physical Appearance Check 1
Device cleaning record present and/or cleaned according to this procedure
2
Vacuum port and exhaust port on base of device are free from obstructions, dust or foreign materials
3
Exhaust port and vacuum port cleaned
4
Clean all external surfaces with germicidal/ antibacterial wipes and dry with disposable towel or cloth
5
Device free of visible damage, cracks, missing pieces
6
Vacuum port, vacuum selector, vacuum selector lock, rocker switch, labeling, case and indicator gauges have no exterior damage and can be actuated
7
Fuse area has not been damaged and the two fuses are acceptable and are both T3.15A fuses
8
Three position rocker switch moves to each position and remains in place
9
Switch printing remain legible
10
If present, both ends of the power cord are free from fraying, missing insulation, bent, loose or missing plug blades or missing earth/ground
11
The device is free from rattles indicating loose components
12
Bed hooks are secure and easy to operate
13
IV pole clamp knob rotates freely across its range of operation
14
Vacuum selector rotates 40mmHg to 200mmHg, clockwise and counterclockwise and selector knob lock functions
15
The device label is present and that the REF and SN numbers are clearly visible
SN
Electrical Safey Check 16
17
Protective Earth Resistance: Acceptance Criteria: Cord electrical resistance <100 mΩ IN ACCORDANCE WITH IEC 62353:
mΩ
Protective Earth Resistance: Acceptance Criteria: Cord + Device electrical resistance <300 mΩ IN ACCORDANCE WITH IEC 62353:
mΩ
12
EN
Steps 18
19
Yes
Equipment Leakage Current Test (Normal Polarity): Acceptance Criteria: Max: 500μA IN ACCORDANCE WITH IEC 62353:
Comments μA
Equipment Leakage Current Test (Reversed Polarity): Acceptance Criteria: Max: 500μA IN ACCORDANCE WITH IEC 62353:
Electrical Functionality 20
Alarm LEDs, Audio Pause button LED, and the audible alarm flash and sound briefly as AC power is connected
21
The ON/OFF indicator LED remains OFF
22
When the rocker switch is set to CONTINUOUS, device starts suction and the ON/OFF LED is solid green
23
When the rocker switch is set to off, the device stops suction and the ON/OFF LED is OFF
24
When the rocker switch is set to INTERMITTENT, the device starts suction and the ON/OFF LED is solid green
25
When the rocker switch is set to off, the device stops suction and the ON/OFF LED is OFF
26
At all settings (40-200mmHg), the device controls and displays within ± 10mmHg
Battery Operation 27
No
The battery charging indicator LED remains flashing or steady green when AC power is connected
Alarm Operation – Low Vacuum, Leak and Audio Pause 28
The Low Vacuum LED flashes and an audible alarm asserts on and off within a period of 30 seconds (reference)
29
Pressing audio pause interrupts the audible alert. The LED for the alert and the audible pause button LED flash
30
Within 30 seconds (reference) after step 29 the high flow alarm LED flashes, the audible alert reasserts, and the Low Vacuum LED remains flashing
31
Pressing audio pause interrupts the audible alert. The LED for the alert and the audible pause button LED flash
32
Audible alert pause (mute) lasts between 2 and 4 minutes before sound reasserts
13
μA
EN
Steps
Yes
No
Comments
Alarm Operation – Blockage/Canister Full 33
Blockage alert asserts within 3 minutes and can be muted
Intermittent Vacuum 34
Verify that the device runs for 5 minutes ±30 seconds
35
Verify that the device remains stopped for 2 minutes ±20 seconds
Battery Charge Level 36
Battery charge level set per the procedure
Cleaning and Packing 37
Device cleaned
38
Dial set to 80mmHg and patient Lock is OFF
39
IV Pole Clamp is screwed fully in
40
Device re-packaged
Summary of Results 41
Overall Physical Appearance showed no anomalies and device is clean
42
Electrical Safety Testing readings meet the requirements (16-19)
43
Functional evaluation successfully completed
44
Battery charge level per the procedure
45
Device re-packaged
Performed by: Print Name: Signature:
Date:
Location (Address):
14
EN
Repair There are no user-serviceable components inside the RENASYS™ EZ PLUS NPWT device. Repairs and adjustments are to be performed only by Smith & Nephew authorized service centers. To arrange repair, please contact the Smith & Nephew Customer Care Center or your Smith & Nephew Sales Representative. WARNING: No modification of this equipment is allowed.
Fuses There are two replaceable fuses in the RENASYS EZ PLUS NPWT device. These are located in the fuse holder of the AC power inlet to the device. The fuses are T3.15Amp, 5.2 x 20 mm, time-lag T fuses with a glass body and a 250 Volt rating. (Schurter part number 0034.3122.) WARNING: To prevent electric shock, unplug the unit from the electrical outlet before attempting to replace fuses. WARNING: To avoid fire hazard, use only fuses of the correct type, voltage and current rating. To Inspect and/or Replace Fuses 1.
Unplug the power cord from the power outlet and from the RENASYS EZ PLUS device.
2.
The fuse compartment can be found below the AC power inlet of the device.
3.
Open the fuse compartment by depressing the catch and pulling outwards.
4.
Replace fuses. See Technical Specification section of this document for replacement fuse types.
5.
Reinsert fuse holder until it clicks into place.
15
EN
Spare Parts The following replacement parts are available from Smith & Nephew: Part Description
REF (product catalog number)
Fuse
Available from electrical suppliers. T3.15Amp, 5.2x20mm, 250v, time-lag T, glass body.
Canister Ring
66800060
Power Cords* North America Power Cord*
66800193
UK Power Cord*
66800213
Continental Europe Power Cord*
66800291
South African and India Power Cord*
66800302
Australia and New Zealand Power Cord*
66800303
Brazil Power Cord*
66801194
China Power Cord *
66801056
* WARNING: The use of replacement parts from any supplier other than Smith & Nephew may compromise safety as a result of increased electromagnetic emissions or decreased immunity to electromagnetic interference of RENASYS EZ PLUS device.
Technical Specification Vacuum Set Points
40, 50, 60, 70, 80, 90, 100, 120, 140, 160, 180 and 200mmHg
Power Requirements
100-240VAC 50/60Hz 90VA
Fuse
T3.15Amp, 5.2x20mm, 250v, time-lag T, glass body
Dimensions
361x240x170mm (14.5x 9.5 x 7in)
Weight
3.7 kg (8.14 lbs)
Operating Time – Battery
~ 40 hours (therapy)
Battery Type
Lithium ion
Charging Time
~ 6 hours
Protection Against Electric Shock
Class I
Patient Protection
Type BF
Ingress Protection
IP2X
Mode of Operation
Continuous
Storage/ Transport
-10 to 55°C (14 to 131°F) 30 to 70% RH 700 to 1060mbar atmospheric pressure
Operating Environment
5-35°C (41-95°F) 30 to 70% RH 700 to 1060mbar atmospheric pressure
Compliance
UL 60601-1 IEC 60601-1 IEC 60601-1-2 CAN/CSA C22.2 16
EN
Glossary of symbols Indicators
Operation switch
Over vacuum When the system encounters
Continuous therapy Device will maintain
excessively high vacuum (of >235mmHg) the device will stop delivering NPWT. The audible alarm will sound and the alarm indicator will flash yellow.
the preset vacuum level without stopping until switched off.
OFF Device is not delivering NPWT.
Leak When the system detects a significant
leak, the audible alarm will sound and the alarm indicator will flash yellow.
Intermittent therapy Device cycles on and off in increments of approximately 5 minutes ON (active vacuum) and approximately 2 minutes OFF (no vacuum).
Low vacuum If the vacuum level is lower than
set point of therapy by >15mmHg, the audible alarm will sound and the alarm indicator will flash yellow.
Indicators
Blockage/Canister full When the system
On/off When the operation switch is in the
continuous or intermittent mode, the indicator will illuminate green.
detects that the canister is full or that there is a blockage in the system, the audible alarm will sound and the alarm indicator will flash yellow.
Battery indicator
Audio pause Pressing the audio pause
button will silence the alarm for approximately 2–4 minutes.
• Battery full: Solid green indicator. • Battery charging: Blinking green indicator. • Battery low: Audible alarm and blinking yellow indicator.
• Battery fault: Solid yellow indicator.
Equipment Classification
Keep dry
European representative
Storage temperature
Batch code
Date of manufacture
Serial number
Refer to instruction manual/booklet
Place of manufacture
Product catalogue number
Caution:
Earth
Do not use if package is damaged
Fuse
Keep upright
Biological risk
Alternating current
Non-ionizing electromagnetic Radiation
Isolation type BF applied part
CSA International Classification EU:
Not for general waste
Follow operating instructions
Single use
Lock position
Do not reuse
Patient number
(ground)
Patient
Unlock position
17
CE mark
Caution: U.S. Federal law restricts this device to sale by or on the order of a physician
EN
Electromagnetic compatibility This equipment has been tested and found to comply with the limits for medical devices to IEC 60601-1-2-2001. These limits are designed to provide reasonable protection against harmful interference in a typical medical installation. This equipment generates, uses and can radiate radio frequency energy and, if not installed and used in accordance with the instructions, may cause harmful interference to other devices in the vicinity. However, there is no guarantee that interference will not occur in a particular installation. Guidance and manufacturer’s declaration - electromagnetic immunity The device is intended for use in the electromagnetic environment specified below. The customer or the user of the device should assure that it is used in such an environment. Immunity test IEC 60601 test level
Compliance level
Electromagnetic environment – guidelines
Electrostatic ±6 kV contact discharge (ESD) ±8 kV air IEC 61000-4-2
±6 kV contact ±8 kV air
Floors should be wood, concrete or ceramic tile. If floors are covered with synthetic material, the relative humidity should be at least 30%
Electrical fast ±2 kV for power supply lines transient/burst IEC 61000-4-4
±2 kV for power supply lines Mains power quality should be that of a typical commercial or hospital environment
Surge IEC 61000-4-5
±1 kV differential mode ±2 kV common mode
±1 kV line to line ±2 kV line to earth
Mains power quality should be that of a typical commercial or hospital environment
Voltage dips, short interruptions and voltage variations on power supply input lines IEC 61000-4-11
<5% UT (>95% dip in UT) for 0.5 cycles 40% UT (60% dip in UT) for 5 cycles 70% UT (30% dip in UT) for 25 cycles <5% UT (>95% dip in UT) for 5 sec
>95% for 10ms 60% for 100ms 30% for 500ms >95% for 5000ms
Mains power quality should be that of a typical commercial or hospital environment. If the user of the device requires continued operation during power mains interruptions, it is recommended that the device be powered from an uninterruptable power supply or battery
NOTE UT is the a.c. mains voltage prior to application of the test level
Conducted RF IEC 61000-4-6
3 Vrms 150 kHz to 80 MHz
3 Vrms
Radiated RF IEC 3 V/m 80 MHz to 2.5 GHz 61000-4-3
3 V/m
NOTE 1: At 80 MHz, the higher frequency range applies. NOTE 2: These guidelines may not apply in all situations. Electromagnetic propagation is affected by absorption and reflection from structures, objects and people. a. Field strengths from fixed transmitters, such as base stations for radio (cellular/cordless) telephones and land mobile radios, amateur radio, AM and FM radio broadcast and TV broadcast cannot be predicted theoretically with accuracy. To assess the electromagnetic environment due to fixed RF transmitters, an electromagnetic site survey should be considered. If the measured field strength in the location in which the device is used exceeds 3V/m, the device should be observed to verify normal operation. If abnormal performance is observed, additional measures may be necessary, such as reorienting or relocating the device. b. Over the frequency range 150 kHz to 80 MHz, field strengths should be less than 3 V/m.
18
Portable and mobile RF communications equipment should be used no closer to any part of device, including cables, than the recommended separation distance calculated from the equation applicable to the frequency of the transmitter. Recommended separation distance: d = 1.2 √P d = 1.2 √P (80 MHz to 800 MHz) d = 2.3 √P (800 MHz to 2.5 GHz) where P is the maximum output power rating of the transmitter in watts (W) according to the transmitter manufacturer and d is the recommended separation distance in yards/metres (yd./m). Field strengths from fixed RF transmitters, as determined by an electromagnetic site survey, a should be less than the compliance level in each frequency rangeb. Interference may occur in the vicinity of equipment marked with the following symbol:
EN
Guidance and manufacturer’s declaration – electromagnetic emissions The device is intended for use in the electromagnetic environment specified below. The customer or the user of the device should assure that it is used in such an environment. Emissions test
Compliance
Electromagnetic environment – guidelines
RF emissions CISPR 11
Group 1
The device uses RF energy only for its internal function. Therefore, its RF emissions are very low and are not likely to cause interference in nearby electronic equipment.
RF emissions CISPR 11
Class B
Harmonic emissions IEC 61000-3-2
Not applicable
Voltage fluctuations/flicker emissions IEC 61000-3-2
Comply
The device is suitable for use in all establishments including domestic and those directly connected to the public lowvoltage power supply network that supplies buildings used for domestic purposes.
WARNING: The device should not be used adjacent to or stacked with other equipment and that if adjacent or stacked use is necessary, the device should be observed to verify normal operation in the configuration in which it will be used. Recommended separation distances between portable and mobile RF communications equipment and the device The device is intended for use in an electromagnetic environment in which radiated RF disturbances are controlled. The customer or the user of the device can help prevent electromagnetic interference by maintaining a minimum distance between portable and mobile RF communications equipment (transmitters) and the device as recommended below, according to the maximum output power of the communications equipment. Rated maximum output power of transmitter (W)
Separation distance according to frequency of transmitter (m): 150 kHz to 80 MHz d = 1.2√P
80 MHz to 800 MHz d = 1.2√P
800 MHz to 2.5 GHz d = 2.3√P
0.01
0.12
0.12
0.23
0.1
0.38
0.38
0.73
1.0
1.2
1.2
2.3
10
3.8
3.8
7.3
100
12
12
23
For transmitters rated at a maximum output power not listed above, the recommended separation distance d in metres (m) can be estimated using the equation applicable to the frequency of the transmitter, where P is the maximum power rating of the transmitter in watts (W) according to the transmitter manufacturer. NOTE 1: At 80 MHz and 800 MHz, the separation distance for the higher frequency range applies. NOTE 2: These guidelines may not apply in all situations. Electromagnetic propagation is affected by absorption and reflection from structures, objects and people.
19
Smith & Nephew, Inc. 970 Lake Carillon Drive, St. Petersburg, FL 33716 Smith & Nephew Medical Ltd. Hull HU3 2BN England 0297
www.smith-nephew.com www.globalwoundacademy.com Customer Care Center 1 800-876-1261 T 727-392-1261 F 727-392-6914
66801207
only ©2012 Smith & Nephew ™Trademark of Smith & Nephew Certain marks Reg. US Pat. & TM Off.
PI03900 10/2012
0
40565 1 2627
2