Quick Reference Guide
11 Pages
Preview
Page 1
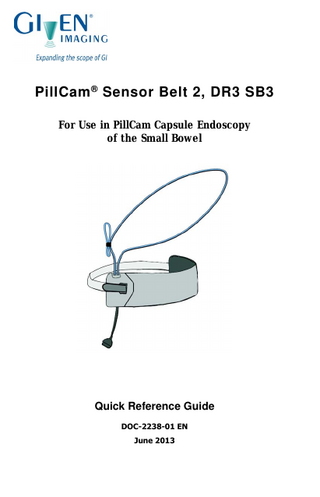
PillCam ® Sensor Belt 2, DR3 SB3 For Use in PillCam Capsule Endoscopy of the Small Bowel
Quick Reference Guide DOC-2238-01 EN June 2013
Given Imaging 3950 Shackleton Road, Suite 500 Duluth, GA, 30096 USA [email protected] Given Imaging GmbH Borsteler Chaussee 47 D-22453 Hamburg, Germany [email protected]
COPYRIGHT Copyright ©2001–2013 Given Imaging Ltd.
TRADEMARKS Copyright ©2001–2013 Given Imaging Ltd. GIVEN, GIVEN & Design, PILLCAM, PILLCAM & Logo, PILLCAM EXPRESS, AGILE, RAPID,RAPID ACCESS, ICCE, ICCE Logos, International Conference on Capsule Endoscopy, BRAVO, BRAVO PH SYSTEM, VUESPAN, VERSAFLEX,GEROFLEX, REPHLUX TRACER, GASTROTRAC, BILITEC, DIGITRAPPER, PHERSAFLEX, MANOSCAN, MANOSHIELD, MANOVIEW, ACCUTRAC, ACCUVIEW, and POLYGRAF ID are Trademarks and/or Registered Trademarks of Given Imaging Ltd., its subsidiaries and/or affiliates in the United States and/or other countries. All other company or product names are the trademarks or registered trademarks of their respective holders. All rights not expressly granted are reserved.
Quick Reference Guide Thank you for purchasing the PillCam sensor belt for improved convenience and comfort in PillCam Capsule Endoscopy. This sensor belt model is for small bowel capsule endoscopies performed with PillCam recorder DR3. For full information about PillCam capsule endoscopy and working with RAPID videos, refer to the PillCam Capsule Endoscopy System manuals. downlink loop plastic buckle clip to adjust downlink loop length
sensor belt strap
Velcro
PillCam recorder connector
The PillCam sensor belt is simple to use for both care providers and patients: • Minimal preparation is required because the sensor belt is worn over clothing, with no need for the patient to undress or attach anything directly to skin. • The easy-fasten straps make attachment and removal effortless. Simply fasten the sensor belt and connect it to the PillCam recorder DR3, which is worn in the recorder pouch with shoulder strap. • After the procedure, the disposable sleeve and strap can be removed and thrown away, so that the sensor belt can be quickly and easily prepared for the next procedure. The sensor belt is used with PillCam recorder DR3 in the recorder pouch with shoulder strap.
!
Warning • Do not use the sensor belt on patients with a BMI greater than 43.3. •
Given Imaging
Localization tracing is not available in RAPID videos when the sensor belt is used. 1
Sensor Belt Instructions
Preparing the Sensor Belt 1.
Remove the sensor belt disposable sleeve, belt strap, and double-sided Velcro fastener from their packaging.
2.
Insert the sensor belt into the disposable sleeve and secure with the Velcro flap.
3.
Feed the belt strap through one of the plastic buckles on the belt. Fold the belt strap over so that the Velcro adheres securely.
Given Imaging
2
Sensor Belt Instructions
Appropriate Patient Clothing When using the sensor belt, the patient must wear an upper garment of thin, natural fiber cloth that is long enough to reach at least to hip level and will not ride up above the sensor belt.
!
Caution The sensor belt must not be worn over synthetic or slippery fabric (such as nylon or silk).
Securing the Sensor Belt on the Patient 1.
While holding the sensor belt at patient’s waist level, place the downlink loop over the patient’s head so that it hangs from the left shoulder.
2.
Adjust the downlink loop to remove excess cable so that it fits closely to the patient’s body. There is a clip on the downlink loop that keeps the excess cable tidy and secure.
!
Caution
• •
Do not allow the sensor belt to hang from the downlink loop. Do not forcibly bend the downlink loop in any way.
downlink loop
3.
Center the sensor belt on the patient’s waist. Tighten the straps on the sides so that the sensor belt will not shift during the examination. Make sure that the blue lines next to the plastic buckles are visible.
Given Imaging
3
Sensor Belt Instructions
Note:
• •
•
When securing the sensor belt, make sure that the fabric is not folded beneath the front portion of the sensor belt. Make sure that nothing other than a single thin layer of fabric is between the sensor belt and the abdomen. (Another layer of clothing may be worn over the sensor belt as long as the sensor belt connecting wire can be attached to the PillCam recorder.) To avoid pulling the sensor belt out of position, do not attach anything to it, or hang anything from it.
4.
Secure the strap with the double-sided Velcro piece.
5.
Cut off any excess strap length.
Given Imaging
4
Sensor Belt Instructions
Connecting the PillCam Recorder 1.
Hang the recorder pouch from the patient’s shoulder while the patient is standing. downlink loop
PillCam recorder in pouch
2.
To connect the sensor belt to the PillCam recorder DR3, insert the connector into the matching connector at the top right side of the PillCam recorder until you hear a click.
3.
Insert the PillCam recorder into the recorder pouch.
Given Imaging
5
Sensor Belt Instructions
4.
Instruct the patient to keep wearing the PillCam recorder during the examination.
Note: Make sure that the PillCam recorder is worn over the sensor belt and that the recorder pouch is not attached in any way to the sensor belt.
Removing the Sensor Belt 1.
Disconnect the sensor belt cable from PillCam recorder DR3.
2.
Remove the PillCam recorder and sensor belt from the patient.
3.
Remove the disposable sleeve and strap.
4.
If necessary, clean and disinfect the sensor belt (see Cleaning the Sensor Belt on page 7).
Using the Original Strap If you wish to use the sensor belt without the disposable sleeve and strap, use the original strap provided. Select the appropriate strap length for the patient. If needed, attach two straps together.
Given Imaging
6
Sensor Belt Instructions
Cleaning the Sensor Belt
1.
Unzip the sensor belt cover and remove the sensor belt insert.
!
2.
Note: Given Imaging recommends using a new disposable sleeve and strap for each procedure so that the belt can be quickly and easily prepared for the next procedure. However, if you choose to use the sensor belt without the disposable sleeve (with the original strap instead), you can clean it as described below.
Caution Do not open the sensor belt insert or tamper with the sensors located inside of it. The sensor belt insert should only be opened by a Given Imaging representative.
To clean and disinfect the surface of the sensor belt and the sensor belt insert, wipe external surfaces gently with alcohol (ethyl or isopropyl (IPA) alcohol, up to 70%). See Cleaning instructions on page 8.
Given Imaging
7
Sensor Belt Instructions
Sensor Belt Specifications Sensor Belt Insert Dimensions
470 mm x 90 mm x 5 mm
Insert material
Polypropylene, DuPont™ Kapton® film
Number of sensors
4
Cable length
550 mm + 3 mm
Cleaning method
Wipe with ethyl or isopropyl (IPA) alcohol (70%) wipes
Sensor Belt Cover and Straps Cover dimensions
500 mm x 120 mm x 8mm
Cover and strap material
Polyester, PU, EVA, PVC, and Velcro
Fits abdomen size
60–150 cm
Cleaning instructions
1. Cleaning instructions are for the non-disposable cover and strap only. 2. Wear protective gloves. 3. Follow manufacturer’s precautions and directions when using alcohol. 4. The areas of the sensor belt intended for cleaning can be cleaned with a 70/30 mixture of alcohol (isopropyl or ethyl) and distilled water by either spraying the mixture on the surface to be cleaned or dampening a clean, lint-free cloth. Disposable, absorbent, lint-free wipes or pads are recommended.
Given Imaging
8
Sensor Belt Instructions
Sensor Belt Insert 5. Wipe in one direction parallel to the sensor belt edge. 6. Allow to air dry at least 15 minutes before reuse. Do not use forced, hot air dryers.
Given Imaging
9
Sensor Belt Instructions