Operating Manual
84 Pages

Preview
Page 1
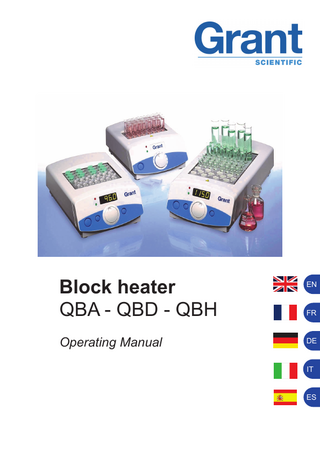
Block heater QBA - QBD - QBH Operating Manual
EN
FR
DE
IT
ES
Contents
1. 2. 3. 4.
Safety Operation of QBA Operation of QBD and QBH ranges User features QBD and QBH ranges Timer Alarm Offset Probe selection Delay start / stop Calibration Programming (QBH only)
5. 6. 7. 8. 9. 10.
Maintenance Guarantee and service Accessories Specification Compliance Declaration of Conformity
2 3 4 6 6 7 7 8 9 10 11 12 13 14 15 16 Inside rear cover
28089 Ver 12 Page 1
QBD, QBA, QBH, Operating Manual www.grantinstruments.com
1. Safety The following symbols mean:Caution: Read these operating instructions fully before use and pay particular attention to sections containing this symbol. Caution: Surfaces can become hot during use. Always observe the following safety precautions Do not check the temperature by touch. Use a thermometer. Do not touch surfaces which become hot during high temperature operation. Use only as specified by the operating instructions, or the intrinsic protection may be impaired. To reduce the risk of eye injury during high temperature operation, use safety goggles or spectacles. After transport or storage in humid conditions, dry out the unit before connecting it to the supply voltage. During drying out the intrinsic protection may be impaired. Connect only to a power supply with a voltage corresponding to that on the serial number label at the rear of the unit. Ensure that the mains switch and power plug are easily accessible during use. Connect only to a power supply which provides a safety earth (ground) terminal. Before moving, allow to cool and disconnect at the power supply socket. If liquid is spilt inside the unit, disconnect it from the power supply and have it checked by a competent person. It is the user’s responsibility to carry out appropriate decontamination if hazardous material is spilt on or inside the equipment. Clean the unit only with a damp cloth. Do not use chemical cleaning agents. Before using any cleaning or decontamination method except those recommended in this manual, users should check with Grant Instruments that the proposed method will not damage the equipment. The unit must be placed on a level, non-flammable surface away from flammable materials and ensuring that all ventilation slots in the base are clear from obstructions. Disconnect the mains before removing the outer cover. Note there are no user serviceable parts inside in the unit. Use appropriate vessels / tubes for temperature required. The unit is for indoor use only. Check that the environmental conditions of the laboratory are within the limits given in Section 5. Do not use in fume cupboards containing corrosive atmospheres. QBD, QBA, QBH, Operating Manual
28089 Ver 12 Page 2 www.grantinstruments.com
EN
2. Operation of QBA
Mains inlet
Extractor tool storage bracket Removable block
Heater indicator Power indicator
Mains switch Control knob
1. 2.
Unpack the unit carefully and retain packaging for future shipment or storage. The pack includes: Block heater, Mains cable, Operating instructions, Extractor tool. 3. Plug the mains cable into the socket at the rear of the unit and position to allow easy access to the power switch and connector. 4. Fit the desired block(s) into the heater well. Ensure that the heater bed and the bottom of the blocks are clean in order to ensure good thermal contact between heater and blocks resulting in optimal temperature control performance. 5. Turn the unit on by pressing the mains switch on the front of the unit. The power light will illuminate. 6. Turn the control knob to the desired temperature. 7. The block heater will now begin to heat the blocks. The heater light will illuminate continuously during the heating phase but will begin to flash when the set temperature is approached. 8. Allow the block(s) to stabilise at the set temperature before use. 9. If a more accurate temperature setting is required, use a calibrated thermometer. Place in the thermometer hole in the block and adjust the set temperature accordingly. N.B. Allow time for block to stabilise between each adjustment. 10. To turn the unit off press the mains switch on the front. Allow the unit to cool before completing any maintenance. Extractor tool: The extractor tool enables the user to remove blocks safely and easily. The tool can be stored on the rear of the unit in the mounting bracket provided. The tool should be screwed tightly into the threaded hole/holes in the block and then the block lifted out. N.B. One tool is provided with the unit for use with single blocks. A second tool is provided with the double size blocks which require the use of two tools.
28089 Ver 12 Page 3
QBD, QBA, QBH, Operating Manual www.grantinstruments.com
3. Operation of QBD,QBH
Display
Mains inlet
Extractor tool storage bracket
Removable block Heater indicator Fault indicator Control knob
Mains switch
(F)unction & (S)elect buttons
1. 2. 3. 4. 5. 6. 7. 8. 9.
Unpack the unit carefully and retain packaging for future shipment or storage. The pack includes: Block heater, Mains cable, Operating instructions, Extractor tool. Plug the mains cable into the socket at the rear of the unit and position to allow easy access to the power switch and connector. Fit the desired block(s) into the heater well. Ensure that the heater bed and the bottom of the blocks are clean in order to ensure good thermal contact between heater and blocks resulting in optimal temperature control performance. Turn the unit on by pressing the mains switch on the front of the unit. The display will illuminate showing the current temperature of the block. Press the ‘S’ button and adjust the set temperature using the knob. Press ‘S’ to select the temperature or press ‘F’ to exit without changing the value. The block heater will now begin to heat the blocks. The heater light will illuminate continuously during the heating phase but will begin to flash when the set temperature is approached. Allow the block(s) to stabilise at the set temperature before use. To turn unit off, press the mains switch on the front. The set temperature will be stored in memory. Allow unit to cool before completing any maintenance.
Extractor tool: The extractor tool enables the user to remove blocks safely and easily. The tool can be stored on the rear of the unit in the mounting bracket provided. The tool should be screwed tightly into the threaded hole/holes in the block and then the block lifted out. N.B. One tool is provided with the unit for use with single blocks. A second tool is provided with the double size blocks which require the use of two tools.
QBD, QBA, QBH, Operating Manual
28089 Ver 12 Page 4 www.grantinstruments.com
EN
Heating Error Detection (QBD\QBH) If the processor detects an error in heating the fault light will illuminate, the buzzer will beep and the display will flash . To reset this fault; switch the unit off and on. If the fault re-occurs contact your local service agent or Grant Instruments: contact details can be found towards the rear of this manual.
Adjustable Over-Temperature Protection Device (QBH) The QBH is fitted with an adjustable over-temperature protection device at the rear of the unit. This device is designed to protect the sample not the user from harm. If operated it will display the same fault as above. To set the device use the following procedure: a) Turn the knob of the protection thermostat to maximum (clockwise) b) Set the control temperature to 2°C above the desired operating temperature and wait for the temperature to stabilise c) Slowly turn the knob down until a click is heard and -ot- is displayed d) Reset the control temperature to the desired operating temperature
28089 Ver 12 Page 5
QBD, QBA, QBH, Operating Manual www.grantinstruments.com
4. User features - QBD, QBH
The digital range of products also contain the following user features: Timer Alarm Offset Probe selection Delay Start and Stop Calibration Programming (QBH only)
Timer The timer is used to count down a time period in the range of 1 to 999 minutes. A buzzer signifies time up, but the heater control is not affected. 1 2 3 4 5 6 7 8 9
Press F to enter main menu. Rotate control knob until display shows . Press S to select timer control. Display will show or . Rotate knob to desired state and press S to select state. If is selected the display will flash and show number of minutes. Rotate the control knob until the desired value is displayed and press S to select. If is selected the display will return to the actual temperature. If the timer is set the display will alternate between actual temperature and time left on the timer. Once the timer has counted down to zero the buzzer will sound and the display will alternate between and actual temperature1. To cancel the buzzer press either F or S key. The buzzer will cancel automatically after 5 minutes. If the main power to the unit fails the timer will revert to 2.
Notes: 1 The heater control is not affected by the timer, normal operation continues. 2 The timer value will be retained in memory after the main power has been turned off.
QBD, QBA, QBH, Operating Manual
28089 Ver 12 Page 6 www.grantinstruments.com
EN
Alarm The alarm is a deviation alarm, settable from 0.5 to 10 ºC. If the actual temperature deviates from the set point by more than the value selected the alarm will sound and the fault lamp illuminates. It is only activated once the actual value has been within ± 0.2 ºC of the set value for 2 minutes. It does not affect the normal operation of the unit. 1 2 3 4 5 6 7 8 9 10
Press F to enter main menu. Rotate control knob until display shows . Press S to select alarm control. Display will show or . Rotate knob to desired state and press S to select. If is selected the display will flash and show the current set value. Rotate control knob until desired value is shown. (The alarm limit is ± 0.5 oC to ±10.0oC) If is selected the display will return to the actual temperature. Press S to set alarm state once the desired value has been selected. The display will return to actual temperature. No indication is given that the alarm is set. If the temperature is outside the limit set for more than 10 seconds, the buzzer will sound and the display will alternate between actual temperature and . To reset the alarm press either F or S key. If the alarm conditions still exist the alarm will re-activate after 10 seconds. To disable the alarm feature select at point 4 above.
Note: The alarm value and set state condition are retained in memory.
Offset The offset feature allows the user to change the temperature from +3ºC to –7 ºC in order to allow single point calibration. 1 2 3 4 5 6
Press F to enter main menu. Rotate control knob until display shows . Press S to select offset control. The display will flash and show current value. Rotate the control knob until desired value is shown. Press S to confirm the offset value. To cancel the offset, set the value to ..
28089 Ver 12 Page 7
QBD, QBA, QBH, Operating Manual www.grantinstruments.com
Probe Selection By using the optional external probe, it is possible to control the temperature of a sample, a dummy sample or the block directly. Ensure the probe is maintained in contact with either a sample or the block during the course of the experiment. Failure to maintain this contact could result in the probe monitoring an air temperature or, another non-specific temperature. This could result in the temperature exceeding the set point and an error condition occurring (see “Errors” below). Grant has provided this function to protect accidental operation when the external probe has been ‘selected’ but is not used. When selected the external probe may be calibrated by the procedure described on page 10. To select the external probe, complete the following procedure: 1 2 3 4 5 6
Press F to enter main menu. Rotate control knob until display shows . Press S to select probe selection. The display will show which probe type is currently selected. for internal and for external. Rotate the control knob until the desired probe is shown. Press S to select the desired probe.
Errors: 1.
2.
The external probe should be plugged in before it is selected. If the probe is not connected to the unit or disconnected the message will be displayed. If a difference of 40°C or more is detected between the internal and external probe then will be displayed. - This condition might occur if the external probe is not in direct contact with a sample, a dummy sample or the block. - This error can also occur if the external probe is placed in a cool sample which is then placed in a pre-warmed block. To remove an error 3, ensure the external probe is indeed in direct contact with the chosen target and there is not a difference of more than 40 oC between the block (measured by the internal probe) and the external probe. As the sample heats-up, the heater will switch on again as the difference becomes less than 40oC. Therefore the user can wait and err3 will clear. N.B. Should experimental conditions require a difference of 40oC or more between the block and the external probe, please contact Grant to discuss other options.
QBD, QBA, QBH, Operating Manual
28089 Ver 12 Page 8 www.grantinstruments.com
EN
Delay Start and Stop The delay start and stop provides a means of turning the heater control on or off after a specified period of time. 1 2 3 4 5 6 7
Press F to enter main menu. Rotate control knob until display shows . Press S to select delay control. Display will show or , rotate knob to desired state. Press S to select state. If is selected the display will show either (delayed start) or (delayed stop). Using the control knob select which type of delay is required. Press S to select. The display will flash and show the number of minutes delay. Rotate the control knob until the desired value is displayed and press S to select.
Notes: 1 2
During delayed start the display will alternate between and the actual temperature. During delayed stop the unit will continue to respond as normal. Once the delayed period has expired the temperature control will be turned off and the display will alternate between and the actual temperature. To return to normal operation press either the S or F keys.
28089 Ver 12 Page 9
QBD, QBA, QBH, Operating Manual www.grantinstruments.com
Calibration The calibration procedure allows the user to calibrate the unit over a wide temperature range. Note that the probe used will be the probe selected as described on page 8. A calibrated thermometer will be required to measure the temperature of the block. The adjusted readings entered must be within ± 5ºC of the original reading. 1 2 3 4 5 6 7 8 9 10 11 12 13
14 15 16 17 18 19
Set the temperature of the unit to 35°C in the normal manner and allow the unit to stabilise. Press F to enter main menu. Rotate control knob until display shows . Press S to select. The display will show for one second then . Rotate to a value of 0004 and press S to select. Rotate the control knob until the display shows . Press S to select. The display will show the current temperature value. Using the control knob change the value to match that of the calibrated thermometer. Press S to select the new value. The display will revert to the non-adjusted actual temperature. Set the temperature of the unit to 75°C and allow the unit to stabilise. Press F to enter main menu. Rotate control knob until display shows . Press S to select. The display will show for one second then . Rotate to a value of 0004 and press S to select. Rotate the control knob until the display shows . Press S to select. The display will show the current temperature value. Using the control knob change the value to match that of the calibrated thermometer. N.B. If the reading is over 3 degrees out the unit will continue to flash the display. In this case turn the unit off and allow to cool. Then remove the blocks and clean the heater bed and bottom of the blocks and start the procedure again. Press S to select the new value. The display will revert to the non-adjusted actual temperature. Press F to enter main menu. Rotate control knob until display shows . Press S to select . The display will show for one second then . Rotate to a value of 0004 and press S to select. Rotate the control knob until the display shows . Press S to select. The display will now display the actual adjusted temperature using the calibration values entered.
To return to factory settings complete the following: 1 Press F to enter main menu. 2 Rotate control knob until display shows . Press S to select. 3 The display will show for one second then . Rotate to a value of 0004 and press S to select. 4 Rotate the control knob until the display shows . Press S to select.
QBD, QBA, QBH, Operating Manual
28089 Ver 12 Page 10 www.grantinstruments.com
EN
Programming (QBH with external probe only) The QBH is capable of running a simple program consisting of three temperature and time segments and an end phase. All the temperature/time segments must be set even if only 2 steps are required. An external probe must be fitted to edit or run a program. 1 2 3 4 5 6 7 8 9 10 11 12 13 14 15
16 17 18 19 20
Press F to enter main menu. Rotate control knob until display shows . Press S to select. Rotate the control knob to show or . Press S to select state. (On or Off will return the display to actual temperature. On runs the program, Off returns to normal operation). If is selected the display will show (section 1) then (set point). Press S to select. The display will flash and show the current set value. Rotate the control knob until the desired value is displayed and press S to select. The display will show t (time). Press S to select. The display will flash and show the time in minutes. Rotate the control knob until the desired value is displayed and press S to select. The display will show (section 2). Repeat steps 6 to 10 above for sections 2 and 3. The display will show (section 4), press S to select. The display will show (buzzer) press S to select. By rotating the control knob the display will show or. Press S to select state of buzzer when the program finishes (it will sound for 1 minute). The display will show (heater control). Press S to select. By rotating the control knob the display will show or. Press S to select state of heater control when the program finishes. If Off is selected the heater is switched off after the last step and there is no temperature control. If On is selected the unit will return to normal operation. The unit is now programmed; to run the program: Press F to enter main menu. Rotate control knob until display shows . Press S to select. By rotating the control knob the display will show or . Select On and press S. (If external probe is not selected will be displayed). To cancel the program complete steps 18 to 21 but select Off.
Notes: 1.
2.
When running a program the display will alternate as follows: When heating up the display will alternate between and the actual temperature. When temperature has been achieved the display will alternate between time left, step number and actual temperature. The time count down for each step is only started once the actual temperature is within 1 ºC of the set temperature.
28089 Ver 12 Page 11
QBD, QBA, QBH, Operating Manual www.grantinstruments.com
5.Maintenance All products covered in this manual are designed to comply with IEC61010-1 and can be flash tested. Some are fitted with radio frequency interference suppressers. Therefore it is recommended that only a D.C. test be performed. No other routine service is required.
Cleaning The case can be cleaned with a damp cloth after disconnection. Do not use solvents. Before using any decontamination or cleaning method except that recommended, check with our Service Department that the proposed method will not damage the equipment.
Replacement of fuses Disconnect from the power supply socket. Remove the IEC power plug from the rear of the unit. Pull out the fuse drawer, replace the fuse with the correct type, and replace the fuse holder. The fuses are ceramic quick acting, rated: Model
Fuse Rating (Amps)
Model
Fuse Rating (Amps)
230V QBA1
2
120V QBA1
2
QBA2
2
QBA2
3.15
QBD1
2
QBD1
2
QBD2
2
QBD2
3.15
QBD4
3.15
QBD4
5
QBH2
2
QBH2
3.15
Routine safety tests If routine tests are to be made, we recommend a test of the integrity of the protective earth conductor and an insulation test at 500 V d.c. Routine flash tests are not recommended for any electrical equipment, because repeated high voltage tests degrade insulation materials.
QBD, QBA, QBH, Operating Manual
28089 Ver 12 Page 12 www.grantinstruments.com
EN
6.Guarantee and Service Guarantee When used in laboratory conditions and according to these working instructions, this product is guaranteed for THREE YEARS against faulty materials or workmanship. Extended warranty for years four and five can be purchased by contacting our sales department at [email protected]
Service There are no user serviceable parts inside the unit. For service return for repair to our Service Department in the UK or in other countries to our distributor. Please do not return the blocks. Service Address: Service Department Grant Instruments (Cambridge) Ltd Shepreth Cambridgeshire SG8 6GB England. Tel: +44 (0) 1763 260 811 Fax: +44 (0) 1763 262 410 E-mail: [email protected] At Grant we are continuously trying to improve the performance we offer our customers. If you have any feedback on Grant’s products or services we would like to hear from you. Please send all feed back to: Quality Manager Grant Instruments (Cambridge) Ltd Shepreth Cambridgeshire SG8 6GB England. Tel: +44 (0) 1763 260 811 Fax: +44 (0) 1763 262 410 E-mail: [email protected]
28089 Ver 12 Page 13
QBD, QBA, QBH, Operating Manual www.grantinstruments.com
7.Accessories
Only use genuine Grant products with your block heater. The following accessories are available from Grant Instruments, or our local distributor. Single Blocks
Double size blocks for QBA2,QBD2 and QBH
Grant Part no. Description
Grant Part no.
Description
QB-0 QB-10 QB-12 QB-13 QB-16 QB-18 QB-24 QB-50 QB-H QB-E0 QB-E1 QB-E2
QDP-H QDP-FL
0.2ml 96-well plate
Plain 10mm holes 12mm holes 13mm holes 16mm holes 18mm holes 24mm holes 50mm holes 0.2ml micro tube 0.5ml micro tube 1.5ml micro tube 2.0ml micro tube
EN
Polycarbonate safety covers QBL1 QBL2 QBL4
Cover for QBA1,QBD1 Cover for QBA2,QBD2,QBH2 Cover for QBD4
External Probe QBEP
External Pt1000 sensor
Special blocks can be made to order. Please contact Grant Instruments at [email protected] for details.
QBD, QBA, QBH, Operating Manual
28089 Ver 12 Page 14 www.grantinstruments.com
8.Specification Supply Specifications Voltage
Frequency
Power
QBA1 QBA2 QBD1 QBD2 QBD4 QBH2
230V ±10%
50-60Hz
200VA 350VA 200VA 350VA 700VA 350VA
QBA1L QBA2L QBD1L QBD2L QBD4L QBH2L
120V ±10%
50-60Hz
150VA 300VA 150VA 300VA 550VA 300VA Width x height mm
External probe socket
Heat up time 25 to 100 ºC minutes
Adjustable overtemperature cut out
Number of blocks
Display resolution ºC
Uniformity @ 37 ºC within block
Setting resolution ºC
Stability @ 37 ºC within block
Max Temperature ºC
Minimum Setting Temperature ºC
Model variations QBA/QBAL
0
100
±1.0
±1.0
1&2
2
2
no
25
no
200 x100
QBD/QBDL
15
130
±0.1
±0.1
1,2&4
0.1
0.1
no
20
yes
200 x100
QBH/QBHL
15
200
±0.1
±0.1
2
0.1
0.1
yes
20
yes
200 x100
Block variations
Length
All block heaters are fitted with a thermal fuse which operates at a temperature of 230°C.
1 block
230
Heater power (watts) 230/110V 150/100
2 block
280
300/200
4 block
380
600/400
Operating Temperature Maximum relative humidity
5 to 40°C 80 % r.h. in room temperatures up to 31°C decreasing linearly to 50 % r.h. at 40°C
Altitude
Up to 6,500 feet (2,000 m) above sea level
28089 Ver 12 Page 15
QBD, QBA, QBH, Operating Manual www.grantinstruments.com
9.Compliance
WEEE Directive In Europe, at the end of its life the GR150, GP200 must be disposed of in accordance with the WEEE directive, For information regarding WEEE collections in the UK please contact our B2B Compliance Scheme directly on 01691 676 124 Grant Instruments complies fully with the Waste Electrical & Electronic Equipment (WEEE) regulations 2006. We are a member of the B2B compliance scheme (Scheme Approval Number WEE/MP3338PT/SCH), which handle our WEEE obligations on our behalf. Grant Instruments have been issued with a unique registration number by the Environmental Agency, this reference number is WEE/ GA0048TZ. For other countries please contact your equipment supplier. For General WEEE information please visit: www.b2bcompliance.org.uk
RoHS Directive All the products covered by this manual comply with the requirements of the RoHS Directive (Directive 2002/95/EC). This means the products are free of Lead and other hazardous substances covered by the directive.
Electrical safety and Electromagnetic compatibility All the products covered by this manual comply the the requirements of the Low Voltage Directive (2006/95/EC) for Electrical safety and the EMC directive (2004/108/EC) for Electromagnetic compatibility. See the Declaration of Conformity on the inside back page
QBD, QBA, QBH, Operating Manual
28089 Ver 12 Page 16 www.grantinstruments.com
EN
Table des matières
1. 2. 3. 4.
Sécurité Fonctionnement du QBA Fonctionnement des gammes QBH et QBD Options d’utilisation des gammes QBH et QBD
2 3 4 6 Minuterie 6 Alarme 7 Compensation 7 Sélection de la sonde 8 Démarrage / Arrêt différés 9 Étalonnage 10 Programmation (QBH uniquement) 11 5. Entretien 12 6. Garantie et réparation 13 7. Accessoires 14 8. Spécifications 15 9. Conformité 16 10. Déclaration de conformité troisième de couverture
28089 Ver 12 Page 1
QBD, QBA, QBH Manuel d’utilisation www.grantinstruments.com
1. Sécurité Signification des symboles suivants : Attention : lisez entièrement ces instructions d’utilisation avant l’emploi, en prêtant une attention particulière aux sections contenant ce symbole. Attention : Les surfaces peuvent être très chaudes pendant l’utilisation. Respectez toujours les précautions de sécurité suivantes Ne vérifiez pas la température au toucher. Utilisez un thermomètre. Ne touchez pas les surfaces chauffantes pendant le fonctionnement à haute température. Utilisez toujours l’appareil conformément aux instructions d’utilisation, faute de quoi sa protection intrinsèque peut être diminuée. Pour réduire le risque d’accident oculaire lors du fonctionnement à haute température, utilisez des lunettes de sécurité. Après le transport ou le stockage en environnement humide, séchez l’appareil avant de le raccorder à l’alimentation électrique. La protection intrinsèque peut être diminuée pendant le séchage. Ne le raccordez qu’à une alimentation délivrant une tension correspondant à celle inscrite sur la plaque signalétique située à l’arrière de l’appareil. Vérifiez que le commutateur d’alimentation et la fiche sont facilement accessibles pendant l’utilisation. Raccordez l’appareil uniquement à une prise électrique offrant une borne de sécurité à la terre (masse). Avant de le déplacer, laissez refroidir l’appareil et déconnectez-le de la prise de courant. Si vous renversez un liquide à l’intérieur de l’appareil, débranchez-le de l’alimentation électrique et faites-le vérifier par une personne qualifiée. L’utilisateur est responsable de la mise en œuvre de la méthode de décontamination appropriée si des produits dangereux ont coulé sur ou dans l’appareil. Nettoyez l’appareil uniquement avec un chiffon humide. N’utilisez pas de détergents chimiques. Avant d’appliquer une méthode de nettoyage ou de décontamination autre que celles recommandées dans ce manuel, vérifiez auprès de Grant Instruments que la méthode envisagée ne risque pas d’endommager l’appareil. Installez l’appareil sur une surface plane non inflammable à l’écart de toute matière inflammable en vérifiant que toutes les fentes d’aération de la base sont dégagées. Débranchez-le du secteur avant de retirer le capot externe. Notez que l’appareil ne contient aucune pièce réparable par l’utilisateur. Utilisez les récipients / tubes appropriés à la température atteinte. L’appareil est exclusivement destiné à une utilisation à l’intérieur. Vérifiez que les conditions environnementales du laboratoire se situent dans les limites indiquées dans la section 5. Ne pas utiliser dans des sorbonnes contenant des atmosphères corrosives
QBD, QBA, QBH, Manuel d’utilisation
28089 Ver 12 Page 2 www.grantinstruments.com
FR
2. Fonctionnement du QBA Entrée secteur
Support de rangement pour extracteur Bloc amovible
Indicateur de chauffage Indicateur d’alimentation
Interrupteur d’alimentation Bouton de réglage
1.
Déballez soigneusement l’appareil et conservez l’emballage pour expédition ou stockage ultérieur de l’appareil. 2. Le colis comprend : le bloc chauffant, le cordon d’alimentation, les instructions d’utilisation, l’extracteur. 3. Branchez le cordon d’alimentation à la prise située à l’arrière de l’appareil et positionnez ce dernier de sorte à pouvoir accéder facilement au commutateur d’alimentation et au connecteur. 4. Installez le(s) bloc(s) voulu(s) dans la cavité de l’appareil. Vérifiez que le fond de l’appareil et le dessous des blocs sont propres afin d’assurer un bon contact thermique entre l’élément chauffant et les blocs pour obtenir des performances optimales de régulation de la température. 5. Mettez l’appareil en marche en appuyant sur le commutateur d’alimentation en façade. Le témoin d’alimentation s’allume. 6. Tournez le bouton de réglage sur la température désirée. 7. Le bloc chauffant commence à chauffer les blocs. Le témoin de chauffage s’allume fixement pendant la phase de chauffage mais commence à clignoter lorsque l’appareil approche de la température programmée. 8. Laissez le(s) bloc(s) se stabiliser à la température réglée avant de les utiliser. 9. Si un réglage de température plus précis est nécessaire, utilisez un thermomètre étalonné. Placez-le dans l’orifice du thermomètre dans le bloc et ajustez la température réglée en conséquence. N.B. Laissez le bloc se stabiliser entre les ajustements. 10. Pour éteindre l’appareil, appuyez sur le commutateur d’alimentation en façade. Laissez l’appareil refroidir avant toute intervention d’entretien. Extracteur de bloc : L’extracteur de bloc permet de retirer les blocs facilement et en toute sécurité. L’extracteur peut être rangé à l’arrière de l’appareil sur le support prévu à cet effet. Vissez correctement l’extracteur dans le(s) orifice(s) fileté(s) du bloc, puis soulevez le bloc pour l’extraire. N.B. Un extracteur est livré avec l’appareil pour utilisation avec les blocs simples. Un deuxième extracteur est livré avec les blocs doubles nécessitant l’utilisation de deux outils. 28089 Ver 12 Page 3
QBD, QBA, QBH Manuel d’utilisation www.grantinstruments.com
3. Fonctionnement des QBD et QBH Affichage
Entrée secteur
Support de rangement pour extracteur Bloc amovible
Indicateur de chauffage Indicateur d’anomalie
Bouton de réglage
Interrupteur d’alimentation
Boutons (F)onction et (S)élection
1. 2. 3. 4.
5. 6. 7. 8. 9.
Déballez soigneusement l’appareil et conservez l’emballage pour expédition ou stockage ultérieur de l’appareil. Le colis comprend : le bloc chauffant, le cordon d’alimentation, les instructions d’utilisation, l’extracteur. Branchez le cordon d’alimentation à la prise située à l’arrière de l’appareil et positionnez ce dernier de sorte à pouvoir accéder facilement au commutateur d’alimentation et au connecteur. Installez le(s) bloc(s) voulu(s) dans la cavité de l’appareil. Vérifiez que le fond de l’appareil et le dessous des blocs sont propres afin d’assurer un bon contact thermique entre l’élément chauffant et les blocs pour obtenir des performances optimales de régulation de la température. Mettez l’appareil en marche en appuyant sur le commutateur d’alimentation en façade. L’affichage s’allume et indique la température actuelle du bloc. Appuyez sur la touche « S » et ajustez la température réglée à l’aide du bouton. Appuyez sur « S » pour sélectionner la température ou sur « F » pour quitter sans modifier la valeur. Le bloc chauffant commence à chauffer les blocs. Le témoin de chauffage s’allume fixement pendant la phase de chauffage mais commence à clignoter lorsque l’appareil approche de la température programmée. Laissez le(s) bloc(s) se stabiliser à la température réglée avant de les utiliser. Pour éteindre l’appareil, appuyez sur le commutateur d’alimentation en façade. La température réglée est mémorisée. Laissez l’appareil refroidir avant toute intervention d’entretien.
Extracteur de bloc : L’extracteur de bloc permet de retirer les blocs facilement et en toute sécurité. L’extracteur peut être rangé à l’arrière de l’appareil sur le support prévu à cet effet. Vissez correctement l’extracteur dans le(s) orifice(s) fileté(s) du bloc, puis soulevez le bloc pour l’extraire. N.B. Un extracteur est livré avec l’appareil pour utilisation avec les blocs simples. Un deuxième extracteur est livré avec les blocs doubles nécessitant l’utilisation de deux outils. QBD, QBA, QBH, Manuel d’utilisation
28089 Ver 12 Page 4 www.grantinstruments.com
FR
Détection d’erreur de chauffage (QBD\QBH) Si le processeur détecte une anomalie de chauffage, le témoin d’anomalie s’allume, le signal sonore retentit et l’affichage clignote . Pour réinitialiser cette erreur, arrêtez et rallumez l’appareil. Si l’incident se reproduit, contactez l’agent du service après-vente local ou Grant Instruments : les coordonnées de contact se trouvent à la fin de ce manuel.
Dispositif réglable de protection contre la surchauffe (QBH) Le modèle QBH est équipé d’un dispositif réglable de protection contre la surchauffe, situé à l’arrière de l’appareil. Ce dispositif est destiné à protéger l’échantillon, et non l’utilisateur. Lorsqu’il est utilisé, il affiche la même anomalie que ci-dessus. Procédez comme suit pour régler le dispositif : a) Tournez le bouton du thermostat de protection au maximum (sens des aiguilles d’une montre) b) Réglez la température de contrôle sur 2°C au-dessus de la température de fonctionnement souhaitée et attendez que la température se stabilise c) Tournez lentement le bouton jusqu’à ce qu’un déclic se fasse entendre et que -ot- s’affiche d) Réglez à nouveau la température de contrôle sur la température de fonctionnement souhaitée
28089 Ver 12 Page 5
QBD, QBA, QBH Manuel d’utilisation www.grantinstruments.com
4. Fonctions d’utilisation - QBD, QBH
La gamme digitale de produits possède également les fonctions d’utilisation suivantes : Minuterie Alarme Compensation Sélection de la sonde Démarrage et arrêt différés Étalonnage Programmation (QBH uniquement)
Minuterie La minuterie sert à décompter une durée entre 1 et 999 minutes. Un signal sonore retentit lorsque le temps est écoulé, mais la régulation du chauffage n’est pas affectée. 1. 2. 3. 4. 5.
6. 7. 8. 9.
Appuyez sur F pour passer au menu principal. Tournez le bouton de réglage jusqu’à ce que l’affichage indique . Appuyez sur S pour sélectionner la commande de la minuterie. L’affichage indique ou . Tournez le bouton sur l’état désiré et appuyez sur S pour confirmer la sélection. Si est sélectionné, l’affichage clignote et indique le nombre de minutes. Tournez le bouton de réglage jusqu’à ce que la valeur désirée soit affichée et appuyez sur S pour la sélectionner. Si est sélectionné, l’affichage revient à la température actuelle. Si la minuterie est réglée, l’affichage alterne entre la température en cours et le temps restant. Lorsque la minuterie a décompté jusqu’à zéro, un signal sonore retentit et l’affichage alterne entre et la température actuelle1. Pour arrêter le signal sonore, appuyez sur la touche F ou S. Le signal sonore s’arrête automatiquement après 5 minutes. En cas de panne de courant secteur, la minuterie revient sur 2.
Remarques : 1. Le régulateur de chauffage n’est pas affecté par la minuterie, le fonctionnement normal continue. 2. La valeur de la minuterie est mémorisée après avoir coupé l’alimentation de l’appareil.
QBD, QBA, QBH, Manuel d’utilisation
28089 Ver 12 Page 6 www.grantinstruments.com
FR
Alarme L’alarme est une alarme de déviation, réglable de 0,5 à 10ºC. Si la température actuelle dévie de la valeur de consigne de plus de la valeur sélectionnée, l’alarme retentit. Elle est uniquement activée lorsque la valeur actuelle s’est située dans les limites de ± 0,2 ºC de la valeur réglée pendant 2 minutes. Elle n’affecte pas le fonctionnement normal de l’appareil. 1. 2. 3. 4.
Appuyez sur F pour passer au menu principal. Tournez le bouton de réglage jusqu’à ce que l’affichage indique . Appuyez sur S pour sélectionner la commande de l’alarme. L’affichage indique ou . Tournez le bouton sur l’état désiré et appuyez sur S pour confirmer la sélection. 5. Si est sélectionné, l’affichage clignote et indique la valeur réglée actuelle. Tournez le bouton de réglage jusqu’à ce que la valeur désirée s’affiche (La limite d’alarme est de ± 0,5oC à ±10,0oC) Si est sélectionné, l’affichage revient à la température actuelle. 6. Appuyez sur S pour régler l’état de l’alarme une fois la valeur désirée sélectionnée. 7. L’affichage revient à la température actuelle. Aucune indication ne précise que l’alarme est réglée. 8. Si la température est hors limite paramétrée pendant plus de 10 secondes, le signal sonore retentit et l’affichage alterne entre la température en cours et . 9. Pour couper l’alarme, appuyez sur la touche F ou S. Si les conditions d’alarme sont toujours présentes, l’alarme est réactivée après 10 secondes. 10. Pour désactiver la fonction d’alarme, sélectionnez à l’étape 4 ci-dessus. Remarque : La valeur de l’alarme et les conditions d’état paramétrées sont mémorisées.
Compensation La fonction de compensation permet de modifier la température d’un maximum de +3ºC en –7ºC pour effectuer un étalonnage sur un seul point. 1. 2. 3. 4. 5. 6.
Appuyez sur F pour passer au menu principal. Tournez le bouton de réglage jusqu’à ce que l’affichage indique . Appuyez sur S pour sélectionner la commande de compensation. L’affichage clignote et indique la valeur actuellement réglée. Tournez le bouton de réglage jusqu’à ce que la valeur désirée s’affiche. Appuyez sur S pour confirmer la valeur de compensation. Pour annuler la compensation, réglez la valeur sur ..
28089 Ver 12 Page 7
QBD, QBA, QBH Manuel d’utilisation www.grantinstruments.com
Sélection de la sonde En utilisant la sonde externe optionnelle, il est possible de réguler directement la température d’un échantillon, d’un factice ou du bloc. Vérifiez que la sonde est maintenue en contact avec l’échantillon ou le bloc pendant la durée de l’essai. Sinon, la sonde contrôle la température ambiante ou une autre température quelconque. Dans ce cas, la température peut dépasser la valeur de consigne et déclencher une condition d’erreur (voir « Erreurs » ci-dessous). Grant a prévu cette fonction pour empêcher le fonctionnement accidentel lorsque la sonde externe est sélectionnée mais n’est pas utilisée. Une fois choisie la sonde externe peut être calibrée par le procédé décrit à la page 10. Pour sélectionner la sonde externe, procédez comme suit : Appuyez sur F pour passer au menu principal. 1. Tournez le bouton de réglage jusqu’à ce que l’affichage indique . 2. Appuyez sur S pour choisir la sélection de la sonde. 3. L’affichage indique quel type de sonde est actuellement sélectionné. pour la sonde interne et pour la sonde externe. 4. Tournez le bouton de réglage jusqu’à ce que la sonde désirée s’affiche. 5. Appuyez sur S pour sélectionner la sonde désirée. Erreurs : 1.
2.
La sonde externe doit être raccordée avant de la sélectionner. Si la sonde n’est pas raccordée à l’appareil ou si elle est débranchée, le message s’affiche. Si une différence de 40°C ou plus est détectée entre la sonde interne et la sonde externe, s’affiche. - Cette condition peut survenir lorsque la sonde externe n’est pas en contact direct avec un échantillon, un factice ou le bloc. - Elle peut également se produire lorsque la sonde externe est placée sur un échantillon froid qui est ensuite placé dans un bloc préchauffé. Pour annuler une erreur 3, vérifiez que la sonde externe est bien en contact direct avec la cible choisie et qu’il n’existe pas de différence supérieure à 40 oC entre le bloc (mesurée par la sonde interne) et la sonde externe. À mesure que l’échantillon chauffe, le chauffage est réactivé lorsque la différence est inférieure à 40oC. Par conséquent, err3 s’efface après un moment d’attente. N.B. Lorsque les conditions d’essai nécessitent une différence égale ou supérieure à 40oC entre le bloc et la sonde externe, contactez Grant pour examiner les autres options.
QBD, QBA, QBH, Manuel d’utilisation
28089 Ver 12 Page 8 www.grantinstruments.com
FR
Démarrage et arrêt différés Le démarrage et l’arrêt différés permettent de déclencher ou de désactiver la régulation du chauffage après un délai déterminé. 1. 2. 3. 4. 5. 6. 7.
Appuyez sur F pour passer au menu principal. Tournez le bouton de réglage jusqu’à ce que l’affichage indique . Appuyez sur S pour sélectionner la commande différée. L’affichage indique ou , tournez le bouton sur l’état désiré. Appuyez sur S pour sélectionner l’état. Si est sélectionné, l’affichage indique (démarrage différé) ou (arrêt différé). À l’aide du bouton de réglage, sélectionnez le type de délai nécessaire. Appuyez sur S pour valider. L’affichage clignote et indique le nombre de minutes du délai. Tournez le bouton de réglage jusqu’à ce que la valeur désirée s’affiche et appuyez sur S pour confirmer la sélection.
Remarques : 1. 2.
Pendant le démarrage différé, l’affichage alterne entre et la température actuelle. Pendant l’arrêt différé, l’appareil continue à réagir normalement. Une fois la période différée expirée, la régulation de la température est interrompue et l’affichage alterne entre et la température actuelle. Pour revenir au fonctionnement normal, appuyez sur la touche S ou F.
28089 Ver 12 Page 9
QBD, QBA, QBH Manuel d’utilisation www.grantinstruments.com
Étalonnage La procédure d’étalonnage permet d’étalonner l’appareil sur une gamme de températures étendue. Notez que la sonde utilisée sera la sonde choisie comme décrit à la page 8. Un thermomètre étalonné est nécessaire pour mesurer la température du bloc. Les valeurs ajustées saisies doivent se situer à ± 5ºC de la valeur d’origine. 1. Réglez la température de l’appareil sur 35°C de façon normale et laissez l’appareil se stabiliser. 2. Appuyez sur F pour passer au menu principal. 3. Tournez le bouton de réglage jusqu’à ce que l’affichage indique . Appuyez sur S pour valider. 4. L’affichage indique pendant une seconde, puis . Tournez jusqu’à une valeur de 0004 et appuyez sur S pour valider. 5. Tournez le bouton de réglage jusqu’à ce que l’affichage indique . Appuyez sur S pour valider. 6. L’affichage indique la valeur de température actuelle. À l’aide du bouton de réglage, modifiez la valeur pour qu’elle corresponde à celle du thermomètre étalonné. 7. Appuyez sur S pour sélectionner la nouvelle valeur. L’affichage revient à la température actuelle non ajustée. 8. Réglez la température sur 75°C et laissez l’appareil se stabiliser. 9. Appuyez sur F pour passer au menu principal. 10. Tournez le bouton de réglage jusqu’à ce que l’affichage indique . Appuyez sur S pour valider. 11. L’affichage indique pendant une seconde, puis . Tournez jusqu’à une valeur de 0004 et appuyez sur S pour valider. 12. Tournez le bouton de réglage jusqu’à ce que l’affichage indique . Appuyez sur S pour valider. 13. L’affichage indique la valeur de température actuelle. À l’aide du bouton de réglage, modifiez la valeur pour qu’elle corresponde à celle du thermomètre étalonné. N.B. Si la valeur diffère de plus de 3 degrés, l’affichage de l’appareil continue à clignoter. Dans ce cas, arrêtez-le et laissez-le refroidir. Retirez ensuite les blocs et nettoyez le fond et le dessous des blocs avant de recommencer la procédure. 14. Appuyez sur S pour sélectionner la nouvelle valeur. L’affichage revient à la température actuelle non ajustée. 15. Appuyez sur F pour passer au menu principal. 16. Tournez le bouton de réglage jusqu’à ce que l’affichage indique . Appuyez sur S pour valider. 17. L’affichage indique pendant une seconde, puis . Tournez jusqu’à une valeur de 0004 et appuyez sur S pour valider. 18. Tournez le bouton de réglage jusqu’à ce que l’affichage indique . Appuyez sur S pour valider. 19. L’affichage indique à présent la température actuelle ajustée en utilisant les valeurs d’étalonnage saisies. Pour rétablir les réglages d’usine, procédez comme suit : 1. Appuyez sur F pour passer au menu principal. 2. Tournez le bouton de réglage jusqu’à ce que l’affichage indique . Appuyez sur S pour valider. 3. L’affichage indique pendant une seconde, puis . Tournez jusqu’à une valeur de 0004 et appuyez sur S pour valider. 4. Tournez le bouton de réglage jusqu’à ce que l’affichage indique . Appuyez sur S pour valider. QBD, QBA, QBH, Manuel d’utilisation
28089 Ver 12 Page 10 www.grantinstruments.com
FR
Programmation (QBH avec sonde externe uniquement) Le QBH peut exécuter un programme simple constitué de trois segments de température et de temps et d’une phase terminale. Tous les segments de température/ temps doivent être paramétrés, même si 2 étapes seulement sont nécessaires. Une sonde externe doit être raccordée pour modifier ou exécuter un programme. 1. Appuyez sur F pour passer au menu principal. 2. Tournez le bouton de réglage jusqu’à ce que l’affichage indique . Appuyez sur S pour valider. 3. Tournez le bouton de réglage pour afficher ou . Appuyez sur S pour sélectionner l’état. (On (Marche) ou Off (Arrêt) ramène l’affichage à la température actuelle. On (Marche) exécute le programme, Off (Arrêt) ramène l’appareil en fonctionnement normal). 4. Si est sélectionné, l’affichage indique (section 1) puis (valeur de consigne). 5. Appuyez sur S pour valider. 6. L’affichage clignote et indique la valeur réglée actuelle. Tournez le bouton de réglage jusqu’à ce que la valeur désirée s’affiche et appuyez sur S pour confirmer la sélection. 7. L’affichage indique t (temps). Appuyez sur S pour valider. 8. L’affichage clignote et indique le temps en minutes. Tournez le bouton de réglage jusqu’à ce que la valeur désirée s’affiche et appuyez sur S pour confirmer la sélection. 9. L’affichage indique (section 2). 10. Répétez les étapes 6 à 10 pour les sections 2 et 3. 11. L’affichage indique (section 4), appuyez sur S pour valider. 12. L’affichage indique (signal sonore) appuyez sur S pour valider. 13. En tournant le bouton de réglage, l’affichage indique ou. Appuyez sur S pour sélectionner l’état du signal sonore à la fin du programme (il retentit pendant 1 minute). 14. L’affichage indique (régulateur de chauffage). Appuyez sur S pour valider. 15. En tournant le bouton de réglage, l’affichage indique ou. Appuyez sur S pour sélectionner l’état de la régulation du chauffage à la fin du programme. Si vous choisissez Off (Arrêt), le chauffage s’arrête après la dernière étape et la régulation du chauffage est interrompue. Si vous choisissez On (Marche), l’appareil revient en fonctionnement normal. 16. L’appareil est désormais programmé ; pour exécuter le programme : 17. Appuyez sur F pour passer au menu principal. 18. Tournez le bouton de réglage jusqu’à ce que l’affichage indique . Appuyez sur S pour valider. 19. En tournant le bouton de réglage, l’affichage indique ou . Sélectionnez On (Marche) et appuyez sur S. (Si la sonde externe n’est pas sélectionnée, s’affiche). 20. Pour annuler le programme, procédez aux étapes 18 à 21 mais sélectionnez Off (Arrêt). Remarques : 1. Pendant l’exécution d’un programme, l’affichage alterne comme suit : Pendant le chauffage, l’affichage alterne entre et la température actuelle. Lorsque la température est atteinte, l’affichage alterne entre le temps restant, le numéro de l’étape et la température actuelle. 2. Le décompte du temps pour chaque étape démarre uniquement lorsque la température réelle se situe à 1 ºC de la température programmée. 28089 Ver 12 Page 11
QBD, QBA, QBH Manuel d’utilisation www.grantinstruments.com
5. Entretien Tous les produits couverts par ce manuel sont conçus conformément à la norme CEI61010-1 et peuvent subir un test flash. Certains sont équipés de suppresseurs d’interférence de fréquence radio. Il est par conséquent recommandé de pratiquer uniquement un test C.C. Aucun autre entretien systématique n’est requis.
Nettoyage Le boîtier peut être nettoyé avec un chiffon humide après avoir débranché l’appareil. N’utilisez pas de solvants. Avant d’utiliser une méthode de décontamination ou de nettoyage autre que celles recommandées, vérifiez auprès du service après-vente que la méthode envisagée ne risque pas d’endommager l’appareil.
Remplacement des fusibles Débranchez l’appareil de la prise d’alimentation. Retirez la prise électrique CEI à l’arrière de l’appareil. Sortez le tiroir à fusibles, remplacez le fusible par un type équivalent et remettez le porte-fusibles en place. Le fusible doit être en céramique à action rapide, de capacité : Modèle
Capacité du fusible en ampères
Modèle
Capacité du fusible en ampères
230V QBA1
2
120V QBA1
2
QBA2
2
QBA2
3,15
QBD1
2
QBD1
2
QBD2
2
QBD2
3,15
QBD4
3,15
QBD4
5
QBH2
2
QBH2
3.15
Tests de sécurité systématiques Si vous souhaitez effectuer des tests systématiques, nous recommandons un test de l’intégrité du conducteur de terre et un test d’isolation à 500 V CC Les tests flash systématiques sont déconseillés, quel que soit l’équipement électrique, car les tests répétés à haute tension dégradent les matériaux d’isolation.
QBD, QBA, QBH, Manuel d’utilisation
28089 Ver 12 Page 12 www.grantinstruments.com
FR
6. Garantie et réparation Garantie Lorsqu’il est utilisé dans des conditions de laboratoire conformément à ces instructions d’utilisation, ce produit est garanti pendant TROIS ANS, pièces et main d’œuvre. Une extension de garantie pour la quatrième et la cinquième année peut être obtenue en contactant notre service commercial à l’adresse [email protected]
Réparation L’appareil ne comporte aucune pièce réparable par l’utilisateur. Pour les réparations, renvoyez l’appareil à notre service après-vente au RoyaumeUni ou à notre distributeur pour les autres pays. Ne renvoyez pas les blocs. Adresse du centre de réparation : Service Department Grant Instruments (Cambridge) Ltd Shepreth Cambridgeshire SG8 6GB Angleterre. Tél : +44 (0) 1763 260 811 Fax : +44 (0) 1763 262 410 E-mail : [email protected] Grant s’efforce continuellement d’améliorer les performances offertes à ses clients. Si vous avez des remarques concernant les produits ou les services de Grant, nous serons heureux d’en prendre connaissance. Merci de communiquer vos remarques à : Directeur de la qualité Grant Instruments (Cambridge) Ltd Shepreth Cambridgeshire SG8 6GB Angleterre. Tél : +44 (0) 1763 260 811 Fax : +44 (0) 1763 262 410 E-mail : [email protected] 28089 Ver 12 Page 13
QBD, QBA, QBH Manuel d’utilisation www.grantinstruments.com
7. Accessoires
Utilisez uniquement des produits Grant d’origine avec le bloc chauffant. Les accessoires suivants sont disponibles auprès de Grant Instruments ou du distributeur local. Blocs simples Référence Grant QB-0 QB-10 QB-12 QB-13 QB-16 QB-18 QB-24 QB-50 QB-H QB-E0 QB-E1 QB-E2
Blocs doubles pour QBA2, QBD2 et QBH Description
Simple Orifices de 10 mm Orifices de 12 mm Orifices de 13 mm Orifices de 16 mm Orifices de 18 mm Orifices de 24 mm Orifices de 50 mm Microtube 2,0 ml Microtube 0,5 ml Microtube 1,5 ml Microtube 2,0 ml
Référence Grant QDP-H QDP-FL
Description
0,2 ml Plaque 96 puits
Couvercles de sécurité en polycarbonate QBL1 QBL2 QBL4
Couvercle pour QBA1, QBD1 Couvercle pour QBA2, QBD2, QBH2 Couvercle pour QBD4
Sonde externe QBEP
Capteur externe Pt1000
Des blocs spéciaux peuvent être fabriqués sur commande. Contactez Grant Instruments à l’adresse [email protected] pour des informations plus détaillées. QBD, QBA, QBH, Manuel d’utilisation
28089 Ver 12 Page 14 www.grantinstruments.com
FR
8. Spécifications Supply Specifications Voltage
Frequency
Power
QBA1 QBA2 QBD1 QBD2 QBD4 QBH2
230V ±10%
50-60Hz
200VA 350VA 200VA 350VA 700VA 350VA
QBA1L QBA2L QBD1L QBD2L QBD4L QBH2L
120V ±10%
50-60Hz
150VA 300VA 150VA 300VA 550VA 300VA
2
2
non
25
non
200 x 100
QBD/QBDL
15
130
±0,1
±0,1
1,2 et 4
0,1
0,1
non
20
oui
200 x 100
QBH/QBHL
15
200
±0.1
±0.1
2
0.1
0.1
oui
20
oui
200 x 100
380
600/400
Largeur x hauteur mm
1 et 2
4 blocs
Prise pour sonde externe
±1,0
300/200
Temps de chauffage de 25 à 100°C en minutes
±1,0
280
Coupe-circuit de surchauffe réglable
Nombre de blocs
100
2 blocs
Résolution de l’affichage en °C
Uniformité à 37°C dans un bloc
0
Variantes de Longueur Puissance blocs chauffage (watts) 230/110 V 1 bloc 230 150/100
Résolution du réglage en °C
Stabilité à 37°C dans un bloc
Température maximale en °C
Réglage de température minimal en °C
Variantes des modèles QBA/QBAL
Tous les blocs chauffants sont équipés d’un fusible thermique qui se déclenche à une température de 230°C.
Température de fonctionnement Humidité relative maximale
5 à 40°C 80 % à une température ambiante jusqu’à 31°C, diminuant linéairement jusqu’à 50 % d’humidité relative à 40°C
Altitude
Jusqu’à 2 000 m.
28089 Ver 12 Page 15
QBD, QBA, QBH Manuel d’utilisation www.grantinstruments.com
9. Conformité
Directive WEEE Grant Instruments se conforme totalement aux réglementations Waste Electrical & Electronic Equipment (WEEE) 2006. Nous participons au programme de conformité B2B (Numéro d’approbation du programme WEE/MP3338PT/SCH), qui gère nos obligations WEEE pour notre compte. Le numéro d’enregistrement unique WEE/ GA0048TZ à été attribué à Grant Instruments par l’agence environnementale. Pour des informations plus détaillées sur les collectes WEEE au Royaume-Uni, contactez directement notre gestionnaire de Programme de conformité B2B au 01691 676 124 Dans les autres pays, contactez le fournisseur de votre équipement. Des informations WEEE générales sont disponibles sur le site : www.b2bcompliance.org.uk
Directive RoHS 5.5 Tous les produits couverts par ce manuel sont conformes aux exigences de la directive RoHS (Directive 2002/95/CE).
FR
QBD, QBA, QBH, Manuel d’utilisation
28089 Ver 12 Page 16 www.grantinstruments.com
Inhalt
1. 2. 3. 4.
Sicherheit Bedienung des QBA Bedienung der Baureihen QBD und QBH Benutzerfunktionen der Baureihen QBD und QBH
2 3 4 6 Zeituhr 6 Alarm 7 Offset 7 Sondenauswahl 8 Verzögerter Start/Stopp 9 Kalibrierung 10 Programmierung (nur QBH) 11 5. Wartung 12 6. Garantie und Service 13 7. Zubehör 14 8. Technische Daten 15 9. Konformität 16 10. Konformitätserklärung im hinteren Innenumschlag
28089 Ver 12 Seite 1
QBD, QBA, QBH Bedienungsanleitung www.grantinstruments.com
1. Sicherheit Bedeutung der folgenden Symbole: Achtung: Lesen Sie diese Bedienungsanleitung vor der Benutzung des Geräts vollständig durch und achten Sie besonders auf die mit diesem Symbol gekennzeichneten Abschnitte. Achtung: Oberflächen können während der Benutzung heiß werden. Beachten Sie grundsätzlich die folgenden Sicherheitshinweise Kontrollieren Sie die Temperatur nicht durch Berühren, sondern verwenden Sie dafür ein Thermometer. Berühren Sie keine Oberflächen, die beim Betrieb mit hohen Temperaturen heiß werden können. Benutzen Sie das Gerät nur gemäß der Angaben in der Bedienungsanleitung, andernfalls kann dessen Eigenschutz beeinträchtigt werden. Zur Reduzierung der Gefahr von Augenverletzungen im Hochtemperaturbetrieb verwenden Sie eine Schutzbrille oder eine Brille. Lassen Sie das Gerät nach dem Transport oder der Lagerung in feuchtem Milieu trocknen, bevor Sie es an die Netzspannung anschließen. Während des Trocknungsvorgangs kann der Eigenschutz beeinträchtigt sein. Schließen Sie das Gerät nur an eine Steckdose an, deren Spannung der auf dem Typenschild an der Geräterückseite entspricht. Netzschalter und Gerätestecker müssen während der Benutzung des Gerätes leicht zugänglich sein. Schließen Sie das Gerät nur an eine Steckdose mit Schutzerde an. Bevor das Gerät bewegt wird, muss es abkühlen und der Netzstecker muss gezogen werden. Wird im Gerät Flüssigkeit verschüttet, so muss es vom Netz getrennt und von einer kompetenten Fachkraft geprüft werden. Die Durchführung geeigneter Dekontaminierungsmaßnahmen liegt in der Verantwortung des Benutzers, wenn gesundheitsgefährdende Materialien auf dem bzw. in das Gerät verschüttet wurden. Das Gerät nur mit einem feuchten Tuch reinigen. Verwenden Sie keine chemischen Reinigungsmittel. Bevor eine andere Reinigungs- oder Dekontaminierungsmethode als die in diesem Handbuch empfohlene angewendet wird, sollten Benutzer mit Grant Instruments abklären, dass die beabsichtigte Methode keine Schäden am Gerät verursacht. Das Gerät muss auf eine ebene, nicht entflammbare Oberfläche, von entflammbaren Materialien entfernt aufgestellt werden.Die Lüftungsschlitze am Geräteboden dürfen nicht blockiert werden. Trennen Sie das Gerät vom Netz, bevor Sie die Außenverkleidung abnehmen. Im Gerät sind keine vom Benutzer zu wartenden Teile vorhanden. Verwenden Sie die für die benötigte Temperatur geeigneten Gefäße/Röhrchen. Dieses Gerät ist nur für den Innengebrauch bestimmt. Die Umgebungsbedingungen im Labor müssen sich stets innerhalb der in Abschnitt 5 angegebenen Grenzwerte befinden. Nicht in Abzügen mit korrosiven Umgebungen verwenden. QBD, QBA, QBH Bedienungsanleitung
28089 Ver 12 Seite 2 www.grantinstruments.com
DE
2. Bedienung des QBA Netzeingang
Halterung für Entnahmewerkzeug Herausnehmbarer Block
Heizungskontrolllampe Stromversorgungsan zeige
Netzschalter Reglerknopf
1.
Packen Sie das Gerät vorsichtig aus und bewahren Sie die Verpackung für den zukünftigen Versand oder die Lagerung auf. 2. Die Verpackung hat folgenden Inhalt: Blockheizgerät, Netzkabel, Bedienungsanleitung, Entnahmewerkzeug. 3. Stecken Sie das Netzkabel in den Eingang an der Geräterückseite und stellen Sie das Gerät so auf, dass Netzschalter und Stecker leicht zugänglich sind. 4. Setzen Sie die gewünschte Anzahl von Blöcken in die Heizmulde ein. Sorgen Sie dafür, dass das Heizbett und der Boden der Blöcke sauber sind, damit ein guter thermischer Kontakt zwischen Heizung und Blöcken gewährleistet ist, was eine optimale Temperaturregelung garantiert. 5. Schalten Sie das Gerät durch Betätigen des Netzschalters an der Vorderseite ein. Die Stromkontrolllampe leuchtet auf. 6. Drehen Sie den Reglerknopf auf die gewünschte Temperatur. 7. Das Blockheizgerät beginnt nun mit der Erwärmung der Blöcke. Die Heizungskontrolllampe leuchtet während der Erwärmungsphase ständig, beginnt jedoch zu blinken, wenn die gewünschte Temperatur erreicht ist. 8. Warten Sie vor der Verwendung ab, bis sich die Blöcke bei der eingestellten Temperatur stabilisiert haben. 9. Sollte eine genauere Temperatureinstellung gewünscht werden, verwenden Sie ein kalibriertes Thermometer. Stecken Sie es in das Thermometerloch im Block ein und justieren Sie die eingestellte Temperatur entsprechend. NB: Warten Sie zwischen den Einstellungen ab, bis sich der Block stabilisiert hat. 10. Schalten Sie das Gerät mit dem Netzschalter an der Vorderseite aus. Lassen Sie das Gerät vor der Durchführung von Wartungsmaßnahmen abkühlen. Entnahmewerkzeug: Mithilfe des Entnahmewerkzeugs kann der Benutzer die Blöcke sicher und einfach herausnehmen. Das Werkzeug kann an der Geräterückseite in der dafür vorgesehenen Halterung verstaut werden. Das Werkzeug muss fest in das Gewindeloch/die Gewindelöcher im Block eingeschraubt werden, wonach der Block entnommen werden kann. NB: Pro Gerät ist ein Werkzeug zur Verwendung mit Einzelblöcken enthalten. Ein zweites Werkzeug wird für Blöcke von Doppelgröße, die die Verwendung von zwei Werkzeugen erforderlich machen, bereitgestellt. 28089 Ver 12 Seite 3
QBD, QBA, QBH Bedienungsanleitung www.grantinstruments.com
3. Bedienung des QBD, QBH Display
Netzeingang
Halterung für Entnahmewerkzeug
Herausnehmbarer Block
Heizungskontrolllampe Fehlerkontrolllampe
Reglerknopf
Netzschalter
Funktionstaste (F) und Auswahltaste (S)
1. 2. 3. 4.
5. 6. 7. 8. 9.
Packen Sie das Gerät vorsichtig aus und bewahren Sie die Verpackung für den zukünftigen Versand oder die Lagerung auf. Die Verpackung hat folgenden Inhalt: Blockheizgerät, Netzkabel, Bedienungsanleitung, Entnahmewerkzeug. Stecken Sie das Netzkabel in den Eingang an der Geräterückseite und stellen Sie das Gerät so auf, dass Netzschalter und Stecker leicht zugänglich sind. Setzen Sie die gewünschte Anzahl von Blöcken in die Heizmulde ein. Sorgen Sie dafür, dass das Heizbett und der Boden der Blöcke sauber sind, damit ein guter thermischer Kontakt zwischen Heizung und Blöcken gewährleistet ist, was eine optimale Temperaturregelung garantiert. Schalten Sie das Gerät durch Betätigen des Netzschalters an der Vorderseite ein. Das Display leuchtet auf und zeigt die aktuelle Temperatur des Blocks an. Drücken Sie die Taste S und stellen Sie die Temperatur mit dem Reglerknopf ein. Drücken Sie S, um die Temperatur auszuwählen oder F, um ohne Änderung des Wertes abzubrechen. Das Blockheizgerät beginnt nun mit der Erwärmung der Blöcke. Die Heizungskontrolllampe leuchtet während der Erwärmungsphase ständig, beginnt jedoch zu blinken, wenn die gewünschte Temperatur erreicht ist. Warten Sie vor der Verwendung ab, bis sich die Blöcke bei der eingestellten Temperatur stabilisiert haben. Schalten Sie das Gerät mit dem Netzschalter an der Vorderseite aus. Die Solltemperatur wird gespeichert. Lassen Sie das Gerät vor der Durchführung von Wartungsmaßnahmen abkühlen.
Entnahmewerkzeug: Mithilfe des Entnahmewerkzeugs kann der Benutzer die Blöcke sicher und einfach herausnehmen. Das Werkzeug kann an der Geräterückseite in der dafür vorgesehenen Halterung verstaut werden. Das Werkzeug muss fest in das Gewindeloch/die Gewindelöcher im Block eingeschraubt werden, wonach der Block entnommen werden kann. NB: Pro Gerät ist ein Werkzeug zur Verwendung mit Einzelblöcken enthalten. Ein zweites Werkzeug wird für Blöcke von Doppelgröße, die die Verwendung von zwei Werkzeugen erforderlich machen, bereitgestellt. QBD, QBA, QBH Bedienungsanleitung
28089 Ver 12 Seite 4 www.grantinstruments.com
DE
Erkennung von Heizgerätefehlern (QBD\QBH) Wenn der Prozessor einen Fehler im Heizgerät erkennt, leuchtet die Fehlerkontrolllampe auf, der Summer piept und am Display erscheint blinkend . Dieser Fehler kann durch Aus- und Einschalten des Geräts zurückgesetzt werden. Sollte der Fehler erneut auftreten, wenden Sie sich an Ihre Servicevertretung oder an Grant Instruments. Kontaktinformationen finden Sie am Ende dieser Bedienungsanleitung.
Einstellbarer Überhitzungsschutz (QBH) Das QBH ist mit einer einstellbaren Überhitzungsschutzvorrichtung ausgestattet, die die Probe (nicht den Benutzer) vor Schäden schützen soll. Bei Betätigung zeigt sie den gleichen Fehler wie oben an. Sie aktivieren die Schutzfunktion wie folgt: a) Drehen Sie den Regler des Probenschutzthermostats (im Uhrzeigersinn) auf das Maximum b) Stellen Sie die Kontrolltemperatur auf 2°C über der gewünschten Betriebstemperatur ein und warten Sie, bis sich die Temperatur stabilisiert hat. c) Drehen Sie den Regler langsam zurück, bis ein Klick zu hören ist und -otangezeigt wird d) Stellen Sie die Kontrolltemperatur wieder auf die gewünschte Betriebstemperatur ein
28089 Ver 12 Seite 5
QBD, QBA, QBH Bedienungsanleitung www.grantinstruments.com
4. Benutzerfunktionen - QBD, QBH
Die digitale Produktreihe bietet außerdem die folgenden Benutzerfunktionen: Zeituhr Alarm Offset Sondenauswahl Verzögerter Start und Stopp Kalibrierung Programmierung (nur QBH)
Zeituhr Die Zeituhr dient zum Zurückzählen einer Zeitdauer im Bereich 1 bis 999 Minuten. Ein Summer meldet, wenn die Zeit abgelaufen ist, die Heizfunktion wird davon aber nicht beeinflusst. 1. 2. 3. 4. 5.
6. 7. 8. 9.
Zum Aufrufen des Hauptmenüs drücken Sie F. Drehen Sie den Reglerknopf, bis am Display erscheint. Drücken Sie S zur Auswahl der Zeituhrsteuerung. Am Display erscheint oder . Drehen Sie den Knopf auf die gewünschte Einstellung und drücken Sie S zur Auswahl. Bei Auswahl von wird die Anzahl der Minuten blinkend am Display angezeigt. Drehen Sie den Reglerknopf auf den gewünschten Wert und drücken Sie S zur Auswahl. Bei Auswahl von kehrt das Display zur IstTemperatur zurück. Ist die Zeituhr eingestellt, wird am Display abwechselnd die Ist-Temperatur und die verbleibende Zeit angezeigt. Hat die Zeituhr bis Null heruntergezählt, ertönt der Summer und am Display wird abwechselnd und die Ist-Temperatur angezeigt1. Zum Quittieren des Summers drücken Sie die Taste F oder S. Nach 5 Minuten wird der Summer automatisch ausgeschaltet. Sollte die Netzversorgung des Geräts ausfallen, schaltet die Zeituhr zurück zu 2.
Hinweise: 1. Sie Heizungsregelung wird von der Zeituhr nicht beeinflusst, der Normalbetrieb wird fortgesetzt. 2. Die Zeituhreinstellung wird im Speicher festgehalten, nachdem der Netzstrom ausgeschaltet wurde.
QBD, QBA, QBH Bedienungsanleitung
28089 Ver 12 Seite 6 www.grantinstruments.com
DE
Alarm Der Alarm ist ein im Bereich 0,5 bis 10ºC einstellbarer Abweichungsalarm. Wenn die Ist-Temperatur vom Sollwert um mehr als den gewählten Wert abweicht, ertönt der Alarm. Er wird nur dann aktiviert, wenn der Ist-Wert für 2 Minuten innerhalb von ± 0,2 ºC des Sollwertes war. Der Normalbetrieb des Geräts wird davon nicht beeinflusst. 1. 2. 3. 4.
Zum Aufrufen des Hauptmenüs drücken Sie F. Drehen Sie den Reglerknopf, bis am Display erscheint. Drücken Sie S zur Auswahl der Alarmsteuerung. Am Display erscheint oder . Drehen Sie den Reglerknopf auf die gewünschte Einstellung und drücken Sie S zur Auswahl. 5. Bei Auswahl von wird der derzeit eingestellte Wert blinkend angezeigt. Drehen Sie den Knopf auf die gewünschte Einstellung. (Der Alarmgrenzbereich ist ± 0,5oC bis ±10,0oC). Bei Auswahl von kehrt das Display zur Ist-Temperatur zurück. 6. Drücken Sie S zum Einstellen des Alarms, wenn der gewünschte Wert ausgewählt wurde. 7. Das Display kehrt zur Anzeige der Ist-Temperatur zurück. Es gibt keine Anzeige dafür, dass der Alarm eingestellt wurde. 8. Liegt die Temperatur mehr als 10 Sekunden lang außerhalb des Grenzwertes, ertönt der Summer und das Display wechselt zwischen der Anzeige der IstTemperatur und . 9. Drücken Sie die Taste F oder S, um den Alarm zurück zu setzen. Wenn die Alarmbedingung weiterhin vorliegt, wird der Alarm nach 10 Sekunden erneut aktiviert. 10. Um die Alarmfunktion zu deaktivieren, wählen Sie bei Punkt 4 oben die Option . Hinweis: Der Alarmwert und die Einstellungsbedingung werden im Speicher festgehalten.
Offset Mit der Offset-Funktion kann die Temperatur von +3ºC bis –7ºC geändert werden, um eine Zweipunktkalibrierung zu ermöglichen. 1. 2. 3. 4. 5. 6.
Zum Aufrufen des Hauptmenüs drücken Sie F. Drehen Sie den Reglerknopf, bis am Display erscheint. Drücken Sie S zur Auswahl der Offset-Steuerung. Am Display wird der aktuelle Wert blinkend angezeigt. Drehen Sie den Knopf, bis der gewünschte Wert erscheint. Drücken Sie S, um den Offset-Wert zu bestätigen. Zum Quittieren der Offset-Funktion stellen Sie den Wert . ein.
28089 Ver 12 Seite 7
QBD, QBA, QBH Bedienungsanleitung www.grantinstruments.com
Sondenauswahl Mit der optionalen externen Sonde kann die Temperatur einer Probe, einer Versuchsprobe oder des Blocks direkt geregelt werden. Die Sonde muss während des Versuchs mit der Probe oder dem Block Kontakt haben, da die Sonde andernfalls fälschlicherweise die Umgebungstemperatur oder eine andere Temperatur überwacht. Dadurch kann die Temperatur den Sollwert überschreiten, und es tritt eine Fehlermeldung auf (siehe Abschnitt „Fehlermeldungen“ weiter unten). Grant hat diese Funktion implementiert, um einen versehentlichen Betrieb der Sonde zu verhindern, wenn eine externe Sonde ausgewählt, aber nicht verwendet wird. Wenn sie vorgewählt wird, kann die externe Prüfspitze durch das Verfahren kalibriert werden, das auf Seite 10 beschrieben wird. Zur Auswahl der externen Sonde verfahren Sie wie folgt: 1. 2. 3. 4. 5. 6.
Zum Aufrufen des Hauptmenüs drücken Sie F. Drehen Sie den Reglerknopf, bis am Display erscheint. Drücken Sie S zur Auswahl des Sondentyps. Am Display wird der aktuell ausgewählte Sondentyp angezeigt: (intern), (extern). Drehen Sie den Knopf, bis die gewünschte Sonde erscheint. Drücken Sie S, um die gewünschte Sonde auszuwählen.
Fehlermeldungen: 1.
2.
Die externe Sonde muss eingesteckt sein, bevor sie ausgewählt wird. Ist die Sonde nicht am Gerät angeschlossen oder wird sie getrennt, erscheint am Display die Meldung . Wird eine Differenz von 40°C oder mehr zwischen interner und externer Sonde gemessen, erscheint die Meldung . - Diese Bedingung kann auftreten, wenn die externe Sonde keinen direkten Kontakt mit einer Probe, einer Versuchsprobe oder dem Block hat. - Dieser Fehler kann auch auftreten, wenn die externe Sonde in eine kühle Probe gesteckt wird, die dann auf einem vorgewärmten Block platziert wird. Damit die Fehlermeldung „Err3“ verschwindet muss die externe Sonde direkten Kontakt mit dem ausgewählten Zielobjekt haben, und die Temperaturdifferenz zwischen dem Block (gemessen von der internen Sonde) und der externen Sonde darf 40oC nicht überschreiten. Mit zunehmender Erwärmung der Probe schaltet sich das Heizgerät wieder ein, wenn die Temperaturdifferenz weniger als 40oC beträgt. Nach einer Weile verschwindet die Fehlermeldung „Err3“. NB: Falls beim Versuch die Temperaturdifferenz zwischen dem Block und der externen Sonde mehr als 40oC betragen muss, sollten Sie sich an Grant Instruments wenden und andere Möglichkeiten besprechen.
QBD, QBA, QBH Bedienungsanleitung
28089 Ver 12 Seite 8 www.grantinstruments.com
DE
Verzögerter Start und Stopp Mithilfe der Funktion verzögerter Start und Stopp lässt sich die Heizungsregelung nach einer festgelegten Zeit ein- oder ausschalten. 1. 2. 3. 4. 5. 6. 7.
Zum Aufrufen des Hauptmenüs drücken Sie F. Drehen Sie den Reglerknopf, bis am Display erscheint. Drücken Sie S zur Auswahl der Verzögerungssteuerung. Am Display erscheint oder . Drehen Sie den Knopf, bis der gewünschte Status erscheint. Wählen Sie den Status mit der Taste S. Bei Auswahl von erscheint auf dem Display entweder (verzögerter Start) oder (verzögerter Stopp). Wählen Sie mit dem Reglerknopf die gewünschte Art der Verzögerung. Drücken Sie S zur Auswahl. Am Display wird die Anzahl der Minuten für die Verzögerung blinkend angezeigt. Drehen Sie den Reglerknopf auf den gewünschten Wert und drücken Sie S zur Auswahl.
Hinweise: 1. 2.
Beim verzögerten Start wechselt die Anzeige zwischen und der IstTemperatur. Während des verzögerten Stopps arbeitet das Gerät weiterhin auf die normale Weise. Nach Ablauf der Verzögerungszeit wird die Temperaturregelung ausgeschaltet und am Display wird abwechselnd und die Ist-Temperatur angezeigt. Um zum Normalbetrieb zurück zu kehren, drücken Sie die Taste S oder F.
28089 Ver 12 Seite 9
QBD, QBA, QBH Bedienungsanleitung www.grantinstruments.com
Kalibrierung Mithilfe des Kalibrierungsverfahrens kann der Benutzer das Gerät auf einen breiten Temperaturbereich kalibrieren. Merken Sie, dass die Prüfspitze, die benutzt wird, die Prüfspitze ist, die vorgewählt wird, wie auf Seite 8. beschrieben.Für die Messung der Temperatur des Blocks wird ein kalibriertes Thermometer benötigt. Die eingegebenen justierten Messwerte müssen innerhalb von ± 5ºC des ursprünglichen Messwertes liegen. 1. Stellen Sie die Temperatur des Geräts mit dem normalen Verfahren auf 35°C ein und warten Sie, bis sich das Gerät stabilisiert hat. 2. Zum Aufrufen des Hauptmenüs drücken Sie F. 3. Drehen Sie den Reglerknopf, bis am Display erscheint. Drücken Sie S zur Auswahl. 4. Am Display erscheint eine Sekunde lang und dann . Drehen Sie auf einen Wert von 0004 und drücken Sie S zur Auswahl. 5. Drehen Sie den Reglerknopf, bis am Display erscheint. Drücken Sie S zur Auswahl. 6. Am Display wird der aktuelle Temperaturwert angezeigt. Stellen Sie den Wert mit dem Reglerknopf auf den Wert des kalibrierten Thermometers ein. 7. Drücken Sie S zur Auswahl des neuen Wertes. Das Display kehrt zur nichtjustierten Ist-Temperatur zurück. 8. Set the temperature of the unit to 75°C and allow the unit to stabilise. 9. Zum Aufrufen des Hauptmenüs drücken Sie F. 10. Drehen Sie den Reglerknopf, bis am Display erscheint. Drücken Sie S zur Auswahl. 11. Am Display erscheint eine Sekunde lang und dann . Drehen Sie auf einen Wert von 0004 und drücken Sie S zur Auswahl. 12. Drehen Sie den Reglerknopf, bis am Display erscheint. Drücken Sie S zur Auswahl. 13. Am Display wird der aktuelle Temperaturwert angezeigt. Stellen Sie den Wert mit dem Reglerknopf auf den Wert des kalibrierten Thermometers ein. NB: Wenn der Messwert um mehr als 3 Grad abweicht, blinkt das Display weiter. Schalten Sie in diesem Fall das Gerät aus und lassen Sie es abkühlen. Entfernen Sie dann die Blöcke und reinigen das Heizbett und den Boden der Blöcke und führen Sie das Verfahren noch einmal durch. 14. Drücken Sie S zur Auswahl des neuen Wertes. Das Display kehrt zur nichtjustierten Ist-Temperatur zurück. 15. Zum Aufrufen des Hauptmenüs drücken Sie F. 16. Drehen Sie den Reglerknopf, bis am Display erscheint. Drücken Sie S zur Auswahl. 17. Am Display erscheint eine Sekunde lang und dann . Drehen Sie auf einen Wert von 0004 und drücken Sie S zur Auswahl. 18. Drehen Sie den Reglerknopf, bis am Display erscheint. Drücken Sie S zur Auswahl. 19. Am Display wird nun die mit den eingegebenen Kalibrierungswerten justierte IstTemperatur angezeigt. Um zu den Werkseinstellungen zurück zu kehren, verfahren Sie wie folgt: 1. Zum Aufrufen des Hauptmenüs drücken Sie F. 2. Drehen Sie den Reglerknopf, bis am Display erscheint. Drücken Sie S zur Auswahl. 3. Am Display erscheint eine Sekunde lang und dann . Drehen Sie auf einen Wert von 0004 und drücken Sie S zur Auswahl. 4. Drehen Sie den Reglerknopf, bis am Display erscheint. Drücken Sie S zur Auswahl. QBD, QBA, QBH Bedienungsanleitung
28089 Ver 12 Seite 10 www.grantinstruments.com
DE
Programmierung (nur QBH mit externer Sonde) Das QBH kann ein einfaches Programm ausführen, das drei Temperatur- und Zeitsegmente und eine Endphase umfasst. Alle Temperatur-/Zeitsegmente müssen auch dann eingestellt werden, wenn nur 2 Schritte erforderlich sind. Damit ein Programm bearbeitet oder ausgeführt werden kann, muss eine externe Sonde installiert sein. 1. 2. 3. 4. 5. 6. 7. 8. 9. 10. 11. 12. 13. 14. 15.
16. 17. 18. 19. 20.
Zum Aufrufen des Hauptmenüs drücken Sie F. Drehen Sie den Reglerknopf, bis am Display erscheint. Drücken Sie S zur Auswahl. Drehen Sie den Reglerknopf auf oder . Wählen Sie den Status mit der Taste S. (Bei On oder Off kehrt das Display zur Ist-Temperatur zurück. Bei On wird das Programm ausgeführt, Off kehrt zum Normalbetrieb zurück.). Bei Auswahl von erscheint auf dem Display (Teil 1) und dann (Sollwert). Drücken Sie S zur Auswahl. Am Display wird der aktuelle Sollwert angezeigt. Drehen Sie den Reglerknopf auf den gewünschten Wert und drücken Sie S zur Auswahl. Am Display erscheint t (Zeit). Drücken Sie S zur Auswahl. Am Display wird die Zeit in Minuten blinkend angezeigt. Drehen Sie den Reglerknopf auf den gewünschten Wert und drücken Sie S zur Auswahl. Am Display erscheint (Teil 2). Wiederholen Sie die obenstehenden Schritte 6 bis 10 für die Teile 2 und 3. Am Display erscheint (Teil 4). Drücken Sie S zur Auswahl. Am Display erscheint (Summer). Drücken Sie zur Auswahl S. Wird der Reglerknopf gedreht, erscheint am Display oder. Drücken Sie S zur Auswahl des Summerstatus am Ende des Programms (er ertönt für 1 Minute). Am Display erscheint (Heizungsregelung). Drücken Sie S zur Auswahl. Wird der Reglerknopf gedreht, erscheint am Display oder. Drücken Sie S zur Auswahl des Zustands der Heizungsregelung am Ende des Programms. Bei Auswahl von Off wird die Heizung nach dem letzten Schritt ausgeschaltet und es erfolgt keine Temperaturregelung. Wird On ausgewählt, kehrt das Gerät zum Normalbetrieb zurück. Das Gerät ist jetzt programmiert. Sie können das Programm wie folgt ausführen: Zum Aufrufen des Hauptmenüs drücken Sie F. Drehen Sie den Reglerknopf, bis am Display erscheint. Drücken Sie S zur Auswahl. Wird der Reglerknopf gedreht, erscheint am Display oder . Wählen Sie On und drücken Sie S. (Wenn keine externe Sonde ausgewählt ist, wird angezeigt). Um das Programm zu beenden, führen Sie die Schritte 18 bis 21 aus, wählen jedoch Off.
Hinweise: 1. Während ein Programm ausgeführt wird, erscheinen am Display folgende Meldungen: Beim Aufwärmen wechselt die Anzeige zwischen und IstTemperatur. Wenn die Temperatur erreicht wurde, wechselt die Anzeige zwischen verbleibender Zeit, Schrittnummer und Ist-Temperatur. 2. Der Zeitzähler für jeden Schritt startet erst dann, wenn die Ist-Temperatur innerhalb von 1 ºC der Soll-Temperatur liegt. 28089 Ver 12 Seite 11
QBD, QBA, QBH Bedienungsanleitung www.grantinstruments.com
5. Wartung Alle in diesem Handbuch beschriebenen Produkte sind auf Konformität mit der Norm IEC61010-1 ausgelegt und können durchschlagsgeprüft werden. Einige sind mit Funkentstörern ausgestattet. Aus diesem Grund wird empfohlen, nur einen Gleichstromtest durchzuführen. Weitere Maßnahmen zur Routinewartung sind nicht notwendig.
Reinigung Das Gehäuse kann nach Trennen vom Netz mit einem feuchten Tuch gereinigt werden. Keine Lösungsmittel verwenden. Bevor eine andere Reinigungs- oder Dekontaminierungsmethode als die in diesem Handbuch empfohlene angewendet wird, sollten Benutzer mit Grant Instruments abklären, dass die beabsichtigte Methode keine Schäden am Gerät verursacht.
Auswechseln von Sicherungen Gerät von der Netzsteckdose trennen. Ziehen Sie den IEC-genormten Netzstecker aus der Buchse an der Geräterückseite. Ziehen Sie die Sicherungsschublade heraus, tauschen Sie die Sicherung mit dem korrekten Sicherungstyp aus und schieben Sie die Sicherungsschublade wieder ein. Zu verwenden ist eine keramische flinke Sicherung folgenden Typs: Modell
Sicherungen (A)
Modell
Sicherungen (A)
230V QBA1
2
120V QBA1
2
QBA2
2
QBA2
3.15
QBD1
2
QBD1
2
QBD2
2
QBD2
3.15
QBD4
3.15
QBD4
5
QBH2
2
QBH2
3.15
DE
Routinemäßige Sicherheitsprüfungen Wenn Routineprüfungen durchzuführen sind, empfehlen wir, die Unversehrtheit des Schutzleiters sowie die Isolierung bei 500V Gleichspannung zu prüfen. Routinemäßige Durchschlagsprüfungen werden für elektrische Geräte nicht empfohlen, weil wiederholte Hochspannungsprüfungen das Isoliermaterial verschlechtern. QBD, QBA, QBH Bedienungsanleitung
28089 Ver 12 Seite 12 www.grantinstruments.com
6. Garantie und Service Garantie Sofern dieses Produkt unter Laborbedingungen und gemäß dieser Bedienungsanleitung verwendet wird, hat es eine Garantie von DREI JAHREN auf Material- und Verarbeitungsfehler. Eine Garantieverlängerung für Jahr vier und fünf erhalten Sie von unserer Verkaufsabteilung bei [email protected]
Service Dieses Gerät enthält keine Komponenten, die vom Benutzer gewartet werden müssen. Zum Service bzw. zur Reparatur schicken Sie das Gerät an unsere Serviceabteilung in GB oder an Ihren Fachhändler in anderen Ländern. Die Blöcke bitte nicht einschicken. Serviceanschrift: Service Department GRANT INSTRUMENTS (CAMBRIDGE) LTD Shepreth Cambridgeshire SG8 6GB England. Tel.: +44 (0) 1763 260 811 Fax: +44 (0) 1763 262 410 E-mail: [email protected] Grant bemüht sich ständig um die Verbesserung seiner Kundendienstleistungen. Wir sind sehr an Ihrer Meinung über Grants Produkte und Serviceleistungen interessiert. Bitte richten Sie Ihre Kommentare an: Quality Manager GRANT INSTRUMENTS (CAMBRIDGE) LTD Shepreth Cambridgeshire SG8 6GB England. Tel.: +44 (0) 1763 260 811 Fax: +44 (0) 1763 262 410 E-mail: [email protected] 28089 Ver 12 Seite 13
QBD, QBA, QBH Bedienungsanleitung www.grantinstruments.com
7. Zubehör
Verwenden Sie nur echte Grant-Produkte mit Ihrem Blockheizgerät. Das folgende Zubehör ist bei Grant Instruments oder bei Ihrem Fachhändler erhältlich. Einzelblöcke
Doppelblöcke für QBA2, QBD2 und QBH
Grant Art.-Nr.
Beschreibung
Grant Art.-Nr. Beschreibung
QB-0 QB-10 QB-12 QB-13 QB-16 QB-18 QB-24 QB-50 QB-H QB-E0 QB-E1 QB-E2
Einfach 10mm Löcher 12mm Löcher 13mm Löcher 16mm Löcher 18mm Löcher 24mm Löcher 50mm Löcher 0.2ml Mikroröhrchen 0.5ml Mikroröhrchen 1.5ml Mikroröhrchen 2.0ml Mikroröhrchen
QDP-H QDP-FL
0,2 ml Platte mit 96 Vertiefungen
Polycarbonat-Schutzabdeckungen QBL1 QBL2 QBL4
Deckel für QBA1,QBD1 Deckel für QBA2,QBD2,QBH2 Deckel für QBD4
DE
Externe Sonde QBEP
Externer Pt1000-Sensor
Spezialblöcke können auf Bestellung angefertigt werden. Für Einzelheiten kontaktieren Sie Grant Instruments unter [email protected] for details.
QBD, QBA, QBH Bedienungsanleitung
28089 Ver 12 Seite 14 www.grantinstruments.com
8. Technische Daten Supply Specifications Voltage
Frequency
Power
QBA1 QBA2 QBD1 QBD2 QBD4 QBH2
230V ±10%
50-60Hz
200VA 350VA 200VA 350VA 700VA 350VA
QBA1L QBA2L QBD1L QBD2L QBD4L QBH2L
120V ±10%
50-60Hz
150VA 300VA 150VA 300VA 550VA 300VA Justierbare Übertemperaturabschaltung
Aufwärmzeit 25 bis 100°C (min)
Eingang f. externe Sonde
Breite x Höhe (mm)
Anzahl der Blöcke
Anzeigeauflösung (°C)
Einheitlichkeit bei 37°C im Block
Einstellungsauflösung (°C)
Stabilität bei 37°C im Block
Höchsttemperatur (°C)
Mindesttemperatur (°C)
Modellvarianten QBA/QBAL
0
100
±1,0
±1,0
1&2
2
2
Nein
25
Nein
200 x100
QBD/QBDL
15
130
±0,1
±0,1
1,2&4
0,1
0,1
Nein
20
Ja
200 x100
QBH/QBHL
15
200
±0,1
±0,1
2
0,1
0,1
Ja
20
Ja
200 x100
Blockvarianten
Länge
Sämtliche Blockheizgeräte besitzen eine Thermosicherung, die bei einer Temperatur von 230°C anspricht.
1 Block
230
Heater power (watts) 230/110V 150/100
2 Block
280
300/200
4 Block
380
600/400
Betriebstemperatur Max. relative Luftfeuchtigkeit
5 to 40°C 80 % r.h. bei Zimmertemperaturen bis zu 31°C, linear abfallend auf 50 %. bei 40°C
Höhe über NN
bis zu 2000 m
28089 Ver 12 Seite 15
QBD, QBA, QBH Bedienungsanleitung www.grantinstruments.com
9. Konformität
WEEE-Richtlinie Grant Instruments erfüllt die Vorschriften der Richtlinie über Elektro- und ElektronikAltgeräte (WEEE) aus dem Jahr 2006. Wir sind Mitglied des B2B Compliance Schemes (Zulassungsnummer WEE/MP3338PT/SCH), das unsere WEEEVerpflichtungen für uns übernimmt. Grant Instruments hat von der britischen Environmental Agency eine eindeutige Registrierungsnummer erhalten; diese Referenznummer lautet WEE/GA0048TZ. Wenn Sie Informationen zur Abholung von Elektro- und Elektronik-Altgeräten in Großbritannien wünschen, wenden Sie sich bitte direkt an unser B2B Compliance Scheme unter 01691 676 124 In anderen Ländern wenden Sie sich bitte an Ihren Geräteanbieter. Um allgemeine WEEE-Informationen zu erhalten, besuchen Sie bitte die Website: www.b2bcompliance.org.uk
RoHS-Richtlinie Alle in dieser Bedienungsanleitung behandelten Produkte erfüllen die Anforderungen der RoHS-Richtlinie (2002/95/EG).
DE
QBD, QBA, QBH Bedienungsanleitung
28089 Ver 12 Seite 16 www.grantinstruments.com
Sommario
1. 2. 3. 4.
Sicurezza Funzionamento del modello QBA Funzionamento dei modelli QBD e QBH Funzioni disponibili nei modelli QBD e QBH
2 3 4 6 Timer 6 Allarme 7 Compensazione 7 Scelta della sonda 8 Avvio / Arresto a tempo ritardato 9 Calibrazione 10 Programmazione (solo modello QBH) 11 5. Manutenzione 12 6. Garanzia e assistenza 13 7. Accessori 14 8. Specifiche tecniche 15 9. Conformità 16 10. Dichiarazione di conformità Retro di copertina interno
28089 Ver 12 Pagina 1
QBD, QBA, QBH Manuale dell’utente www.grantinstruments.com