Operating Manual
61 Pages

Preview
Page 1
IMAGING
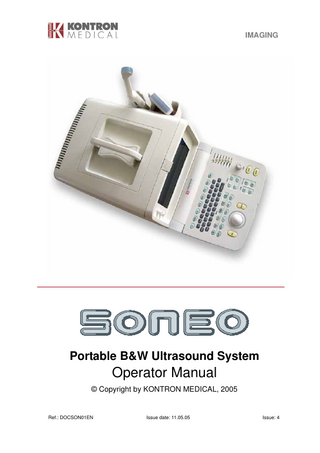
Portable B&W Ultrasound System
Operator Manual © Copyright by KONTRON MEDICAL, 2005
Ref.: DOCSON01EN
Issue date: 11.05.05
Issue: 4
Operator Manual
Operator Manual
KONTRON MEDICAL S.A.S Zone d'Activités les Gâtines 52, rue Pierre Curie Boîte Postale 97 F – 78373 PLAISIR – FRANCE Telephone: +33 (0) 1 30 07 60 00 Telefax : +33 (0) 1 30 07 55 82
Internet : www.kontronmedical.com E-mail : [email protected]
Manufacturer according to 93/42/EEC
All rights reserved Technology upgrade is a continuous process at KONTRON MEDICAL. Hence, the specifications mentioned in this manual are subject to change without any prior notice. The contents in this manual are strictly not to be reproduced in any form, by any method, for any purpose.
Operator Manual
REGULATORY REQUIREMENT This product complies with regulatory requirements of the following European directive 93/42/CEE concerning medical devices.
Operator Manual
PREFACE To use the unit correctly and ensure a long operation life of the unit, it is most important to understand well the instructions, operation as well as its necessary maintenance. Please read the operator manual carefully before using it.
Even though the system is designed and manufactured with the safety of its operators and patients emphasized, be sure to read the following instructions to ensure a safe and reliable operation of the system:
a. The system should be operated by a qualified person, or let other person operate the unit under his guidance. b. This unit belongs to Type B, Class 1 of the IEC Standard. Be sure to use it correctly and safely according to the safety instruction specified in Section 1.5 Safety of the Operator Manual. c. Never try to remodel the unit. If remodeling is necessary, let us or our appointed agents do the work. d. The unit has been completely adjusted before delivery. Do not touch any adjustable parts that have been well fixed. e. Should any abnormality occur during operation, immediately shut off the power supply and contact our appointed contactor or us. f. The power cord of the unit should be connected to a power socket with ground terminal. The grounding wire should not be moved away. g. In case of connecting the unit with other manufacturer’s device either electrically or mechanically, make sure the device conform to IEC60601-1 standard and re-check the safety of electrical leakage of the system to avoid any possible hazard caused. h. The system is running with safety, however according to specialist’s promote, the working probe cannot be placed on an organ of a patient particularly the
Operator Manual
fetus for a long time. i. The ultrasound gel applied on the patient should be a qualified one.
This Operator manual may be different from that of your equipment due to the updated software for SONEO.
Operator Manual
TTA AB BLLE EO OFF C CO ON NTTE EN NTTS S
1.
GENERAL INFORMATION ................................................................2
1.1 1.2 1.3 1.4 1.5 1.6
The characteristic of the products ....................................................................2 Application and Warning ..................................................................................2 Ambient Conditions..........................................................................................2 Power Requirements .......................................................................................3 Safety Classification.........................................................................................4 Safety Mark......................................................................................................6 2. STRUCTURE OF THE UNIT ............................................................7 2.1 Main Unit Operation principle...........................................................................7 2.2 The front panel of main unit .............................................................................8 2.3 The rear panel..................................................................................................9 2.4 Keyboard .......................................................................................................10 2.5 Probe .............................................................................................................20 2.6 Accessories ...................................................................................................20 2.7 Options ..........................................................................................................20 3. SPECIFICATIONS ...............................................................................21 3.1 Specification of main unit ...............................................................................21 3.2 Probe Specification ........................................................................................24 4. INSTALLATION AND VERIFICATION ........................................25 4.1 Preparations before turning on the system ....................................................25 4.2 Inspection after power on...............................................................................25 4.3 Performance verification ................................................................................25 5. OPERATION ...........................................................................................26 5.1 Preparation before turning on the system ......................................................26 5.2 Operation Procedures after installation of the equipment ..............................28 5.3 Image Depiction .............................................................................................28 5.4 Character input and measurement operation.................................................33 5.5 Relocation of the equipment ..........................................................................51 6. MAINTENANCE AND SERVICE ...................................................52 6.1 Maintenance and service of probe .................................................................52 6.2 Cleaning and disinfection...............................................................................53 6.3 Maintenance ..................................................................................................53 6.4 Service...........................................................................................................54 6.5 Service responsibility .....................................................................................54 6.6 Service information ........................................................................................54 AAPPPPEEN ND DIIXX AA ..............................................................................................................55
-1-
Operator Manual
1. GENERAL INFORMATION 1.1 The characteristic of the products SONEO is an electronic linear/convex ultrasound scanner with an advanced built-in digital scan converter (DSC) and a full range of multi-frequency probes from 2.5MHz to 10MHz. Take the C2-5S4 probe as an example. The center frequency of C2-5S4 is 3.5MHz and it can be converted to 2.5MHz, 3.0MHz and 5.0MHz. SONEO consists of a 10” non-interlaced monitor with larger ultrasound imaging and a backlit keyboard. The backlit keyboard allows the operator to view clearly the character on the keyboard even in a dark room. Besides, some keys will become brighter when activated. It is compatible with a video printer and equipped with a RS-232 interface for storage and handling of the image via a computer. SONEO is a full-featured and easy-operated ultrasound scanner. 1.2 Application and Warning With a varied selection of probes, SONEO can be used for examination of abdominal organs, OBS/GYN (including vagina), cardiac and thyroid gland etc. in a polymorphous hospital.
WARNING The SONEO is not applicable for ophthalmology or any examination that ultrasound beam would penetrate through eye.
1.3 Ambient Conditions This unit must be used on the following environmental conditions to ensure a safe and correct operation:
-2-
Operator Manual
Operation condition
Storage condition
5~40℃
-40℃~55℃
≤80%
≤95%
700~1600hPa
700~1600hPa
Ambient Temperature: Relative Humidity: Atmospheric Pressure:
If the operation temperature and humidity are beyond the ranges above, no correct ultrasonic images are ensured.
NOTE In case of storing the unit for a long time, the ventilation of the storage place must be considered.
Strong radiation sources or electromagnetic waves, from broadcast & TV station for instance, may cause the unit to display an image overlapped or noise. Keep the unit away from the disturbance sources. Do not place anything on the top of main unit. After use of the unit, be sure to turn off the power switch and protect the unit with the accessory dust proof cover. Whenever the unit is not used, keep the cover on since the unit is sensitive to dust. 1.4 Power Requirements The power requirements for the unit are as specified as below. Never use this unit when power supply does not meet the requirements, or the unit may possibly be damaged. Power Voltage for the Main Unit The power voltage for the main unit should be in accordance with the specification on the rear panel of the unit. The voltage fluctuation of power supply to the unit should be within the limits of ±10%. Otherwise, the unit is likely to be damaged.
-3-
Operator Manual
Power voltage: 110V~/220V~ Frequency of the Power Supply: 50Hz/60Hz Apparent Impedance of Power Supply: 0.5Ω or less Grounding Connect the power supply after the additional protective ground connector is connected to the special ground device.
WARNING The user should wait for at least 20 seconds before switching the unit on again after power off.
1.5 Safety Classification a. This system is designed and manufactured in accordance with the Safety Requirements of IEC. To operate the unit correctly and safely, observe the following instructions: The safety protection of electronic shock is classified in Ⅰclass Type B. The safety protection of deleterious fluid is classified in IPX0. The unit should not be used in a flammable atmosphere. The unit can be operating continuously more than 8 hours. This unit needs a protective grounding device. When using it, be sure to earth it with the additional grounding device. Do not use the unit where no ground terminal is available b. Data of Acoustic Output:
X
X
MI 1.0
5-2MHz, C2-5S4 Convex Array ISPTA.3(B) ISPTA.3(M) ISPPA.3 108.45 7.16 41.1
MI
10-5MHz, L5-10S5 Linear Array ISPPA.3 ISPTA.3(B)
0.66
176.0
6.35
-4-
ISPTA.3(B/M) 46.41
Operator Manual
c. Adverse Effects and Precautions The SONEO, same as other diagnostic ultrasound system in the market, should be used only for clinically appropriate reasons, for the shortest period of time and at power settings as low as reasonably achievable (ALARA). The American Institute of Ultrasound in Medicine (AIUM) principle of As Low As Reasonably Achievable (ALARA) is recommended during selection of the output of ultrasound power. Try not to aim probe at the same spot in tissue for a long period of time unless it is really necessary for diagnostic purpose. This system generates acoustic power that is below pre-enactment level, which is generally considered to be safe for the respective applications. The value of ISPTA.3 under M-mode and B/M-Mode is larger than the ISPTA.3 under B-mode. The value of ISPTA.3 is the maximum when only focus M is selected. However the difference between the values of ISPTA.3 for each focus is no so much. Multi-frequency Each probe has three frequencies, including the center frequency, high frequency and low frequency. The acoustic output is decreasing from low frequency, center frequency to high frequency.
-5-
Operator Manual
1.6 Safety Mark The user should observe the operating procedure in this Operator Manual and the relative warning message to ensure the safety of the unit. Following is the interpretation of the mark on the unit.:
Characteristic
Name Equalization potential terminal Caution
Type B
Damage for electric shock
Description To eliminate the phasic mistake, the terminal linking to the unit cover should connect to the corresponding terminal of other equipment. Please refer to the relative explanation in the Operator Manual when you find this label on the unit or any document. It is labeled for the safety assurance of the unit. Type B equipment (IEC 60601-1)
Terminals at the High voltage
-6-
Operator Manual
2. STRUCTURE OF THE UNIT 2.1 Main Unit Operation principle The block diagram of SONEO is shown in Fig. 2-1. Following the main unit operation principle: a. The CPU (Central Processing Unit) in the main CPU module reads the instruction from the key operation on the keyboard and issue control commands to the ultrasonic transmitter/receiver according to the instructions. b. The ultrasonic transmitter/receiver sends ultrasonic transmitting signal to the ultrasonic probe. c. The electrical signals are converted into ultrasonic signals by the transducer in ultrasonic probe, and are able to propagate in a patient’s body. d. The ultrasonic waves reflected from a patient’s body are then converted into the electrical signal by the transducer. e. The echo signals are sent to the ultrasonic transmitter/receiver, where the signals are amplified, compressed and detected. f. The detected signals are analog signals. The digital scan converter (DSC) converts them to digital signals, and further writes into a frame memory. The signals in the frame memory are read by means of television timing signals and then are converted into analog signals once again and displayed as an ultrasonic image on the monitor screen, Some image processing function, such as freezing, frame averaging, interpolation and gray scale mapping, is also realized by DSC. g. The 10” monitor receives the non-interlaced compounded video signal and display on the CRT.
-7-
Operator Manual
Pr obe A
Moni t or Pusl e T/ R
DSC
Aux. CPU Syst em
Mai n CPU Syst em
Pr obe B
Power Syst em Oper at i on Panel RS- 232C VI DEO I
VI DEO I I
Foot Swi t ch
Fig 2-1 The block diagram of SONEO
2.2 The front panel of main unit Fig 2-2 shows you the scheme of the front panel. The numbers on the front panel represent: 1. 10” monitor 2. Nameplate 3. Brightness Control knob The brightness of the monitor will increase when the knob is turned clockwise. 4. Contrast Control Knob The contrast will increase when the knob is turned clockwise. 5. Power Switch Turn on and off the power supply of the unit.
-8-
Operator Manual
1 2
3
4
5
Fig 2-2 Front Panel
2.3 The rear panel Fig 2-3 shows you the scheme of rear panel. 2
1
12
13 3
4 11 5
10 9
8
Fig 2-3
7
Real Panel
-9-
6
Operator Manual
1. Probe Connector A 2. Probe Connector B 3. Video output interface for non-interlaced signal 4. Video output interface for interlaced signal 5. Video printer Connector 6. Connector for Foot Switch (Freeze and unfreeze) 7. RS-232 Port 8. Fan for heat-sinking 9. Power connector 10. Grounding terminal 11. Fuse 12. Warning label 13. Label 2.4 Keyboard Fig 2-4 shows you the picture of keyboard.
● B-mode Selection keys a) B-mode full screen image will be displayed by pressing the
key.
b) The active B mode image of dual B mode will be displayed on the left half of the screen by pressing the
key. Press the
key, the active B mode image is
displayed on the right half of the screen and the image on the left side will freeze.
● M-mode Selection keys Press the
key to display M-mode and B-mode images simultaneously. The left
part on the screen is B-mode image. The sampling beam position, which can be changed by operating the trackball, decides the sampling position of M-mode image on the right part of the screen.
- 10 -
Operator Manual
Press
key to display the full M-mode image.
● M-mode Sweep Speed Selection key Press
key repeatedly, and you can select four sweep speeds: 8s/f, 4s/f,
2s/f and 1s/f.
● Image Magnification Selection keys (a) Magnification factor increases by pressing Magnification factor decreases by pressing (b) Press
key. key.
key repeating, the magnification factor will be changed from ×
0.8→×1.0→ ×1.2→ ×1.5→×1.7 → ×2.0.
● Image Vertical shift keys The image will be shifted up or down vertically about 2 mm by each press when the image is in B mode and the magnification factor is >1.0.
Fig 2-4 Keyboard
● Focus Selection keys - 11 -
Operator Manual
The focus is corresponding to a required position in the depth direction, which can be selected by the following operation. The focus selected is displayed on the right side of the screen. : Select the focus in ear field, i.e., focus in less-depth portion. Select the focus in middle field, i.e., focus in intermediate portion. Select the focus in far field, i.e., focus in deep portion. Select the focus in extra-far field, i.e., focus in deeper portion.
NOTE a) Only one focus can be selected in M or B/M mode.
b) Multi-step focusing can be selected in B-mode and adjacent focus should be selected simultaneously,
and
for instance, or else the image may have
horizontal straps with discontinuous darkness. ●
Image Processing key Press (1) CORRM
key to enter into Image Processing Menu Change correlated coefficient
To select an extent of frame correlation, there are four correlation factors for selection. When you select a correlation factor form CORR0 to CORR3, a corresponding indication is displayed on the left side of screen. (2) ENHCM
Image Edge Enhancement
By pressing the key, four kinds of edge enhancement can be selected. (3) GREYM
Grayscale Curve Selection key
There are 4 grayscale curves (γ correction) for selection. A corresponding indication is shown on the screen. (4) P/N M
Image Positive-Negative Reverse Key
To reverse the display of image between positive and negative. The key is initially set for negative image display (black background and white characters) - 12 -
Operator Manual
(5) L/R M
Image Left-Right Reverse key
Pressing the key can change scanning direction of ultrasonic beam to reverse the image between left and right. (6) U/D M
Image Upside/downside Reverse Key
The image can be upside-down by pressing this key. The near field is initially set on the upside when power on. This function is subject to trans-vaginal probe only. The Item can be selected by pressing down the corresponding number key or by moving the trackball to highlight the item. To activate the function, pressing key or
key。Press
the item after selected. Press
key repeatedly to alter the parameter of key to retreat from the alteration.
● Frequency selection key Press
Key to convert the working frequency of the probe. There are four
frequencies available for selection for each probe. The working frequency will correspondingly be display on the right side of the monitor.
● Probe Selection key Press
key to select the desired probe. The model and the frequency of
the probe will be displayed on the left side of the screen. Message “NO PROBE” will appear on the screen and the image will be frozen when no probe connects to the selected probe connector. NOTE Probe A will be automatically selected when SONEO power on. Probe B will be initially selected if no probe connects to Probe A when the system turn on.
- 13 -
Operator Manual
● Freeze key Freeze key is to freeze or unfreeze the image. The character inputted and image acquired will remain unchanged when frozen. The screen will be renewed after unfrozen.
● Cine loop Control key To playback the single frame, please press down frozen. Under single B-mode, press
when the image is
key to Cine loop the frame
continuously. Under M-mode continuous Cine loop is not available. Press “U” to change the speed of Cine loop. Four different kinds of speed are available. In single frame loop under B-mode, the number of frame can be selected by moving the trackball. In M-mode, single frame can be selected by choosing different time slice with trackball. key will be unable when one of PROCESS, OB, MEAS or BODY key is activated.
● Body Mark Control Key Press
key to enter into the Body Mark Menu shown as below:
BODY
Enter the selection of Body Mark
MOROP
Move and turn over the Probe Mark
OFFBY
Remove the Body Mark
- 14 -
Operator Manual
NOTE a. Press
to enter into the table of Body Mark. And then move the trackball to
select the corresponding body mark and press
b. Press
key to activate.
key to move and turn over the Probe Make. Press
to select
the Probe Mark and move it to the desired position by the trackball. Press key to exit.
● Distance Measurement key Under frozen state, press
key to activate the distance measurement.
● Function keys for measurement key: a. Under B or B/B mode, following functions will displayed: AREAE
(measure the area with ellipse method)
AREAT
(measure the area with trackball)
VOL-E
(measure the volume with ellipse method)
VOL-B
(measure the volume with biplane method)
ANGL
(measure the angle)
NOTE The measurement of one angle with ANGLE in this menu is different from that of two angles with ANGLE in the OB menu.
- 15 -
Operator Manual
b. To display the following menu in M-mode: HR*
(measure the heart rate)
MV
(measure the Mitral Valve)
LV
(measure the Left Ventricle)
AO
(measure the Aortic Valve)
TIME
(measure the time)
SLOPE
(measure the slope)
c. Under B/M mode, Press
key to display two menus (B-mode and
M-mode) simultaneous.
NOTE The item indicated with “*” must be measured for OB report.
By pressing down
key, the measurement function menu will display
immediately under unfrozen. In B or B.B mode, to display items 1-9 of the measuring function menu. BPD*
(Biparietal Diameter)
GS
(Gestational Sac)
CRL
(Crown-Rump Length)
FL*
(Femur Length)
AC*
(Abdominal Circumference)
HC*
(Head Circumference)
VOL-B
(Volume)(Bi-plane method)
ANGLE
(Angle)
OBRPT
(Obstetric Patient Report)
- 16 -
Operator Manual
NOTE Item indicated with“*” must be measured for OB Report. key: Confirm key
key: Exit key
●
key Press this key to input the patient’s ID. Press
●
key again to exit.
key A cursor “_” will appear at the center of the screen by pressing down this key. Use the trackball to move the cursor to the desired position to comment on the image. Press the
●
key again to withdraw.
key Press this key to alter the preset menu. There are five items. a. For inputting the detailed information of the patient including Name, ID, AGE and LMP). Press“EDIT”to enter edit operation.
NOTE The data inputted here is equivalent to that inputted after pressing the
key.
When the new information of patient ID is inputted, the system will automatically renewed the ID on left side of the screen.
b. Move the cursor to “[
]”for inputting the hospital name.
c. For setting the system time. Follow the prompt and input date and time in the“[
]”. During inputting, the system will execute a validity test. - 17 -
Operator Manual
d. For modifying the reference list of OB/GYN measurement, including the TOTAL PERIODS and six other measurement tables. e. For setting the communication baud rates between the main unite and the PC. 115K and 57K are selectable. Note: When the setting is finished, move the cursor to“EXIT”and press down the
key to save and exit the Preset Menu.
● Biopsy Guide Line Biopsy Guide Line will appear on the screen by pressing down first (it will become brighter) and then press
key
under active state.
Biopsy Guide Line is available to all probes for SONEO. Among the biopsy guide line of the ER5-9SB probe is movable. To move the key. The
biopsy guide line of ER5-9SB probe, please press down
biopsy guide line will shift down 2mm. The biopsy guide line of ER5-9SB will continuously shift down to the deepest 5 cm.
● Numeral/Character keys Press the group of keys on the keyboard to input date, annotation, etc. Among those there are some special keys: key: To clear the annotation and measured diagram, etc. Press down key while annotating, only the cursor will be cleared. This key at the second time.
function is equivalent to press
key: To select the upper or lower part of the Number/Character key. When
this
key
is
highlighted,
Number/Character is effective.
- 18 -
the
upper
part
of
the
Operator Manual
●
key To start the video printer linked to the main unit to print the image. This key is equivalent to the Print Knob on panel of the printer.
●
key This key is effective only when storage device is available. Press down this key, “STORE NO??” will be displayed at right side of screen. Press 01-16 (two digit) to identify the storing ultrasound image, for example press 12. The displayed ultrasound image and No. 12 will be stored into the non-volatile memory.
NOTE Please wait for 15 seconds to press the STORE or RECALL key again. However it will not affect the other operation.
●
key This key can be activated when storage device is available. “RECALL NO.??” will appear on the right side of screen by pressing down
key.
Select No. 01 to 16 to recall the stored ultrasound image. Press 12, the No. 12 ultrasound frame will be recalled. On the analogy of this, press 13 to recall the No. 13 ultrasound frame. Press ESC key to exit.
● Gain Control knob The whole gain will be increased when the knob is turned clockwise.
● 7-steps TGC Control There are 7 TGC sliding control on the keyboard. To adjust the gain of Near
- 19 -
Operator Manual
field, please slide the TGC control near the monitor. For changing the gain of Far field, just slide the TGC control near the Gain Control Knob. Move the TGC sliding to the left to increase the gain of the corresponding field and vice versa. 2.5 Probe C2-5S6 3.5MHz R60 Convex high density multi-frequency probe. 2.6 Accessories Ultrasound gel
one Bottle
Power Cable
one piece
Ground wire
one piece
Fuse 50T-T1.6AL 250V
two pieces
2.7 Options Probe (Please refer to 3.2 probe.) Video Printer Foot Switch RS-232C communication line Component for Memory
- 20 -
Operator Manual
3. SPECIFICATIONS 3.1 Specifications of main unit Scanning Mode: electronic convex and linear Display Mode: B, B/B, B/M, M Grey scale: 256 Frequency of probe: From 2.5MHz to 10MHz Image Display Multiple: ×0.8, ×1.0, ×1.2, ×1.5, ×1.7, ×2.0, Shift about 2mm step Focusing method: Variable aperture 1-4 focal zone electronic focusing Display range (max): Convex probe: Depth 200mm, Angle 80° Linear probe:
Depth 140mm, width 65mm
Image adjustment: General Gain Control Knob 7 steps TGC Control Grey map curve: 4 types Frame correlation: 4 steps Edge Enhance: 4 steps Sweep Speed in M mode: 1, 2, 4, 8 sec/frame Image display: left/right, positive/negative, up/down Cine loop: up to 64 frames under B-mode, continual/single, up to 256 sec under M-mode Image storage: 16 frames of image with related characters and diagram (Optional) DSC Memory capacity: 512×512×8 bit Monitor: 10 inch B/W non-interlaced monitor Backlit keyboard: All the keys have background light. Some keys will become brighter when activated. - 21 -
Operator Manual
Character Display: Patient ID Hospital Name Comment Automatically Display Item: Date & time, Frequency probe, Gain and operating parameters, and various measured values Body marks: 25 types Measuring function: Basic measurement: Distance, Circumference, area, volume, angle, HR, time Obstetrics measurement: BPD, CRL, FL, AC, HC, GS, VOL, ANG Other measurement: MV, LV, AO, Slope Input/output port: RS-232C port for transmitting image to PC (optional) One active convex or linear array port Video system: VideoⅠ:
non-interlaced 50 frame/sec
VideoⅡ:
625 lines/frame, 50 field/sec (PAL format)
Dimension:
417×310×260(mm)
Net weight: 12Kg approx. Power consumption: ~110V
60Hz
120VA
~220V
50Hz
120VA
Environmental requirement:
Ambient Temperature: Relative Humidity: Atmospheric Pressure:
Operation condition
Storage condition
5~40℃
-40℃~55℃
≤80%
≤95%
700~1600hPa
700~1600hPa
- 22 -
Operator Manual
Order references:
PN
Designation
171078
SONEO B/W ultrasound system (~220V) W/ one convex probe of C2-5S6
171078- 01
SONEO B/W ultrasound system (~110V) W/ one convex probe of C2-5S6
171190
SONEO B/W ultrasound system (~220V) W/ one microconvex probe of MC3-7S2
171190- 01
SONEO B/W ultrasound system (~110V) W/ one microconvex probe of MC3-7S2
- 23 -
Operator Manual
3.2 Probe Specifications The following probes are optional except C2-5S6 probe. Angle/ PN°
Model
Frequency Width
C2-5S4 171093
2.5/3.0/3.5/5.0
80°
L5-10S5 5.0/6.0/7.5/10.0
50mm
EV3-7S1 3.5/4.0/5.0/6.5
135°
MC3-7S1 3.5/4.0/5.0/6.5
130°
C2-5S6 2.5/3.0/3.5/5.0
70°
MC2-5S2 2.5/3.0/3.5/5.0
110°
MC3-7S2 3.5/4.0/5.0/6.5
110°
C3-7S4 3.5/4.0/5.0/6.5
90°
ER5-9SB 5.0/6.5/7.5/9.0
60mm
L3-7S5 3.5/4.0/5.0/6.5
50mm
LO5-12S1 5.0/7.5/10.0/12.0
1mm
1mm
(depth<60mm)
(depth<60mm)
3mm
1mm
(depth<60mm)
(depth<60mm)
3mm
1mm
(depth<60mm)
(depth<60mm)
4mm
2mm
Abdominal,
(depth<80mm)
(depth<80mm)
OB/GYN
4mm
2mm
(depth<80mm)
(depth<80mm)
3mm
1mm
Pediatric
(depth<60mm)
(depth<60mm)
cardiology
3mm
1mm
Pediatrics/
(depth<60mm)
(depth<60mm)
Abdominal
1mm
1mm
(depth<40mm)
(depth<40mm)
3mm
1mm
Pediatric
(depth<60mm)
(depth<60mm)
Small parts
28mm
1mm
1mm
Intra-
(depth<40mm)
(depth<40mm)
operative
Small Part
Gynecology
Pediatrics
Cardiology
Transrectal
110mm
Linear
171123
OB/GYN
110mm
Biplane
171042
(depth<80mm)
140mm
Convex
171131
(depth<80mm)
120mm
Microconvex
171107
Abdominal,
170mm
Microconvex
171174
2mm
220mm
Convex
171166
4mm
Application
120mm
Microconvex
171026
resolution
120mm
Endovaginal
171050
resolution
90mm
Linear
171069
Longitudinal
220mm
Convex
171115
Transverse Depth
90mm
Linear
- 24 -
Operator Manual
4. INSTALLATION AND VERIFICATION 4.1 Preparations before turning on the system Please refer to 5.1. 4.2 Inspection after power on a.
The keys on the front panel light up within three seconds after the system switches on.
b.
Make sure that the fan on the rear panel is running correctly.
4.3 Performance verification The performance verification can be done by a professional doctor or service engineer. The verification includes: a.
Display model: B-mode, duplex B-mode (left and right real-time image), B/M-mode and M-mode
b.
Focus: N, M, F1, F2, image display multiple, shift up/down under ZOOM
c.
To check up if the numeral/character key is working by inputting ID or press COMMENT key etc.
d.
Confirm the measurement of distance and area, etc working properly.
- 25 -
Operator Manual
5. OPERATION 5.1 Preparation before turning on the system
● Cord connection a. Connect one end of the additional ground connector to the ground terminal on the real panel of the main unit and the other end to a reliable grounding device. b. Connect the probe to the probe socket on the rear panel and lock it securely. (Please refer to Fig 5-1.) c. Please confirm that the power switch is off. d. Connect the Power Cord (refer to Fig. 5-2).
● Grounding wire and power cord check-up Make sure the grounding wire grounded properly and there is no any abnormality or shedding of isolation cover of both wires. In order to avoid danger, special attention should be paid to these wires each time before use.
● Consumables a. Ultrasound Jelly For applying to the region of a patient’s body to be examined. b. Tissue Paper For removing and cleaning ultrasound jelly away from the patient and the probe head after examination. c. Recorder (Option)
- 26 -
Operator Manual
L5-10S5
Fig. 5-1 Connect of Probe
Fig. 5-2 Connect of power cord
- 27 -
Operator Manual
5.2 Operation Procedures after installation of the equipment
● Turn on Power Supply Turn on the power switch on the front panel, the backlit keyboard lights up within 3 seconds. The monitor starts to work after 30 seconds. Automatically the system is initially set to frozen state after power on, press
key or footswitch to
unfreeze the screen.
● Initial setting upon turning on the power supply is as follows: Item
State
Freeze
Image is set to frozen state.
Examination Mode
B-mode
ZOOM
×1.0
FOCUS
M,F1
Enhance
1
Grey scale calibration γ
0
Frame correlation CCOR 2 Orientation of Probe
● Unfreeze the state Press
key or footswitch to unfreeze the screen to begin scanning.
● Preliminary setting of GAIN control Set the GAIN, TGC controls nearly at the middle of the respective tuning ranges. 5.3 Image Depiction
● Image Depiction a. Apply sufficient amount of ultrasonic jelly to the patient’s body region to be examined and the front probe surface. - 28 -
Operator Manual
NOTE If air enters between the patient body surface and the transducer place during examination, a dark spot will appear in the image. In this case, re-apply the ultrasound gel.
b. When the probe is placed on the examination region, a real-time image will immediately appear on the TV monitor screen. The orientation of the probe and the corresponding image on the screen change according to the “left/right reverse” as shown in Fig. 5-3. c. When a satisfied image is acquired on the TV monitor, press
key or
footswitch to freeze it.
● Fine adjustment of GAIN and TGC It is necessary to adjust the gain setting according to the shape of the patient and different organ to be examined. When adjusting, please refer to the following instructions. The upper portion of an image depicting the region near the body surface is too white. (near gain is too high)
Move the near field TGC sliding to the left.
The lower portion of an image depicting the inner body is too dark. (far gain is low)
Move the far field TGC sliding to the right.
Too many fine echoes on the image (the full image shows white)
Anti-clockwise turn the GAIN control
● Split the screen - 29 -
Operator Manual
Fig. 5-3 Image Display in two-half image
a. Press
key in unfrozen B-mode state. The B-mode image is now
displayed on the left half of the screen, and the right half of the screen is blacked. A mark “▲” (real-time mark) also appear under the real-time B-mode image. Press down
key. The real time B-mode image appears on the
right half screen with the mark “▲”, and the image on the left side will freeze. Both image on the left and right sides will be frozen when
key is
pressed. And a freeze mark “F” will be displayed on the lower left side of the screen. b. Setting a Body Mark A body mark can be set in the image with a “▲” mark. c. Freeze Release The freeze state can be released only for the image with a “▲” mark.
● Description of M-mode and B/M-mode Image a. Depiction of M-mode Image Under unfrozen state, M-mode measurement can be done by pressing the key and entered the M-mode image. (Fig. 5-4) - 30 -
Operator Manual
Fig. 5-4
M-mode image
b. B/M-mode image display Under unfrozen state, press down
key to enter into B/M-mode
image. The real-time B-mode image is displayed on the left half of the screen while a M-mode image on the right half. The position of the sampling line of M-mode can be moved with trackball.
c. A Sweep Speed Selected for M-mode Image Four sweep speed ranges including 1s/f, 2s/f, 4s/f and 8s/f can be selected by pressing When
key. key or foot switch is pressed, the freeze mark “F” is displayed,
but the M-mode image will not freeze until the last frame is swept. (See Fig.5-5)
- 31 -
Operator Manual
Fig. 5-5 B/M image
● Zooming Operation The image display magnification can be changed by press
key in
the unfrozen state.
Fig. 5-6
Scroll of an Image
● Scroll of an Image In an unfrozen single B-mode and magnification factor is >1.0, by pressing key, the display depth can be changed. The image is vertically shifted up or down 2mm by each press. (See Fig. 5-6).
● To change over the enhancement extent, γ calibration curve, Frame Correlation, - 32 -
Operator Manual
Left/right, positive/negative, up/down reverse, press down
to select the
.
item desired and modify it by pressing
5.4 Character input and measurement operation
● There are two ways for inputting the patient’s information. 1) Input a patient’s detail information (NAME, ID, Age and so on). a. Press
key and move the cursor to “EDIT” in the first item of “PATIENT
INFO”. And then press
to enter into the submenu “PATIENT
INFORMATION”. b. New patient Input: To decide whether to clear the current gestation measurement data (BPD, HC, FL, AC), move the cursor to “YES” or “NO”, then press
key. Select “YES” to
delete the data, “NO” is to keep the data. Usually select “YES”. Select “NO” only when correcting AGE and LMP (see c and d) but not gestation data. c. Name and ID Input: In the input box “[
]”, press letter key, numeral key to input maximum of 9
characters of NAME and 8 characters of ID. d.
Age Input:
In the input box “[ e.
]”, maximum of 3 numbers can be inputted at Age.
LMP Input:
Input the first day of the last menstrual period (year, month and day) in the input box “[
]” by numeral keys. Any number should be inputted in two digits like “01”
for January.
NOTE The cursor will remain at the same place if the inputted date is invalid.
f. Move the cursor to “OK” and press - 33 -
key to save the inputted information
Operator Manual
and exit. Move the cursor to “CLEAR” and press
to clear the patient’s
information and be ready for re-input. Move the cursor to “CANC” and press to abort the inputted information and exit.
2) Input the brief information of the patient (ID) a. Press
key and move the cursor. Press
key after inputting the
character at the position of cursor. key to confirm and exit after finishing inputting.
b. Press
● Date Input a.
Press Edit box [
key to enter the SET interface and move the cursor to /
/
] of the third item “D/T”. Input the date and time as
the format YYYY/MM/DD HH in the prompt box. b.
Move the cursor to “EXIT” and press
key to confirm and exit the
SET interface.
● Annotation Input a. Press
key. A cursor will appear at the center of the screen. Move
the cursor to a desired place by trackball to input character or number. b. Press
key again to exit. The cursor will disappear but the
comment will remain on the screen. (See Fig. 5-7)
- 34 -
Operator Manual
Fig. 5-7
Annotation Input
● Hospital name input a. Press
key to enter the main SET interface. Move the cursor to the
prompt box “[ ]” of the second item “HOSPITAL NAME” to input hospital name. b. Move the cursor to “EXIT” and press down
key to exit SET
interface.
● Distance Measurement To measure the distance between any two points in the image. a. Press
key. A cursor of “+” appear at the center of screen,
simultaneously “D” and “MM” appear at the region of character. By operating the trackball, move the cross mark “+” to a desired place.
b. Press
key to set the cross mark “+” at the first measuring point
desired. Operate the trackball to move the cursor “+” to the second point while the distance between these two points appears at the DIST region.
c. Press
key to fix the “+”. In case of a distance measurement in a
B-mode image, the distance between the two points is displayed in the - 35 -
Operator Manual
image. (See Fig. 5-8) After completion of the operation c, the distance measurement can be repeatedly done by repeating the above operations.
Fig. 5-8 Distance Measurement
● Area and Circumference Measurement (AREA) The area and circumference of a selected portion of a tomographic image displayed can be measured in the frozen state. a. Press
key, a menu will display. Select AREAT (tracing the edge of
the measured area with trackball) or AREAE(measuring the area with
ellipse method)and press down
key to confirm. A cross mark “+”
display at the center of the image while “C MM” appear at the character region. Move the cross mark “+” with trackball to a portion where measurement is going to be done.
b. When AREAT is selected. Press
key to set the initial point. By
operating the trackball, the trace of “+” mark having been moved is displayed as a solid line. The length of this trace is the circumference.
- 36 -
Operator Manual
c. Press
key, and an area will be displayed. If an object area has not
yet been traced, there will be a line between the start and stop points, and an area and circumference are displayed. After completion of the operation of (c) above, it can be started again as described in (a). By repeating the above operation, measurement can be repeated as desired. And the measured value will be renewed.
NOTE If the traces intersect each other, no correct area and circumference is measured.
Fig. 5-9
Area and Circumference measurement
Fig. 5-9 shows you the area and circumference measurement with the ellipse method (AREAE). Ellipse method is to measure the object area or circumference with an approximate ellipse. Move the first “+” to the top point of major axis or minor axis of the measured ellipse, press ENTER key to confirm. Operate the trackball to draw out the second point and then press ENTER again to confirm the major or minor axis. Moving the trackball again can change the length of the other axis.
- 37 -
Operator Manual
DL:Diameter of Major axis DS:Diameter of Minor axis C:Circumference A:Area
A=
π 4
C=
π
[ DL + DS +
4 ( DL • DS )
1 ( DL2 + DS 2 ) ] 2
● Measurement of Heart Rate (HR) Heart rate can be measured in frozen state of M-mode or B/M-mode.
a. Press
key. Highlight “HR” and press
key. A small “+” mark is
displayed at the center of an image, and “BEAT NUM: 2HR” appears beneath the image. By operating the trackball, set the “+” mark at the point of heartbeats desired to measure.
b. Press
key. The large “+” is fixed, and by operating the trackball,
move the small “+” mark to make the interval be two heartbeats.
c. Press
key. The heart rate between the interval of two heartbeats is
obtained and displayed in the heart rate displayed region. (See Fig. 5-10) Measurement can be repeated. However, the previously measured value will be replaced by a new value.
NOTE The numeral key 1~9 can be pressed to change the number of cardiac cycles while measuring.
- 38 -
Operator Manual
Fig. 5-10
Heart Rate Measurement
● Measurement of Time (TIME) Time between any two points in the image can be measured in frozen state under M or B/-mode.
a. Press
key. Highlight “TIME” in the menu and press
small “+” mark will appear at the center of the image and “T:
key. A SEC” in
the character area. By operating the trackball, move the “+” to the first measured point. (See Fig. 5-11)
NOTE T represents the time span between two points.
b. Press
key to fix the “+” mark on the image. By operating the
trackball, move the “+” mark to another point to be measured. The time between two points are displayed in time display area
c. .Press
key to fix the “+” mark. Time between two points is displayed
in time display are. (See Fig. 5-11) Repeat the above operation after (c) is finished. Measurement can be taken - 39 -
Operator Manual
repeatedly, but the previous value will be replaced by a new measure value.
Fig. 5-11
Time Measurement
● Measurement of Slope (SLOPE) Speed between any two points in the image can be measured in frozen state under M or B/M-mode.
a. Press
key. Highlight “SLOPE” in the menu and press
key. A
small “+” mark will appear at the center of the image and “H:MM S: MM/S” is in the character area. By operating the trackball, set the “+” at the point to be measured.
NOTE H: The depth difference between two points S: The slope of two points
b. Press
key to fix the “+” mark in the image. By operating the trackball,
move the “+” to another point to be measured. Speed between two points is displayed in speed display area.
c. Press
key to fix the “+” mark. Speed between two points is displayed
- 40 -
Operator Manual
in time display area. (See Fig. 5-12) Repeat above operation after (c) is finished. Measurement can be taken repeatedly, but previous value will be replaced by new measured value.
Fig. 5-12
Slope Measurement
● Measurement of Mitral Valve (MV) In M-mode or B/M-mode frozen state, the following items can be measured and calculated based on the coordinates of each of the points A to F (except B) in the image.
Item
a. Press
Display
E-wave amplitude
CE
Distance DE
DE
A-wave amplitude
CA
DE gradient
DE
EF gradient
EF
A wave/E wave
A/E
key. Highlight “MV” and press
key. MV measurement
schema will be displayed at the low part of left side of image while “+” mark at - 41 -
Operator Manual
the center of the image. By operating the trackball, move the cursor to the corresponding point A.
Fig. 5-13
b. Press
MV Measurement
key to confirm A point. The “+” mark will be fixed on the image,
and point B and C will be displayed. By operating the trackball, move the “+” mark to points C, D, E and F on the M-mode image in the same way. The measurement and calculation result of mitral valve are displayed. (See Fig. 5-13)
●
The measurement of Left Ventricle and Aorta can be carried out with the
following prompt schema.
● Measurement of Volume-Biplane method D3 D1
D2
Fig. 5-14
- 42 -
Operator Manual
Volume measurement can be conducted in a duplex B-mode frozen image. Volume can be calculated and displayed according to perpendicular D1, D2 and D3 value calculated in a solid as shown in Fig. 5-14. Volume can be calculated by the following equation: Volume = π/6 × D1 × D2 × D3 a. Display two images on the screen and determine a biggest plane (L plane) of the solid, and freeze it. b. Obtain a plane perpendicular to L plane and freeze it. (Shown as R plane in Fig. 5-15).
D3 D1
D2
R
L
Fig. 5-15
c.
Press
key. Highlight “VOL-B” and press
key. A mark “+”
will display at the center of the image and “D1 MM”, “D2 MM”, “D3 MM” and “VOL-CC” be displayed in the character area. Move trackball and set the “+” mark at the beginning point of major axis of L (R) plane.
d. Press
key to fix the beginning point. Operating the trackball, move
the cursor to the terminal point of major axis. - 43 -
Operator Manual
e. Press f.
key to fix mark “+”. The distance of long axis D1 is achieved.
The distance of perpendicular D2 and D3 in the R plane can be obtained by the same way of measuring D1.
g. The value of volume will be display in “VOL CC” column after pressing
key to finish D3 measurement.
● Measurement of area- Ellipse method a. Press
key. Highlight “VOL-E” and press
key. A “+” will be
displayed at the center of image and “DL MM DS MM VOL CC” simultaneously in the character area. V =
π/6 × DL × DS2
b. The rest of measurement is the same as the measurement of area method.
● Measurement of Angle For gynecology, the measurement of angle is mainly for fetal hip-joint angle. It is available in the frozen state of B or B/M mode.
a. Press
key. Select “ANGLE” in the menu and press
key. A small
“+” appear at the center of the image. At the same time “α:°;β:°” is displayed in the status bar.
b. Move the “+” to the initial point of basic line “B” and press down
Then move the “+” mark to the end point of basic line “A”. Press
key.
key. A
baseline section BA will be displayed on the screen. c. Fix the initial point and the end point in the same way to determine the first - 44 -