Service Manual
44 Pages
Preview
Page 1
SERVICE manual
AS5000 SERVICE MANUAL
TABLE OF CONTENTS
Chapter 1 – Getting Started... 1 Introduction... 1 Customer Support... 1 Warnings & Cautions... 1 System Setup... 2 System Navigation... 3 Therapy Screens... 3 Chapter 2 – Components... 5 Hydraulic Components... 5 Electronic Components... 5 Chapter 3 - Theory of Operation... 6 Main Hydraulic Circuits... 6 Ancillary Hydraulic Circuits... 7 Electronic Control System... 7 Chapter 4 - Hypothermia Settings... 7 Maintenance Schedule... 7 Inspect Connectors and Cables... 7 Clean the Condenser... 7 Drain the Reservoir... 7 Refill... 7 Inspect Screen Protector... 7 Calibration... 7 Chapter 5 - Advanced Setup... 8 Alarms... 8 Main Safety Alarms... 8 Non-Recoverable Alarms... 8 Recoverable Alarms... 8 Alerts... 8 Alarm and Alert Listing... 9
Chapter 6 – Troubleshooting... 14 6.1 Diagnostic Screen... 14 6.2 Event Log... 14 6.3 General Troubleshooting Guide... 14 6.3.1 Device Not Controlling Patient Temperature... 14 6.3.2 Patient Does Not Cool... 14 6.3.1 Patient Does Not Warm... 14 6.3.3 Device Will Not Fill... 15 6.3.4 Control Panel Will Not Power On... 15 6.3.5 Low Flow Alarm ... 15 6.4 Troubleshooting Assistance... 15 Chapter 7 – Component Replacement... 15 7.1 Tools Required... 21 7.2 Drain the control module ... 21 7.3 Remove Back Panel... 22 7.4 Remove Outer shell... 22 7.5 Removing / Replacing Circuit Cards from card cage ... 23 7.6 Removing internal components from Chiller Frame... 25 7.7 Separating the Internal Components into Two Sections... 26 7.8 Replacing Mixing Pump... 27 7.9 Replacing Circulation Pump... 28 7.10 Replacing Chiller Pump... 29 7.11 Replacing Heater... 30 7.12 Replacing Flowmeter... 31 7.13 Replacing Control Panel... 32 7.14 Replacing Chiller ... 32 7.15 Replacing Tank Temperature Sensor Harness... 33 7.16 Replacing Manifold Harness... 33 7.17 Replacing Inlet/Outlet Manifold ... 34 7.18 Replacing Level Sensor... 35 7.19 Replacing Power Module ... 35 7.20 Replacing Mains Voltage Circuit Card... 36 7.21 Replacing the AC Breaker Harness... 36 Chapter 8 – Calibration / Calibration Check ... 37 8.1 Calibration Test Unit... 37 8.2 When to Perform a Calibration or Calibration Check... 37 8.3 Performing a Calibration ... 37 Appendix A - Arctic Sun 5000 Specifications... 38 Appendix B - Spare Parts and Accessories... 39 Appendix C - Temperature Cables... 40 Appendix D - Shipping... 41
2
ENGLISH
Chapter 1 – Getting Started Introduction
The Arctic Sun Temperature Management System is a device that monitors and controls patient temperature within a range of 32°C to 38.5°C (89.6°F to 101.3°F). The system consists of the Model 5000 and disposable ArcticGel ™ Pads. The Arctic Sun system delivers temperature-controlled water ranging between 4°C and 42°C (39.2°F and 107.6°F) through the pads adhered to the patient’s skin. This results in highly efficient conductive heat transfer between the water and the patient. The Arctic Sun Model 5000 was designed with ease of service in mind and incorporates several features that will assist clinical engineers in maintaining its performance. These features include: negative pressure flow that eliminates water leaks, real-time air leak detection, and performance monitoring. It also includes access to alarm logs and past system case data, real-time diagnostic information, simplified calibration and maintenance, and modular construction allowing for simple repair if required.
Customer Support USA Headquarters Medivance, Inc. 321 South Taylor Avenue, Suite 200 Louisville, Colorado 80027 USA Phone: 303 926 1917 Toll Free: 877 267 2314 Fax: 720 880 5400 [email protected] EC REP Bard Limited Forest House Brighton Road Crawley, West Sussex UK RH 11 9BP For assistance outside the US and Germany, contact your Arctic Sun Model 5000 Distributor.
Indications for Use
The Arctic Sun Temperature Management System is intended for monitoring and controlling patient temperature.
Warnings and Cautions Warnings • Do not use the Arctic Sun in the presence of flammable agents because an explosion and/or fire may result. • There are hazardous moving parts and a risk of electrical shock. There are no user-serviceable parts inside. Do not remove covers. Refer servicing to qualified personnel. • Power cord has a hospital-grade plug. Grounding reliability can only be achieved when connected to an equivalent receptacle marked “hospital use” or “hospital grade.” • When using the Arctic Sun, note that all other thermal conductive systems, such as water blankets and water gels, in use while warming or cooling with the Arctic Sun may actually alter or interfere with patient temperature control. Cautions • See Operator’s Manual for complete list of Cautions prior to using the Arctic Sun Temperature Management System to treat a patient. This is not an exhaustive list and is not intended to replace the Operator’s Manual. • This product is to be used by or under the supervision of trained, qualified medical personnel. • Federal law (USA) restricts this device to sale by or on the order of a physician. • Use only distilled or sterile water. The use of other fluids will damage the Arctic Sun system. • When moving the Arctic Sun always use the handle to lift the controller over an obstacle to avoid over balancing. • The patient’s bed surface should be located between 30 and 60 inches (75 cm and 150 cm) above the floor to ensure proper flow and minimize risk of leaks. • The clinician is responsible to determine the appropriateness of custom parameters. When the system is powered off, all changes to parameters will revert to the default unless the new settings have been saved as new defaults in the Advanced Setup screen. • When using Manual Control, the operator must continuously monitor patient temperature and adjust the temperature of the water flowing through the pads accordingly. The Arctic Sun will not control patient temperature in Manual Control. • Due to the system’s high efficiency, Manual Control is not recommended for long-duration use. The operator is advised to use the automatic therapy modes (e.g. Control Patient, Cool Patient, Rewarm Patient) for automatic patient temperature monitoring and control. • The Arctic Sun will monitor and control patient core temperature based on the temperature probe attached to the system. The clinician is responsible for correctly placing the temperature probe and verifying the accuracy and placement of the patient probe at the start of the procedure. • Medivance recommends measuring patient temperature from a second site to verify patient temperature. Medivance recommends the use of a second patient temperature probe connected to the Arctic Sun Temperature 2 input, as use of the second probe allows the unit to provide continuous monitoring and safety alarm features. Alternatively, patient temperature may be verified periodically with independent instrumentation. • The displayed temperature graph is for general information purposes only and is not intended to replace standard medical record documentation for use in therapy decisions. • In Stop Mode, patient temperature will not be controlled and alarms are not enabled. Patient temperature may increase or decrease with the Arctic Sun in Stop Mode. • Carefully observe the system for air leaks before and during use. If the pads fail to prime or a significant continuous air leak is observed in the pad return line, check connections. If needed, replace the leaking pad. Leakage may result in lower flow rates and potentially decrease the 1
AS5000 SERVICE MANUAL
system’s performance. • • •
• •
•
The Arctic Sun Temperature Management System is for use only with ArcticGel Pads. Do not allow circulating water to contaminate the sterile field when patient lines are disconnected. The rate of temperature change and potentially the final achievable patient temperature are affected by many factors. Treatment application, monitoring, and results are the responsibility of the attending physician. If the patient does not reach target temperature in a reasonable time or the patient is not able to be maintained at the target temperature, an extended period of skin exposure to low or high water temperatures may increase the risk for skin injury. Ensure that pad sizing / coverage and custom parameter settings are correct for the patient and treatment goals; environmental factors such as excessively hot rooms, heat lamps, and heated nebulizers are eliminated; water flow is greater than or equal to 2.3 liters per minute’ the primary patient temperature probe is properly located; and patient shivering is controlled. Otherwise, consider increasing minimum water temperature, modifying target temperature to an attainable setting, or discontinuing treatment. The USB data port is to be used only with a stand-alone USB flash drive. Do not connect to another mains-powered device during patient treatment. Users should not use cleaning or decontamination methods different from those recommended by the manufacturer without first checking with the manufacturer that the proposed methods will not damage the equipment. Do not use bleach (sodium hypochlorite) as it may damage the system. Medivance will not be responsible for patient safety or equipment performance if the procedures to operate, maintain, modify, or service the Medivance Arctic Sun are other than those specified by Medivance.
Power Switch
Patient Temp 1
Patient Temp Out
Strain Relief Patient Temp 2 Patient Temp Cable
Fluid Delivery Line
Fill Tube Parking Fill Tube/Port
Power Cord Equipotential Stud
Drain Ports Air Filter
System Setup Unpack 1) Unpack the Arctic Sun Control Module and accessories. 2) Allow the control module to remain upright for at least 2 hours prior to completing the installation and setup procedure in order to allow the chiller oil to settle. Damage to the chiller compressor may result otherwise. 3) Connect the Fluid Delivery Line, Patient Temp 1 cable, Patient Temp 2 cable (optional) and Fill Tube to the back of the control module. 4) Plug the Power Cord into a hospital-grade wall outlet and power On. Position Arctic Sun so that access to the power cord is not restricted. The control module will automatically go through a brief self-test of the independent safety alarms.
2
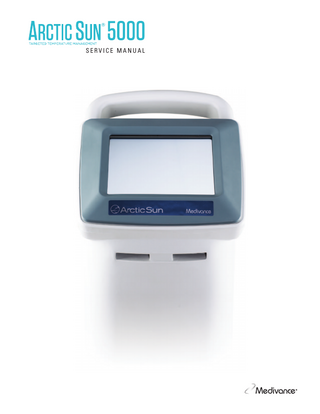
Fig. 1-1 Arctic Sun Model 5000 Control Module
ENGLISH
System Navigation
Therapy Screens C
G D
P
F E
L
H
J
M N
I
K
A
O
Q
R

Fig. 1-4 Normothermia Therapy screen
Fig. 1-2 Start-up screen with training module A training module including a section for Clinical Engineering (Setup and Maintenance) is available from the start-up screen.
C
G D
P
F
H
J
E
I
L M N
K
O
A
B
R
Q
Fig. 1-5 Hypothermia Therapy screen Fig. 1-3 Therapy Selection screen When the self-test is complete, the Patient Therapy Selection screen will appear on the control panel.
The following information is displayed and functions are available from the Normothermia and Hypothermia therapy screens. A Cool Patient window (Hypothermia screen) Control Patient window (Normothermia screen) B Rewarm Patient window (Hypothermia screen) C Patient Monitoring area D Patient Temperature E Patient Temperature 2 (if enabled) F Patient Temperature Trend Indicator G System Monitoring area H Water Temperature I Water Flow Rate J Reservoir Water Level K Therapy Graph L Manual Control button (if enabled) M Empty Pads button N Fill Reservoir button O Therapy Selection / Screen Lock button P Temperature Units button (if enabled) Q Stop button R Help button
3
AS5000 SERVICE MANUAL
Fill Reservoir • Four liters of sterile or distilled water are required to fill the reservoir at initial installation. • Prior to filling, add one vial of Arctic Sun Cleaning Solution to the water. • From the Patient Therapy Selection screen, press either the Normothermia or Hypothermia button, under the New Patient heading. • From the Normothermia or Hypothermia therapy screen, press the Fill Reservoir button. • The Fill Reservoir screen will appear. Follow the directions on the screen.
Fig 1-8 Control Patient - Adjust panel (appears after user presses Adjust on Control Patient panel)
Fig. 1-6 Fill Reservoir screen Manual Control Manual Control allows the user to directly set the water temperature in the Circulating Tank. It does not require a patient temperature probe to be connected and therefore can be used for troubleshooting and diagnostic purposes.
Fig 1-9 Normothermia Settings screen
If Manual Control has been disabled it will need to be enabled. To enable Manual Control, from the Normothermia Therapy screen press the Adjust button located at the bottom center of the screen. From the Control PatientAdjust screen, press the More button. This will display the Normothermia Settings screen (Fig. 1-9). Press the adjust button for manual control. Select the desired water temperature and time. Press Save. Enabling Manual Control will not automatically change the default settings. When enabled, the Manual Control button is visible in the upper right hand corner of the Therapy screen. Pressing the Manual Control button allows the user to change the water target and duration, and to start Manual Control.
Fig. 1-10 Manual Control panel (appears after user presses Manual Control on main Normothermia or Hypothermia Screen)
Functional Verification Certificates of Conformance for calibration, performance, and electrical safety tests are included with the shipment of each Arctic Sun Model 5000. To verify the system will heat and cool properly, perform the following:
Fig 1-7 Control Patient panel from Normothermia screen
4
1) Power On the system. 2) From the Patient Therapy Selection screen, press the Hypothermia button to display the Hypothermia therapy screen. 3) From the Hypothermia therapy screen, press the Manual Control button to open the Manual Control window. 4) Set the Manual Control water target temperature to 40°C and the duration to 30 minutes. 5) Press the Start button to initiate Manual Control. Allow at least three minutes for the system to stabilize. Monitor the flow rate and verify at least 1.5 liters/minute. 6) Monitor the water temperature in the System status area on the Hypothermia therapy screen. Verify that the water temperature increases to at least 30°C. 7) Without pressing Stop, set the Manual Control water target temperature to 4°C and the duration to 30 minutes. Verify that the water temperature drops to at least 6°C. 8) Press the Stop button to stop Manual Control . Press the Cancel button to close the Manual Control window. Power Off the control module.
ENGLISH
Chapter 2 Components Hydraulic Components Fluid Delivery Line – reusable dual lumen tubing that connects the Control Module to the ArcticGel Pads. Pumps Circulation Pump – pumps water from the Circulation Tank through the ArcticGel Pads. Mixing Pump – Transfers cold water from the Chiller Tank to the Circulation Tank. Chiller Pump – continuously circulates the water from the Chiller Tank through the chiller’s evaporator. Tanks Circulation Tank – contains temperature-controlled water that supplies the ActicGel Pads. Chiller Tank – contains water that is maintained at approximately 4°C. Supply Tank – contains water that is used to replenish the Circulation Tank when the ArcticGel Pads are filled. Sensors Outlet Monitor Temperature - T1 – located within the Circulation Tank. Used to monitor the temperature of water that supplies the ArcticGel Pads. Outlet Control Temperature - T2 – located within the Circulation Tank. Used to control the temperature of water that supplies the ArcticGel Pads. Inlet Temperature – T3 – located within the Inlet/Outlet Manifold. Monitors the temperature of water returning from the ArcticGel Pads. Chiller Temperature – T4 – located within the Chiller Tank. Used to control temperature of water in the Chiller Tank. Pressure Sensor – located within the Inlet/Outlet Manifold. Used to maintain a constant negative pressure within the ArcticGel Pads by controlling the speed of the Circulation Pump. Flow Sensor – located at the outlet of the Circulation Pump. Monitors the flow rate in the Circulation Circuit.
Electronic Components Cables – power cord and temperature cables. Additional adapter cables are available to purchase for use with different manufacturers’ temperature probes. In addition, temperature out cables can be purchased to allow output of patient temperature to an external monitor. Please refer to the Temperature Cables in Appendix C. The Mains Voltage Circuit Card – located below the Supply Tank. Includes electromechanical relays to control mains power to the chiller and heater. Also includes solid state relays to control power to each of the four heating elements. Power Module – located next to the Mains Voltage Circuit Card. Converts AC mains voltage to 24 VDC. Power Circuit Card – located within the Card Cage. Converts 24 VDC to lower DC voltages used by the system. The Processor Circuit Card – located within the Card Cage. Includes both the control and monitor microprocessors and associated circuitry, including nonvolatile memory. The Isolation Circuit Card – located within the Card Cage. Provides electrical isolation for the Patient Temperature circuits to a level of 1500V. Also provides a simulated YSI 400 compatible patient temperature signal (Temperature Out) to an external monitor. The Input/Output Circuit Card – located within the Card Cage. Contains circuits that monitor water temperature, pressure and flow. Provides control for Circulation and Mixing Pumps, valves, and Chiller. The Backplane Circuit Card – located at the back of the Card Cage. Interconnects the circuit cards within the card cage. Control Panel – located at the top of the Control Module. Consists of touch screen, microprocessor, hard drive, USB interface, and USBpowered speaker.
Valves Conditioning Valve – located within the Inlet/Outlet Manifold. When open, allows water to circulate internally when priming or preconditioning. Fill Valve – located within the Inlet/Outlet Manifold. When open, allows the Circulation Pump to draw water into the system. Vent Valve – located within the Inlet/Outlet Manifold. When open, allows air to supply ArcticGel Pads and the displaced water to be returned to the Supply Tank. Heater – located in the Circulation Tank. The heater consists of 4 heating rods. The heating element within each rod is in series with a non-resettable thermal fuse, which protects each rod against an overtemperature condition. Inlet/Outlet Manifold – connects to Fluid Delivery Line and Fill Tube. Contains the valves, the inlet temperature sensor, and the pressure sensor. Chiller – a refrigeration unit that continuously cools the evaporator.
5
AS5000 SERVICE MANUAL
VENT LINE
INLET/OUTLET MANIFOLD VV
CHILLER TANK T4
CIRCULATION TANK T1 HEATER T2
SUPPLY TANK
BV
BYPASS LINE
FV
FILL LINE
T3 P1
FLOW METER
CHILLER PUMP
MIXING PUMP
FLUID DELIVEY DELIVERY LINE
CIRCULATION PUMP
CHILLER CIRCUIT
CIRCULATING CIRCUIT VALVE VALVE
DRAIN PORTS KEY EVAPORATOR
AIR FLOW
CHILLER
ARCTICGEL PAD AIR FLOW
VV BV FV P1 T1 T2 T3 T4
Vent Valve Bypass Valve Fill Valve Pressure Sensor Outlet Monitor Temperature Outlet Control Temperature Inlet Temperature Chiller Temperature
Fig. 2-1 The Hydraulic Schematic
Chapter 3 Theory of Operation Main Hydraulic Circuits
Circulation Circuit - circulates temperature-controlled water from the Circulation Tank through the ArcticGel Pads and returns to the inlet port of the Circulation Pump. The speed of the Circulation Pump varies to maintain -7.0 PSI (0.5 bar) at the Pressure Sensor. Since water in the ArcticGel Pads flows under negative pressure, a break in the circuit, such as a pad being punctured or disconnected, will result in air leaking into the system instead of water leaking out. Air in the system is removed in the Circulation Tank and exits through the tank vent. When warmer water is required, the heaters located in the Circulation Tank are energized. The heater power is dependent upon the flow rate through the circulation tank and the difference between the water temperature and the commanded water temperature. The heater
6
has four elements that are cycled on sequentially to minimize power fluctuations in the mains supply. Chiller Circuit – maintains the water in the Chiller Tank at approximately 4⁰C. Water is gravity-fed into the centrifugal Chiller Pump and is then pumped through the chiller’s evaporator and returned to the Chiller Tank. The refrigerant system’s cooling capacity is controlled by a refrigerant valve. When the Chiller Circuit approaches 4⁰C, the cycling of the valve can be heard. Mixing Circuit – when cold water is required to cool the Circulation Circuit, the Mixing Pump pulls water from the Circulation Tank and meters it into the Chiller Tank. Cold water overflows from the Chiller Tank into the Circulation Tank. The speed of the mixing pump is dependent upon the flow rate through the circulation tank and the difference between the water temperature and the commanded water temperature.
ENGLISH
Ancillary Hydraulic Circuits
Filling - When filling, the Fill Valve is opened and water is drawn up through the valve by the Circulation Pump. Water returns through the Circulation Tank to the Supply Tank. Negative Pressure must be generated at the inlet of the Inlet/Outlet Manifold for filling to occur, therefore the Fluid Delivery Line must be attached. ArcticGel Pads should not be attached to the Fluid Delivery Line during filling. Preconditioning – The system can be programmed to precondition water prior to initiating therapy. In this mode, the Bypass Valve opens and allows temperature-controlled water to circulate internally to bring the Circulation Tank and Supply Tank water to a pre-programmed temperature. Empty Pads – To empty water from the ArcticGel Pads, the Vent Valve is opened, which enables air to enter the pads. Water is pulled from the pads by the Circulation Pump and returned through the Circulation Tank to the Supply Tank.
Electronic Control System
The electronic system consists of two independent subsystems: control and monitor. The control subsystem is responsible for delivering therapy to the patient. The monitor subsystem confirms the safe operation of the control subsystem. Each subsystem has an independent microprocessor, audio alarm, and both water and patient temperature sensing circuits. The control subsystem performs the following functions: • Command interpretation from the Control Panel • System information update to the Control Panel • Circulation Tank water temperature control (T2 & T3) • Circulation Pump speed control from pressure sensor (P1) • Patient temperature measurement (PT1) • Temperature Out signal generation • Chiller Tank water temperature control (T3) • Valve control (VV, BV and FV) • Chiller control The monitor subsystem performs the following functions: • Redundant command interpretation from Control Panel • Circulation Tank temperature monitoring (T1) • Patient temperature measurement (PT2) • Circulation Pump power interrupt control • Power Circuit Card voltage monitoring
Chapter 4 – Maintenance Maintenance Schedule Procedure
Interval
Clean external surfaces
As required
Inspect connectors and cables
6 months
Clean the condenser
6 months
Replenish Cleaning Solution
6 months
Inspect Screen Protector
6 months
Calibration
Every 2000 hours or 250 uses, whichever occurs first, as indicated by system display
Required accessories and supplies can be ordered separately. Refer to Appendix B for the Spare Parts and Service Items.
Clean the External Surfaces
Cleaning should include the exterior of the Control Module, Fluid Delivery Lines, Temperature Cables and the power cord. Clean visible contamination from the surfaces with a dampened cloth using a mild detergent. Rinse and dry thoroughly. Use a soft cloth dampened with disinfectant according to hospital protocol. Medivance has qualified and approves the use of the following types of disinfectants for exterior surfaces: sodium hypochlorite, isopropyl alcohol, and quaternary ammonium.
Inspect Connectors and Cables
Inspect the patient temperature cable(s) and power cord for integrity. Ensure temperature cables are properly strain relieved. Ensure power cord bracket is secure.
Clean the Condenser
Remove the back panel. Using a brush or a vacuum, gently remove dust from the grill of the condenser. Reinstall the back panel. Replenish Cleaning Solution Concentration
Replenish Cleaning Solution
While the system is powered off, connect the drain tube to the two drain ports on the back of the device. Place the other end of the drain tube into a container. Prior to filling, add one vial of Arctic Sun Cleaning Solution to water. Fill the unit as described in the Fill Reservoir section.
Inspect Screen Protector
The Control Panel’s touchscreen is supplied with a disposable screen protector. If it becomes damaged, it can be removed by lifting the edge and carefully peeling it from the screen. To ensure dust and particulates are removed, clean the touchscreen using isopropyl alcohol. Remove the blue liner from the screen protector. Then carefully apply the protector to the screen with the liner side down against the screen.
Calibration
To perform a calibration on the Arctic Sun Model 5000, press the Advanced Setup button on the Therapy Selection Screen. Press the Start button and follow the on-screen directions.
7
AS5000 SERVICE MANUAL
Chapter 5 – Alarms and Alerts The Arctic Sun safety system continually monitors the state of the device and the patient, and issues alarms or alerts to notify the user of conditions that may interfere with patient safety or system performance. There are two types of conditions: Alarms and Alerts. An Alarm notifies the user of a condition that may potentially pose an unsafe situation with respect to the patient or the device; an Alarm interrupts the procedure. An Alarm is a High Priority condition that requires immediate operator response. An Alert informs the user about patient and device status without interrupting the procedure. An Alert is a Medium Priority condition that requires prompt operator response. A list of Alarms and Alerts that the user might encounter appears at the end of this chapter.
Alarms
An Alarm is denoted by an audio signal that repeats every 10 seconds until the Alarm is cleared. The Alarm screen will appear displaying the alarm number, alarm title, a description of the problem or conditions that triggered the alarm, and solutions and instructions for troubleshooting and resolving the alarm condition.
Non-Recoverable Alarms
If an Alarm condition occurs that prevents proper use of the device or proper patient treatment (such as the five main safety alarms discussed above), the system is placed into Stop mode and will not allow therapy to continue. This type of Alarm is known as Non-Recoverable. If this situation occurs, cycle the device power (turn device Off then On). If the alarm recurs contact Medivance Customer Support.
Recoverable Alarms
Other Alarms that temporarily Stop the device until the user is able to correct the cause and clear the Alarm are classified as Recoverable. If the condition that initiated the alarm is not addressed and problem persists, the Alarm will recur. If a Recoverable Alarm occurs: 1) When an alarm is issued the device is placed into Stop mode. 2) Read the displayed instructions. 3) Note the Alarm number. 4) Press the Close button to clear the alarm. 5) Follow the instructions to correct the alarm condition. Perform the actions in the order listed until the alarm condition is resolved. 6) Once you have cleared the alarm, press the Start button in the therapy window to restart therapy. You will hear a tone and a voice stating, “Therapy Started.” Additionally, the active therapy window and the Arctic Sun icon will blink. 7) If the condition does not resolve, contact Medivance Customer Support.
Alerts
Alerts are denoted by an audio signal that repeats every 2 minutes. The Alert screen will appear, displaying the alert number, alert title, a description of the problem that triggered the alert, and solutions and instructions for troubleshooting and resolving the alert condition.
Fig. 5-1 Alarm screen
Main Safety Alarms
While there are multiple alarms and safety features in the Arctic Sun, there are five main safety alarms that will place the device into Stop mode until the condition is addressed. Alarm Specification High Patient Temperature 39.5 °C (103.1 °F) Low Patient Temperature 31.0 °C (87.8 °F) High Water Temperature 42.5 °C / 44 °C (108.5 °F / 111.2 °F) Low Water Temperature 3.0 °C / 3.5 °C (37.4 °F / 38.3 °F) System Self-Test Failure At device power ON Each time the Arctic Sun is powered On, a system self-test for the independent safety alarm is automatically run. This test simulates a “water high temperature” fault situation on both the primary and secondary water temperature sensors. Both the primary and secondary safety systems must respond to the fault and be verified by the opposing safety system. If either safety system fails to respond appropriately, either an alarm 80 or 81 will be issued. Contact Medivance Customer Support.
8
Fig. 5-2 Alert screen If an Alert occurs: 1) Read the displayed instructions. 2) Note the Alert number. 3) Press the Close button to clear the alert. 4) Follow the instructions to correct the alert condition. Perform the actions in the order listed until the alarm condition is resolved. If the condition does not resolve, contact Medivance Customer Support.
ENGLISH
Alarms and Alert Listing
The following table consists of a listing of the alarms and alerts that a user might observe during use of the Arctic Sun 5000. Text highlighted in yellow denotes an alert, while red denotes an alarm.
Alarm
Alert
Alarm/Alert
Message Displayed
Problem
01
Patient Line Open
The system is detecting that the fluid delivery line or patient line is open to air or has significant air in the line. The fluid pump is working at the expected speed but the flow rate is less than 1 liter per minute and the fluid pressure is less than -6 psi.
02
Low Flow
The flow rate is less than 50% of the maximum flow rate measured since the last power On or Empty Pads, or the flow rate is less than 300 ml/minute.
03
Water Reservoir Low
At power On or the end of the Empty Pads cycle or the Fill Reservoir cycle, the system fluid level sensors are detecting that the water reservoir is low. There is only enough water in the reservoir to run one patient therapy.
04
Water Reservoir Below Minimum
At the end of the Empty Pads cycle, the system fluid level sensors are detecting that the water reservoir is empty or below the minimum level required to operate the system.
05
Water Reservoir Empty
At power On or the end of the Empty Pads cycle, the system fluid level sensors are detecting that the water reservoir is empty or below the minimum level required to operate the system.
07
Empty Pads Not Complete
A significant amount of water was still being returned from pads at the end of the Empty Pads cycle.
08
Patient Temperature 1 high
The Patient Temperature 1 reading is above 39.5°C (103.1°F), and the water temperature is above 39.5°C (103.1°F), and the system is continuing to warm the patient when the system is in a patient control mode (e.g. Control Patient, Cool Patient or Rewarm Patient).
09
Patient Temperature 1 Above High Patient Alert
In Normothermia Therapy: The Patient Temperature 1 reading is above the High Patient Alert setting in Normothermia Settings. In Hypothermia Therapy: The Patient Temperature 1 reading is above the High Patient Alert setting in Hypothermia Settings.
10
Patient Temperature 1 Low
The Patient Temperature 1 reading is below 31°C (87.8°F), and the water temperature is below 31°C (87.8°F), and the system is continuing to cool the patient when the system is in a patient control mode (e.g. Control Patient, Cool Patient or Rewarm Patient).
11
Patient Temperature 1 Below Low Patient Alert
In Normothermia Therapy: The Patient Temperature 1 reading is below the Low Patient Alert setting in Normothermia Settings. In Hypothermia Therapy: The Patient Temperature 1 reading is below the Low Patient Alert setting in Hypothermia Settings.
12
Patient Temperature 1 High
The Patient Temperature 1 reading is above 39.5°C (103.1°F), and the water temperature is above 39.5°C (103.1°F) while in Manual Control mode. Patient temperature is not automatically controlled while in Manual Control Mode.
13
Patient Temperature 1 Low
The Patient Temperature 1 reading is below 31°C (87.8°F), and the water temperature is below 31°C (87.8°F) when the system is in Manual Control mode. Patient temperature is not automatically controlled while in Manual Control mode.
14
Patient Temperature 1 Probe Out of Range
Patient Temperature 1 probe is not detected, or the temperature reading is below of the lower limits of the display range (10 °C /50 °F) while in a patient control mode (e.g. Control Patient, Cool Patient or Rewarm Patient).
15
Unable to Obtain a Stable Patient Temperature
Patient temperature discontinuity. A significant change in the patient temperature reading for more than 10 minutes while in a patient control mode (e.g. Control Patient, Cool Patient or Rewarm Patient).
16
Patient Temperature 1 Probe Out of Range
Patient Temperature 1 probe is not detected, or the temperature reading is above the upper limit of the display range (44 °C/111.2 °F) while in a patient control mode (e.g. Control Patient, Cool Patient or Rewarm Patient). 9
AS5000 SERVICE MANUAL
17
Patient Temperature 1 Calibration Error
The system is unable to internally check the calibration of the Patient Temperature 1 channel within ± 1.0 °C while in a patient control mode (e.g. Control Patient, Cool Patient or Rewarm Patient).
18
Patient Temperature 1 Calibration Error
The system is unable to internally check the calibration of the Patient Temperature 1 channel within ± 1.0 °C when the system is in Manual Control mode.
19
Patient Temperature 1 Calibration Error
The system is unable to internally check the calibration of the Patient Temperature 1 channel within ± 1.0 °C while in a patient control mode (e.g. Control Patient, Cool Patient or Rewarm Patient).
20
Patient Temperature 1 Calibration Error
The system is unable to internally check the calibration of the Patient Temperature 1 channel within ± 1.0 °C when the system is in Manual Control mode.
21
Patient Temperature 2 High
The Patient Temperature 2 reading is above 39.5°C (103.1°F), and the water temperature is above 39.5°C (103.1°F), and the system is continuing to warm the patient while in a patient control mode (e.g. Control Patient, Cool Patient or Rewarm Patient).
22
Patient Temperature 2 Above High Patient Alert
In Normothermia Therapy: The Patient Temperature 2 reading reading is above the High Patient Alert setting in Normothermia Settings. In Hypothermia Therapy: The Patient Temperature 2 reading is above the High Patient Alert setting in Hypothermia Settings.
23
Patient Temperature 2 Low
The Patient Temperature 2 reading is below 31°C (87.8°F), and the water temperature is below 31°C (87.8°F), and the system is continuing to cool the patient when the system is in a patient control mode (e.g. Control Patient, Cool Patient or Rewarm Patient).
24
Patient Temperature 2 Below Low Patient Alert
In Normothermia Therapy: The Patient Temperature 2 reading is below the Low Patient Alert setting in Normothermia Settings. In Hypothermia Therapy: The Patient Temperature 2 reading is below the Low Patient Alert setting in Hypothermia Settings.
25
Patient Temperature 2 High
The Patient Temperature 2 reading is above 39.5°C (103.1°F), and the water temperature is above 39.5°C (103.1°F) while in Manual Control mode. Patient temperature is not automatically controlled while in Manual Control mode.
26
Patient Temperature 2 Low
The Patient Temperature 2 reading is below 31°C (87.8°F), and the water temperature is below 31°C (87.8°F) when the system is in Manual Control Mode. Patient temperature is not automatically controlled while in Manual Control Mode.
27
Patient Temperature 2 Probe Out of Range
Patient Temperature 2 probe is not detected, or the temperature reading is below the lower display range (10 °C /50 °F).
28
Patient Temperature 2 Probe Out of Range
Patient Temperature 1 probe is not detected, or the temperature reading is above the upper limit of the display range (44 °C/111.2 °F) while in a patient control mode (e.g. Control Patient, Cool Patient or Rewarm Patient).
29
Patient Temperature 2 Calibration Error
The system is unable to internally check the calibration of the Patient Temperature 2 channel within ± 1.0 °C when the system is in a patient control mode (e.g. Control Patient, Cool Patient or Rewarm Patient). Patient Temperature 2 channel is made inactive.
30
Patient Temperature 2 Calibration Error
The system is unable to calibrate the Patient Temperature 2 channel within ± 1.0 °C when the system is in Manual Control mode.
31
Patient Temperature 2 Calibration Error
The system is unable to calibrate the Patient Temperature 2 channel within ± 1.0 °C when the system is in a patient control mode (e.g. Control Patient, Cool Patient or Rewarm Patient).
Patient Temperature 2 channel is made inactive.
Patient Temperature 2 channel is made inactive.
10
ENGLISH
32
Patient Temperature 2 Calibration Error
The system is unable to calibrate the Patient Temperature 2 channel within ± 1.0 °C when in Manual Control mode. Patient Temperature 2 channel is made inactive.
33
Water Temperature High
The primary outlet water temperature is above 44°C (111.2 °F).
34
Water Temperature High
The primary outlet water temperature is above 42.5°C (108.5 °F)
35
Water Temperature Low
The primary outlet water temperature is below 3.5°C (38.3 °F).
36
Water Temperature High
The secondary outlet water temperature is above 44°C (111.2 °F).
37
Water Temperature High
The secondary outlet water temperature is above 43°C (109.4 °F).
38
Water Temperature Low
The secondary outlet water temperature is below 3.0°C (37.4 °F)
40
Unable to Maintain Stable Water Temperature
In Manual Control mode, the system is unable to control the water temperature within 1.0 °C/°F of the water target after 25 min. in the current mode or since last change to water target temperature.
41
Low Internal Flow
Insufficient internal flow during system priming or pre-conditioning.
43
User Settings Not Saved
The user settings are invalid and are unable to be saved. The saved system default settings are restored.
44
Invalid System Log Entry
One or more of the entries into the system event log is invalid. The system event log is used by clinical engineering personnel for product service. This issue does not affect the performance of the system to deliver patient therapy.
45
AC Power Lost
The AC power was lost while the power switch was in the On position.
46
Control Panel Communication
The control panel is not communicating with the system.
47
Control Panel Communication
The control panel is not communicating with the system.
48
Patient Temperature Out Invalid
The Patient Temperature Out calibration data in non-volatile memory is invalid.
50
Patient Temperature 1 Erratic
Patient Temperature 1 discontinuity. There has been a significant change in patient temperature over the past 8 minutes.
51
Patient Temperature 1 Below Control Range
Patient Temperature 1 is less than 31°C (87.8°F) while in a patient control mode (e.g. Control Patient, Cool Patient, or Rewarm Patient).
52
Extended Period of Cold Water
The circulating water temperature has been below 10°C (50°F) for 8 of the previous 10 hours. The alert will recur after 1 hour if the condition continues. After the device has issued 11 extended cold water exposure alerts, it will issue a prolonged cold water exposure alarm. Extended periods of cold water delivery may increase the risk for skin injury. Assess patient’s skin underneath the ArcticGel Pads.
53
Prolonged Cold Water Exposure
The circulating water temperature has been below 10°C (50°F) for a prolonged period of time. The extend period of cold water alert has been issued 11 times. The alert was first issued after the system sensed that the water temperature was below 10°C (50°C) for 8 of 10 hours. The alert was then issued an additional 10 times every 1 hour because the situation was not resolved. Prolonged cold water exposure may increase the risk for skin injury. Assess patient’s skin underneath the ArcticGel Pads.
60
Non-Recoverable System Error
Control processor and Monitor processor start up synchronization fault.
61
Non-Recoverable System Error
Control processor parameter memory fault.
62
Non-Recoverable System Error
Monitor processor parameter memory fault.
64
Non-Recoverable System Error
Unable to enable pump power (Control processor).
11
AS5000 SERVICE MANUAL
65
Non-Recoverable System Error
Unable to enable pump power (Monitor processor).
66
Non-Recoverable System Error
Unable to disable pump power (Control processor).
67
Non-Recoverable System Error
Unable to disable pump power (Monitor processor).
69
Non-Recoverable System Error
Interprocessor communication fault.
70
Non-Recoverable System Error
Mains signal is missing or inconsistent.
71
Non-Recoverable System Error
Primary outlet water temperature sensor out of range – high resistance.
72
Non-Recoverable System Error
Primary outlet water temperature sensor out of range – low resistance.
73
Non-Recoverable System Error
Secondary outlet water temperature sensor out of range – high resistance.
74
Non-Recoverable System Error
Inlet water temperature sensor out of range – high resistance.
75
Non-Recoverable System Error
Inlet water temperature sensor out of range – low resistance.
77
Non-Recoverable System Error
Chiller water temperature sensor out of range – high resistance.
78
Non-Recoverable System Error
Chiller water temperature sensor out of range – low resistance.
79
Non-Recoverable System Error
Primary and secondary outlet water temperature sensors differ by greater than 1 °C.
80
Non-Recoverable System Error
The control processor failed to detect a simulated water temperature fault.
81
Non-Recoverable System Error
The monitor processor failed to detect a simulated water temperature fault.
82
Non-Recoverable System Error
Processor fault.
83
Non-Recoverable System Error
Monitor processor communications fault.
84
Non-Recoverable System Error
Control processor communications fault.
86
Non-Recoverable System Error
Power supply voltage fault.
98
Non-Recoverable System Error
Processor fault.
99
Non-Recoverable System Error
Program unexpectedly aborted.
100
Unable to Save Default Settings
The system is unable to save the default settings in Advanced Setup.
101
No USB Drive Found During Save
When attempting to Download Patient Data, no flash drive was found in the USB port.
102
Control Panel Locked
Approximately 2 minutes after Control Patient, Cool Patient, Rewarm Patient or Manual Control is activated, the control panel screen will lock to prevent inadvertently changing parameters during patient therapy. An image of a padlock will appear over the Therapy Selection button when the screen is locked.
103
Unable to Communicate Settings
There was an error communicating Hypothermia Settings, Normothermia Settings or Advanced Setup settings to the system.
104
Manual Control End
The Manual Control has reached the end of its set duration.
105
Cool Patient End
Cool Patient timer has reached the end of its set duration and Rewarming Begins in Hypothermia Settings is set to Manually. See Help Index topic Hypothermia Settings – Rewarming Begins for more information.
12
106
Non-Recoverable System Error
Graphic user interface communications lost with control module control processor.
107
Non-Recoverable System Error
Graphic user interface communications lost with control module monitor processor
108
Operating Mode Incorrect
The system has not successfully entered the commanded therapy mode.
ENGLISH
109
Esophageal Probe Recommended
Control Strategy 3 has been chosen which allows the Patient Target temperature to be set between 32.0 °C and 32.9 °C (89.6 °F to 91.2 °F). For patient target temperatures between 32ºC to 32.9ºC (89.6ºF to 91.2ºF) an esophageal temperature probe should be used. During the hypothermia induction phase, the esophageal temperature tracks real-time core temperature changes more closely than bladder or rectal temperature. Due to this lag time when using bladder or rectal temperature sites, actual patient core temperatures may be lower than measured. Therefore, the use of esophageal temperature is recommended for patient temperature control below 33ºC.
110
Data File Corrupted
The data file which contains the system default settings has been corrupted. The system has automatically reset the system to the factory defaults.
111
Confirm New Patient
A New Patient treatment was selected, but this system has treated a patient within the last 6 hours and a Current Patient treatment is still available.
112
Confirm Return to Cooling Phase
Treatment is currently programmed to be in the Rewarming phase, but the Start button in the Cool Patient window was pressed.
113
Reduced Water Temperature Control
The system has detected that the water temperature has not been controlled as accurately as expected in the last 30 minutes. This situation may be temporary due to sudden patient temperature changes, interruption in water flow, or blockage of air flow by an obstruction or dirty filter.
13
AS5000 SERVICE MANUAL
Chapter 6 – Troubleshooting 6.1 Diagnostic Screen
The Diagnostic screen allows the user to view the flow, pressure, patient temperatures and individual water temperature sensor readings. This information is valuable during the troubleshooting process. The Diagnostic screen can be accessed from the Maintenance and Service Topic in the Help Index.
6.3 General Troubleshooting Guide
A calibration check is an effective method for verifying proper operation of the device. Many technical issues with the Arctic Sun 5000 can be diagnosed during a calibration check. See Chapter 8 for the Calibration Check procedure. Case data recorded at one minute intervals such as water flow rate, pressure, water and patient temperatures, pump and heater commands for the previous 10 cases are available for download from the USB port. This can be valuable information when attempting to troubleshoot reported problems from previous cases. The download feature is available from the Advanced Settings screen. The following are the most common issues and methods of resolution: 6.3.1 Device Not Controlling Patient Temperature The Arctic Sun 5000 has a sophisticated control algorithm which calculates the appropriate water temperature based on a comparison of the patient’s actual temperature versus the programmed target temperature. The system also monitors the actual water temperature versus the commanded water temperature. If the system fails to deliver the commanded temperature within a short period of time, alarm 113 will occur. This is the best indication as to whether the system was controlling appropriately during patient therapy. If this alarm has occurred, it can be viewed in the Event Log viewable on the device, as described in Section 6.2.
6.2 Event Log
The Event Log will record non-recoverable system alarms and recoverable operational alarms and alerts from the last 10 cases. The Event Log can be accessed from the Maintenance and Service Topic in the Help Index.
6.3.2 Patient Does Not Cool To verify the cooling function of the device, perform the following steps: • Check that the water temperature limits have not been adjusted too high on the Normothermia or Hypothermia Therapy Setting screen. • With the device at room temperature power the device on, wait 5 minutes, and check the Chiller temperature (T4 on the Diagnostic screen). This temperature should be below 10° C (50° F). • Connect the Fluid Delivery Line and a Shunt Tube, initiate Manual Control, and set water target to 4° C (39°F). • Verify that the water temperature lowers to less than 10 ° C (50° F) within 10 minutes. • If no problems seem evident, performing a calibration check 6.3.3 Patient Does Not Warm To verify the heating function of the device, perform the following steps: • Verify with clinical staff that flow rate during therapy was at least 1 lpm as water flow rates below this will limit heater power. • Check that the water temperature limits have not been adjusted too low on the Normothermia or Hypothermia Therapy Setting screen. • Connect the Fluid Delivery Line and the Shunt Tube, initiate Manual Control, and set water target to 42° C (108°F). • Verify water temperature increases from room temperature to at least 35° C (95° F) within 10 minutes. • If unsuccessful, remove back panel and shell and check Heater power connection on Mains Voltage Circuit Card. • If no problems seem evident, consider performing a calibration check.
14
ENGLISH
6.3.4 Device Will Not Fill If the device will not fill, perform the following steps: • Ensure the Fluid Delivery Line is connected with no Shunt Tube or pads connected. The Fluid Delivery Line must be connected in order for the device to fill. • Replace the fill tube. Attempt filling to check for resolution. • To confirm Fluid Delivery Line does not leak air, remove the Fluid Delivery Line, place thumb over the left port of the Inlet/Outlet Manifold, and repeat fill process. 6.3.5 Control Panel Will Not Power On To verify proper operation of the Control Panel, perform the following steps: • Check that mains power is available by ensuring the amber light is lit on the power switch. • Remove the back panel and shell. Check connection at top of card cage to Control Panel and verify the connection is seated properly. 6.3.6 Low Flow Alarm If the device shows a Low Flow alarm, perform the following steps: • Power device on; ensure Fluid Delivery Line is connected. • With no pads or Shunt Tube attached, start the device in Manual Control and allow 3 minutes for bypass flow to stabilize. • Using the Diagnostic screen, verify a flow rate of > 1.5 lpm and a Circulation Pump Command of less than 70%. If this cannot be achieved it indicates an air leak either internal to the device or in the Fluid Delivery Line. • To confirm there is no internal air leak, remove Fluid Delivery Line and place thumb over the left port. Repeat the test in step 3. • To confirm there are no leaks in the Fluid Delivery Line valves, attach a shunt tube to any set of valves and, initiate Manual Control. Watch for water to flow through tube, then without stopping, move shunt tube quickly to the opposite branch of the Fluid Delivery Line. Watch for water flow through the tube. Place the Fluid Delivery line on the floor. Press Stop. Remove the shunt tube. Monitor the Fluid Delivery Line valves for any water leaks over the next 5 minutes. • To confirm the pad connector seals are not damaged, inspect the orange seal at the end of each valve and look for damage. Actuate each valve and ensure it moves freely.
Chapter 7 – Component Replacement The Arctic Sun 5000 is designed and built to have a high degree of reliability; however, failures can occur. Use the troubleshooting methods in Chapter 6 or consult with Medivance Technical Support to determine the root cause component for the failure. Once this root cause component for the failure has been determined, follow the appropriate procedure for removal and replacement of the component. An abbreviated list of spare parts and accessories is located in Appendix B. For parts not listed, contact Medivance Technical Support. In general, reverse the order of removal to install a replacement component. Please note any special instructions to the contrary. Caution: Observe precautionary electrostatic discharge control procedures (ESD) when working with circuit card assemblies.
Continued on next page...
6.4 Troubleshooting Assistance
For further assistance with troubleshooting, contact your distributor or Medivance Technical Support.
15
AS5000 SERVICE MANUAL
Power Switch Card Cage
Inlet/Outlet Manifold Inlet/Outlet Ports
Serial Number Label
Power Inlet Module Drain Ports
Chiller Condenser Chiller Frame Shell
Fig. 7-1 Control Module, rear view after removal of Back Panel
16
ENGLISH
Manifold Harness Level Sensor Cable Flowmeter Cable Card Cage Main Harness: • Pump Connections • Control Panel Connection • Chiller Power Connection
A/C Breaker Harness
Chiller Evaporator Tank Heater Power Cables
Chiller Frame Compressor
Fig. 7-2 Control Module, front inside view
17
AS5000 SERVICE MANUAL
Card Cage Chiller Frame
Inlet/Outlet Manifold
Chiller Evaporator
Chiller Pump
Chiller Fan Hot Gas Bypass Valve
Fig. 7-3 Control Module, right inside view
18