Operators Manual
20 Pages
Preview
Page 1
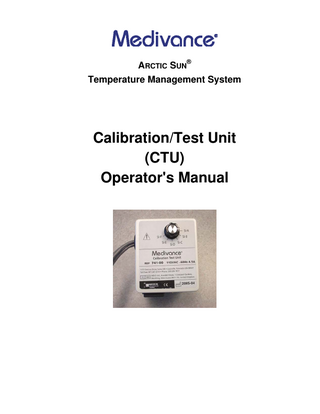
ARCTIC SUN® Temperature Management System
Calibration/Test Unit (CTU) Operator's Manual
TABLE OF CONTENTS CHAPTER 1
INTRODUCTION ... 3
1.1
Use of the Calibration/Test Unit (CTU) Operator's Manual ... 3
1.2
Customer Information and Technical Support ... 3
1.3
System Description ... 3
1.4
Symbols and Standards ... 5
1.5
Environmental Conditions... 6
1.6
General Warnings ... 6
CHAPTER 2
THEORY OF OPERATION ... 7
2.1
Introduction ... 7
2.2
Basic CTU Operation ... 7
2.3
Controls ... 7
2.4
Connections ... 8
2.5
Understanding the Test and Calibration Sequence ... 9
2.5.1
Calibration Factor Longevity ... 9
2.5.2
Screen Navigation... 9
2.5.3
Initiation ... 9
2.5.4
Pre-Warm and Flow Check ... 9
2.5.5
Patient Temperature Channel Checks... 10
2.5.6
Temperature Out Check ... 10
2.5.7
Water Temperature Check ... 11
2.5.8
Calibration ... 12
2.6
Water Temperature High Alarm Check ... 12
CHAPTER 3
MAINTENANCE ... 13
3.1
Recommended Maintenance... 13
3.2
Calibration... 13
CHAPTER 4
INSTRUCTIONS FOR USE... 14
4.1 Stage 1, 2, and 3: Warm-up, Flow Check, Patient Temperature Calibration, Water Temperature Calibration, and Interim Results Reporting ... 15 4.2
Stage 4: Temperature Out Calibration ... 16
4.3
Stage 5: Acceptance ... 16
4.4
Stage 6: Water Temperature Alarm Test ... 16
4.5
Stage 7: Chiller Capacity Test ... 17
APPENDIX A
SPECIFICATIONS ... 20
REF 000744-01 Rev F
2
CHAPTER 1 1.1
INTRODUCTION
Use of the Calibration/Test Unit (CTU) Operator's Manual
The Calibration/Test Unit provides an effective and easy way of checking and calibrating, if necessary, the ARCTIC SUN® Temperature Management System Model 2000. This Manual provides a detailed description of the CTU, its use, construction, routine maintenance and calibration. It is important that the CTU be properly maintained and serviced in accordance with the instructions described in this manual. Only trained personnel should use and service this product.
1.2
Customer Information and Technical Support
The CTU is intended to be used in association with the ARCTIC SUN® Temperature Management System Model 2000 Service Manual. The Service Manual provides detailed information about the ARCTIC SUN® Temperature Management System and how the CTU can be used to troubleshoot problems in addition to its normal test and calibration functions. Requests for technical support, information or orders may be placed by mail, fax, or by calling Medivance Customer Service. Medivance hours of operation are 8:30 am to 6 pm Eastern Time. Emergency support is offered after hours by calling 887-267-2314.
1.3
System Description
The CTU is, for the most part, a passive device that provides stimulus and feedback to the ARCTIC SUN® Temperature Management System to enable it to test and calibrate itself. The sole active function of the CTU is to provide an external heat source to force the circulating water temperature over the safety limit of the machine in order to test its safety systems.
3
Model No. ...ARCTIC SUN® Temperature Management System Model 2000 Phone: ...Toll free 877-267-2314 Fax: ... 720-880-5400 Address:...321 South Taylor Avenue, Suite 200 Louisville, CO 80027 E-mail:[email protected] Internet:
www.medivance.com
European Representative: Bard Limited, Forest House, Brighton Road Crawley, West Sussex UK, RH 11 9BP
4
1.4
Symbols and Standards
The CTU bears the following symbols affixed to the system: Table 1.1 CTU Symbols For the safe and effective use of this device, the operator must consult the accompanying documents prior to use. ®
Models of the ARCTIC SUN Temperature Management System Model 2000 that bear the ETL Monogram have been Certified for Safety by ETL Intertek in accordance with standards C22.2, No. 61010-1, ISA-82.02.01 (IEC 61010-1 MOD), and UL 61010-1. Indicates high temperature part or component. The maximum temperature of this internal component allowed by the protective system is also listed.
Indicates electrical hazard.
Indicates Earth Ground. Identifies the heater fuse. Identifies the storage temperature range.
Identifies the storage relative humidity range.
Indicates the date of manufacture
Indicates conformity with European standards for this device
Denotes calibration data.
Denotes a push-button, momentary switch.
5
1.5
Environmental Conditions
Ambient Temperature Range: o Operating Temperatures: 18oC to 24oC (65oF to 75oF) o Transport and Storage Temperatures: -30oC to 50oC (-20oF to 120oF)
Ambient Humidity Range: o Operating Humidity: 5% to 95% relative humidity, non-condensing o Transport and Storage Humidity: 5% to 95% relative humidity, non-condensing
Ambient Atmospheric Pressure Range: o Operating: 375 mmHg to 795 mm Hg o Transport and Storage: 375 mmHg to 795 mm Hg NOTE: If the Calibration Test Unit is used at higher room temperatures, the test system’s cooling capability and accuracy may be degraded.
1.6
Ingress Protection Rating IPX0 for ordinary usage.
General Warnings
This equipment is to be used only as described in this manual. Failure to do so may result in damage to the device. The CTU must not be used on equipment while connected to a patient. Do not use the Calibration and Test Unit in the presence of flammable agents because an explosion or fire may result. Anyone performing the procedures must be appropriately qualified. Carefully observe the Calibration and Test unit for fluid leaks before and during use. Leakage may result in lower flow rates or an electrical shock hazard. Discontinue use immediately if leakage is observed. For indoor use only.
6
CHAPTER 2 2.1
THEORY OF OPERATION
Introduction
The Calibration and Test Unit (CTU) is an instrument that is used to calibrate and verify operation of the ARCTIC SUN® Temperature Management System Model 2000 Control Module. It is a hand sized unit that connects directly to the fluid delivery line port, taking the place of the Model 2000 fluid delivery lines and pads. The CTU can be used to semi-automatically test and calibrate the Control Module’s two patient temperature measurement inputs, the temperature out function, and the internal water temperature measurement channels. It can also be used to automatically verify the Control Module’s flow rate and inlet pressure measurements. Correct operation of the Model 2000’s primary water over-temperature alarm can also be verified manually using this device.
2.2
Basic CTU Operation
The CTU is used as an external stimulus and measuring device by software embedded in the Control Module. By testing the subsystems of the CTU in sequence, operation of the Control Module can be verified and calibrated. The CTU contains precision resistors that simulate several patient temperatures. After a warm-up period, the simulated temperatures are first applied to the Warming System patient temperature inputs to temporarily calibrate each channel. This calibration is temporary in the sense that it is used to perform the balance of the testing. It is not saved by the Control Module until the operator accepts it. Once the patient temperature channel's accuracy has been temporarily established, the CTU’s temperature probe is connected to the Control Module’s Patient Temperature 1 input. The Control Module then circulates water through the CTU at various temperatures. The patient temperature channel can then be used to check and calibrate the accuracy of the internal water temperature sensors and circuits. The fluid path in the CTU is designed to allow a specific flow, which was selected to provide this flow rate at a given pressure. Since the Model 2000 controls the inlet pressure at a constant value, a crosscheck of flow and pressure measurement accuracy can be obtained. The flow rate and inlet pressure offset are checked, and the inlet pressure offset is zeroed during the initial warm-up period. The CTU contains heaters that are used to slowly raise the system water temperature above its high temperature limits in order to verify correct operation of the Control Module’s safety systems. The test unit heaters are thermally and electrically protected, and are only powered while pressing the Heater Power Switch.
2.3
Controls
A rotary switch (S1), two slide switches (S2 and S3), and a heater switch (S4) comprise the CTU controls. The Output Select Switch, S1, is used to select the temperature simulator to be applied to the patient temperature channel. Six switch positions represent specific temperatures as follows: 7
Position A is “open” or “no connection” Position B is approximately 10.8C Position C is approximately 25.5C Position D is approximately 34.5C Position E is approximately 40.0C Position F is a “shorted” connection. The precise values of the simulators listed above are determined by a calibration process and are listed on a calibration sticker on the CTU. The slide switch, S2, is used as follows: Position A connects Patient Temperature Channel 1 to the rotary switch and Patient Temperature Channel 2 to the Temperature Out Channel. Position B connects Patient Temperature Channel 1 to the CTU temperature sensor and Patient Temperature Channel 2 to the rotary switch. Position C connects Patient Temperature Channel 1 to the Temperature Out Channel. The slide switch, S3, is used as follows: Position A connects the internal thermistor to an “open” connection. Position B connects the internal thermistor to a parallel resistance, shifting the temperature up at the low water temperature setting, allowing it to be read by the patient temperature circuit. The heater power switch, S4, is a momentary, normally open switch that applies AC power to the two 250W heaters when pressed and held in the ON position.
2.4
Connections
A hydraulic connection and three electrical connections must be made to the control module so that the unit will function correctly in conjunction with the control module’s software functions.
The hydraulic connection is a custom fitting which mates directly to the control module. The seal must be tight with no leaks to ensure a proper test.
The three electrical connections are labeled ‘PT1’, ‘PT2’, and ‘TO’. o
PT1 corresponds to the primary patient temperature receptacle on the control module.
o
PT2 corresponds to the secondary patient temperature connector.
o
TO corresponds to the temperature out connector on the control module.
TO has a different keying scheme from PT1 and PT2, and therefore cannot be interchanged. However, care must be taken when connecting PT1 and PT2 because they can be interchanged. If this does occur, the control module will indicate an error on the user interface display.
The electrical cables do not supply a voltage or current. They are passive connections with the voltage or current being supplied by the control module.
8
2.5
Understanding the Test and Calibration Sequence
The Calibration and Test Unit and ARCTIC SUN® Temperature Management System Model 2000 Control Module work together to perform the tests and calibration in a semi-automated sequence. This section gives a step by step description of how this is accomplished
2.5.1
Calibration Factor Longevity
In order to perform this process accurately, various parameters of the Control Module must first be calibrated to be used in subsequent measurements. It should be noted that this calibration is temporary and it applys only during the Test and Calibration Sequence. This data is saved only if the operator accepts the calibration at the end of the sequence.
2.5.2
Screen Navigation
Screen navigation is achieved primarily through prompts and operator responses. Pressing the Remote Display Enter Key will move the system through a defined test sequence. The Up and Down Keys are also used for data entry and for scrolling through some menu selections. Other remaining keys function normally, such as Automatic, Manual, Purge, Stop, and Cancel and do not change function during this process. It should be noted, however, that the Control Module will abort the test and calibration sequence and return to the User Diagnostic Mode screen if any of these keys are pressed.
2.5.3
Initiation
Test and Calibration Mode is a sub-mode of User Diagnostic Mode. The test and calibration sequence is started by scrolling to the UD4 Screen following the prompts. The Control Module will enter Test and Calibration Mode only if all of the following are true:
Patient Temperature 1 is between 10°C and 12°C.
Patient Temperature 2 is less than 10°C.
The reservoir level is 4 or greater.
These unique conditions are required to ensure that the system is connected to the CTU, not a patient. The operator has one minute to respond affirmatively or the Control Module returns to the normal User Diagnostic Mode. If one of the criteria above is not met, the user is prompted to rectify it.
2.5.4
Pre-Warm and Flow Check
The system pre-warm and flow check begins when the Test and Calibration Mode is initiated. This process starts with an automatic 10 minute pre-warm period (starting when the unit is powered on). During this time, the unit runs in Manual Mode with a 28°C water target temperature and a countdown timer displays how many pre-warm seconds remain. Additionally, the average flow rate and average inlet pressure are displayed. Approximately 55 seconds after initiating pre-warm, a bypass mode flow check is also performed. For successful completion of pre-warm to occur, the following criteria must be met:
The bypass mode flow check flow rate must be greater than 3500ml/min. A timeout error is immediately displayed if this condition is not met.
The average flow rate must be within ±600ml/min. of 2850ml/min. 9
The inlet pressure average must be within 0.2psi of –7.0 psi.
The bypass valve must be closed.
Once these conditions have been met, the system performs a purge for approximately one minute to prepare for checking the inlet pressure offset. Then once purging is complete, the system performs an internal test of the patient temperature channels. If successful, it indicates completion of the prewarm / flow check and the final average flow is displayed along with a prompt to continue. If successful completion of the pre-warm / flow check does not occur within 12 minutes of its initiation, a time-out error is indicated. Also note that the pre-warm / flow check can be aborted by pressing the Enter Key. It can be started again at any time during the test sequence. At this point, operator assistance is needed to observe the flow result and to remove the CTU so that the pressure sensor and circuit can be zeroed. The pressure offset is calculated after the user responds and the pressure stabilizes within 0.01PSI. The pressure offset result is then displayed for the user to observe. Note that if the offset is greater than ±0.5PSI, a message is displayed.
2.5.5
Patient Temperature Channel Checks
Operator assistance is needed to start the Patient Temperature 1 (PT1) checks. Four items of CTU calibration data must be entered, A through D. The operator is then prompted to sequence the system through measurement of a set of precision resistors that simulate a patient temperature sensor at various temperatures. Any of the temperature checks can be aborted by pressing the Enter Key, and then restarted at any time during the test. The first time the check is aborted the sequence restarts at the beginning of the current check. The second time the check is aborted the sequence restarts at the beginning of the check group. Each check is completed when the following criteria is met:
The difference between patient temperature average and the respective CTU temperature value is within 0.8 C.
The patient temperature is stable within 0.01 C.
If any check cannot meet the above criteria within 60 seconds, a message is displayed along with a prompt to retry. Temporary calibration parameters are calculated based on the data obtained from Check 1 (A) and Check 4 (D). These parameters are then applied to the average values obtained for all four checks. These values are then checked against the respective CTU values that had been entered. The measured values must be within 0.14 C of the CTU values for successful completion. An error message is displayed if the criteria is not met. The process is identical for Patient Temperature 2 with the exception of the S2 position.
2.5.6
Temperature Out Check
The Temperature Out Check is very similar to the patient temperature checks in that the same four sensor simulators are used. The operator is prompted to sequence the system through a PT1 measurement of each, while PT2 measures the Temperature Out. (Temperature Out is an “echo” of Patient Temperature 1.) Obviously, this test requires precise measurement by the patient temperature channels. Therefore, the patient temperature checks must first be successfully 10
completed. If not, "N/A" is displayed at the Temperature Out Check summary screen to indicate that it could not be completed. Each check is completed when the following criteria is met:
The difference between the PT1 average and the respective CTU temperature value is within 0.8°C.
The Temperature Out (as measured by PT2) is stable within 0.01°C
If any check cannot meet the those criteria within 75 seconds, an error message displayed along with a prompt to retry.
2.5.7
Water Temperature Check
The Water Temperature Check again requires that the operator enter calibration data from the CTU, E through G. Once this is done, the system requires the user change the S3 position at the beginning of the low temperature set point and then back after the low temperature setpoint has completed. The system runs in Manual Mode for the duration of the test. As the system runs, the water temperature is controlled at various setpoints while PT1 measures the temperature of the water flowing through the CTU. This reference temperature is then used to check the system’s internal water temperature sensors. Check 2 and Check 4 also serve as heating and cooling capacity tests. Four segments of up to 15 minutes each comprise the Water Temperature Check. Check 1 takes place at approximately 6°C, Check 2 at approximately 28°C, Check 3 at approximately 40.5°C, and Check 4 at approximately 38°C. During this process, Patient Temperature 1, Outlet Water Temperature 1 (T1), Outlet Water Temperature 2(T2), Inlet Water Temperature (T3), Chiller Temperature (T4), the inlet pressure, and the flow are continuously averaged monitored. Each check point requires the following to complete successfully:
The average T2 must be within 2.0°C of the, corrected reference temperature (i.e. the CTU probe as measured by PT1).
The corrected reference temperature must momentarily cross over the desired cal. temperature (6°C, 28°C., and 40.5°C) and then cross back over again. The only exception is check 4 where the reference temperature must only drop below 38°C.
The average Inlet Pressure must be within 0.2 PSI of -7.0 PSI.
The Bypass Valve must be closed.
If a check cannot be completed in 15 minutes, a message is displayed. Again, this test requires precise measurement by the patient temperature channels. Therefore, the patient temperature checks must first be successfully completed. Further, in the measurement of water temperature, flow is also important. Therefore, the inlet pressure check must also have been completed as suction is the driving force in creating flow. If not, "N/A" is displayed at the Water check prompt to indicate that it could not be completed. Newly calibrated temporary values are checked against the corrected average probe temperature values obtained during the checks. Both T1 and T2 readings must be within 0.24 C of the probe, the T3 sensor must be within 0.4C of the probe reading, and the T4 sensor must be within 0..4C 11
(checked at the 6 deg temperature only). An “ck err X” message (X = sensor 1,2 ,3, or 4) is displayed if the criteria is not met.
2.5.8
Calibration
All checks, with the exception of the Temperature Out check, must have been successfully completed before calibration is allowed. The Temperature Out check must at least be attempted, but does not have to be successful, since the check will fail if the function has not been previously calibrated. N/A is displayed following the “Cal System?” prompt if calibration is not allowed. At this point, the operator may record the system clock and reject or proceed with the new calibration. The final stage of calibration uses PT1 to measure the Temperature Out as it is stepped through the range of possible values. This process takes about 28 minutes. Upon completion, the operator is prompted to save the calibration values. The information saved during the save process includes;
New cal factors generated during the calibration,
CTU values (A thru G) entered during the test
Cal Hours value which was set to zero prior to the save.
The stored CTU values can be manually set to defaults by exercising the “Erase Novram User Defaults” (Diag 23) menu option in advanced service mode. Additionally, stored CTU values will automatically be set to defaults if the cyclical redundancy check (crc) value for either of the CTU values is incorrect when retrieved from memory. The default CTU values are: A.
10.87 C
B. 24.54 C C. 34.35 C D. 39.97 C E. 0.00 C F. 0.00 C G. 0.00 C
2.6
Water Temperature High Alarm Check
The CTU includes a 500W heater that is activated by a momentary switch. This heater can be used to add heat when the Arctic Sun is operating at its highest water temperature setpoint to force a high water temperature alarm, thus verifying the alarm's correct operation.
12
CHAPTER 3 3.1
MAINTENANCE
Recommended Maintenance
The Calibration and Test Unit contains no operator maintainable parts. Other than periodic cleaning of the exterior surfaces, none is required. Cleaning instructions: Spray a mild detergent solution onto a towel and wipe down the unit. Take care to not saturate the towel with the solution, use only enough to dampen the unit. Towel dry the unit after wiping it down with the cleaning solution. If a Mains fuse opens (inoperative heater), return the CTU to Medivance for service. An open fuse is indicative of a problem that requires immediate service.
3.2
Calibration
The CTU should be returned to the manufacturer for calibration every two years. The date of last calibration is indicated by the international symbol for calibration, an upside down solid black triangle,
, which can be found on the top of the CTU.
13
CHAPTER 4
INSTRUCTIONS FOR USE
The entire test and calibration process takes approximately 75 minutes. Operator assistance is required only in certain stages:
Stage 1: Warm-up, Flow Check, and Patient Temperature Calibration: 10 minutes (after a 10 minute warm-up), operator assistance required.
Stage 2: Water Temperature Calibration: 30 minutes, automatic.
Stage 3: Interim Results Reporting: 1 minute, operator assistance required.
Stage 4: Temperature Out Calibration: 30 minutes, automatic.
Stage 5: Acceptance: 1 minute, operator assistance required.
Stage 6: Water Temperature Alarm Test: 15 minutes, operator assistance required
Stage 7: Chiller Capacity Test: 15 minutes, operator assistance required
14
4.1
Stage 1, 2, and 3: Warm-up, Flow Check, Patient Temperature Calibration, Water Temperature Calibration, and Interim Results Reporting
1. Replace the fluid delivery lines with CTU. 2. Connect the Blue circular connector labeled “PT1” to the Model 2000 connector Patient Temperature 1 (larger thermometer and patient symbol). 3. Connect the Blue circular connector labeled “PT2” to the Model 2000 connector Patient Temperature 2 (smaller thermometer and patient symbol).
CTU Connections Figure 5.2
4. Connect the Black circular connector labeled “TO” to the Model 2000 connector labeled “TEMP OUT”. 5. Set the CTU switches: S1: B
S2: A
S3: A
Note: For best results, act promptly when instructed by the machine. Do not allow the machine to lie idle waiting for data input or test unit switching.
CTU Switch 1 Figure 5.3
Note: If an alarm occurs during calibration, check the CTU connections and switch positions. If the alarm persists, power down and start over. If the alarm persists, call Medivance Service. Note: The calibration process can be aborted and restarted at any time by pressing Enter. 6. Power up while holding the Automatic and Purge Keys. 7. Verify that the unit is at least 3/4 full. If not, fill the unit. 8. At the User Diagnostic Home Screen, press the Up Key once (twice if Patient Temperature 2 is enabled.) to scroll to the UD4 Screen. Press the Enter Key to initiate the Test and Calibration Mode.
CTU Switches 2 and 3 Figure 5.4
9. Follow the prompts on the Remote Display Module. Note: The Control Module software will ask for the CTU calibration data, termed "A" through "G", at various points in the process. This data is printed on the CTU label. Note: If any of the check values are outside the bounds listed in Table 4.1, calibrate the ARCTIC SUN® Temperature Management System Model 2000 as described below. CTU Calibration Data Figure 5.5
15
4.2
Stage 4: Temperature Out Calibration
1. Press the Enter Key if calibration is desired. The sequence may be aborted at this stage if only verification is desired. 2. The “Calibrate System” menu screen displays the number of “Cal Hours” that have elapsed since the system was last calibrated.
4.3
Stage 5: Acceptance
1. Save the calibration data, if desired, by pressing Enter on the “Save Calibration Values” screen. If only verification is desired, do not save. If the new data is not saved, the calibration will revert to the previous set of values. Note: If the Up arrow is pressed at this time a “No Calibration Values were Saved” prompt displays and pressing the Enter produces the Exit screen.
4.4
Stage 6: Water Temperature Alarm Test
1. Press the Manual Mode Key. 2. Press the Down Key once and change the “Water Target Temperature” to 42C. 3. Press the Home Key. 4. Allow the water temperature to stabilize at 42C for at least 5 minutes. Note: It is important to allow the temperature to fully stabilize at 42°C. If it does not, it may not be possible to attain the alarm conditions. 5. Press the S4 switch on the CTU. Monitor the T3 temperature and release the switch once the temperature reaches 44.5C. 6. Start the timer when the T1 temperature reaches 43.01°C. Verify that Alarm 37 sounds in less than 18 seconds. Note: If the T1 water temperature drops below 43.01°C, restart the timer when the water again reaches 43.01°C. 7. Turn power off. 8. Turn power on and allow the Control Module to start normally. 9. Press the Manual Mode Key. 10. Press the Down Key once and change the “Water Target Temperature” to 42C. 16
11. Press the Home Key. 12. Allow the water temperature to stabilize at 42C for at least 5 minutes. Note: It is important to allow the temperature to fully stabilize at 42°C. If it does not, it may not be possible to attain the alarm conditions. 13. Press the S4 switch on the CTU. Monitor the User Interface Water temperature and start the timer once the temperature reaches 42.6 . Verify that alarm 34 sounds in less than 14 seconds. Release the switch immediately. Note: If the water temperature drops below 42.6°C, restart the timer when the water again reaches 42.6C. Note: If the water temperature exceeds 44.1C for more than 1 second Alarm 33 will occur, and the test must be repeated Note: If S4 is held too long or is pressed when no water is flowing, a safety circuit will turn off power to the heater. The CTU must be allowed to cool completely if this should occur. 14.
4.5
Stage 7: Chiller Capacity Test
1. Press the Manual Mode Key. 2. Press the Down Key once and change the “Water Target Temperature” to 6C. 3. Press the Home Key. 4. Allow the water temperature to stabilize at 6C for at least 5 minutes. 5. Press and hold S4 for 10 minutes. Note the temperature of the water. Release the switch. 6. Note: If S4 is held too long or is pressed when no water is flowing, a safety circuit will turn off power to the heater. The CTU must be allowed to cool completely if this should occur.. 7. Once verification and calibration is complete, press the “Purge” key to remove the water from the CTU. 8. Turn off the ARCTIC SUN® Temperature Management System Model 2000, and remove the CTU. Disconnect associated cabling from the Model 2000 and reconnect operator cabling. 9. Drain the water from the CTU before storing
17
Table 4.1 Model 2000 Verification Data
Test
Criteria
Flow Rate
Factor H - 300ml/min < Flow < Factor H + 300ml/min
Inlet water pressure
-7.2 psi < P < -6.8 psi
Patient Temperature 1 PT1 (4 checks)
-0.3 C < CK1 < 0.3C -0.3 C < CK2 < 0.3C -0.1C < CK3 < 0.1C -0.3C < CK4 < 0.3C
Patient Temperature 2 PT2 (4 checks)
-0.3C < CK1 < 0.3C -0.3C < CK2 < 0.3C -0.1C < CK3 < 0.1C -0.3C < CK4 < 0.3C
Patient Temperature Echo Out (4 checks)
-0.2C < CK1 < 0.2C -0.2C < CK2 < 0.2C -0.2C < CK3 < 0.2C -0.2C < CK4 < 0.2C
Water Temperature T1 (3 checks)
-0.4C < CK1 < 0.4C -0.4C < CK2 < 0.4C -0.2C < CK3 < 0.2C
Water Temperature T2 (3 checks)
-0.4C < CK1 < 0.4C -0.4C < CK2 < 0.4C -0.2C < CK3 < 0.2C
Water Temperature T3 (3 checks)
-0.4C < CK1 < 0.4C -0.4C < CK2 < 0.4C -0.4C < CK3 < 0.4C
Water Temperature T4 (3 checks)
-0.4C < CK1 < 0.4C -1.0C < CK2 < 1.0C -1.0C < CK3 < 1.0C
Miscellaneous Heat Cool Flow
Heat < 120 seconds Cool < 150 seconds Factor H - 300ml/min < Flow < Factor H + 300ml/min
Secondary Alarm
Alarm 37 in < 18 seconds
18
Test
Criteria
Primary Alarm
Alarm 34 in < 14 seconds
Chiller Capacity Test
Model 2000-02: Water Temp. < 12°C
Model 2000-03 or -10: Water Temp. < 13°C
19
APPENDIX A SPECIFICATIONS Voltage: 115V, 60Hz or 230, 50/60Hz Current: 4.5A or 2.25A Fuse: 6.3A Slow Blow (2) Power: 500W
Spécifications Voltage: 115V, 60Hz ou 230, 50/60Hz Courant: 4.5A ou 2.25A Fusibles: 6.3A (2) Alimentation: 500W
20