User Manual
10 Pages
Preview
Page 1
User Manual
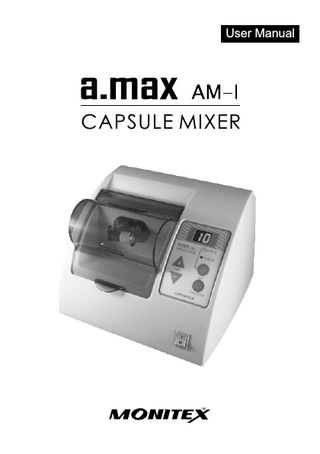
CAPSULE MIXER
Disclaimer: 1. First of all, we would like to thank you for purchasing Monitex AM-I Optimum Capsule Mixer. Please carefully read the user manual and operate the apparatus accordingly. Please keep this user manual well preserved for future reference. 2. Monitex shall not assume any responsibility if any malfunction or damage was caused by improper operation, removal, modification or maintenance. 3. We shall not assume any responsibility if any malfunction or damage was caused by operating under unsuited environment. 4. We shall not assume any responsibility if any malfunction or damage was caused by forceful majeure. 5. We reserve the right to explain for the given cause of the Defective products which might have been caused by natural disasters or abnormal temperature, humidity that is inconcurrent to the guidance instructed in this manual.
ENGLISH
Content Product parts & accessories...2 Important tips before operation...3 Operating steps...4 Important tips on product maintenance...5 Important tips on product cleaning...5 Trouble Shooting...6 Product Warranty & Repair...6 Product Specification...7
1
Product Parts & Accessories
7 1
5 4
2 6 8 3
9
1 Protective Shield: The safety switch will be activated when the Protective Shield is not closed. The machine will automatically stop its operation in case the protective shield is opened. 2 Holding Arms: Where to place the capsule. 3 Power Button: The Mode indicator & Time Display indicator will start to blink (showing display of “10” ) when the power button is pressed ON. 4 Mode Set-up Buttons: Press Mode button to set up required Mode setting. 5 Mode Indicator: When the required mode is selected, the corresponding indicator will be turned on. - Timer Setting Button: 6 ▲▼ + To set the mixing time, adjustable up to 1~30 seconds. 7 Time Display indicator: Display the selected mixing time. The timer will blink during operation as it counts down. 8 STORT/STOP Button: Press the button to start operation. Press once again to stop the operation at anytime. 9 Adaptor: 100V ~ 240V 50/60Hz
2
ENGLISH
Important tips before Operation 1. Due to transportation requirement, all the motors inside each unit is secured with 2 fixing screw bolts. Please observe below diagram for removing these screws before place the capsule mixer on the cabinet. 1) Please unscrew the two screw bolts, which are pre-installed at the bottom of each unit, like shown in the Diagram 1. Please maintain the balance of the apparatus while removing the screw bolts. 1 Please also remove the two screw bolts simultaneously as unscrewing only 1 bolts first could result in difficult position for the other screw bolt to be loosen. 2) Please safe-keep these two bolts to the screw holes pre-designated in the Diagram 2 for future needs. When the apparatus requires to 2 be transported from one place to another, please screw back these two screw bolts before removal or delivery to prevent possible damage. 3) Insert the “L” shape plug into the amalgamator power socket, then connect the power plug with the adaptor. Please make sure the 3 power plug is connected securely. (Like shown in Diagram 3)
3
Operating STEPS 1. After pressing the Power button on, the mode indicator as well as the time indicator will start blinking. There should be a sign of “10” seconds blinking in the display.
2. Depending on each characteristic of different capsules, the time equired for mixing might vary from others. Please refer to the specified capsule instruction for further details. ※ The Amalgam capsule & Filling material in general require an average time of 10 seconds to gain a consistent mixture. Material with special specification may vary from different capsules. ※ Mixing time can be reset at any given time setting between 1 to 30 seconds. There are 2 separate time setting memories that can allow user to set up two different time setting accordingly. Regarding individual capsule time setting, please review the instruction manual accompanied with the capsule products for further details. 1) Please make sure the Protective glass is securely closed. 2) Press Set button to select the designated mode. - ” - add to change the time set up mode. Press “▲” or “ ▼ 3) Press ▲/▼ + + to add or reduce the mixing time by one second. 4) Press “SET” button to confirm the setting. The time indicator will change from blinking display to fix display. 3. Open the Protective shield, and place the capsule into the holding arms as shown in diagram 4.
4
4
ENGLISH
4. Securely close the protective glass and press “START/STOP” button to begin mixing operation. The timer display on the screen will start to countdown as time proceeds. ※ This apparatus will not operate if the protective glass is not securely shut. The time indicator will display “OF” as a result. 5. After Mixing complete, please open the protective glass and take the capsule from the holding arms. Please reivew diagram 5 for removing the capsule.
Important tips on Product maintenance 1. Do not operate when the capsule is not in place. Operation without capsule might result malfunction under human error. The possible damage is not covered with warranty. 2. The location of this product should be avoided under direct sun light. Please DO NOT place this equipment under dusty environment. 3. Perchance when liquid inside the capsule escaped inside the mixing chamber, please immediately wipe clean to prevent possible damage of color-change or metallic distortion caused by Dental-use liquid or solvent.
Important tips on Product cleaning Please apply with soft clean clothe soaked with warm water or disconcentrated neutral cleaning agent to wipe clean the surface of this equipment. One should avoid using Volatile solvent when cleaning.
5
Trouble Shooting When there are some problems or troubles, occuring on the capsule mixer, please check against the below listed SOP. If none of the provided possible cause matches your situation, please contact your local dealer or Monitex for solution or repair. Thank you. Scenario
Possible Cause
Possible Solution
The plug of the power adaptor might be loosen.
Please make sure the power adaptor plug-in to the unit.
The L shaped power plug might be loosen.
Please make sure the L-shape plug is plug-in properly.
The protective shield is open.
Make sure the protective shield is firmly shut.
The apparatus moves during operation.
Please check if the apparatus is placed on uneven surface.
Please place a securely stable plastic pad under the equipment.
Abnormal Noise
2 Screw bolts have not been removed.
Unscrew the two screw bolts at the bottom of the units.
Unable to operate when pressing START / STOP button
Product Warranty & Repair All Monitex Products were manufactured under thorough quality control. Perchance the apparatus were to be broken under normal operation in accordance to the Instruction Manual within warranty period . The broken unit is subject to repair and maintenance free of charge. Please contact your nearest local dealer or Monitex Industrial Co., Ltd. for your inquiry & best solution. Our warranty period extends 1 year after the date of purchasing.
6
ENGLISH
Specification Product Classification: Protection against power strike
CLASS I equipment
Voltage
DC24V
Input Power
50VA
Specification on the power adaptor
(Input) AC110V~240V 50/60Hz (Output) DC24V
Specification: Timer Set up
1~30 Seconds Time adjustable
Modes
2 modes
Operating temperature
10º C~40º C
Size
Machine-L 210 x W 200 x H 150 mm Adaptor-L 60 x W 120 x H 40 mm
Weight
3.1kgs (Power adaptor included)
** Product specification is subject to implementation of change or further upgrades without prior notice.
7