User Instructions
168 Pages
Preview
Page 1
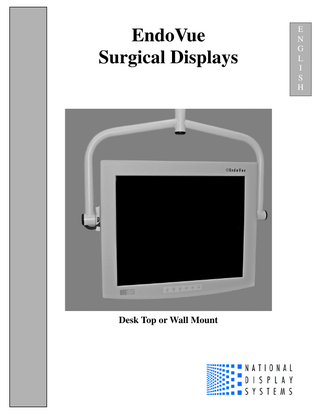
EndoVue Surgical Displays
Desk Top or Wall Mount
E N G L I S H
Table of Contents Tab 1 Safety Considerations ---------------------------------------------------------------------------- ii Declaration of Conformity ----------------------------------------------------------------------iii Limited Warranty ---------------------------------------------------------------------------------iii Tab 2 About This Manual --------------------------------------------------------------------------------1 Quick Startup---------------------------------------------------------------------------------------1 Powering On The Unit -------------------------------------------------------------------------1 First Time Users and Initial Test--------------------------------------------------------------1 Tab 3 Connector Panels ----------------------------------------------------------------------------------2 Display Mounting to Base -----------------------------------------------------------------------3 Tab 4 Control ----------------------------------------------------------------------------------------------4 Image Adjustments --------------------------------------------------------------------------------4 Brightness ----------------------------------------------------------------------------------------4 Contrast ------------------------------------------------------------------------------------------4 Backlight -----------------------------------------------------------------------------------------4 Tab 5 Menu Systems Overview -------------------------------------------------------------------------5 Video Source ---------------------------------------------------------------------------------------6 Display Set Up -------------------------------------------------------------------------------------7 SDI Picture Menu -------------------------------------------------------------------------------7 S-Video Picture Menu--------------------------------------------------------------------------7 Composite Picture Menu -----------------------------------------------------------------------7 VGA Picture Menu -----------------------------------------------------------------------------8 RGBS / YPbPr Picture Menu -----------------------------------------------------------------8 Color Menus -------------------------------------------------------------------------------------9 Setup Menu ------------------------------------------------------------------------------------ 10 Defaults Menu --------------------------------------------------------------------------------- 11 Tab 6 Troubleshooting --------------------------------------------------------------------------------- 12 Tab 7 Drawing and Dimensions ----------------------------------------------------------------------- 13 EndoVue 15 ------------------------------------------------------------------------------------ 13 EndoVue 19 ------------------------------------------------------------------------------------ 14 Tab 8 Data Connectors and Pin Outs ----------------------------------------------------------------- 15 Power Connector and Pin Out ----------------------------------------------------------------- 16 24 Volt Extension Cable ------------------------------------------------------------------------ 16 Tab 9 Specifications ------------------------------------------------------------------------------------ 17 Video Inputs -------------------------------------------------------------------------------------- 18 Video Formats ----------------------------------------------------------------------------------- 18 Proprietary Notice and Liability Disclaimer ------------------------------------------------- 18 Cleaning Instructions---------------------------------------------------------------------------- 18 Contact -------------------------------------------------------------------------------------------- 19
i
1 CAUTION This symbol alerts the user that important literature concerning the operation of this unit has been included. Therefore, it should be read carefully in order to avoid potential problems.
This symbol warns user that un-insulated voltage within the unit may have sufficient magnitude to cause electrical shock. Therefore, it is dangerous to make contact with any part inside the unit. To reduce the risk of electric shock, DO NOT remove cover (or back). There are no user serviceable parts inside. Refer servicing to qualified service personnel. To prevent fire or shock hazards, do not expose this unit to rain or moisture. Also, do not use this unit's polarized plug with an extension cord receptacle or other outlets unless the prongs can be fully inserted. The display is designed to meet the medical safety requirements for a patient vicinity device. This device may not be used in connection with life support equipment.
Underwriters Laboratories (UL) Classification: UL Safety Compliance: This LCD monitor is U.L. Classified WITH RESPECT TO ELECTRIC SHOCK, FIRE AND MECHANICAL HAZARDS ONLY IN ACCORDANCE WITH UL 60601-1/CAN/CSA C22.2 NO. 601.1. EEC Safety Compliance: This display unit meets the requirements of EN-60601-1 so as to conform to the Medical Device Directive 93/42/EEC (general safety information).
DEMKO EN 60601-1
This monitor complies to the above standards only when used with the supplied medical grade power supply. 24 Volt: Ault MW116KA2400F02 The monitor should be powered from a center tapped circuit when used in the US at voltages over 120 volts. Monitor is intended for continuous operation. This display is energized from an external electrical power source for class 1 equipment. It is the responsibility of the installer to test the display’s earth ground to verify that it complies with the hospital, local and national impedance requirements. A ground post, located on the back of the display, may be used for the purpose of grounding the display’s chassis. Any such ground must be installed in accordance with applicable electrical codes. The ground post is shown on the mechanical drawing found on page 2. This equipment may not be used in the presence of flammable anesthetics mixture with air, oxygen or nitrous oxide.
Recycling: Follow local governing ordinances and recycling plans regarding the recycling or disposal of this equipment. ii
Declarations of Conformity FCC and Council Directives of European Standards: This device complies with Part 15 of FCC rules and 93/42/EEC of the Council Directives of European Standards. Operation is subject to the following two conditions: (1) This device may not cause harmful interference, and (2) this device must accept any interference received, including interference that may cause undesirable results. 1. Use the attached specified cables with the color monitor so as not to interfere with radio and television reception. Use of other cable and adapters may cause interference with other electronic equipment. 2. This equipment has been tested and found to comply with the limits pursuant to FCC part 15 and CISPR 11. This equipment generates, uses and can radiate radio frequency energy and, if not installed and used in accordance with the instructions, may cause harmful interference to radio communications. IEC: This equipment has been tested and found to comply with the limits for medical devices to the IEC 60601-1-1:2001. These limits are designed to provide reasonable protection against harmful interference in a typical medical installation. This equipment generates, uses and can radiate radio frequency energy and, if not installed and used in accordance with the instructions, may cause harmful interference to other devices in the vicinity. FCC, Council Directives of European Standards and IEC: There is no guarantee that interference will not occur in a particular installation. If this equipment does cause harmful interference to radio or television reception, which can be determined by turning the equipment off and on, the user is encouraged to try to correct the interference by one or more of the following measures: • Reorient or relocate the receiving antenna. • Increase the separation between the equipment and receiver. • Connect the equipment into an outlet on a circuit different from that to which the receiver is connected. Accessory equipment connected to this monitor must be certified according to the respective IEC Standards (i.e., IEC 60950-1 for data processing equipment and IEC 60601-1 for medical equipment). Furthermore, all configurations shall comply with the system standard, IEC 60601-1-1. Anyone who connects additional equipment to the signal input part or signal output part configures a medical system, and is therefore responsible that the system complies with the requirements of system standard IEC 60601-1-1. Whoever is responsible for securing the monitor to a system needs to insure that the mounting equipment used with this display complies to IEC standard 60601-1. If in doubt, consult the technical services department or your local representative.
Limited Warranty National Display Systems, Inc. (hereinafter "NDS") warrants this product to be free from defects in material and workmanship and, subject to the conditions set forth below, agrees to repair or replace any part of the enclosed unit other than the LCD backlight, which proves defective for a period of three (3) years from the date of first purchase or 10,000 hours of operation whichever comes first. Spare parts are warranted for ninety (90) days. This warranty is limited to the original purchaser of the product and is not transferable. This warranty covers only NDS supplied components. Service required as a result of third party components is not covered under this warranty. Proof of Purchase will be required by NDS to substantiate date of purchase. Such proof of purchase must be an original bill of sale or receipt containing the name and address of the seller and the purchaser and the serial number of the product. It shall be your obligation and expense to have the product shipped, freight prepaid, or delivered to the authorized reseller from whom it was purchased, or other facility authorized by NDS to render services provided hereunder, in the original package. All products returned to NDS for service MUST have prior approval which may be obtained by contacting the factory. The product shall not have been previously altered, repaired, opened or serviced by anyone other than a service facility authorized by NDS to render such service. The serial number of the product shall not have been altered or removed. In order to be covered by this warranty, the product shall not have been subjected to displaying of fixed images for long periods of time, resulting in image persistence (afterimage effects), accident, misuse or abuse or operation contrary to the instructions contained in the User's Manual. Any such conditions will void this warranty. NDS SHALL NOT BE LIABLE FOR DIRECT, INDIRECT, INCIDENTAL, CONSEQUENTIAL OR OTHER TYPES OF DAMAGES RESULTING FROM THE USE OF ANY NDS PRODUCT OTHER THAN THE LIABILITY STATED ABOVE. THESE WARRANTIES ARE IN LIEU OF ALL OTHER WARRANTIES OF MERCHANTABILITY OR FITNESS FOR A PARTICULAR PURPOSE. The product is warranted in accordance with the terms of this limited warranty. Consumers are cautioned that system configuration, software, the application, customer data and operator control of the system, among other factors, affect the product performance. While NDS products are considered to be compatible with many systems, specific functional implementation by the customers of the product may vary. Therefore, suitability of a product for a specific purpose or application must be determined by consumer and is not warranted by NDS.
iii
About This Manual
2
This manual is designed to assist the user with proper installation, setup and operation of the EndoVue Surgical LCD display. Depending on the model and options that were purchased, some of the features and options in this manual may not apply to the display you are using. A black tab number on the side of the page denotes the beginning of a section. The functional descriptions in this manual are representative of: Model Number: SC-SX19 Firmware BIOS: 58B0182 Version A and later. Model Number: SC-X15 Firmware BIOS: 58B0194 Version A and later. SDI Support: Model Number: SC-SX19 Firmware BIOS: 58B0238 Version A and later. Model Number: SC-X15 Firmware BIOS: 58B0236 Version A and later. Due to the technology utilized to manufacture flat-panel screens, characters will appear crisper with sharper edges than that of a computer CRT. For the same reason, live video may appear a little blocky. Users not familiar with the image differences should familiarize themselves before utilization in a critical application and determine its usability. For mission critical applications, we strongly recommend that a replacement unit be immediately available.
Quick Startup Powering On The Unit: Connect the power supply to the display via the power plug. Plug in the AC adapter. Connect the video source to the EndoVue display. Apply power to the peripheral device, then to the display. The National Display Systems (NDS) logo is displayed, followed shortly by video. The electronics, designed by NDS, incorporates proprietary SmartSync™ technology which at initialization, examines the incoming signal and automatically displays the video image in its proper format. This eliminates making adjustments to most video sources. To fine tune the image, please refer to “Image Adjustments” on page 4.
First time users and initial test: Visually, Flat-Panel (LCD) images will look crisper than those of a traditional CRT. It is recommended that first time users view the display next to a CRT to familiarize themselves with any subtle differences in viewing quality.
1
Connector Panels
EndoVue 19
3 EndoVue 19 with SDI
EndoVue 15
EndoVue 15 with SDI
Notes 1. An S-Video signal may be applied via 2 BNC terminated cables to the Y and C labeled BNC connectors or a DIN 4 terminated cable, but not both. 2. RGBS, VGA or YPbPr signals may be applied via the HD-15 connector or the R / Pr, G / Y, B / Pb, HS / C-SYNC and VS BNC connectors. If the HD-15 connector is used for inputs, then the BNC connectors may not be used for inputs. 3. Set the REDRIVE switch to Off when the RGBS, VGA and YPbPr signals will not be daisy chained to another display. The REDRIVE switch is set to On when the RGBS, VGA or YPbPr signals will be daisy chained to a second display.
Electrical Symbols Equipotentiality: This symbol appears next to the display’s Potential Equalization Conductor. (ground post) Open (Off) Switch: This symbol appears on the open, or off, side of the display’s rocker switch. Closed (On) Switch: This symbol appears on the closed, or on, side of the display’s rocker switch. 2
Display Mounting to Stand Attach the stand to the display using the four supplied thumbscrews. Note: Display Stand is an optional accessory. Order Part Number: 26B0063
3
Control The EndoVue displays are controlled via a 6 button keypad. The keypad, located on the bottom front of the display, allows the user to make adjustments to various display parameters using the On Screen Menus (OSM) system.
4 Image Adjustments
Adjust Brightness Press the Brightness / Contrast button to display the Brightness control. Press the or button to increase or decrease brightness. Setting the brightness too high or too low will decrease the amount of visible grayscales.
Adjust Contrast Press the Brightness / Contrast button twice to display the Contrast control. Press the or button to adjust the contrast. Setting the contrast too high or too low causes loss of some grayscales. Color saturation may appear incorrect.
Adjust Backlight Press the Brightness / Contrast button three times to display the Backlight control. Press the or button to set the backlighting. Note: Lowering the backlight level will increase the backlight lifetime.
4
Menu Systems Overview Press the MENU button once to open the Menu System. The current video input is shown in the Display Mode tab on the top right of the menu. The Menu System opens with Picture menu displayed. Press the or button to select the menu you want to work with, then press the SCROLL button to select the parameter. Press the or button to set the parameter to the desired value. Press the MENU button to save your changes and close the Menu System.
5
Notes: 1. All parameter names change to the language selected in the Setup Menu. 2. Grayed out parameters are not accessible. 3. SDI is not available on all EndovVue displays.
Language List: English Deutsch Francais Italiano Svensk Espanol Nederlands 5
Video Source Inputs Menu
When the display is powered on Auto Source Select looks at the previously selected video source first. If a signal is present it is displayed, otherwise Auto Source Select starts scanning the inputs for a signal. To switch to a different input source, press the INPUT button to open the input menu. The Input menu shows: selected to the right of the active input. Press the SCROLL button to highlight the desired input. Finally, press the button to select it. To select RGBS-VGA* / YPbPr; Scroll to the RGBS-VGA / YPbPr input and press the button to select the input. Finally, press the button to toggle between RGBS-VGA / YPbPr . The inactive input is grayed out. *Notes: 1. The display’s internal logic determines if an applied signal is RGBS or VGA and configures itself accordingly. 2. SDI is not available on all EndoVue displays
6
Setting Up the Display SDI Picture Menu
S-Video Picture Menu
Composite Picture Menu
Horizontal Position Moves the image to the left or right. Press
or
Vertical Position Moves the image up or down. Press
to vertically center the image.
Sharpness Press or
or
to horizontally center the image.
to adjust the sharpness (focus) of the displayed image.
Overscan off = Picture is displayed at the maximum size that will fit on the screen without losing video information. on = Stretches picture horizontally and vertically to fill the screen, but does not change its aspect ratio. Some video information may be lost. Picture may have black bars top and bottom or left and right. Select using or buttons. Video Format auto = Automatically sets the unit to the format of the connected video source. ntsc = Sets the unit to accept NTSC video. pal = Sets the unit to accept PAL video. Select using or buttons.
7
VGA Picture Menu
RGBS / YPbPr Picture Menu
Horizontal Position Moves the image to the left or right. Press
or
Vertical Position Moves the image up or down. Press
to vertically center the image.
or
to horizontally center the image.
Sharpness Press or to adjust the sharpness (focus) of the displayed image. Note: When the VGA input is active Sharpness cannot be adjusted when the display is operating at native resolution. Phase Press or
to adjust the phase of the display’s pixel clock.
Frequency Adjusts the frequency of the display’s pixel clock. With Scaling set to Fill adjust until image just fills the screen horizontally. Press or to adjust the frequency of the display’s pixel clock. Scaling (VGA ) Fill = Expands the video image to fill the entire screen. The aspect ratio may not be accurately displayed. Aspect = Expands the video image until its largest dimension fills the screen. Image may be displayed with black bars on the top and bottom or the left and right. 1:1 = Displays the video data in its native size and aspect ratio. Image may be displayed with black bars on the top and bottom and on the left and right. Select using or buttons. SmartSync™ On initialization NDS’ proprietary SmartSync™ technology examines the incoming signal and automatically displays the video image in its proper format. To run select SmartSync™ and press the button. When the input is RGBS the resolution toggles from 737 x 464 to 720 x 480 or vice versa each time SmartSync™ is run. Overscan (RGBS / YPbPr) off = Picture is displayed at the maximum size that will fit on the screen without losing video information. Picture may have black bars top and bottom or left and right. on = Over scans the screen by 5%. Select using or buttons.
8
Color Menus
VGA
SDI, RGBS, YPbPr, S-Video and Composite
Gamma (VGA) Press or to select a preset Gamma, Video or PACS Notes: 1. Video is a color corrected Look Up Table (LUT) available with VGA. 2. Picture Archive Communications System (PACS) is a DICOM-like LUT available with VGA. Saturation (SDI, RGBS, YPbPr, S-Video and Composite) Press or to set the saturation (color intensity) of the image. Red, Green, Blue (All) Press the or button to increase or decrease the intensity of the selected color. Hue (SDI, RGBS, YPbPr, S-Video and Composite) Press or to set the hue (color tint) of the image.
9
Setup Menu
Menu Position Places the menu in 1 of 9 predefined screen positions. Press the positions.
or
button to select any of the 9 screen
Language Selects 1 of 7 languages: English, Deutsch, Francais, Italiano, Scandinavia, Espanol or Dutch. Press the button to select any of the 7 languages.
or
DPMS Enable Display Power Management System. When DPMS is enabled (on), and no input signal is present, an “Entering Power-Save Mode” message is displayed for 10 - 15 seconds, after which the display shuts down. This prolongs the life of the backlight tubes in the display. The display turns on when the input signal is restored. Press the button to enable DPMS, press the button to disable DPMS. Auto Source Select on = Searches through all possible input sources until an active video source is found. off = Video input is manually selected. Press the or button to disable or enable Auto Source Select. Menu Lock Disables access to menu system. This prevents inadvertent changes to the display’s settings. To enable Menu Lock, press the button. MENU LOCKED is displayed when the button is pressed. To unlock, simultaneously press and hold the MENU and SCROLL buttons until MENU UNLOCKED is displayed. Operating Hours: Backlight hours of operation. BIOS: Version of the display’s BIOS firmware.
10
Defaults Menu
Factory Defaults Displays Restoring Factory Defaults message and returns all settings to their factory preset values. Press the SCROLL button to highlight Factory Defaults, then press the button. User Defaults Allows up to five customized user settings to be saved. Setting User Defaults 1. Set the Picture, Color and Setup parameters to the user’s preferences. 2. Select the Defaults tab. 3. Use the SCROLL button to select an available User Defaults. ***EMPTY*** appears in available User Defaults. 4. Press the to save the user’s settings. The ***EMPTY*** message will be removed, see User Defaults 1 in the above OSM illustration. 5. Repeat steps 1 thru 4 for up to 5 users. Restoring User Defaults 1. Select the User Defaults to be restored, then press the
button .
Clearing User Defaults 1. Select the User Defaults to be cleared, then press the Brightness / Contrast button . Note: The prompt at the bottom of the Defaults menu appears only when one of the User Defaults is selected.
11
Troubleshooting Section Image Size is Very Large for the Screen If the computer data does not appear to be the correct format, then SmartSync™ must be run. To run SmartSync™, press the Menu button. Select the Setup menu. Press SCROLL to highlight SmartSync™ , then press the button. SmartSync™ will run and size the image properly. Ghosting in Characters Ghosting in characters is usually attributed to reflections in the video cable or source. Use a high quality coaxial cable and, if possible, lower the vertical refresh rate. Lower scan rates can help eliminate reflections. Unlike a CRT a flat-panel will not flicker at lower refresh rates (60 Hz is optimal) and data update will be the same at all refresh rates. Text is Too Small Since the monitor accepts and displays computer data with a higher resolution than the display’s native resolution, this may produce small text. In the Menu check the Display Mode tab. Verify that the computer data resolution does not exceed the Native Resolution specification shown on page 17. Character Jitter If text characters seem to be “shaky” or bold, then Sharpness, Frequency and / or Phase may require adjusting. See: Setting Frequency, Phase and Sharpness below. Character Noise and Vertical Distortion The Frequency adjustment expands or contracts the horizontal size of the displayed image. The displayed image may be too wide or too narrow and vertical banding and pixel jitter may appear in grays and light colors. Adjust the Frequency until the image just fits the screen. Horizontal position adjustment can be used to verify that Frequency is set correctly. Line up the image on the left edge of the screen and then shift by one “click” to the right. The image should have one column off the screen on the right side if the Frequency is set correctly. Black Screen Power the display Off and On. If the NDS logo appears then the display is working properly. Check if the power management feature (DPMS) is enabled. An “Out of Range” message appears in the upper left hand corner when an input source is out of the display’s resolution range. A “Searching” message appears in the lower right hand corner when the video source is not present. Setting Frequency, Phase and Sharpness Windows Users: Open a WordPad document and set the font to Arial 8. Press the enter key to move the cursor to the middle of the page. Hold the shift and + keys down to create a line of +s. If the + signs appear in groups of light or dark, then the Frequency is not correct. Press the MENU button to open the OSM, then SCROLL to the Frequency parameter. Press the or buttons to increase or decrease Frequency. There will be a point were all the + signs snap into focus and are the same intensity. Phase and Sharpness are subtle adjustments and are best set using a display calibration program.
12
6
Drawing and Dimensions EndoVue 15
7
Display Stand is an optional accessory. Order Part Number: 26B0063
13
EndoVue 19
14
Data Connectors and Pin Outs RGBS / YPbPr 1 RED
6 GND RED
11 N. C.
2 GREEN
7 GND GREEN
12 N. C.
3 BLUE
8 GND BLUE
13 C. Sync / H. Sync.
4 N. C.
9 N. C.
14 V. Sync.
5 GND TEST
10 GND
15 N. C.
VGA 1 RED
6 GND RED
11 ID0
2 GREEN
7 GND GREEN
12 ID1
3 BLUE
8 GND BLUE
13 HORIZ SYNC
4 ID2
9 N. C.
14 VERT SYNC.
5 GND
10 SYNC GND
15 ID3
S-Video
8 Pin
Name
Description
1 GND
Ground (Y)
2 GND
Ground (C)
3 Y
Intensity (Luminance)
4 C
Color (Chrominance) Serial and / or Touch Screen Control
Pin
Name
Description
1
NC
2
RXD Touch Screen Data Receive
3
TXD Flash Upgrade & Touch Screen Transmit
4
NC
5
GND Ground
6
NC
7
NC
8
NC
9
RXD Flash Upgrade Receive Data
Note: The following cables are available from NDS. 1. Flash Upgrade Cable order part number: 35Z0009
15
Power Connector and Pin Out
24 volt connector X Z
Pin
1
2
3
+ 24 VDC
GND
Shield
Y
24 Volt Extension Cables Note: Use of an extension cable may invalidate the unit’s UL Classification. Use only copper wire for power wiring. Power extension cable shall be constructed in accordance with applicable hospital and electrical codes. The table below shows the maximum cable length for a given wire gauge. Cable should be constructed of SJT, SJTO, SJO, ST, SO, STO or equivalent flexible cord per US National Difference Clause 59.1DV. Users outside of the U.S. should adhere to the applicable electrical codes for their country. The cable requires one each of the following connectors: Switchcraft SL403F (female) and SL413M (male). See illustration below. AWG
Maximum Length
14
250 ft / 76 m
16
150 ft / 45 m
18
100 ft / 30 m
16