Operators Manual
146 Pages
Preview
Page 1
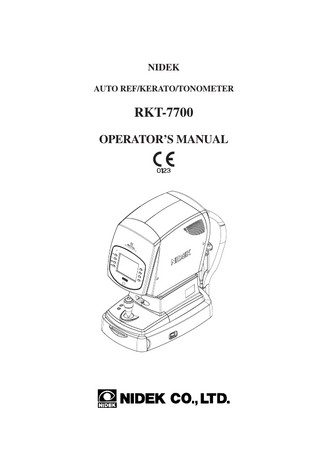
NIDEK AUTO REF/KERATO/TONOMETER
RKT-7700 OPERATOR’S MANUAL
NIDEK CO., LTD. (Manufacturer) NIDEK CO., LTD (Tokyo Office)
NIDEK INCORPORATED (United States Agent) NIDEK SOCIETE ANONYME (Authorized Representative)
: 34-14, Maehama, Hiroishi-cho, Gamagori, Aichi 443-0038, Japan Telephone: (0533) 67-6611 Facsimile: (0533) 67-6610 : 6th Floor, Takahashi Bldg., No.2, 3-chome, Kanda-jinboucho Chiyoda-ku, Tokyo 101-0051, Japan Telephone: (03) 3288-0571 Facsimile: (03) 3288-0570 Telex: 2226647 NIDEK J : 47651 Westinghouse Drive, Fremont, California 94539, U. S. A. Telephone: (510) 226-5700 Facsimile: (510) 226-5750 : Europarc 13, rue Auguste Perret, 94042 CRETEIL, France Telephone: (01) 49 80 97 97 Facsimile: (01) 49 80 32 08 2005. 4 32105-P902D Printed in JAPAN
:
Use this device properly and safely.
BEFORE USE, READ THIS MANUAL. This Operator's Manual contains information necessary for the operation of the NIDEK AUTO REF/KERATO/TONOMETER Model RKT-7700. This manual includes the operating procedures, safety precautions, and specifications. IEC standards are applied in this manual. The safety precautions and operating procedures must be thoroughly understood prior to operation of the device. Keep this manual handy for reference. The device complies with ISO 10342 (Ophthalmic instruments-Eye Refractometers). The dioptric powers are indicated with reference wavelength λd = 587.56 nm. There are no user-serviceable parts inside the device except a printer paper and fuses. If you encounter any problems or have questions about the device, please contact NIDEK or your authorized distributor.
Safety precautions In this manual, signal words are used to designate the degree or level of safety alerting. The definitions are as follows.
WARNING • Indicates a potentially hazardous situation which, if not avoided, could result in death or serious injury.
CAUTION • Indicates a potentially hazardous situation which, if not avoided, may result in minor or moderate injury or property damage accident.
Even situations indicated by “ CAUTION” may result in serious injury under certain conditions. Safety precautions must be strictly followed at all times.
I
:
Use precautions
Before Use CAUTION • Never use the device for other than its intended purpose.
NIDEK will assume no responsibility for accident or malfunction caused by improper use.
• Never modify nor touch the internal structure of the device. Electric shock or malfunction may result. • Install the device in an environment that meets the following conditions. The following conditions must be maintained during use. Use conditions Temperature: 10 ºC to 35 ºC Humidity: 30 to 75 % (Non-condensing) Pressure: 800 hPa to 1060 hPa No large amount of dust is contained in the air Place with a little influence of disturbance light Vibration- and shock-free, level and stable surface without vibration and shock If the device is not installed and used under the above conditions, the reliability of measured results is lowered, and malfunction may result. In addition, there is a fear of injury if the device receives a shock and falls down. • Install the device in an environment where no contaminants such as corrosive gas, acid, and salt are contained in the air. Corrosion or malfunction of the device may result. • Avoid installing the device where it is exposed to direct air flow from an air conditioner. Changes in temperature may result in condensation inside the device or adversely affect measured results. • Be sure to use a power outlet which meets power requirements. If the supplied voltage is too high or low, the device may not deliver full performance, and malfunction, or fire may result. • The electrical outlet must be equipped with a grounding terminal. Electric shock or fire may result from current leakage caused by malfunction. • Insert the mains plug into an outlet as far as the prongs of the plug will go. Imperfect connection may result in fire. • For supplying the device with the power, never use a table tap and an extension cable. There is a fear of reduction in electrical safety. • Never crush nor pinch the power cord with heavy objects. Damage may result in electric shock or fire.
II
:
CAUTION • Before connecting cables to the device, turn the device off and disconnect the power cord from an outlet.
Malfunction may result. • Before transporting the device, put the device into the packing mode and lock the main body to the base with the locking lever. An accidental movement of the measuring unit during transportation may result in malfunction. • When the device is carried, two persons should hold (A) and (B) (both right and left sides). Avoid holding the forehead rest and the main body; hold the bottom of the base. If only one person carries the device, or areas other than the base are held and the device falls, there is a fear of injury or malfujnction.
• To transport the device, use the attached packing materials to protect the device from a shock from dropping etc.
(A)
(B)
Excessive vibration or impact to the device may result in malfunction. • This device has been tested and found to comply with the limits for medical devices to the IEC 60601-1-2: 2001, and Medical Device Directive 93/42/EEC. These limits are designed to provide reasonable protection against harmful interference in a standard medical installation. This device generates, uses and can radiate radio frequency energy and, if not installed and used in accordance with the instructions, may cause harmful interference to other devices in the vicinity. However, there is no guarantee that interference will not occur in a particular installation. If this device does cause harmful interference to other devices, which can be determined by turning the device off and on, the user is encouraged to try to correct the interference by one or more of the following measures: If this device does cause harmful interference to other devices, which can be determined by turning the device off and on, the user is encouraged to try to correct the interference by one or more of the following measures: - Reorient or relocate the receiving device. - Increase the separation between the devices. - Connect the device to an outlet on a circuit different from that to which the other device(s) are connected. - Consult the manufacturer or field service technician for help.
III
:
CAUTION • In installation and operation of the device, observe the following instructions about EMC (electromagnetic compatibility):
- Do not use the device simultaneously with other electronic equipment to avoid electromagnetic interference with the operation of the device. - Do not use the device near, on, or under other electronic equipment to avoid electromagnetic interference with the operation of the device. - Do not use the device in the same room with other equipment such as life-support equipment, other equipment that has major affects on the life of the patient and results of treatment, or other measurement or treatment equipment that involves small electric current. - Do not use the device simultaneously with portable and mobile radio frequency communication systems because it may have an adverse effect on operation of the device. - Do not use cables and accessories that are not specified for the device because that may increase the emission of electromagnetic waves from the device or the system and decrease the immunity of the device to electromagnetic disturbance. • The Electromagnetic Compatibility Directive sets the essential requirements for electrical and electronic equipment that may disturb, or be disturbed by, other equipment. The RKT-7700 complies with these requirements as tabled on pages 119 to 122. Follow the guidance in the tables for use of the device in an electromagnetic environment.
During Use WARNING • Before starting NT measurement, set the safety stopper for each patient to prevent the air nozzle from touching the patient’s eye.
Contact between the air nozzle and the eye may damage the cornea.
CAUTION • Properly connect interface cables, checking the input (IN:
) and output (OUT:
)
symbols. Data transmission will not be performed properly. • Every time before capturing a different patient, wipe the patient contact areas (chinrest and forehead rest) with a clean cloth. If necessary, wipe them with a cloth dampened with rubbing alcohol. If the chinrest paper is used, remove one piece for each patient. • Keep the measuring window free of fingerprints and dust. The accuracy of measurements may deteriorate substantially. • In the event that a strange odor or smoke is noticed coming from the device, turn it off and unplug the power cord immediately. After confirming that the smoke is no longer being produced, contact NIDEK or your authorized distributor. Continued use may result in electric shock or fire. In case of fire, use a dry chemical (ABC) extinguisher.
IV
:
CAUTION • If the internal wires of the power cord are exposed, power to the device is interrupted by moving the cord, or the plug or cord becomes extremely hot, this indicates that the cord is damaged. Immediately replace the power cord. Immediately remove the plug from the outlet and contact NIDEK or your authorized distributor for replacement; otherwise, electric shock or fire may result. • Never press the LCD screen with a hard object such as a ball-point pen.
Keep
magnetic objects away from the LCD screen. Malfunction may result. • Do not operate the LCD screen with wet hands. Water intrusion may result in malfunction of the device. • There may be a few “constantly-lit”, “missing” or “dead” pixels in your LCD screen which are a characteristic of the LCD screens, This does not represent a failure of the LCD screen; continuously use the monitor.
After Use CAUTION • When the device is not in use, turn it off, put the cap on the measuring window and dust cover over the device.
Dust may affect the accuracy of measurements. • Never pull the power cord to remove it from an outlet; always hold the plug. The metal core of the cord may be damaged and electric shock, malfunction, or fire may result. • Wipe between the prongs of the power plug periodically. Dust that may settle between the prongs attracts moisture and could result in short circuit, electric shock, or fire. • If the device will not be used for a long period of time, disconnect the power cord from the grounded power outlet . Fire may result. • Maintain the surrounding temperature and humidity at the following ranges during transportation and storage of the device. Environmental conditions: Temperature: –20 ºC to 60 ºC Humidity: 10 to 95 % (non-condensing) Pressure: 800 hPa to 1060 hPa No large amount of dust is contained in the air. A place not exposed to direct sunlight • To transport the device, use special packing materials to protect it from shock and impact. Excessive vibration or impact may result in malfunction.
V
:
Maintenance CAUTION • Only service technicians properly trained by Nidek may service the device.
Nidek assumes no responsibility for accidents resulting from improper servicing.
• When performing maintenance work, secure a sufficient maintenance space. Maintenance work in an insufficient space may result in injury. • Prior to replacement of the fuses, turn off the power and unplug the power cord from the power outlet. Electric shock may result. • Use the specified fuses to replace the old ones. If not, fire may result. • When the device is sent back to NIDEK for repair or maintenance, wipe the surfaces (especially, the area where patients contact) of the device with a clean cloth dampened with ethyl alcohol for disinfection. • Contact NIDEK or your authorized distributor to check whether the device needs measurement accuracy calibration if the AR-measured results are substantially different from subjectively measured results.
Disposal CAUTION • Follow local governing ordinances and recycling plans regarding disposal or recycling of device components. The device contains the circuit board with a lithium
battery mounted. Because the disposal method of lithium batteries varies according to the local government, follow the local governing ordinates and recycling plans when disposing of the circuit board with the lithium battery. It is recommended to commission the disposal to a designated industrial waste disposal contractor. • When disposing of packing materials, sort them by material and follow local governing ordinances and recycling plans.
VI
:
{ Patient environment The patient environment represents a space where there is a possibility of direct contact between the patient or the operator and third person. When another type of device is used in the patient environment, use a device that complies with IEC 60601-1. If the devices that do not comply with IEC 60601-1 are used, it is necessary to use an isolating transformer as a power supply or to connect the devices to additional protective grounding.
Radius of 1.5 m
2.5 m
1.5 m
1.5 m
VII
Table of Contents 1. BEFORE USE... 1 1.1 Outline of the device...1 1.2 Indications for Use...2 1.3 Principles...3 1.4 Device Description...4 1.5 Screen Description...9 1.5.1 1.5.2
R/K measurement screen...9 NT measurement screen...14
1.6 Labels and Indications on the Device...16 1.7 Checking Contents...17 1.8 Before First Use...18
2. OPERATING PROCEDURES... 21 2.1 Operation Flow...21 2.2 Preparation for Measurements...22 2.2.1 2.2.2
Measuring window check for soiling and puffed out air pressure check during startup.27 Switching between the R/K measurement to NT measurement...29
2.3 Finishing Measurements...30 2.3.1 2.3.2
Normal shutoff...30 Shutoff before transporting the device...31
2.4 Selecting the Mode...32 2.4.1
Switching to the manual mode...34
2.5 AR (refractive error) and KM (corneal curvature radius) Measurements . . .35 2.5.1 2.5.2 2.5.3
AR (refractive error) and KM (corneal curvature radius) measurements: AR/KM measurement mode...35 AR (refractive error) measurement: AR measurement mode...45 KM (Corneal curvature radius) measurement: KM measurement mode...47
2.6 NT (Tonometry) Measurement: NT Mode...49 2.6.1
Eyelid detection mode...59
2.7 CS (Corneal Size) Measurement...60 2.8 PS (Pupil Size) Measurement...62 2.9 PD (Pupillary Distance) Measurement...64 2.9.1 2.9.2
Auto-PD measurement...64 Manual PD Measurement...64
2.10 Measuring Hard Contact Lenses...66 2.11 Printout...68 2.11.1 Printing Measured Data...68
VIII
:
2.11.2 Eyeprint... 71 2.11.3 Printing parameter settings... 72
2.12 Parameter Settings... 73 2.12.1 Parameter Tables... 75 2.12.2 Setting the date and time... 87 2.12.3 Entering comments... 89
3. OPERATION WHEN PHERIPHERAL DEVICES ARE CONNECTED... 91 3.1 Connecting to the NIDEK Motorized Refractor (RT) or Computer... 91 3.1.1 3.1.2 3.1.3
Outline... 91 Method of connection... 92 Operating procedure... 92
3.2 Connecting to the NIDEK Auto Lensmeter (LM)... 93 3.2.1 3.2.2 3.2.3
Outline... 93 Method of connection... 93 Operating procedure... 94
3.3 Connecting to the Eye Care Card System... 95 3.3.1 3.3.2 3.3.3 3.3.4
Outline... 95 Method of connection... 95 Transferring data with the EyeCa-RW... 96 Erasing data on the Eye Care card... 97
3.4 Reading a Patient ID... 98 3.4.1 3.4.2
Entering a patient ID using a barcode scanner... 98 Entering a patient ID using a numeric keypad... 100
4. MAINTENANCE... 103 4.1 Troubleshooting... 103 4.2 Various error codes and Suggested Actions... 104 4.3 Replacing Printer Paper... 108 4.4 Replacing Fuses... 110 4.5 Fixing a Stack of Chinrest Paper... 111 4.6 Checking AR/KM Measurement Accuracy... 112 4.7 Cleaning... 113 4.7.1 4.7.2 4.7.3
Cleaning the measuring window... 113 Cleaning the air nozzle... 115 Cleaning the printer... 116
4.8 List of Replacement Parts... 116
IX
:
5. SPECIFICATIONS AND ACCESSORIES... 117 5.1 Classifications... 117 5.2 Safety Features... 118 5.3 Specifications... 119 5.4 Standard Configuration... 122 5.4.1 5.4.2
Standard accessories... 122 Optional accessories... 122
6. EMC (ELECTROMAGNETIC COMPATIBILITY)... 123 7. GLOSSARY... 127 8. INDEX... 133
X
1. BEFORE USE 1.1
Outline of the device
1
AUTO REF/KERATO/TONOMETER Model RKT-7700 is designed to singly perform objective refraction, corneal shape measurement, and non-contact tonometry measurement; the device incorporates the traditional auto ref/keratometer and non-contact tonometer into one unit. An objective refraction function measures spherical powers, cylindrical powers and cylinder axis. A corneal shape measurement function measures the radius of corneal curvature (corneal refractive powers), the direction of the steepest meridian, and the amount of corneal astigmatism. A non-contact tonometry function measures the intraocular pressure in a non-contact manner. Refraction are mainly performed as a reference for lens prescription for the correction of visual acuity using spectacle and contact lenses. The corneal curvature radius measurement is performed mainly for the following purposes: • For lens prescription for the correction of visual acuity using contact lenses etc. • For determination of the power of intraocular lenses to be implanted after cataract surgery. • Postoperative follow-up of corneal shape Tonometry is performed for the early detection of glaucoma, and for preoperative examination and postoperative care in ophthalmology. This device is an integral type with a main body mounted on a base. On the base is a chinrest on the patient’s side and a printer on the operator’s side which outputs measured results. On the main body is an LCD panel, control buttons and joystick which are used to make alignment and perform operations. Inside the device is the measuring unit for the AR/KM and NT measurements; each measurement is performed by switching the measuring unit. The device also offers the following features as well as the above features: • Space-saving concept that allows the AR/KM and NT measurements to be performed singly by this device saves footprint without needing the patient to move between two devices. • For easy measurements, the auto-tracking mechanism is provided; the device automatically controls the up-and-down and back-and-forth movements for alignment and focusing. • The auto-shot function is provided; measurements take place automatically when the device is best aligned and in focus. • In the intraocular pressure measurement, the APC function measures the intraocular pressure with the minimum necessary pressure of puffed air. • Motorized up-and-down chinrest allows the operator to adjust the height of the chinrest at hand. • Built-in RS-232C interface allows data export to computers etc.
1
BEFORE USE: Indications for Use
1.2
Indications for Use The AUTO REF/KERATO/TONOMETER RKT-7700 is a medical apparatus which performs measurement of the refractive errors of the eye, corneal radius of curvature and intraocular pressure.
2
BEFORE USE: Principles
1.3
Principles
1. Objective refraction Slit-shaped ray bundles created by the optical transmission system (3 meridian directions: 30°, 90°, 150°) ar projected into the patient's eye and scan the retina. The ray reflected from the fundus is received by 6 pairs of photoreceptors. According to the refractive status of the patient’s eye, the phase difference among signals received by respective pairs of photoreceptors results occurs. From the phase difference, the patient's refractive errors (spherical powers, cylindrical powers and cylinder axis) are measured.
2. Corneal curvature radius measurement Four near-infrared rays area projected onto the cornea and the ray reflected by the cornea is electrically detected. From the detected signals, the corneal curvature radius, the direction of the steepest meridian and the amount of corneal astigmatism are measured.
3. Measurement of intraocular pressure (NT measurement) Based on Imbert-Fick principle (W = Pt × A), the intraocular pressure is calculated by dividing the amount of air pressure into the area of applanated surface. The device increases the air pressure puffed out onto the cornea in proportion to time. The shape of the cornea changes gradually in the order of convex surface → applanated surface → concave surface. This change is optically detected and the device calculates the time (t) required to make the pressed area (A) flat after puffing out air. The air pressure (W) used to make the cornea flat is calculated from the time (t), and finally the intraocular pressure is obtained. APC (Automatic Puff Control) function The intraocular pressure measurement is performed with the air pressure as low as possible. When the measurement range is set to “APC 40” or “APC 60”, in the first measurement, the automatic shut-off function, which is to stop puffing air as soon as the light reflected from the cornea is detected, activates in order to eliminate excessive puffing. In the subsequent measurement, the APC function activates to perform the measurement with the minimum air pressure based on the former measurement data. As the patient's eye is protected from excessive air pressure, uncomfortableness for the patient can be decreased and continuous measurement can be performed smoothly.
3
1
BEFORE USE: Device Description
1.4
Device Description
{ Front view
Memory indicator
Function switches
LCD screen
Start button
Locking lever
Chinrest up/down switch
Joystick Power switch
Printer cover
Memory indicator Indicates that measured data is being stored in memory. ON
Measured data is stored in the internal memory.
OFF
Measured data is not stored in the internal memory.
Flashing
Sleep Mode
Function switches Used to set the device and to switch the screen. Functions assigned to the function switches are displayed by icon on the screen. Four switches on the left of the screen have unique functions when the measurement screen is displayed. • RK/T switch (
)
Used to select the mode. Select the mode from the RKT mode, R/K mode and NT mode. The mode is switched in the following order: RKT mode (AR/KM and NT measurements in a row) → R/K mode (AR/KM measurement) → NT mode (NT measurement) → RKT mode → ……
4
BEFORE USE: Device Description
• Auto switch (
)
Used to select the auto-tracking mode and auto-shot mode. Select the auto-tracking mode from “3D”, “2D”, and “OFF”. Select the auto-shot mode from “ON” or “OFF”. • Print switch (
)
When this switch is pressed while the memory indicator is lit, measured results are printed out. If this switch is pressed when the memory indicator is turned off, the printer paper is fed. After the printout, the measuring unit automatically returns to the origin in the up, down, right, left, back and forth directions, and the chinrest automatically returns to the origin in the up and down direction. • CLR switch (
1
)
Used to clear the measured data. When the CLR switch is pressed for about a second, all the measured data related to the selected mode is erased and the measuring unit automatically returns to the origin in the up, down, right, left, back and forth directions and the chinrest automatically returns to the origin in the up and down direction.
LCD screen 5-inch color LCD screen. The LCD screen panel pops out when the lower portion of the panel is pressed. When operating the device in an upright position, tilt the panel so that the indications on the screen are clear.
Start button When the start button is pressed during measurement, the measurement takes place regardless of the alignment and focusing status of the device. If the start button is pressed on condition that the main body is fully pulled toward the operator in the RKT mode, the measuring unit is switched.
Chinrest up/down switch (
,
)
Used to move up or down the chinrest. Joystick Used for alignment and focusing. Tilt the joystick to the right and left for alignment. Turn the joystick for alignment in the up and down directions. For focusing, push the joystick backward and pull it forward.
Locking lever Used to fix the main body to the base unit. To lock the main body, press the locking lever down.
Power switch Used to turn on or off the power to the device. Printer cover Inside is the printer equipped with the auto cutter located. Pull out the cover for replacing a printer paper roll.
5
BEFORE USE: Device Description
{ Rear view Eyelid detection LEDs
Forehead rest Eye level marker
LED for Corneal Illumination
Air nozzle Safety stopper
Chinrest
PD window Patient sensor
Forehead rest During measurements, the patient’s forehead should be gently placed over the forehead rest. Clean the forehead rest for each patient.
Air nozzle Air is puffed out of the nozzle of the NT measuring unit. In this operator’s manual, the area containing the observation window around the air nozzle is referred to as the air nozzle. Just before the AR/KM measurement, the air nozzle is automatically switched to the R/K measuring window.
Chinrest Clean the chinrest for each patient. Patient sensor The patient sensor detects whether the patient is seated in front of the device. The sensor, while detecting the patient, assumes that the patient’s chin is placed on the chinrest. The chinrest is not moved up and down to the origin for safety.
Eye level marker Used as a guide for the patient's eye level during measurements. The height of the chinrest should be adjusted so that the center level of the patient’s eye almost aligns with this line.
6
BEFORE USE: Device Description
Safety stopper Used to provide a safety space so that the air nozzle does not touch the patient’s eye. Change the position of the stopper for each patient to keep the proper amount of the space for safety. When the safety stopper is locked, a click is heard and the stopper returns to the up position. After that, the measuring unit automatically returns to the origin in the right, left, back and forth directions.
1
PD window LEDs that detect the PD value is located.
7
BEFORE USE: Device Description
{ Bottom view PS/2 connector
Interface connectors
Voltage selector
Inlet
PS/2 connector Used to connect a PS/2 device such as a barcode scanner, numeric keypad etc. Interface connectors Used to connect an interface cable to transfer measured data to an external computer etc. Only connect devices that comply with IEC 60601-1-1. Connectable devices: RT-1200 series, RT-2100 series LM-970, LM-990/990A, LM-1000/1000P To export measured data to a refractor (RT) or an external computer etc., connect the interface cable to this side. The optional Eye Care card system is connected to this side. To import measured data from a NIDEK lensmeter, connect the interface cable from the lensmeter to this side.
Connecting the lensmeter to the
side and the RT-2100 to the
side allows data transmission to the
connected refractor by way of the RKT-7700.
Voltage selector The selector should be set according to the mains voltage. Inlet Used to connect the detachable power cord. The inlet is integral with the fuse holder.
8