Operators Manual
23 Pages
Preview
Page 1
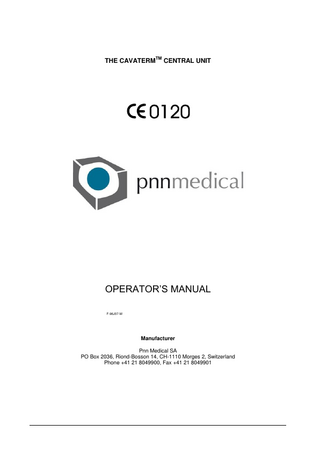
THE CAVATERMTM CENTRAL UNIT
OPERATOR‟S MANUAL F-96J07-M
Manufacturer Pnn Medical SA PO Box 2036, Riond-Bosson 14, CH-1110 Morges 2, Switzerland Phone +41 21 8049900, Fax +41 21 8049901
Cavaterm
Central Unit – Operator‟s Manual
TABLE OF CONTENTS 1
TM
CAVATERM
SYSTEM FOR THE TREATMENT OF MENORRHAGIA ... 3
1.1 The Cavaterm system ...3 1.2 How to use this manual ...3 1.3 Warnings ...3 1.4 Precautions ...4 1.5 Responsibility of the manufacturer ...4 1.6 Equipment symbols ...5 1.6.1 Central unit ...5
2
GETTING STARTED ... 7 2.1 Unpacking ...7 2.2 Transport safety switch ...8 2.3 The Cavaterm™ Central Unit ...9 2.3.1 Front panel ...9 2.3.2 Keys ...10 2.3.3 Indicator displays and operator keys ...11 2.3.4 Rear panel...14
3
OPERATION... 15 3.1 3.2 3.3
4
FUNCTIONS OF THE CENTRAL UNIT DURING THE PROCEDURE ... 17 4.1 4.2 4.3
5
Preparation ...17 Treatment ...17 End of the treatment ...17
CENTRAL UNIT TROUBLE-SHOOTING ... 18 5.1
6
Charging the batteries ...15 Set up of Cavaterm central unit ...16 Factory set parameters ...16
Error and Warning Messages (summary of troubleshooting under central unit)...18
BATTERY CHARGER ... 21 6.1 6.2 6.3
Safe use and adequate maintenance of rechargeable batteries ...21 Specifications of charger unit ...21 Malfunctions and trouble shooting...21
7
CAVATERM™ CENTRAL UNIT: TECHNICAL SPECIFICATIONS ... 22
8
MAINTENANCE, CLEANING PREVENTIVE INSPECTION AND DISPOSAL ... 23
F-96J07-M
Page 2 of 23
Cavaterm TM
Central Unit – Operator‟s Manual
1
CAVATERM
SYSTEM FOR THE TREATMENT OF MENORRHAGIA
1.1
The Cavaterm
system
The treatment is based on heat in combination with pressure. Histology shows that a uniform tissue destruction of 6 - 8 mm in depth is obtained using the Cavaterm system. The bleeding diminishes or ceases completely. The Cavaterm system consists of two parts, a single-use balloon catheter and a stationary battery operated central unit.
Cavaterm
system (catheter and central unit)
The Cavaterm plus catheter uses a circulation system and a self-regulating heater. After insertion of the catheter into the uterus, the balloon is inflated with a non-conducting fluid until a pressure of 230 - 240 mmHg is obtained. The balloon pressure will reduce the blood flow in the adjacent tissue and thus reduce the cooling effect. The heat is produced by the unique heating elements with inherent self-regulating properties. The heating elements are powered by the battery operated Cavaterm central unit. The fluid is brought into vigorous circulation inside the balloon by the pulse generator in the central unit. This vigorous circulation ensures uniform heat distribution on the balloon surface and thus a uniform and optimal destruction of the uterus endometrium.
1.2
How to use this manual
This manual describes the operational functions of the Cavaterm central unit. For the operational functions of the Cavaterm™ plus catheter, see the document 'Instructions for Use' delivered with the catheter. You must read both documents completely before operating the system. Start by carefully reading the sections 'Warnings' and 'Precautions'. Then proceed by reading the remainder of the manual and the Cavaterm™ plus 'Instructions for Use' delivered with the catheter before performing any work with the Cavaterm system. When you have received proper training and have gained a working knowledge of the system, then use this manual as a reference guide.
1.3
Warnings
Please help us ensure continued safe use of the equipment, by carefully reviewing the information in this section (see also sections 'Warnings' and 'Precautions' of the document 'Instructions for Use' of the Cavaterm™ plus catheter). Do not attempt to open the Cavaterm central unit, charger or battery packs; doing so might lead to potential hazards. There are no user serviceable parts inside the central unit or battery packs. Do never block the drain tube of the catheter; the drain tube is part of the overpressure safety system, blocking it might result in an overpressure and uterine rupture. Never exceed pressure of 240 mmHg. Overpressure may lead to uterine rupture.
F-96J07-M
Page 3 of 23
Cavaterm
1.4
Central Unit – Operator‟s Manual
Precautions The Cavaterm system is to be used only by qualified physicians who have received appropriate training regarding the use of the system. Always use the supplied charger when recharging the batteries. Using a different charger may shorten the battery life and may lead to potential hazards. If the Cavaterm™ central unit was transported and/or stocked below a temperature of 10°C, please allow the device to warm up to room temperature before using it. Store unused batteries at normal room temperature. Overheating might damage the batteries and can lead to potential hazards. The Cavaterm central unit including charger and battery packs is an electrical device. An electrical short-circuit created by inappropriate manipulation may lead to potential hazards. The device complies with the EMC requirements according to IEC 60601-1-2. Radio transmitting equipment, cellular phones, etc. shall not be used in close proximity of the device since this could influence the performance of the device. Strong emission sources such as High Frequency surgical equipment and High Frequency cables should not be routed on or near the device. If in doubt, contact qualified technician or the manufacturer. When a catheter, with the luer cap on, is inserted the maximum value displayed should be 10 mmHg; if a higher value is displayed, send the central unit for service. The central unit and the batteries must be returned to the distributor or the manufacturer for recycling after usage. The central unit and the batteries must be recycled or disposed of properly. Do not dispose of in fire!
1.5
Responsibility of the manufacturer
Pnn Medical SA is responsible for the safe operation, reliability and performance only if: Readjustments, modifications and training are performed by staff authorised by Pnn Medical. The Cavaterm system is used in accordance with the instructions for use by physicians who have received appropriate training.
F-96J07-M
Page 4 of 23
Cavaterm
1.6
Central Unit – Operator‟s Manual
Equipment symbols
1.6.1 Central unit Two information labels are placed on the Cavaterm central unit. The large information label is placed at the rear of the central unit and the smaller identification label is placed on the bottom plate underneath the unit.
Cavaterm
TM
Model: 3000 Gyn V2.0 SN
See bottom Battery voltage: 24 V.
XXXX YYYY Patents and pending patents F-99B 02-B
Bottom plate
Pnn Medical SA Morges Switzerland
F-99B01-D
Rear of unit
On these labels different symbols are found. The symbols have the following meaning and purpose.
The symbol, SERIAL NUMBER, is used to identify the serial number. XXXX in the figure above denotes the identification serial number for this specific central unit.
Identification label and SERIAL NUMBER The symbol, SIGNATURE OF QUALITY CONTROL OFFICER, is used to identify the person performing the Quality Control function. YYYY is an identification code identifying the person who performed the final test on this central unit. The signature is a confirmation that the unit has received an internal approval.
Identification label and SIGNATURE OF QUALITY CONTROL OFFICER.
The symbol, DATE OF MANUFACTURE, is printed for informative reasons and accompanied with year, month and day (format YYYY-MM-DD) the Cavaterm™ central unit passed the final inspection.
Identification label and DATE OF MANUFACTURE F-96J07-M
Page 5 of 23
Cavaterm
Central Unit – Operator‟s Manual
On the information label the following symbols are found.
ATTENTION, SEE INSTRUCTIONS FOR USE
The symbol, ATTENTION, SEE INSTRUCTIONS FOR USE, indicates that a printed user's instruction (OPERATORS MANUAL) is supplied together with the Cavaterm central unit. The OPERATORS MANUAL contains important information, read the instructions carefully before using the system.
The symbol, CE MARK, indicates that the unit has been approved and certified by the notified body, which number is 0120. CE-MARK
This symbol indicates that the unit has been approved as a class I type BF equipment.
TYPE BF EQUIPMENT
This is the symbol for recycling. After usage, return the unit to distributor or to manufacturer for recycling.
This equipment contains lead acid batteries and must be disposed of properly or recycled. Do not dispose of into fire.
F-96J07-M
Page 6 of 23
Cavaterm
2
Getting started
2.1
Unpacking
Central Unit – Operator‟s Manual
The unit is shipped in a cardboard box with 2 battery packs, charger and manual. Please save all packing material in case the unit has to be returned to the distributor or manufacturer for service or upgrade.
Open the box
From above
Central unit with floating support. The Cavaterm™ central unit is placed in a flight case with floating support to protect it during the shipment.
Short side
Front Long side
Lift the unit out of the box
F-96J07-M
Page 7 of 23
Cavaterm
Central Unit – Operator‟s Manual
Short side
Charger
Front Long side
Battery Pack
Charger
Battery Pack
Location of charger and battery packs: The batteries and charger are individually packed and located in the bottom of the main cardboard box. Please remember to store the packing material for future use.
2.2
Transport safety switch
Before operating the unit make sure that the transport safety switch is placed in the ON position. To set the switch, use a pen or similar object and slide the switch to the ON position. After doing this install the main battery. The switch should always be in the OFF position during shipment and storage to protect the electronics and the internal back-up battery.
Transport safety switch
F-96J07-M
Page 8 of 23
Central Unit – Operator‟s Manual
Cavaterm
2.3
The Cavaterm™ Central Unit
The Cavaterm™ central unit is a battery operated power supply and monitoring device intended to be used together with the Cavaterm plus catheter. A pump unit is also integrated into the Cavaterm™ central unit. This device will promote a vigorous circulation of the fluid located inside the balloon.
The central unit The rechargeable battery pack is installed at the rear of the unit (1). The Cavaterm™ plus catheter is connected to the power supply when introduced into the pump slot (2). The Cavaterm™ system is operated using the keyboard and display unit (3).
MAX.
MIN.
MEDICAL
WALLSTEN MEDICAL SA MORGES SWITZERLAND
The central unit front panel 2.3.1 Front panel The system is operated from the keyboard located on the central unit front panel. The front panel is divided into five blocks with related indicators and keys. 1 Main power 4. Temperature and heating power indicator
F-96J07-M
2. Treatment status 5. Treatment time
3. Pressure monitor
Page 9 of 23
Cavaterm
Central Unit – Operator‟s Manual
2.3.2 Keys Below are the different keys and indicators described with their corresponding names and functions.
The blue ON/OFF button is used to activate/deactivate the central unit. Keep the key pressed for a few seconds to activate the unit.
The green START button is used to activate pump and heat.
The yellow STOP button is used to deactivate the acoustic signal noting the end of the treatment and to release the catheter.
MODE: Used to select parameters on the corresponding display.
LOW BATTERY: Indicates that the battery has to be recharged.
HEAT ON: Indicates that the heating is active.
PUMP ON: Indicates that the pump is running.
CATHETER: A flashing light indicates that the central unit is ready to accept a catheter. Constant light indicates that the catheter is in place.
TIME TO GO ON: Indicates that the display is showing the remaining treatment time.
TIME DONE ON: Indicates that the display is showing completed treatment time.
TIME TO GO OFF and TIME DONE OFF: Total treatment time available for treatment with present catheter.
TIME TO GO ON and TIME DONE ON: Indicates several parameters after pressing the key repetitiously in the following order: real time clock (mins & secs), real time clock (hour & mins), date (month & day), year, total treatments done since last service.
F-96J07-M
Page 10 of 23
Cavaterm
Central Unit – Operator‟s Manual
POWER ON: Indicates that the display is showing current heating power.
TEMP ON: Indicates that the display is showing the actual temperature of the fluid inside the balloon.
TEMP AVG. ON: Indicates that the display is showing the average temperature calculated since the start of the ongoing or just finished treatment.
MAXIMUM PRESSURE ON: Indicates that the display is showing the upper system pressure limit.
PRESSURE ON: Indicates that the display is showing the actual system pressure
MINIMUM PRESSURE ON: Indicates that the display is showing the lower system pressure limit
2.3.3 Indicator displays and operator keys 2.3.3.1
Main power The blue ON/OFF switch and LOW BATTERY indicator.
ON/OFF key and LOW BATTERY indicator Pressing the blue ON/OFF key will activate or deactivate the Cavaterm™ central unit. The LOW BATTERY indicator will illuminate and an acoustic signal will sound when the system has detected a weak battery. Replace the battery as soon as possible and never start a new treatment session with this indicator on. In case the main battery goes below a certain level, an internal back-up battery will protect the unit from losing stored treatment information. The pump as well as the heating will be switched off to protect the unit. The same will happen if the main battery is removed during an ongoing treatment. The internal back-up battery makes it possible to replace the main battery while the Cavaterm™ central unit is active. The pump and heat will automatically be deactivated as described above and the indicators will start flashing if pump and heat was active before the removal of the main battery. The system will automatically restart when a charged main battery is reinstalled. 2.3.3.2
Treatment monitor
START/STOP keys and treatment indicators After turning the power on, the bottom indicator 'Catheter' starts flashing. This indicates that the unit is ready to accept a catheter.
F-96J07-M
Page 11 of 23
Cavaterm
Central Unit – Operator‟s Manual
When introducing a catheter into the pump slot the pump compartment will automatically close. The Cavaterm™ plus catheter connects to the central Unit. This includes the pressure readout means, the over-pressure device, the pump and the low voltage power. The bottom indicator 'Catheter' lights to indicate that the Cavaterm™ system is ready for use. Pressing the green START button activates the pump and the heating. All three indicators are on which indicates an ongoing treatment. During the heat up phase, HEAT is displayed on the heat indicator until 60°C is reached. When reaching the treatment temperature of 65°C, the treatment timer will start running. The heating will terminate automatically after completing a treatment. The indicators HEAT ON and PUMP ON will turn off. Pressing the yellow STOP button will stop the acoustic signal. Pressing the yellow STOP button a second time will allow the Cavaterm™ plus catheter to be removed. A humming sound can be noted after pressing the yellow STOP button. When the motor has stopped, removal of the catheter for disposal is possible. Note: It is only possible to remove the Cavaterm™ plus catheter from the pump if the balloon is empty and system pressure is below 30 mmHg. After removal of the catheter, the central unit will automatically sense that no catheter is present in the pump slot and reverts to waiting for another catheter. The bottom indicator 'Catheter' starts flashing. During an ongoing treatment procedure it is possible to pause the heating and the pump: Press the yellow key to pause the treatment. This will stop the circulation and the heat. Press the green button once to restart circulation and heat. This will resume the treatment.
2.3.3.3
Pressure monitor
Pressure monitor By pressing the MODE key the readout mode is selected. The selected mode is indicated by the three indicators below the digital display. Three modes are possible (from the top): Maximum system pressure limit Actual system pressure (default) Minimum system pressure limit
F-96J07-M
Page 12 of 23
Cavaterm
2.3.3.4
Central Unit – Operator‟s Manual
Heating status indicator
The power and temperature display with selector.
Heating status indicator By pressing the MODE key the readout mode is selected. The three indicators below the digital display indicate the selected mode. Three modes are possible (from the top): Actual heating power Actual balloon temperature (default) Average balloon temperature After completing a treatment cycle a calculated average value will be displayed, this value has been calculated as an average for the duration of the treatment.
2.3.3.5
Treatment timer Time display and MODE selector.
Treatment timer During a treatment: By pressing the MODE key during a treatment, the readout mode is selected. The two indicators below the digital display indicate the selected mode. Three modes are possible during the treatment: Remaining time (upper indicator lit) Completed time (lower indicator lit) Total time available for treatment from the beginning (both indicators lit)
F-96J07-M
Page 13 of 23
Cavaterm
Central Unit – Operator‟s Manual
In standby mode: To verify the function of the clock and the treatment counter: press the time key when the central unit is 'on' and no catheter is inserted (for example before performing a treatment). Press the time key repetitiously (8 times) to view the following information in this order: 1) Treatment time available with the inserted catheter (when no catheter is inserted, this value equals 10.00; upper LED 'on'). 2) Performed treatment time with the inserted catheter (when no catheter is inserted, this value is 00.00). 3) Total treatment time. 4) Minutes and Seconds (format MM.SS) of clock. 5) Minutes and Hours of clock (format HH.MM). 6) Date (MM.DD). 7) Year (YYYY). 8) Number of treatments performed since last service of central unit.
2.3.4 Rear panel The main battery pack is located at the rear panel. To remove the battery: Lift the locking device Rotate the battery unit out from the unit (see figure A and B below). If the battery is replaced during an ongoing treatment, the heating and pump will automatically be deactivated. If activated at the time of removal of the battery then the corresponding indicators PUMP ON and HEAT ON will start flashing. The parameters will remain on display for a maximum of 15 minutes using the internal battery. After replacement of the main battery the unit will automatically reactivate heat and pump if activated before the removal.
Replacing the battery pack
F-96J07-M
Page 14 of 23
Cavaterm
3 3.1
Central Unit – Operator‟s Manual
OPERATION Charging the batteries Note: The charger is designed for domestic and office use. The charger should not be used in the operating room or in any facility where a device having certifications according to IEC 335-1 and IEC 336-2-29 is not allowed.
The sealed batteries are of lead/acid type and filled with a gel. The batteries can be charged at any time and do not require discharging. Using the charger shipped with the unit, there is no risk of overcharging or damaging the batteries. The batteries can be left connected to a plugged charger when not in use. Always disconnect the charger from the battery pack when not connected to the mains. The charger and battery packs are electrical devices. An electrical short-circuit created by inappropriate manipulation may lead to potential hazards due to electrical energy.
Cavaterm
battery charger
Connect the charger to a suitable mains outlet. Using the battery connection plug, connect the charger to the battery pack.
a
b
c
Charger Type I (Model G124-1) The indicator on the charger will light. The charge indicator LED is constantly lit when the battery needs to be recharged.
Charger Type 2 (Model 600-62320) The indicators on the charger will light noting that the mains are “ON” and that charging has begun. When the battery has reached a fully charged state the charge complete will light.
The indicator intensity will diminish during the charge cycle.
When the battery has reached a fully charged state the LED indicator will be very dim or completely extinguished. A full recharge cycle will take approximately 4 - 5 hours. Recharging after one treatment session will normally take approximately one hour.
A full recharge cycle will take approximately 4 - 5 hours. Recharging after one treatment session will normally take approximately one hour.
To check whether a battery is fully charged, connect the charger‟s battery plug and the green indicator will temporarily light up. F-96J07-M
Page 15 of 23
Cavaterm
3.2
Set up of Cavaterm
Central Unit – Operator‟s Manual
central unit
The only preparation needed prior to a treatment is to assure that the batteries are fully charged. Although the batteries will last up to three treatment sessions, always start a treatment with a fully charged battery. To set the Cavaterm™ central unit into standby press the blue ON/OFF key firmly. An internal test procedure will start and the unit will display a welcome message if no errors are detected.
Power on message
Display after start-up.
3.3
Factory set parameters
The following parameters are factory set: o Treatment time (see document 'Instructions for Use' supplied with the catheter). o Maximum system pressure, factory setting 270 mmHg. At the maximum system pressure, the warning buzzer will sound. If the Cavaterm™ system pressure remains at this level for a time period longer than 30 seconds then the heating and pump will stop automatically. o
Absolute maximum pressure, factory setting 300 mmHg (pump off) and 320 mmHg (pump on).
If a pressure above 320 mmHg is measured, then the unit will immediately open an over pressure device letting the fluid out and interrupt the treatment. To restart the treatment, adjust pressure to 230 – 240 mmHg and press the green button. Note: The maximum pressure setting works independently of the mechanical over-pressure valve that is factory set. o
Minimum pressure limit, factory setting 100 mmHg
If the pressure drops below this limit the alarm will sound. If the Cavaterm™ System pressure remains below this level for a time period of longer than 30 seconds, the system will pause the treatment.
F-96J07-M
Page 16 of 23
Cavaterm
4 4.1
Central Unit – Operator‟s Manual
FUNCTIONS OF THE CENTRAL UNIT DURING THE PROCEDURE Preparation Turn safety switch to 'ON' position Ensure that the batteries are fully charged. Insert one battery pack in the compartment at the rear of the central unit. The following steps 'Patient and catheter preparations' are described in the document 'Instructions for Use' available with the Cavaterm™ plus catheter.
4.2
Treatment
During the treatment, the central unit monitors the treatment parameters and displays it to the user. The user controls the balloon pressure based on the information provided by the central unit. All other treatment parameters like treatment duration and temperature are monitored automatically. The treatment procedure is very easy to learn and can be carried out by pressing 3 keys. On insertion of the catheter into the slot of the Cavaterm™ central unit, the pump compartment will close. All necessary connections are automatically made. Note: If the pump compartment does not close (a humming sound should be heard from the motor inside the Cavaterm™ central unit), make sure that the catheter connector is fully inserted into the pump slot. If the pump compartment does not close then press the green start button once. This might occur if the indicator is not flashing (i.e. a catheter was removed just before insertion in the uterus). The green START button on the Cavaterm™ central unit starts the pump and heating.
Start Note: If the treatment has to be interrupted for any reasons, press the yellow STOP button once. Pressing the green START key can then restart the treatment. The three indicators between the two keys indicate the treatment status. The time countdown starts when the temperature reaches 65°C or after a heating time of 5 minutes. Heating will continue until the treatment time has elapsed. At the end of the treatment a buzzer signal shall be heard. Press yellow STOP button on the Cavaterm™ central unit to stop the buzzer signal.
Stop Press the yellow STOP button again and remove the Cavaterm™ plus catheter from the central unit. Note: If the pump compartment does not open and the catheter is not released, then make sure that the system pressure is below 30 mmHg.
4.3
End of the treatment Remove and recharge the battery pack. Turn off the safety switch at the rear of the central unit.
F-96J07-M
Page 17 of 23
Cavaterm
Central Unit – Operator‟s Manual
5
CENTRAL UNIT TROUBLE-SHOOTING
5.1
Error and Warning Messages (summary of troubleshooting under central unit)
Warning/Error Messages
Description
Action
SEND FOR SER
Send in for service. The central unit has performed the number of treatments requiring a service or the central unit has not been serviced for 3 years.
CAT USED
Catheter used. This catheter has already been used for a treatment. As the Cavaterm™ plus catheter is a disposable (single-use) device, it cannot be re-used.
CAT EP
Catheter expired. This message means „Catheter expired‟. The Cavaterm™ plus catheter expires three years after production.
Treatments can still be carried out, but the central unit needs to be sent in for servicing as quickly as possible. To use the central unit for a treatment, press the yellow key once. The central unit is ready for insertion of the catheter. The treatment can be carried out as usual. Press the yellow key once to stop the acoustic alarm. The writing „Cat out‟ appears. Press the yellow key once more to take out the catheter. Dispose. If you know that the catheter has not been used: please send catheter back to Pnn Medical SA with a device complaint form and explanation. Press the yellow key once to stop the acoustic alarm. Press the yellow key once more to take out the catheter and dispose.
„HI‟ with OP-device open for pressures over 300 mmHg (Circulation/heat not activated)
High pressure. High pressure may cause uterine rupture. This alarm consists of an acoustic signal and the „Hi‟ message blinking on the pressure display.
F-96J07-M
The central unit opens automatically the OP-device. Fluid comes out of the OP-tube for one second. The OP-valve closes with a balloon pressure below 300 mmHg. The „Hi‟ Message disappears. Readjust pressure to 230 – 240 mmHg and continue procedure.
Page 18 of 23
Cavaterm
Central Unit – Operator‟s Manual
Warning/Error Messages
Description
Action
CAT DEFECT
Catheter defective. The central unit has detected a problem with either an improperly purged catheter or the heating elements.
„HI‟ message for pressures over 270 mmHg. (Circulation/heat activated)
High pressure. High pressure may cause uterine rupture. This alarm consists of an acoustic signal and the „Hi‟ message blinking on the pressure display.
A) If this occurs before the countdown starts: Press the yellow key once to stop the acoustic alarm. „Cat out‟ appears. Pull out liquid from balloon. Press the yellow key once more to take out the catheter. Do not use the catheter. Send it back to Pnn Medical SA with a device complaint form and explanation. B) If this occurs during the treatment: Press the yellow key once to stop the acoustic alarm. „Cat out‟ appears. Pull out liquid from balloon and extract catheter from uterus. Press the yellow key once more to take out the catheter. Reinsert and repurge it. Resume treatment. If message reappears, send it back to Pnn Medical SA with a device complaint form and explanation. Gently pull out fluid from the balloon to decrease pressure to 230-240 mmHg.
„LO‟ message for pressures below 100 mmHg. (Circulation/heat activated)
Low pressure. Low pressures can be responsible for an inefficient treatment. This alarm consists of an acoustic signal and the „Lo‟ message blinking on the pressure display.
Gently inject fluid to increase pressure to 230 - 240 mmHg. Note: Low pressure might be caused by a catheter leak, a misplaced catheter or an uterine rupture. See the section “Warning” of the document 'Instructions for Use' of the Cavaterm™ plus catheter.
„STOP‟ Message with OP-device open for pressures over 320 mmHg. (Circulation/heat activated)
Pressure above max. limit. High pressures above 320 mmHg may cause uterine rupture. This alarm stops circulation/heat immediately when 320 mmHg pressure is reached, opens the OPdevice to evacuate fluid from the balloon and sends out an acoustic alarm.
Wait for pressure to drop below 320 mmHg (automatically done by the open OP-device evacuating fluid from the balloon). Verify pressure and if necessary readjust. Press the green key to resume the treatment.
F-96J07-M
Page 19 of 23
Cavaterm
Central Unit – Operator‟s Manual
Warning/Error Messages
Description
Action
CAT BAL STOP
Sudden pressure drop. This alarm is triggered when pressure in the balloon has dropped very fast and remains at a low level. This can be a sign of a ruptured balloon, a uterus rupture or a mechanical problem.
A) If this occurs before the countdown starts: Clear the acoustic alarm by pressing the yellow key. Ensure that the balloon adjustment is still properly set. If not, deflate balloon and readjust. Press the green button and slowly inject liquid to readjust the pressure to 230 - 240 mmHg. If after 30 ml you are unable to achieve this pressure follow indications below. B) If this occurs during the treatment: Clear the acoustic alarm by pressing the yellow key. Verify integrity of balloon and uterus. Pull out liquid from balloon and extract catheter from uterus. Verify integrity of balloon. Check if pressure sensor works by injecting some liquid into the balloon and pressing it gently with your hand. Verify that the pressure display reacts with circulation both off an on. If all OK, check integrity of uterus with hysteroscope. If all OK, resume treatment.
F-96J07-M
Page 20 of 23