User Instructions
46 Pages
Preview
Page 1
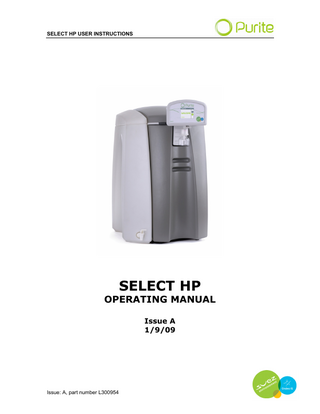
SELECT HP USER INSTRUCTIONS
SELECT HP OPERATING MANUAL Issue A 1/9/09
Issue: A, part number L300954
SELECT HP USER INSTRUCTIONS
Issue: A, part number L300954
2
SELECT HP USER INSTRUCTIONS
CONTENTS 1
DOCUMENT HISTORY ...5
2
CONTACT DETAILS ...5
3
HEALTH AND SAFETY ...7 3.1 Explanation of symbols and references ...7 3.2 Additional safety requirements ...7 3.3 Usage in accordance with intended purpose. ...7 3.4 Operating staff ...8 3.5 Bringing the system to a stop in the event of an emergency ...8 3.6 Safety information for maintenance tasks...8 3.7 Disposing of system parts and operating materials ...8 3.8 Unauthorised conversion and manufacturing replacement parts...9 3.9 Warranty claims and liability ...9
4
ABOUT YOUR WATER PURIFIER ...11 4.1 The Select HP range of units...11 4.2 Key Components of the Select HP ...11 4.2.2 Touch screen display ...11 4.2.3 Close coupled tank ...12 4.2.4 Removable front cover...12
5
OPERATING YOUR WATER PURIFIER...13 5.1 Menu Structure ...13 5.1.1 Power On screen ...13 5.1.2 Start Up Screen ...13 5.2 Power On screen ...14 5.3 Menus...16 5.4 Clean routine menu ...16 5.5 Dispense options menu ...19 5.6 Settings menu...19 5.7 Maintenance ...24 5.8 Systems menu...26
6
MAINTENANCE...31 6.1 Replacing media packs...31 6.2 Cleaning inlet screen filter ...31 6.3 Cleaning procedure. ...32 6.4 Replacing the filter ...33 6.5 Maintenance and service spares ...34 6.6 Trouble shooting ...35
7
Technical specification...37 7.1 Product outputs ...37 7.2 Treated water specification...37 7.3 Water storage ...37 7.4 Fuse rating / type ...37
Issue: A, part number L300954
3
SELECT HP USER INSTRUCTIONS
8
INSTALLATION ...39 8.1 Installation Kit ...39 8.2 Media Packs ...39 8.3 Feedwater supply requirements ...40 8.4 Electrical Supply ...40 8.5 Unit positioning ...40 8.6 Drain connection...42 8.7 Installation of media cartridge packs ...42
9
APPENDIX...43
Issue: A, part number L300954
4
SELECT HP USER INSTRUCTIONS
1
DOCUMENT HISTORY
Issue Date of Change A
Description of Change
Approved by
First Issue: 1/09/2009
2 CONTACT DETAILS We trust the system will meet all your expectations. However, should you have any additional questions concerning the equipment please do not hesitate to contact Purite Ltd at: Purite Ltd Bandet Way Thame Oxfordshire OX9 3SJ United Kingdom For all spares and consumable enquiries contact: Customer Services Department: Tel No. +44(0)1844 217141 For all service enquiries contact: Service Department:
Tel No. +44(0)1844 211555
For further sales enquires contact: Sales Department:
Tel No. +44(0)1844 217141
Issue: A, part number L300954
5
SELECT HP USER INSTRUCTIONS
Issue: A, part number L300954
6
SELECT HP USER INSTRUCTIONS
3 HEALTH AND SAFETY 3.1 Explanation of symbols and references
Danger
Warning
This symbol refers to any immediate dangers. Failure to follow the specified procedure could result in serious personal Injury. Extreme caution should be observed when conducting any activity where this symbol is shown. Work should be completed by a trained competent person. Electrical shock. Do not touch electrical components. Before performing tasks on parts of the electrical system, disconnect the system from the power supply. This symbol refers to a possible danger. Failure to follow the specified procedure could result in personnel injury. Caution should be observed when conducting any activity where this symbol is shown. It is recommended work should be completed by a trained competent person.
Caution
I
This symbol refers to a possibly hazardous situation. Failure to observe these references may result in minor injuries and/or damage to property. This symbol points out important information for working with the system in the proper manner. Failure to observe these references may result in malfunctions in the system or impact on the environment.
3.2 Additional safety requirements Country-specific requirements standards and regulations must be observed. 3.3 Usage in accordance with intended purpose. The units must only be operated with water supplied in accordance with the quality described and the operating parameters specified in “installation details”. The units must not be operated unless in proper working order. Any malfunctions must be rectified immediately.
Issue: A, part number L300954
7
SELECT HP USER INSTRUCTIONS
3.4 Operating staff Only persons who have read and understood this Operating Manual should be permitted to operate the unit. When operating the units, it is important to observe all safety information. 3.5 Bringing the system to a stop in the event of an emergency
Switch off via the display. Turn off the electrical supply. Shut off the water supply.
After remedying the damage:
Open the water supply. Turn on the electrical supply. Restart the unit via the main display.
3.6 Safety information for maintenance tasks The operator must take care to ensure that all maintenance, inspection and assembly tasks are performed by authorised and qualified professionals who have been sufficiently informed regarding the task at hand (via use of Operating Manual). The system must be shut down and be protected from further use until all repair and maintenance tasks have been completed. It is essential to observe the shutdown procedure as described in this Operating Manual. Before beginning tasks relating to electrical equipment/components of this system, a check must confirm that power has been disconnected from the corresponding section of the system. In addition, the system must be secured to prevent it from being turned on again unintentionally. 3.7 Disposing of system parts and operating materials When they need to be discarded, consumables must be disposed of according to local and National requirements.
Issue: A, part number L300954
8
SELECT HP USER INSTRUCTIONS
3.8 Unauthorised conversion and manufacturing replacement parts Conversion or modification of the system is only permitted with the approval of the manufacturer. The same applies to making changes in the programming for the control system. Original replacement parts and accessories authorised by the manufacturer enhance safety. Use of other parts will void the warranty. 3.9 Warranty claims and liability This product has been manufactured in accordance with ISO 9001:2008 procedures, after which it was subjected to a quality control process. If, however, you are unsatisfied with the unit, please contact the manufacturer (Purite Limited).
Issue: A, part number L300954
9
SELECT HP USER INSTRUCTIONS
Issue: A, part number L300954
10
SELECT HP USER INSTRUCTIONS
4 ABOUT YOUR WATER PURIFIER The Purite Select HP purifies potable water. Water fed into the unit is pumped through a combination of filtration devices, ionic resin exchange units and reverse osmosis modules. Purified water produced by the unit complies with latest standards for laboratory grade water. 4.1 The Select HP range of units GP: IT:
Generation unit (with no close coupled tank). Generation unit with close coupled 20 litre water storage tank GP BP: Generation unit with feed water boost pump BP/IT: Generation unit with close coupled water storage tank and feed water boost pump Each of the above variants is available with 4 different output flow rates: HP 40 HP 80 HP 160 HP 320
6 litres per hour 12 litres per hour 24 litres per hour 48 litres per hour
Please note that the above outputs are based on an 8 hour working day at 60psi (4 bar) inlet pressure, 25oC and maximum of 400 ppm total dissolved solids. The unit type is detailed on its serial plate which can be found on the reverse side of the front cover. The Select HP is provided with an installation kit for quick installation. Both media packs are provided and packaged separately. 4.2 Key Components of the Select HP 4.2.2
Touch screen display
Operation of the Select HP is controlled solely through the touch screen display. System schematics are displayed for easy understanding of the unit’s process.
Issue: A, part number L300954
11
SELECT HP USER INSTRUCTIONS
4.2.3
Close coupled tank
The close coupled tank holds 20 litres of purified water. To dispense water a bib tap has been provided at the front of the tank. Note: Generation units are NOT supplied with a water storage tank 4.2.4
Removable front cover.
The front cover is easily removed and provides access to the cartridge media packs.
Issue: A, part number L300954
12
SELECT HP USER INSTRUCTIONS
5 OPERATING YOUR WATER PURIFIER Your Select HP is operated via the touch screen display. Buttons are provided on the display to access start menus and set up functions. The display also provides a mimic of the system when in operation. 5.1 Menu Structure 5.1.1
Power On screen PROCESSING
09/09/09 10.22
MENU
WELCOME START
HP
When connected to an electrical supply the power on screen is displayed. 5.1.2
Start Up Screen
Start → → → →
Stop Dispense Menu A Text bar display options
→
Clean routine →
Menu
→
→
Are you sure → → Dispense options → Method → → → Settings menu → Language → → Time and date → → →
Issue: A, part number L300954
13
Loop clean clean Volume Manual Latched Manual hold English Set Time Set date Set Format
SELECT HP USER INSTRUCTIONS →
→
→
Alarms → → → Maintenance → → System Menu → → → → →
Audible alarm enable Set Quality Alarm Set Temperature alarm PT pack date PP pack date Product information Engineer menu → Enter Pin No. Set Unit ID Auto restart → Enable → Disable Data Transfer
5.2 Power On screen To switch the unit on press the START button on the power on screen. PROCESSING
09/09/09 10.22
MENU
WELCOME START
HP
When start is pressed the following screen is displayed to show the unit is in operation and processing water.
Issue: A, part number L300954
14
SELECT HP USER INSTRUCTIONS
The mimic screen shown above features four buttons and displays the process elements of the system. In normal operation they remain a fixed colour. However, in the event an alarm is detected or a specific process element goes into fault, the symbol on the display will flash red to indicate maintenance or corrective action is necessary. In addition the text bar at the top of the screen will alternate between showing an alarm is active and the data normally displayed. The mimic screen push buttons STOP
This stops the unit and returns you to the power on screen.
DISPENSE
When pressed, water is dispensed from the dispense point. It is not possible to dispense water from the unit until the tank is filled to its mid level switch. This may take a few minutes dependant upon model variant.
MENU
This accesses a secondary menu to allow dispense settings to be stored.
▼
Scrolls through the text bar display on the top of the screen to show Alarms active Temperature Outlet quality Outlet Quality Uncompensated
These are features for display only and cannot be adjusted or reset from this screen. If an alarm is active the text bar display will alternate between the active alarm and the last required display feature.
Issue: A, part number L300954
15
SELECT HP USER INSTRUCTIONS
5.3 Menus PROCESSING
09/09/09 10.22
MENU
WELCOME START
HP
Pressing the menu button on the POWER-ON screen leads to a sequence of options, user definable parameters and information about your Select HP. Menu screens feature buttons: BACK; UP; DOWN; ENTER. UP and DOWN are used to move through the options available (or to increase or decrease numerical vales). ENTER selects the option highlighted and BACK returns to the previous screen. 5.4 Clean routine menu Selecting the Clean Routine from the menu begins the cleaning process. Prompts are provided to describe the insertion of the cleaning agents required for the process. i.e. remove media pack and replace with disinfect pack adaptor. USER MENU 09/09/09 10.22 BACK
Clean Routine Dispense Options Settings Menu
ENTER
Issue: A, part number L300954
16
SELECT HP USER INSTRUCTIONS
Selecting Clean routine commences the cleaning process. You will be required to confirm you wish to commence cleaning with the following prompt. Refer to maintenance section before commencing the cleaning process.
USER MENU 09/09/09 10.22
Are you sure? NO
YES
If yes is confirmed you will be required to select one of two cleaning routines. Two routines are available: Loop Clean and Full Clean USER MENU 09/09/09 10.22 BACK
Loop Clean Full Clean
ENTER
Loop Clean circulates the disinfectant around the recirculation loop and the close coupled tank if one is fitted. Full Clean circulates the disinfectant through the entire system.
Issue: A, part number L300954
17
SELECT HP USER INSTRUCTIONS
During the a status bar displays progress. Loop Clean
09/09/09 10.22
Cleaning Tank Filling
1% DO NOT DISPENSE WATER !!
If power to the device is interrupted during a the process it is imperative the cleaning routine is completed. When power is restored to the device it will start by displaying the screen below. Press CLEAN to resume the clean routine at the point it was interrupted Failure to complete the clean routine may lead to chemicals remaining in the dispensed water. Loop Clean
09/09/09 10.22
Restart Clean Interrupted by Power down Press CLEAN to continue CLEAN
Issue: A, part number L300954
18
SELECT HP USER INSTRUCTIONS
5.5 Dispense options menu Method BACK
Manual Latched Manual Hold
ENTER
Dispense options enable different dispense methods to be set. Manual latched When the dispense button is pressed water is dispensed continuously until the dispense button is pressed again. Manual Hold The dispense button must be pressed and held down to dispense water. When the button is released water dispense is terminated. 5.6 Settings menu System Menu BACK
Language Time and Date Alarms Maintenance System menu
ENTER
ettings menu enables system parameters to be entered and stored The settings
Issue: A, part number L300954
19
SELECT HP USER INSTRUCTIONS
Language Text displays can be set to be shown in one of two languages. LANGUAGE
09/09/09 10.22 BACK
ENGLISH FRENCH
ENTER
Highlight the appropriate tick box by pressing on it and then pressing enter. Time and date The system time and date can be set. Time and Date menu BACK
Set Time Set Date Set Format
ENTER
Issue: A, part number L300954
20