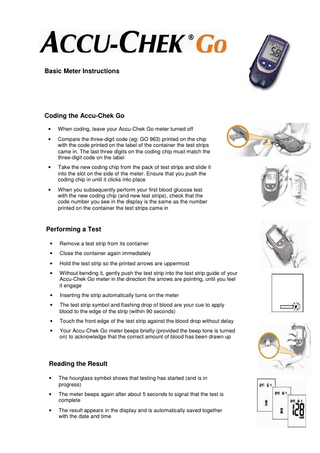
Basic Meter Instructions
3 Pages
Preview
Page 1
Basic Meter Instructions
Coding the Accu-Chek Go •
When coding, leave your Accu-Chek Go meter turned off
•
Compare the three-digit code (eg: GO 963) printed on the chip with the code printed on the label of the container the test strips came in. The last three digits on the coding chip must match the three-digit code on the label
•
Take the new coding chip from the pack of test strips and slide it into the slot on the side of the meter. Ensure that you push the coding chip in until it clicks into place
•
When you subsequently perform your first blood glucose test with the new coding chip (and new test strips), check that the code number you see in the display is the same as the number printed on the container the test strips came in
Performing a Test •
Remove a test strip from its container
•
Close the container again immediately
•
Hold the test strip so the printed arrows are uppermost
•
Without bending it, gently push the test strip into the test strip guide of your Accu-Chek Go meter in the direction the arrows are pointing, until you feel it engage
•
Inserting the strip automatically turns on the meter
•
The test strip symbol and flashing drop of blood are your cue to apply blood to the edge of the strip (within 90 seconds)
•
Touch the front edge of the test strip against the blood drop without delay
•
Your Accu-Chek Go meter beeps briefly (provided the beep tone is turned on) to acknowledge that the correct amount of blood has been drawn up
Reading the Result •
The hourglass symbol shows that testing has started (and is in progress)
•
The meter beeps again after about 5 seconds to signal that the test is complete
•
The result appears in the display and is automatically saved together with the date and time
Ejecting the test strip •
Hold the meter directly above a waste bin
•
Remove the test strip from the meter by briskly pressing the test strip ejector forwards as far as it will go (towards the test strip guide)
•
Keep the ejector in that position until the test strip falls out
•
The meter turns off automatically once the strip has been ejected
Changing the batteries •
Turn the meter over to locate the battery compartment
•
Push the locking catch downwards and remove the battery compartment cover
•
Remove the used battery
•
Place the new battery (type CR 2032) in the compartment, with the + symbol facing upwards
•
Re-attach the battery compartment cover so the two prongs on its lower edge engage with the slots in the battery compartment
•
Press the cover down so it audibly clicks into place
Retrieving results •
Your meter has a 300-location memory for saving results together with time and date
•
With the meter turned off, press the < or > button briefly. The meter turns on. The most recent result is displayed together with the time, date and memory
•
Press the < button once to move back one result.
•
By pressing and holding down the < button, you can scroll quickly through the results, initially one result at a time and subsequently 10 at a time
•
Once you have reached the oldest memory location (i.e. the highest numbered location), the meter beeps each time you press the < button.
•
To return to the more recent results, press the > button. To fast-scroll, press and hold down the > button
•
To see the average for the last 7, 14 or 30 days, with the meter turned off, press the < or > button
•
The meter turns on. The most recent result is displayed together with the time, date and memory
•
Press the > button. The 7 day average is displayed along with memory
•
Press the > button to move to the other averages
•
To return to the previously displayed averages, press the < button. You can exit the average screen at any time: to do so, press the on/off button. The meter turns off
Cleaning the meter •
On the right-hand edge of the meter is a small triangle on the measurement optics cover and below it is a recess
•
Lift the measurement optics cover at that point and remove it
•
Wipe the measuring window covering the optical system and surrounding area as well as the test strip guide with a cotton swab lightly moistened with cold water or 70% ethanol). Any other cleaning agents may damage the meter or impair its measuring function
•
Remove any fluff or lint that may remain
•
Allow areas you have wiped time to dry thoroughly
•
Then close the measurement optics cover again, pushing it down so that it audibly clicks into place
“For people with diabetes. Use only as directed and see your healthcare professional for medical advice.” Accu-Chek Integra is a trademark of Roche. © 2008 Roche Diagnostics
Roche Diagnostics Australia Pty. Ltd ABN 29 003 001 205 Accu-Chek Enquiry Line 1800 251 816 www.accu-chek.com.au