Maintenance Manual
182 Pages
Preview
Page 1
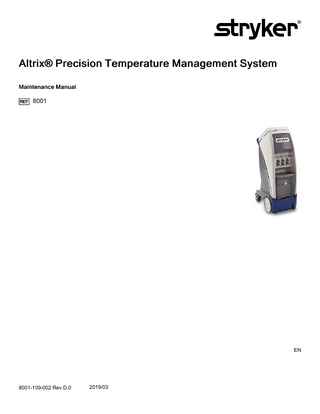
Altrix® Precision Temperature Management System Maintenance Manual
8001
EN
8001-109-002 Rev D.0
2019/03
Symbols Refer to instruction manual/booklet
General mandatory action sign
Consult instructions for use
General warning
Caution Warning; electricity Catalogue number / model
Serial number For US Patents see www.stryker.com/patents Manufacturer Mass of equipment Direct current
~
Alternating current Product provides terminal for connection of a potential equalization conductor. The potential equalization conductor provides direct connection between the product and potential equalization busbar of the electrical installation. Protective earth ground
IPX1
Protection from dripping water from above the device
Defibrillation proof type BF applied part
ONLY
C A U T I O N - Federal law (USA) restricts this device to sale by or on the order of a physician.
C A U T I O N - Always use sterile distilled water or distilled water that has been passed through a filter less than or equal to 0.22 microns with this product.
8001-109-002 Rev D.0
EN
In accordance with European Directive 2012/19/EU on Waste Electrical and Electronic Equipment, this symbol indicates that the product must not be disposed of as unsorted municipal waste, but should be collected separately. Contact your local distributor for disposal information.
87VL Medical Electrical Equipment
Medical Equipment Classified by Underwriters Laboratories Inc. with Respect to Electric Shock, Fire, Mechanical and Other Specified Hazards Only in Accordance with IEC 60601-1:20 05 (3rd edition), ANSI/AAMI ES60601-1 (2005, 3rd edition), CAN/CSA C22.2 No. 60601-1:20 08, IEC 80601-2-35:2009, CAN/CSA C22.2 NO 80601-2-35:12, ISO 80601-2-56:2009, CAN/CSA C22.2 NO 80601-2-56:12, IEC 60601-1-8:2007, CAN/CSA C22.2 NO 60601-1-8-08, IEC 60601-110:2008, CAN/CSA C22.2 NO 60601-1-10-09, IEC 60601-1-6, CAN/CSA-C22.2 No. 60601-16:11 Liquid level indicator
Fragile, handle with care
Keep dry
Do not stack
This way up
EN
8001-109-002 Rev D.0
Table of Contents Warning/Caution/Note Definition ...4 Summary of safety precautions ...5 Introduction ...6 Product description ...6 Contact information ...6 Serial number location...7 Expected service life ...7 Theory of operation ...7 System modes...7 System overview...8 Physiological Closed-Loop Control System (PCLCS) responses...8 Specifications ...9 Specifications International ...9 Service icons ...10 Product illustration ...11
Service ...12 Powering off the product...12 Maintenance mode, RFU code...12 Service log ...12 System state ...13 Software versions ...13 Protecting against Electrostatic Discharge (ESD) ...14 Water flow diagram ...15 Removing and replacing the reservoir...15 Connecting and disconnecting thermal transfer devices ...16 Disconnecting the insulated hoses ...17 Back cover removal...17 Front cover removal ...18 Side cover removal (left or right)...18 Back cover replacement ...18 Battery removal and replacement ...19 Display assembly screen replacement...19 User interface replacement ...20 Front wheel replacement (left or right)...20 Rear swivel lock caster replacement (left or right) ...21 Power cord replacement...22 Valved panel mount female coupling ...23 Drain valve body replacement ...25 Condenser air filter replacement...27 Fluid pump replacement ...27 Heater replacement ...30 Refrigeration temperature probe replacement ...32 Thermal unit replacement ...33 Temperature probe replacement ...34 Fan assembly, thermal unit replacement...36 Fluid management board (FMB) replacement...38 Main control board (MCB) replacement...42 Temperature or Monitor probe jack replacement...44 Manifold assembly replacement ...45 Manifold flow sensor cable replacement ...48 System flow sensor replacement...49 Supply manifold replacement ...51 Return manifold replacement ...53
Storage ...57 8001-109-002 Rev D.0
1
EN
Storing the controller ...57 Storing the power cord and hoses ...57 Draining water from the controller and hoses...57 Draining the thermal transfer devices...58 Draining water from the reservoir...59
Test equipment ...60 Preventive maintenance ...61 Functional test data sheet...62 LCD functionality, testing the visual and audible alarms ...63 High thermal cutout test ...65 Probe port resistance, flow and water temperature verification...65 Preventive maintenance annual replacement ...67 Air eliminator hose assembly replacement...68 9 volt battery replacement ...68 Condenser inlet filter replacement...68
Quick Reference Replacement Parts ...69 Troubleshooting ...71 Remove from use code entry ...75 Remove from use codes...76
Main Control Board (MCB) assembly ...83 Controller Communications Board (CCB) assembly ...85 Fluid management board (FMB) assembly ...86 Replaceable fuse ratings and type...88
Final assembly ...89 Frame assembly ...95 Side cover assembly, right hand 8001-000-140 ... 100 Side cover assembly, left hand 8001-000-145 ... 101 Storage assembly 8001-000-190 ... 102 Label assembly ... 104 Reservoir assembly kit 8001-007-241 ... 106 Base assembly ... 107 Fluid assembly ... 109 Display assembly ... 114 Control assembly ... 116 Power supply assembly ... 120 Manifold assembly ... 122 Thermal product, 100-120V ... 127 Thermal product, 220-240V ... 135 Wheel assembly ... 142 Back cover assembly ... 143 Recycling passport 8001-000-460 ... 144 Recycling passport 8001-123-410 or 8001-223-410 ... 145 Recycling passport 8001-100-420 ... 146 Recycling passport 8001-000-510 ... 147 Recycling passport 8001-000-140 ... 148 Recycling passport 8001-000-145 ... 149 Recycling passport 8001-007-100 / 8001-007-120 / 8001-007-220 ... 150 Recycling passport 8001-000-190 ... 151 Recycling passport 8001-103-010 / 8001-123-010 / 8001-233-010 ... 152 Recycling passport 8001-000-460 ... 153 EN
2
8001-109-002 Rev D.0
Recycling passport 0059-426-000 ... 154 Recycling passport 0059-428-000 ... 155 Recycling passport 0059-429-000 ... 156 Recycling passport 0039-232-000 ... 157 Recycling passport 0039-242-000 ... 158 Recycling passport 0039-236-000 ... 159 Recycling passport 0039-231-000 ... 160 Recycling passport 0039-234-000 ... 161 Recycling passport 0039-243-000 ... 162 Recycling passport 0039-235-000 ... 163 Recycling passport 0039-240-000 ... 164 Recycling passport 0039-238-000 ... 165 Recycling passport 0039-246-000 ... 166 Recycling passport 0039-244-000 ... 167 Recycling passport 0039-239-000 ... 168 Recycling passport 8001-103-125 ... 169 Recycling passport 8001-123-125 ... 170 Recycling passport 8001-223-125 ... 171 Recycling passport 8001-233-125 ... 172 EMC Information ... 173
8001-109-002 Rev D.0
3
EN
Warning/Caution/Note Definition The words W A R N I N G , C A U T I O N , and N O T E carry special meanings and should be carefully reviewed. W A R N I N G - Alerts the reader about a situation which, if not avoided, could result in death or serious injury. It may also describe potential serious adverse reactions and safety hazards. C A U T I O N - Alerts the reader of a potentially hazardous situation which, if not avoided, may result in minor or moderate injury to the user or patient or damage to the product or other property. This includes special care necessary for the safe and effective use of the device and the care necessary to avoid damage to a device that may occur as a result of use or misuse. N o t e - Provides special information to make maintenance easier or important instructions clearer.
EN
4
8001-109-002 Rev D.0
Summary of safety precautions Always read and strictly follow the warnings and cautions listed on this page. Service only by qualified personnel. WARNING • Always use Stryker accessories. Only IEC 60601-1 equipment shall be hooked to the patient temperature ports. Failure to comply with these instructions may invalidate any or all warranties and may negatively affect the products EMC performance. This also protects the product from cardiac defibrillation. • Avoid reduction in water flow. Do not connect two or more thermal transfer devices in a series on a single port. CAUTION • Federal law (USA) restricts this device to sale by or on the order of a physician. • Always use sterile distilled water or distilled water that has been passed through a filter less than or equal to 0.22 microns with this product. • Do not modify the product or any components of the product. Modifying the product can cause unpredictable operation resulting in injury to patient or operator. Modifying the product also voids its warranty. • Always use ESD protective equipment before opening antistatic bags and servicing electronic parts. • Do not place unprotected circuit boards on the floor. • Do not place your fingers in between the reservoir and the sides of the controller, to avoid the risk of pinching your fingers. • Avoid the use of materials of good thermal conductivity, such as water, gel, or similar substances, with the A l t r i x system not powered on. This can decrease the temperature of the body of a patient. • Do not apply thermal transfer devices to patients with ischemic limbs. This may result in harm to the patient. • Do not use this product if the patient has a transdermal medication (patch) as this can result in increased drug delivery. • Do not use three or more adult Mul-T-Blanket products at the same time to avoid the risk of water overflow when you power off the controller. • Always pre-fill the thermal transfer devices with sterile distilled water before you apply it to the patients. This is to reduce the risk of pressure ulcers. • Always clamp the hoses when disconnecting the thermal transfer devices. • Always wear gloves when replacing the battery in case of battery leak. • Do not put the unit on its side. You will not be able to put the product back into service for 24 hours. • Do not store the product with water in the device. • Always store the product within the specified environmental condition values. • Do not hang items on the controller handle to avoid the risk of tipping the product. • Always store the power cord, cables, and hoses before you transport the product to reduce the risk of trip hazard. N o t e - Disinfection of the Altrix internal water system was validated using M. mucogenicum.
8001-109-002 Rev D.0
5
EN
Introduction This manual assists you with the maintenance of your Stryker product. Read this manual before maintaining this product. Set methods and procedures to educate and train your staff on the safe maintenance of this product. C A U T I O N - Do not modify the product or any components of the product. Modifying the product can cause unpredictable operation resulting in injury to patient or operator. Modifying the product also voids its warranty. N o t e - Stryker continually seeks advancements in product design and quality. This manual contains the most current product information available at the time of release. There may be minor discrepancies between your product and this manual. If you have any questions, contact Stryker Customer Service or Technical Support at 1-800-327-0770.
Product description The Stryker model 8001A Al t r i x ® Precision Temperature Management System can supply water to an individual or multiple thermal transfer devices simultaneously with each of these circuits monitored separately. Three operating modes are available to ease patient care: Automatic, Manual, and Monitor. The controller uses the patient temperature probe to provide closed loop feedback for automatic patient temperature management and monitoring. The controller alarms visual and audible indications for when safety parameters are exceeded or it detects system function or performance irregularities. The A l t r i x system is able to provide a patient temperature output reference signal to be connected to a non-specific third party device or system. The controller regulates water temperatures between 4.0° C (39.2° F) and 40.0° C (104.0° F) and circulates the heated or cooled water via hose sets through the thermal transfer devices. A graphical display provides the user an interface for selecting desired water or patient temperature settings, operating modes, help menus, and other key parameters. Visual indicators are displayed to inform the user of system status or when the user must confirm a setting selection. The system’s water temperature and flow outputs can be monitored with 400 series compatible devices to optimize system operation. The A l t r i x system includes the following components: •
controller
•
reusable hose sets
•
thermal transfer devices (blankets, vests, and leg wraps)
•
patient temperature probes
•
reusable adapter cables
•
reusable patient temperature output cable
N o t e - The blankets, vests, leg wraps, and patient temperature probes are type BF applied parts.
Contact information Contact Stryker Customer Service or Technical Support at: 1-800-327-0770. Stryker Medical 3800 E. Centre Avenue Portage, MI 49002 USA To view your operations or maintenance manual online, see https://techweb.stryker.com/. Have the serial number (A) of your Stryker product available when calling Stryker Customer Service or Technical Support. Include the serial number in all written communication.
EN
6
8001-109-002 Rev D.0
Serial number location A
Expected service life The A l t r i x controller has a five year expected service life under normal use, conditions, and with appropriate periodic maintenance. See the maintenance manual for preventive maintenance and service information.
Theory of operation The temperature management system circulates temperature controlled water via centrifugal pump through a configured combination of hoses connected to single or multiple thermal transfer devices which can be applied around, placed over or under a patient. Using a heater to increase water temperature and a refrigeration system to decrease water temperature, delivery and removal of thermal energy to and from the patient occurs at the contact point of the patient skin and thermal transfer device to raise or lower patient temperature. A patient temperature probe can also be used to provide closed-loop feedback patient temperature control capability or to monitor patient temperature.
System modes The A l t r i x system has eight modes of operation. This section contains general descriptions of each of the modes. Mode
Description
Sleep
Initial mode when the product is plugged into a Mains AC. System is active but not yet available for any therapy or user input other than to turn the product on into Standby Mode or Maintenance Mode.
Preparation
The system checks different subsystem statuses to make sure that it is ready to start therapy. This mode begins once Sleep Mode initiates, continues, and concludes before the system can move from Sleep to any other Mode.
Stand-by
Shows that the product is ready for therapy and presents the operator with the choice of starting one of the active therapies.
Maintenance
Allows the maintenance technician the ability to perform the following functions:
Remove from use (RFU)
8001-109-002 Rev D.0
•
Review and clear the latest RFU code
•
Review the controller software versions
•
Test visual and audible indicators
•
Review the service log
•
Monitor the state of the system sensors
The product enters this mode when there is a problem with the system providing adequate therapy. The operator will not be able to perform therapy and may be instructed to remove the product from use for qualified service personnel to evaluate.
7
EN
Therapy mode
Description
Manual
In this mode, the product will provide thermally treated water to the patient through the thermal transfer device as it is targeting operator input water temperature control setting. In this mode, the operator determines what the water temperature should be and as a result, a patient temperature probe is not necessary to have. No rate selection is necessary as the water controller will always use the maximum cooling/warming capacity of the product to achieve the final Water Temperature Control Setting. During Manual Mode the A l t r i x controller will utilize the pump to regulate the water flow to a prescribed target flow in order to obtain maximum heat transfer through the thermal transfer device(s). The water controller will also utilize the heater cartridge and refrigeration product to regulate the Water Temperature at the supply manifold to the Water Temperature Control Setting
Automatic
In this mode, the product will provide thermally treated water to the patient through thermal transfer device(s) as it is targeting a user input patient temperature control setting. In this mode, the CS determines what the water temperature should be according to the therapy rate chosen and what it takes to reach the desired patient temperature control setting. A patient temperature probe is necessary to have in this mode. The A l t r i x water controller provides an Automatic Mode to allow the caregiver to monitor and control the core body Patient Temperature. The A l t r i x water controller requires the caregiver to select the Final Patient Target Temperature and to select the warming or cooling rate. In Automatic Mode, the A l t r i x water controller will utilize the pump to regulate the water flow to obtain maximum heat transfer through the thermal transfer device(s). The water controller will also utilize the heater cartridge and refrigeration product to regulate the Primary Patient Temperature to the selected Final Patient Target Temperature by manipulating the water temperature of the supply ports. The A l t r i x water controller offers 3 cooling rates and 4 warming rates.
Monitor
The patient's temperature is monitored through a patient temperature probe. No thermally treated water is being provided to the patient through thermal transfer devices.
System overview The A l t r i x system includes the main controller, fluid management controller and a basic user interface controller. The system gathers input from the Human machine interface (HMI) system to determine the correct mode for the system. The control system receives input from the following systems. •
Thermal management system
•
Fluid system
•
Patient interface
•
Power system
•
HMI system
Physiological Closed-Loop Control System (PCLCS) responses •
Relative overshoot: 0.3° C
•
Command overshoot: 0.3° C
•
Steady state deviation: ±0.1° C
EN
8
8001-109-002 Rev D.0
Specifications Model
8001-000-001
Electrical Requirements - AC Voltage Input Current and Voltage Ratings
120VAC, 60Hz 12A
Specifications International Model
8001-000-002
8001-000-003, 8001-000-006
8001-000-008, 8001-000-009, 8001-000-011
8001-000-013, 8001-000-015, 8001-000-016, 8001-000-017, 8001-000-018, 8001-000-019, 8001-000-021, 8001-000-022, 8001-000-023
Electrical Requirements AC Voltage Input Current and Voltage Ratings
100VAC, 50/60Hz 12A
120V, 60Hz 12A
220V, 60Hz 6A
220-240V, 50Hz 6A
Physical dimensions Height
42.5 in.
107.9 cm
Width Depth
15.0 in. 23.0 in.
38.1 cm 58.4 cm
Empty weight
150.0 lb
68.0 kg
Filled weight
160.5 lb
72.8 kg
Reservoir capacity
1.3 gal
5.0 L
Control setting range
39.2° - 104.0° F
4.0° - 40° C
Control accuracy
±0.3° C (4.0° - 40.0° C)
Display measurement accuracy
±0.2° C (4.0° - 40.0° C)
Display / resolution setting
0.1° C
Default setting
104.0° F
40.0° C
Control setting range
89.6° - 100.4° F
32.0° - 38.0° C
Control accuracy
±0.1° C (32° - 38°C)
Measurement accuracy
±0.3° C (25.0° - 45.0° C)
Water temperature
Patient temperature
±0.4° C (0° C - 24.9° C, 45.1° C - 50° C) Display / resolution setting
0.1° C
Display range
32.0° - 122° F
0.0° - 50° C
Default setting
98.6° F
37.0° C
8001-109-002 Rev D.0
9
EN
Controller Heater capacity, maximum
500 watts
Circulating fluid
Sterile distilled water or water that has been passed through a filter less than or equal to 0.22 microns with this product
Battery
9V Lithium
Alarm tone range
75 - 85 dBA per standard IEC 60601-1-8
Water flow rate in each hose port
Typical 1.2 lpm
Refrigerant type
R134a
Power cord length
14 to 15 feet
Clinical thermometer
Direct mode
Equipment Class
Class I
4.2 - 4.5 meters
Rated for continuous operation N o t e - The controller takes approximately 9 minutes to heat from 23.0±2° C (73.4° F) to 37.0° C (98.6° F) when not connected to a patient. Time will vary when connected to a patient. Stryker reserves the right to change specifications without notice. For more information about thermal transfer devices, cables, or probes, see the manufacturer’s instructions for use. Environmental conditions
Storage
Operation
Ambient temperature 59°F (15°C)
89.9°F (32.2°C)
Transportation
-40°F (-40°C)
75 %
Relative humidity (noncondensing)
30 %
700 hPa
-20°F (-29°C)
95 % 10 %
1060 hPa
Atmospheric pressure
140 °F (60 °C)
140 °F (60 °C)
95 % 25 %
1060 hPa
Not applicable
500 hPa
Service icons Icon
Name RFU Code
Service log
System state
EN
10
8001-109-002 Rev D.0
Icon
Name Software version
High thermal cutout
High thermal cut out test
Product illustration
G A
D
H E
I
F J B
L
C M
K
Figure 1 – Controller, patient front Figure 2 – Controller, patient back A
Storage compartment
G
Graphical user interface display
B
Removable water reservoir
H
Handle
C
Front wheels
I
Power cord
D
Patient probe ports
J
Hose and power cord management straps
E
Patient temperature output port
K
Swivel casters
F
Hose connection ports
L
Wheel locks
M
Ground chain
8001-109-002 Rev D.0
11
EN
Service Powering off the product To stop therapy or power off the product: 1. Press and hold the Stand-by button for two seconds. 2. Unplug the product from the wall outlet.
Maintenance mode, RFU code
1. To gain access to the maintenance mode see LCD functionality, testing the visual and audible alarms (page 63). Complete steps 1 through 4. 2. To review the RFU codes tap R F U C o d e button (Figure 3).
Figure 3 – Maintenance Mode 3. To clear the RFU Codes, tap C o n f i r m (Figure 4).
Test Failed
Figure 4 – RFU Code
Service log 1. To gain access, see LCD functionality, testing the visual and audible alarms (page 63). Complete steps 1 though 4. 2. Review the service log and clear. (Figure 5).
EN
12
8001-109-002 Rev D.0
Figure 5 – Service log N o t e - In the upper right hand corner of the service log screen (Figure 5), xx is the current page number The yy will display the total number of service log pages.
System state 1. To gain access, see LCD functionality, testing the visual and audible alarms (page 63). Complete steps 1 though 4. 2. The system state. (Figure 6 sample screen)
Figure 6 – System state Cool
Starts the cooling sub-function of the System State maintenance function
Heat
Starts the heating sub-function of the System State maintenance function
Stop
Stops the warming or cooling sub-function of the System State maintenance function
Software versions 1. To gain access, see LCD functionality, testing the visual and audible alarms (page 63). Complete steps 1 though 4. 2. Displays controller software versions. (Figure 7)
8001-109-002 Rev D.0
13
EN
Figure 7 – Software versions, sample screen
Protecting against Electrostatic Discharge (ESD) CAUTION • Always use ESD protective equipment before opening antistatic bags and servicing electronic parts. • Do not place unprotected circuit boards on the floor. N o t e - Always ship back circuit boards to Stryker in the same antistatic bags that the new boards were originally shipped in. The electronic circuits in the product are completely protected from static electricity damage when factory assembled. Always use adequate static protection when servicing the electronic systems of the product. All service personnel must use static protection whenever they are touching wires. Sample antistatic protection equipment includes: •
1 antistatic wrist strap
•
1 grounding plug
•
1 test lead with a banana plug on one end and an alligator clip on the other end
Make sure that you follow the ESD manufacturer’s instructions for appropriate protection against static discharge.
EN
14
8001-109-002 Rev D.0
Water flow diagram
Removing and replacing the reservoir The removable reservoir enables you to fill or drain the reservoir away from the controller without interrupting therapy. You will need to have the reservoir installed before starting a therapy. C A U T I O N - Do not place your fingers in between the reservoir and the sides of the controller, to avoid the risk of pinching your fingers. To remove the reservoir, pull forward at an angle, and lift out the reservoir (Figure 8).
8001-109-002 Rev D.0
15
EN
A B
C
Figure 8 – Removable reservoir 1. To replace the reservoir, align the base of the reservoir over the drain (C). 2. Align the notch on the back of the reservoir (A) with the hook on the controller (B) (Figure 8) 3. Push the reservoir back into place. Make sure that the reservoir is secure to avoid water leakage.
Connecting and disconnecting thermal transfer devices Read the operations manual for the individual thermal transfer devices for warnings, cautions, and safe operating instructions before use. WARNING • Always use Stryker accessories. Only IEC 60601-1 equipment shall be hooked to the patient temperature ports. Failure to comply with these instructions may invalidate any or all warranties and may negatively affect the products EMC performance. This also protects the product from cardiac defibrillation. • Avoid reduction in water flow. Do not connect two or more thermal transfer devices in a series on a single port. CAUTION • Avoid the use of materials of good thermal conductivity, such as water, gel, or similar substances, with the A l t r i x system not powered on. This can decrease the temperature of the body of a patient. • Do not apply thermal transfer devices to patients with ischemic limbs. This may result in harm to the patient. • Do not use this product if the patient has a transdermal medication (patch) as this can result in increased drug delivery. • Do not use three or more adult Mul-T-Blanket products at the same time to avoid the risk of water overflow when you power off the controller. • Always pre-fill the thermal transfer devices with sterile distilled water before you apply it to the patients. This is to reduce the risk of pressure ulcers. • Always clamp the hoses when disconnecting the thermal transfer devices. To connect or disconnect the C l i k - T i t e ® connectors (Figure 9) to the insulated hoses.
EN
16
8001-109-002 Rev D.0
Figure 9 – Clik-Tite To connect or disconnect the Colder style (Figure 10) to the insulated hoses.
Figure 10 – Colder style connectors To close or open hose clamps (Figure 11). Always clamp the hoses before disconnecting. See Draining the thermal transfer devices (page 58).
Figure 11 – Hose clamps To connect the A l t r i x ® T e m p e r a t u r e M a n a g e m e n t W r a p ™ to the A l t r i x ® T e m p e r a t u r e M a n a g e m e n t H o s e ™ see Figure 12. Press the button (A) on the hose to disconnect from the wrap.
A
Figure 12 – Altrix Temperature Management Wrap connectors The A l t r i x ® T e m p e r a t u r e M a n a g e m e n t W r a p s have an internal valve and do not need a clamp to stop the water flow. N o t e - The term “thermal transfer devices” is used throughout this manual and is interchangeable with blankets and wraps, unless indicated otherwise.
Disconnecting the insulated hoses To disconnect the insulated hoses: 1. To disconnect, push back on the retaining collar of the port on the controller. 2. Pull the hose to disconnect.
Back cover removal Tools required: •
T27 Torx
8001-109-002 Rev D.0
17
EN