Instructions for Use
32 Pages
Preview
Page 1
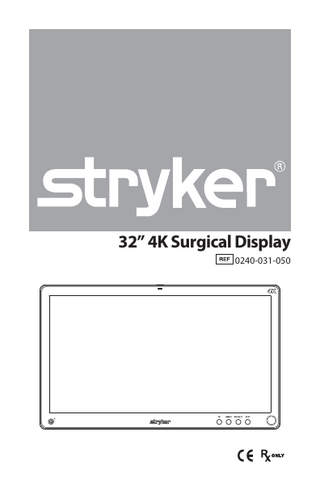
32” 4K Surgical Display 0240-031-050
Table of Contents Warnings and Cautions...3 Warnings...3 Cautions...3 About Your Device...5 Intended Use and Indications for Use...5 Contraindications...5 Package Contents...6 Device Features...7 Setup...11 Connections... 11 Basic Video Setup... 13 Operation...14 On-Screen Display (OSD)... 14 OSD Menus... 16 Troubleshooting... 18 Cleaning and Maintenance...19 Cleaning... 19 Inspection... 19 Electrical Safety Testing... 19 Storage... 19 Expected Service Life... 20 Disposal... 20 Technical Specifications...21 General Description... 21 Classification and Approvals... 22 Compliance... 22 Electromagnetic Compatibility...23 Symbols and Definitions...27
1
Warnings and Cautions Please read this manual and follow its instructions carefully. The words warning, caution, and note carry special meanings and should be carefully reviewed: Warning: Indicates measures to avoid potential serious injury to the user and the patient. Caution: Indicates risks to the equipment. Failure to follow cautions may result in product damage. Note: Provides special information to clarify instructions or present additional useful information.
Warnings To avoid potential serious injury to the user and the patient, please note the following warnings: 1. Read this manual thoroughly and be familiar with its contents prior to using this device. 2. Federal law (United States of America) restricts this device to sale by, or on the order of, a physician. 3. Carefully unpack the device and check if any damage occurred during shipment. 4. This device is non-sterile and therefore should not be placed in the sterile field. 5. Do not place the device or any other heavy object on the power cord. Damage to the cable can cause fire or electric shock. 6. To avoid electric shock, avoid removing the bezel. 7. This device should not be used adjacent to or stacked with other devices. If adjacent or stacked use is necessary, the device should be observed to verify normal operation in the configuration in which it will be used. 8. Ensure weight compatibility with mounting apparatus. Do not mount the display on a cart arm unless it is labeled with a maximum load ≥ 11.9 kg/26.3 lb. 9. Test this device prior to a surgical procedure. This device was fully tested at the factory before shipment. 10. Do not attempt internal repairs or adjustments not specifically detailed in this manual. Ensure that readjustments, modifications, and/or repairs are carried out by persons authorized by Stryker Endoscopy. 11. Do not put any object into the panel. If this occurs, unplug the device and have it checked by qualified personnel before operating it any further. 12. Use appropriate caution to prevent contact with fluids if the device is being used with a power supply in patient environments. 13. The use of cables and/or other accessories with this device, other than those specified, may result in increased emissions or decreased immunity of this device.
Cautions 1. 2. 3.
To achieve grounding reliability, connect the device to an AC adapter that is connected to a hospital-grade power cord, and ensure the power cord is plugged into a grounded power outlet. Do not sterilize the device, as the delicate electronics cannot withstand this procedure. Use only the proprietary power supply for the display. If you use an extension cable, completely secure the connection to the DC power cord of the power supply. 3
4.
Never operate the device immediately after transportation from a cold location to a warm location. 5. To connect to an international power supply, use an attachment plug appropriate for the power outlet, as outlined in the “Technical Specifications” section of this manual. 6. Unplug the device if it is not to be used for an extended period of time. To disconnect the power cord from the display, unscrew the plug first, then pull the cord out by the plug. Never pull the cord itself. 7. Do not expose the device to moisture or apply liquid cleaners directly to the screen. Spray the cleaning solution onto a soft cloth and clean gently. For further detail, refer to the “Cleaning and Maintenance” section of this manual. 8. Allow adequate air circulation to prevent internal heat buildup. Do not place the device on surfaces (rugs, blankets, etc.) or near materials (curtains, draperies) that may block the ventilation slots. The device is cooled by natural convection and has no fan. 9. Do not touch the patient with signal input or output connectors. Equipment with SIP/ SOP connectors should either comply with IEC 60601-1 and/or IEC 60601-1-1 harmonized national standards or the combination should be evaluated for safety. 10. To ensure electromagnetic compatibility, refer to the “Electromagnetic Compatibility” section of this manual. The 32” 4K Surgical Display (0240-031-050) must be installed and operated according to the EMC information provided in this manual. 11. Pay close attention to the cleaning instructions in this manual. A deviation may cause damage. 12. Do not install the device near sunlight, excessive dust, mechanical vibration, or shock. 13. Do not position the device so that it is difficult to disconnect the power cord from the supply mains. 14. Do not operate with the glass device screen facing downward. 15. Handle the device with care. Do not strike or scratch the screen. 16. Changes or modifications not expressly approved by the party responsible for compliance could void the user’s authority to operate the device. 17. Note: This device has been tested and found to comply with the limit for a Class B digital device, pursuant to Part 15 of the FCC Rules. These limits are designed to provide reasonable protection against harmful interference in a residential installation. This device generates, uses, and can radiate radio frequency energy and, if not installed and used in accordance with the instructions, may cause harmful interference to radio communications. There is no guarantee that interference will not occur in a particular installation, which can be determined by turning the device off and on. The user is encouraged to try to correct the interference by one or more of the following measures: • Reorient or relocate the receiving device. • Increase the separation distance between the device. • Connect the device to an outlet on a circuit different from that to which the other device(s) are connected. • Consult the manufacturer or field service technician for help. The warranty is void if any of these warnings or cautions is disregarded. This product contains electrical waste or electronic equipment. It must not be disposed of as unsorted municipal waste and must be collected separately. 4
About Your Device
The 32” 4K Surgical Display is a wide screen LED surgical display that can support a maximum resolution of 4K (4096 x 2160). The display supports the following video inputs: digital RGB (DVI), HDMI 1.4 and HDMI 2.0. It supports serial communication via the RS232 port and SDC port. It also has two USB ports that each supply power (5 V, 1 A) for accessories and peripherals (not used for data transfer).
Intended Use and Indications for Use The 32” 4K Surgical Display is intended for video display during surgical procedures including arthroscopy (orthopedic surgery), laparoscopy (general and gynecological surgery), thoracoscopy, endoscopy (general, gastroenterological, and ENT surgery) and general surgery. The display is a non-sterile reusable device not intended for use in the sterile field. The display is intended for use by qualified physicians and qualified operating room personnel having complete knowledge of the surgical procedures being used.
Contraindications There are no known contraindications for this device.
5
Package Contents
1
2
5
6
3
4
Reference
Part Number
Package Contents
1
0240-031-050
32” 4K Surgical Display
2
–
Cable Cover
3
–
(4) M4 x 16 mm VESA screws
4
0240-031-004
Medical Power Supply Model : BPM150S24F11 (Bridgepower)
5
–
Hospital-grade AC power cord
Reference
Optional Accessories
0240-031-004
Medical Power Supply Model: BPM150S24F11 (Bridgepower)
0240-031-051
32” 4K Surgical Display Cover
0240-030-951
15-ft. (5 pin) DC extension cable Model: 1501047***(Bridgepower) ***: blank or 001~999
0240-030-952
75-ft. (5 pin) DC extension cable Model: 1501047***(Bridgepower) ***: blank or 001~999
Device Features Front panel 1
2
3
4
1.
SDC recording status
2. 3. 4.
Display Screen Power switch (soft) Power LED*
5. PIP 6. Bright 7. Specialty 8. Input 9. Rotary control 10. Logo Light
10
5
6
7
8
9
LED shines red when SDC is in record mode (requires SDC compatibility; contact a Stryker representative for conditions). Shows video image Powers the display ON and OFF. Indicates current status: Green - Display is powered on or is in screen saver mode Blinking Green - Display is in sleep mode Accesses the Picture in Picture adjustment menu. Accesses the Brightness adjustment menu. Accesses the Specialty selection menu. Accesses the Input selection menu. Accesses the on-screen and navigates through its function. Indicates current status: No illumination - Off Continuous white illumination - On Slowly fading white illumination - Sleep mode (see Sleep Timer settings for detail)
7
Rear Panel
2 1
9
4
9 5 1 7 3 6 1
4
5
1.
Accessory mount (3)
2.
VESA mounting holes
3. 4.
Power switch (hard) Handles
5. 6. 7. 8. 9.
Cable cover hinges Velcro straps Cable cover Cable cover clips Accessory Mount holes
8
8
Provide an access point for mounting optional accessories. (accepts 1/4 - 20 screws) Provide access points for mounting the display using provided screws. (100x100 mm, 200x100 mm, accepts M4 x 16 mm screws) Turns the input DC power On and OFF. Aid in display positioning. Caution: The handles are not intended to bear the entire weight of the display. Attach the bottom of the cable cover to the display. Straps aid in cable management. Covers and conceals cables. Attach the top of the cable cover to the display. Provide access points for mounting optional video accessories. (accepts M4 x 16 mm screws)
Cable Cover
Installing the Cable Cover 1. Align the left and right hinges of the cable cover onto the bottom rear of the display. 2. Snap on the top section of the cable cover to the aligning clips. Removing the Cable Cover 1. Pinch the left and right clips and pull the cable cover towards you. 2. Remove the cable cover from the left and right hinges.
9
Display Handles
Caution: The handles are intended to aid in positioning the display, not for transporting the display. The handles should not bear the full weight of the display. Removing the Display Handles 1. Using a 3 mm hex key, loosen the two M4 x 25 mm screws and gently pull the handle away from the display. Installing the Display Handles 1. Align the handle with the screw holes on the rear of the display. 2. Using a 3 mm hex key, install the two M4 x 25 mm screws to attach the handle.
10
Setup Stryker Endoscopy considers instructional training, or inservice, an integral part of this device. Your local Stryker Endoscopy sales representative will perform at least one inservice at your convenience to help set up your device and instruct you and your staff on its operation and maintenance. To schedule an inservice, contact your local Stryker Endoscopy representative after your device has arrived.
Connections Video input and output signals are connected to the rear of the display, as illustrated below:
1
1. 2. 3. 4. 5. 6. 7.
2
3
4
5
6
7
Power Connector (24V) DVI HDMI (HDMI 1.4) HDMI 4K (HDMI 2.0) RS-232 communication port SDC device control port ACC (Accessory) POWER
11
Connecting the Power Supply
1. 2. 3. 4. 5.
Connect the power supply to the 24 V input on the display. Connect the AC power cord to the power supply*. Connect the AC power, using the supplied hospital-grade power cord. (Optional, not shown) Connect an extension cord between the power supply and display. Install cable cover.
* Power supply information: Model Number: BPM150S24F11, Manufacturer: Bridgepower Corp.
12
Basic Video Setup
2
Stryker Endoscopy 5900 Optical Court San Jose, CA 95138 USA Stryker European Rep - RA/QA Manager ZAC Satolas Green Pusignan Av. de Satolas Green 69881 MEYZIEU Cedex, France
产品型号:SDC3 产品名称:数字图像刻录装置 AC~100-240V, 50/60Hz; 4-2A 美国史赛克内窥镜
仅适用于非热带气候和海拔2000m以下地区安全使用
1
1. 2.
Route the video output 1 from the camera to the SDC DVI input. Route the video output 1 from the SDC DVI output to the DVI input on the display.
Note: Stryker recommends a backup connection directly from the camera to the display.
13
Operation Operate the display using the rotary control and the four buttons located on the front panel. A list of the display controls and their functions is provided below.
On-Screen Display (OSD) Accessing the On-Screen Display
1
2
3
4
To use the four front-panel buttons: 1. PIP: Press to activate Picture Mode (Picture in Picture, Picture by Picture, Picture on Picture) 2. Bright: Press to activate the Brightness adjustment menu. 3. Specialty: Press to activate the Specialty adjustment menu. 4. Input: Press to activate the Input selection menu. Note: Press and hold any of the four front-panel buttons to exit the OSD menu. Use the Rotary Control to navigate the on-screen menus once they are activated: • Push - Accesses/selects on-screen display menu. • Turn Right/Left - With the on-screen display menu activated, turning increases/decreases the value of the selected parameter. • Push and Hold - Exits on-screen display menu.
14
Operating On-Screen Display The device OSD helps navigate through various device menus. 1. Press the Rotary Control to activate the OSD menu. 2. Rotate the Rotary Control to move up or down through the menu. The parameter is highlighted when selected. 3. Press the Rotary Control to enter the next level OSD. 4. Rotate the Rotary Control to increase or decrease the value of the selected parameter, or to make a selection on different options. 5. To exit the OSD menu screen from the second or third level OSD menu, select the Exit option. To completely exit the OSD, press and hold the Rotary Control. If no keys are pressed, the OSD will automatically exit after the factory-set predetermined time (the time is customizable).
15
OSD Menus Specialty Menu Item
Description
Range
Color
Choose between color profiles for Standard, Arthro A, Arthro B, Lap A, Lap B, ENV, ENT, PACS, Norm or GYN. Color temperature RGB and gamma adjustment are available on each profile except PACS and Norm.
-
Red
Red balance
-128 – 127
Green
Green balance
-128 – 127
Blue
Blue balance
-128 – 127
Gamma
Gamma value
1.0 – 2.5, S0, S1, S2
Enhancement
Color adjustment to enhance sharpness
Off, Low, Mid, High
Menu Item
Description
Range
Brightness
Increase or decrease the brightness.
0 – 100
Contrast
Increase or decrease the contrast.
0 – 100
Image Sharpness
Set image sharpness.
1 – 10
Brightness Settings
Image Effect Menu Item
Description
Scale Mode
Choose scale mode between Fill All, Fill To Aspect, Fill All to Aspect, One To One, V-Fill or H-Fill.
Freeze Frame
Enable or disable the freeze frame.
Mirror
Enable or disable the mirror function.
PIP
Enable PIP (picture in picture) function.
POP
Enable POP (picture on picture) function.
PBP
Enable PBP (picture by picture) function.
16
Advanced Settings Menu Item
Description
Key Lock
Key lock on: Disables all key functions (except Specialty and Inputs selection) Press and hold the rotary knob to turn off key lock.
Auto Source Select
Scans inputs until an active video source is detected. Auto Source Select is disabled during PIP/POP/PBP mode.
Sleep Timer
On: The display enters sleep mode if no active video source is detected. Off : The display will not enter sleep mode. Timer: Set the time until the display enters sleep mode: 30 or 60 minutes
OSD Control
Controls OSD (On Screen Display) Menu Position, Background, and Timeout
Restore Factory Settings
Sets to factory default
Com Port
Selects which port to use for communications. Select SDC for SDC device control; select RS-232 for SPI router control.
Converter power
ON: Enables power to converter through HDMI port OFF: Disables power to converter through HDMI port
Time Table
Enable: Default signal detection and display output Disable: Recommended for detecting signal in iSuite setups
Information Menu Item
Description
User Name Entry
Enter custom name to be displayed in screen saver mode
Serial Number
Display device serial number
Runtime
Display current device total run time
Input
Display current input format
Note: Actual on-screen display values may vary with updated version of the firmware and user settings.
17
Troubleshooting Before returning your display for service, consult the troubleshooting list below: Problem
Current Status
Remedy
No picture
Power LED on
Using the OSD Menu, adjust the brightness and contrast to maximum or reset them to their default settings. Check the power supply functionality.
Power LED off
Ensure the power switch at the front and rear of the display are set to ON. Check if the AC power cord is properly connected to the AC adapter and outlet. Check that the power supply is fully connected and functioning properly.
Power LED blinking
Display is in sleep mode. Connect ACTIVE sources or change INPUT to wake the display.
Converters not powering on
Check that the converter power setting is ON in the OSD menu. Turn the hard power switch off and on again.
Abnormal picture
OSD Error message
18
Oversized, undersized or missing video
Adjust settings in Scale Mode.
Resolution not supported
Ensure the video source has a compatible output resolution.
Wait a few seconds after initial sync of video signals, or power cycle the display.
Cleaning and Maintenance Warning To avoid electric shock and potentially fatal injury, unplug the display and power supply from the electrical outlet before cleaning.
Caution • Do not spray cleaning liquid directly onto the display or the power supply as product damage may result. Spray on the cloth before wiping the unit. • Do not immerse the display or power supply in any liquid as product damage will result. • Do not use corrosive cleaning solutions to clean the display or power supply as product damage may result. • Do not sterilize the display or power supply as product damage may result.
Cleaning Note: Take extra care when cleaning the display screen. Excess liquid or drips that enter the bottom of the screen or the power supply receptacle may result in product damage. To clean the display or the power supply: 1. If the display cover is in place, remove the cover prior to cleaning. 2. Apply standard disinfectant or mild detergent to a dry sterile cloth. 3. Wipe the display or power supply. 4. Visually inspect the external surface of the device for cleanliness, focusing on hard-to-reach areas. If visible soil remains, repeat steps 1 – 3.
Inspection Inspect the device on a continual basis for unacceptable deterioration such as (but not limited to) corrosion, discoloration, pitting, cracked seals, or abnormal noises. If a problem is observed or suspected, the device should be returned for service.
Electrical Safety Testing Testing of ground protective earthing from the display is not necessary. Protective earthing is assured by the certified external power supply.
Storage Never store the device in a non-ventilated, humid environment. This can damage the delicate electronics in the device.
19
Expected Service Life The expected service life of the device is four years.
Disposal This product contains electrical waste or electronic equipment. It must not be disposed of as unsorted municipal waste and must be collected separately in accordance with applicable national or institutional related policies relating to obsolete electronic equipment. Dispose of any system accessories according to normal institutional practice relating to potentially contaminated items.
20