Guide
12 Pages
Preview
Page 1
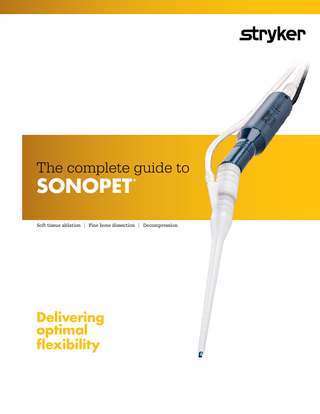
The complete guide to
SONOPET
®
Soft tissue ablation | Fine bone dissection | Decompression
Delivering optimal flexibility
SONOPET
Ultrasonic Aspirator
Equipment guide 1 Console, irrigation pole, foot pedal 2 Handpiece and tray 3 Tip
1 2 Handpiece and wrench come inside tray. Don’t remove tray or wrench from sterile field; you’ll use it to set up the handpiece.
3
4 Tubing 5450-850-003 5 Disposable suction canister liner 5450-850-002 and reusable plastic suction canister 5450-850-001 or Disposable plastic suction canister 5450-851-012 6 Saline/irrigation bag (1000 mL)
Equipment guide
4 Pass this end off sterile field
Pass the shorter tubing with round filter off sterile field
5
Reusable canister
Disposable liner
Keep this end on sterile field, connects to handpiece
or Disposable liner inside reusable canister
6 Disposable canister
If you have questions or need additional help, please get in touch with your sales representative or call customer service at 800 253 3210.
SONOPET
Ultrasonic Aspirator
Settings and soft tissue tips Recommended initial settings
Soft tissue
Ultrasonic power
Suction
Irrigation
50%
50%
15 ml/min
Soft tissue tips | moderate ablation Straight
Straight large diameter
Straight micro diameter
Straight superlong
Part number
Length
OD
ID
5450-800-307
4.5in (11.4cm)
1.92mm
1.50mm
Part number
Length
OD
ID
5450-800-308
4.6in (11.7cm)
2.47mm
2.01mm
Part number
Length
OD
ID
5450-800-309
4.9in (12.3cm)
1.77mm
1.37mm
Part number
Length
OD
ID
5450-800-301
7.9in (20.0cm)
1.92mm
1.50mm
Soft tissue | cutting ablation
Spetzler barracuda large diameter
Spetzler barracuda
Spetzler barracuda superlong
Ring curette
Payner 360
OD = outer diameter; ID = inner diameter; CL = cutting length; CW = cutting width
Part number
Length
OD
ID
5450-800-306
4.6in (11.7cm)
2.46mm
2.01mm
Part number
Length
OD
ID
5450-800-310
4.5in (11.4cm)
1.92mm
1.50mm
Part number
Length
OD
ID
5450-800-317
7.9in (20.0cm)
1.92mm
1.50mm
Part number
Length
OD
ID
5450-800-316
4.4in (11.2cm)
3.18mm
2.26mm
Part number
Length
CL
CW
5450-800-312
3.9in (9.9cm)
2.7mm
3.12mm
SONOPET
Ultrasonic Aspirator Recommended initial settings
Bone
Ultrasonic power
Suction
Irrigation
100%
50%
18 ml/min
Bone tips | unroofing and skeletonization Spetzler claw
Spetzler micro claw long
Spetzler micro claw superlong
Spetzler open angle micro claw
Spetzler open angle micro claw superlong
Payner 360
Payner 360 superlong
OD = outer diameter; ID = inner diameter; CL = cutting length; CW = cutting width
Part number
Length
CL
CW
5450-800-311
3.8in (9.7cm)
2.0mm
2.8mm
Part number
Length
CL
CW
5450-800-315
4.6in (11.7cm)
1.8mm
2.0mm
Part number
Length
CL
CW
5450-800-303
7.9in (20.0cm)
1.8mm
2.0mm
Part number
Length
CL
CW
5450-800-313
4.0in (10.2cm)
1.2mm
2.0mm
Part number
Length
CL
CW
5450-800-304
7.9in (20.0cm)
1.4mm
2.0mm
Part number
Length
CL
CW
5450-800-312
3.9in (9.9cm)
2.7mm
3.12mm
Part number
Length
CL
CW
5450-800-302
7.9in (20.0cm)
2.7mm
3.12mm
SONOPET
Ultrasonic Aspirator
Bone tips | longitudinal cutting and splitting
Knife
Serrated knife
Serrated aggressive knife
Nakagawa serrated knife
Part number
Length
CL
CW
5450-815-100
4.3in (11.0cm)
12.4mm
0.8mm
Part number
Length
CL
CW
5450-815-107
4.3in (11.0cm)
12.4mm
0.8mm
Part number
Length
CL
CW
5450-815-114
4.3in (11.0cm)
12.4mm
0.8mm
Part number
Length
CL
CW
5450-800-305
4.3in (11.0cm)
3.0mm
0.8mm
OD = outer diameter; ID = inner diameter; CL = cutting length; CW = cutting width
If you have questions or need additional help, please get in touch with your sales representative or call customer service at 800 253 3210.
SONOPET
Ultrasonic Aspirator
Setup instruction guide Handpiece setup (sterile field)
1
• Thread the tip onto the handpiece until it’s tight. • Place the handpiece into the notched bracket on the side of the tray. The tip should face out. • Match the silver on the handpiece to the silver on the brackets.
2
• Place the wrench on the grooves of the tip. • With the arrow on the wrench facing the working end of the tip, rotate it in the direction of the arrow. • Use minimal force and stop after you feel one click or release in the wrench. • Don’t over tighten the tip or you may damage the handpiece. • Keep tray and wrench on sterile field. You may need them later.
3
• Place the white irrigation sleeve over the tip until it connects fully onto the handpiece. • Connect the thinner, longer tubing to the irrigation port on the white sleeve.
4
• Attach the wider tubing to the silver suction port stem on the end of the handpiece. • Push the tubing flush to the end of the nozzle and use clips to connect the tubing and cord.
Please refer to the product IFU for additional detailed information.
SONOPET
Ultrasonic Aspirator Console setup
1
• Receive the round filter tubing from the scrub tech. • Use the tubing to connect the suction port on the back of the console to the vacuum port on the canister.
2
• Receive the longer tubing from the scrub tech. • Feed the tubing that spikes the saline/irrigation bag over the roller and through the gap on the irrigation pump. • Make sure the blue stopper on the irrigation tube is between the pump and the saline/irrigation bag. • Close the irrigation pump latch until it clicks. • Spike the saline/irrigation bag.
3
• Feed the suction tubing underneath the irrigation pump. • Connect the blue end to the patient port on the canister.
4
• Plug the handpiece into the front of the console until you hear a click. • Plug the foot pedal into the console and be sure that the notches at 3, 9 and 12 o’clock are lined up. • Plug the console into an approved, conditioned outlet. • On the back of the console, turn the power switch to the ON position.
5
• When the handpiece is ready, press the white irrigation prime button on the irrigation pump. • As soon as irrigation starts to flow from the tip, press the prime button again to stop the flow. • Test the system by stepping on the foot pedal. You should observe: 1) irrigation flow turning into an irrigation mist; 2) a higher-pitched tone coming from the console.
Please refer to the product IFU for additional detailed information.
SONOPET
Ultrasonic Aspirator
Troubleshooting guide Frequency indicator
Frequency indicator If the frequency light comes on, the system stops sending power to the handpiece. Several things could cause this to happen.
1
The handpiece tip is installed incorrectly. • Make sure you twisted the tip on correctly using the tray and wrench. If not, install it again. • If tip is damaged or still not working properly, replace it
4
The console is damaged. Replace with a new console. Please contact your sales representative and send the console back to us for repair.
with a new one. • Press the ultrasound circuit reset button (yellow button). • Turn the console off and back on.
2
The handpiece is assembled incorrectly or damaged.
Note: After you’ve corrected the problem that caused the frequency light to come on, turn the console off and back on or press the frequency alarm reset button pictured below.
• Properly thread the tip onto the handpiece. • Place the handpiece and tip in tray and twist tip to the right. Stop when you feel a slight release or click in the wrench. • Connect the irrigation tubing and check for mist coming out of the tip.
3
The suction system is blocked. • Remove any blockage within the suction system. • If the tip is clogged, unclog it using the instructions on the US light page. • Turn the console off and back on. • Press the ultrasound circuit reset button.
Please refer to the product IFU for additional detailed information.
SONOPET
Ultrasonic Aspirator Overload indicator
Overload indicator If the overload light comes on, the system stops sending power to the handpiece. One main issue causes this to happen.
1
Too much pressure on the handpiece has caused the tip to embed or stick. • Carefully withdraw the tip of the handpiece from the procedure site. • Wait five to 10 minutes for the handpiece and the tip to cool down. • Turn the console off and back on. • If the tip is damaged or still not working properly, replace it with a new tip.
Please refer to the product IFU for additional detailed information.
SONOPET
Ultrasonic Aspirator US indicator
US indicator If the US light comes on, the system stops sending power to the handpiece. Several things could cause this to happen.
1
The handpiece cord isn’t plugged into the console all the way. Plug in the cord again and make sure you hear a click.
5
The console is damaged. Replace with a new console. Please contact your sales representative and send the console back to Stryker for repair.
2
The handpiece tip is installed incorrectly. • Take off the irrigation sleeve and tip. • Place the tip back on correctly using the tray and wrench. Place the white irrigation sleeve back on until it snaps into place. • See instructions supplied with the handpiece or page 3.
3
The handpiece is assembled incorrectly or damaged. • See instructions supplied with the handpiece or page 3. • If the handpiece is damaged, please contact your sales representative and send the handpiece back to Stryker for repair.
4
The handpiece tip is clogged. • Use the sterile cleaning wire from the tubing package and run through distal end of tip. • If the tip is still clogged, remove the suction port tubing from back of the handpiece and run the stylet through the port on the handpiece or flush the suction port with a syringe until suction clears. • Activate the foot pedal and flush the tip in sterile water until suction clears.
Please refer to the product IFU for additional detailed information.
SONOPET
Ultrasonic Aspirator Irrigation and pinch valve indicator
Irrigation and pinch valve indicator If the overload and US lights come on, irrigation and/ or suction aren’t working right and the system stops sending power to the handpiece. Several things could cause this to happen.
Irrigation
Suction
1
1
The irrigation pump latch is open or not closed all the way. Close the irrigation pump latch and make sure you hear
The vacuum line from the back of the console isn’t connected to the suction canister. Connect the vacuum line to the suction canister.
a click.
2
The irrigation tube isn’t routed through the irrigation pump correctly.
2
The suction line isn’t connected from the handpiece to the patient canister port. Connect the suction line to the canister port.
Remove the tube from the pump, reverse and reconnect it, then close the pump.
3
Irrigation isn’t at the appropriate level. Irrigation should be set at 15ml for soft tissue; 18ml for bone.
4
3
The suction tubing isn’t connected to the suction stem on the handpiece. Connect the suction tubing to the suction stem.
4
The handpiece tip is clogged. • Use the sterile cleaning wire from the tubing package and
The irrigation tube isn’t connected to the handpiece irrigation sleeve. Connect the tube firmly to the sleeve.
run through distal end of tip. • If the tip is still clogged, remove the suction port tubing from the back of the handpiece and run the stylet through the port on the handpiece OR flush the suction port with a syringe until suction clears. • Activate the foot pedal and flush the tip in sterile water until suction clears.
Please refer to the product IFU for additional detailed information.
Neuro Spine ENT This document is intended solely for the use of healthcare professionals. A surgeon must always rely on his or her own professional clinical judgment when deciding whether to use a particular product when treating a particular patient. Stryker does not dispense medical advice and recommends that surgeons be trained in the use of any particular product before using it in surgery. The information presented is intended to demonstrate a Stryker product. A surgeon must always refer to the package insert, product label and/or instructions for use, including the instructions for cleaning and sterilization (if applicable), before using any Stryker product. Products may not be available in all markets because product availability is subject to the regulatory and/or medical practices in individual markets. Please contact your Stryker representative if you have questions about the availability of Stryker products in your area. Stryker Corporation or its affiliates own, use, or have applied for the following trademarks or service marks: SONOPET, Spetzler, Stryker. All other trademarks are trademarks of their respective owners or holders. Literature Number: 9100-002-178 Rev. B Copyright © 2016 Stryker
Manufactured by: Stryker Neuro Spine ENT 4100 East Milham Avenue Kalamazoo, MI 49001 USA Tel: 269 323 7700 Fax: 269 353 3026 Toll free: 800 253 3210 stryker.com/nse