Service Manual
103 Pages
Preview
Page 1
SERVICE MANUAL
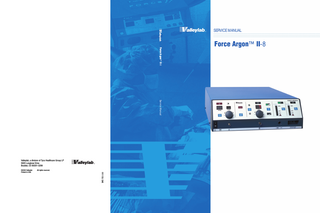
Force Argon™ II-8 Service Manual
Valleylab, a division of Tyco Healthcare Group LP 5920 Longbow Drive Boulder, CO 80301-3299 All rights reserved.
945 103 089
©2002 Valleylab Printed in USA
Force Argon™ II-8
Service Manual
Force Argon™ II-8
The following service instructions are for use by personnel qualified to repair and service the equipment described in this manual. This manual covers the installation and basic service instructions for the Force Argon™ II System. Also included are chapters covering technical specifications, circuit descriptions, and testing of the unit. Instructions for use and warnings and cautions concerning electrosurgery are in the Force Argon™ II User’s Guide supplied with the unit. Caution Federal (USA) law restricts this device to sale by or on the order of a physician.
Patent information: One or more of the following U.S. patents and corresponding foreign patents cover the Force Argon™ II System: 5,088,997; 5,217,457; and 5,244,462. Trademark acknowledgments: REM™, IsoBloc™, Force Argon™, ArgonPlus™, Force FX™, and Force™ 300 are trademarks of Valleylab Freon® is a registered trademark of E.I. DuPont de Nemours & Co. Equipment covered in this manual: Valleylab Force Argon™ II Unit 120–240 VAC nominal, 50–60 Hz The Force Argon™ II Service Manual consists of two parts - the text and the Schematics Supplement Valleylab Part Number: 945 103 089 Effective Date: July 2002 Manufactured by: Valleylab a division of Tyco Healthcare Group LP Boulder, Colorado 80301-3299 USA For information call: 1-303-530-2300 European Representative: Tyco Healthcare UK Ltd. Gosport, PO13 0AS, UK
Made in USA Printed in USA ©2002 Valleylab All rights reserved.
ii
Force Argon II-8 Service Manual
Conventions Used in this Guide Warning Indicates a potentially hazardous situation, which if not avoided, could result in death or serious injury.
Caution Indicates a hazardous situation, which if not avoided, may result in minor or moderate injury. Notice Indicates a hazard which may result in product damage. Important Indicates an operating tip or maintenance suggestion.
Force Argon II-8 Service Manual
iii
Service Centers Valleylab Boulder, Colorado, 80301-3299 USA Ph: 303-530-2300 Toll Free: 800-255-8522 Tyco Healthcare Nederland B.V. Technical Service Center De Beverspijken 37 5221 EE ’s-Hertogenbosch THE NETHERLANDS Ph: 073-6312412 Fax: 073-6314540 Auto Suture France S.A. 2, rue Denis Diderot La Clef de Saint Pierre 78990 Elancourt, FRANCE Ph: 33 (0)1 30 79 80 40 Fax: 33 (0)1 30 79 85 73 Tyco Healthcare Deutschland Tempelsweg 26 47918 Tonisvorst, GERMANY Ph: 49 (0)2151 7096 92 Fax: 49 (0)2151 7096 67 For the UK, Europe, Middle East & Africa: Tyco Healthcare UK Limited Valleylab Service Centre Unit 1a Corinium Industrial Estate Raans Road Amersham Bucks. HP6 6YJ UNITED KINGDOM Ph: 44 (0)1494 789200 FAX: 44 (0)1494 789239 Tyco Healthcare Italia SpA Via Gaetano Crespi, 12 20134 Milano, ITALY Ph: 39 02 212181 Fax: 39 02 2640059 Tyco Healthcare Spain S.L. C/Fructuos Gelabert, 6 – 8 planta 8a, 08970 – Saint Joan DESPI Barcelona SPAIN Ph: 34-93-680-3370 Fax: 34-93-680-2457
iv
Tyco Healthcare Belgium B.V. Generaal De Wittelaan 9/5 B-2800 Mechelen BELGIUM Ph: 32-15-298111 Fax: 32-15-217987 Tyco Healthcare Austria GmbH Jochen Rindt Str. 37 A-1230 Vienna AUSTRIA Ph: 43-1-610-3441 Fax: 43-1-615-3808 Tyco Healthcare Norden AB (Denmark, Finland, Iceland, Norway, Sweden) Årstaängsvägen 11 B, II SE-117 43 Stockholm SWEDEN Ph. +46 8 585 605 00 Fax +46 8 585 605 06 Tyco Healthcare PTY Ltd Service & Technical Support 59 - 69 Halstead Street Hurstville NSW 2220 AUSTRALIA Ph: 61 2 9579 6066 Toll free hotline: 1800 350 702 Fax: 61 2 9585 1908 Tyco Healthcare Japan Regulatory Affairs Department Technical Support Section Customer Call Center 1-2-20 Heiwajima Ota-ku Tokyo-to JAPAN Toll Free: 0120-073-008 Ph: 03-3764-0733 Fax: 03-3764-0744 Auto Suture Company, Canada 4490 Garand Street Ville St. Laurent Quebec, CANADA H4R 2A2 Ph: 514-334 -7602 Fax: 514-331-5983
Force Argon II-8 Service Manual
Conventions Used in this Guide ...iii Service Centers ... iv
Chapter 1. Introduction General Description... 1-2 List of Components ... 1-2 Service Personnel Safety ... 1-3 General Service Precautions ... 1-3 Fire/Explosion ... 1-3 Electric Shock ... 1-3 High Pressure ... 1-4 Argon Gas... 1-5 Cleaning ... 1-5
Chapter 2. Controls, Indicators, and Receptacles Force Argon II Front Panel Descriptions... 2-2 Overpressure System ... 2-2 System Purge Control ... 2-2 Gas Flow Controls ... 2-2 Gas Tank Indicators and Controls... 2-3 Gas Lines and Receptacles ... 2-3
Chapter 3. Technical Specifications Performance Characteristics ... 3-2 Standard Conditions of Measurement ... 3-2 Operating Parameters ... 3-2 Storage and Shipping ... 3-2 Input Power Source ... 3-2 Low Frequency Leakage (50-60 Hz) ... 3-2 Gas Flow Ranges ... 3-2 Audio Volume ... 3-3 Approximate Weight... 3-3 Size ... 3-3 Gas Tanks ... 3-3 Classification ... 3-3
Chapter 4. Principles of Operation Functional Descriptive Overview ... 4-2 Circuit Descriptions... 4-2 Main Microprocessor (Control Board, sheet 2 of 8) ... 4-2 RS-232 Interface (Control Board, sheet 2 of 8) ... 4-2 Address Latches and I/O Decoders (Control Board, sheet 2 of 8) ... 4-3 Solenoid Drivers (Control Board, sheet 3 of 8) ... 4-3 Audio Amplifier (Control Board, sheet 3 of 8) ... 4-3 Solenoid Master Power Switch (Control Board, sheet 3 of 8) ... 4-3
Force Argon II-8 Service Manual
v
Watchdog Circuitry (Control Board, sheet 4 of 8) ... 4-3 Malfunction Microprocessor (Control Board, sheet 4 of 8) ... 4-3 Argon Gas Tank Pressure Scale (Control Board, sheet 4 of 8) ... 4-4 Display Interface and Lamp Drivers (Control Board, sheet 4 of 8) ... 4-4 Argon Gas Tank Detection and Measurement (Control Board, sheet 5 of 8) ... 4-4 Pressure Transducers (Control Board, sheet 6 of 8 and sheet 7 of 8) ... 4-4 Overvoltage Monitors (Control Board, sheet 6 of 8) ... 4-5 A-D Converter (Control Board, sheet 6 of 8) ... 4-5 DC Power Connector (Control Board, sheet 6 of 8) ... 4-5 IsoBloc Circuit Modules (Control Board, sheet 8 of 8) ... 4-5 Lamps and LEDs (Display Board, sheet 2 of 4) ... 4-5 Switch Read Buffer (Display Board, sheet 2 of 4) ... 4-5 Bar Graph Display Driver (Display Board, sheet 3 of 4) ... 4-6 Seven Segment Display Driver (Display Board, sheet 4 of 4) ... 4-6 ESU Interface Connector (Footswitch Board, sheet 1 of 1) ... 4-6 Footswitch Connector (Footswitch Board, sheet 1 of 1) ... 4-6 Speaker (Footswitch Board, sheet 1 of 1) ... 4-6 Software Initialization ... 4-6
Chapter 5. Setup, Tests, and Adjustments Setting up the Force Argon II Unit ... 5-2 Unpacking and Installing the Unit... 5-2 Adjusting the feet of the Force Argon II Unit ... 5-2 Connecting the Argon Gas Tank(s) ... 5-3 Constructing an Extended Length Argon Gas Supply Hose ... 5-3 Removing the argon gas supply hose from the Force Argon II System ... 5-4 Constructing and Installing the extended length argon gas supply hose ... 5-5 Connecting the Electrosurgical Generator and Accessories ... 5-8 General Test Information... 5-11 Recommended Test Equipment ... 5-12 Mechanical Inspection ... 5-13 Front Panel Controls ... 5-13 Rear Panel Connectors ... 5-13 Power Cord ... 5-13 Initialization Sequence ... 5-14 Functional Test with Gas ... 5-14
Chapter 6. Troubleshooting Inspecting the Force Argon II Unit ... 6-2 Error Codes ... 6-3 Nonfatal Warnings ... 6-3 Fatal Warnings... 6-4 Error Code Download ... 6-8
vi
Force Argon II-8 Service Manual
Recommended Test Equipment ... 6-9 Power Supply Board Test ... 6-9 Cable Connection Test ... 6-9 Footswitch Board Test ...6-10 Footswitch Test ...6-10 ESU Interface Test ...6-10 Front Panel Test ...6-11 Argon Control Assembly Test ...6-12 Description of Valve Operation ...6-12 Test Setup ...6-12 Testing Tanks 1 and 2, and the Release Solenoid Valves ...6-13 Testing the Orifice and Flow Control Solenoid Valves...6-13 Testing the Peritoneal Directional Solenoid Valve...6-14
Chapter 7. Replacement Procedures Required Equipment... 7-2 Force Argon II Spare Components ... 7-2 Front Bezel and Display Board Replacement ... 7-3 Power Switch Replacement ... 7-5 Power Supply Board Replacement... 7-6 Footswitch Board Replacement... 7-8 AC Inline Filter Replacement ... 7-9 Internal Argon Filter Replacement ...7-10 Argon Control Valve Assembly/Second Stage Regulator Replacement ...7-12 Control Board Replacement ...7-14 Fuse Replacement ...7-15 Argon Gas Tank Replacement...7-16
Chapter 8. Repair Policy and Procedures Responsibility of the Manufacturer ... 8-2 Obtaining a Return Authorization Number ... 8-2 Returning Circuit Boards and Other Subassemblies ... 8-2 Returning the Force Argon II Unit for Service ... 8-3 Cleaning the Unit ... 8-3 Shipping the Unit... 8-3 Disposing of the Force Argon II Unit ... 8-4
Chapter 9. Service Parts Ordering Replacement Parts ... 9-2 Force Argon II Assembly ... 9-3 Force Argon II Parts List ... 9-4 Footswitch Board Components ... 9-6
Force Argon II-8 Service Manual
vii
Display Board Components ... 9-7 Control Board Components ... 9-8
Chapter 10. Warranty
viii
Force Argon II-8 Service Manual
Chapter
1
Introduction
1
This manual provides instructions for servicing the Force Argon II Unit. This chapter introduces the features and components of the unit and reviews the precautions associated with repair. Additional information about using the generator is available in the Force Argon II User’s Guide.
Force Argon II-8 Service Manual
1-1
General Description
General Description The Force Argon II System is designed to provide a controlled flow of argon (an inert, nonreactive gas) over the active electrode of an electrosurgical accessory which is powered by a Force series electrosurgical generator. A variety of handsets provide argon-enhanced electrosurgery as well as standard electrosurgery. Argon-enhanced coag permits the coagulation of certain tissue in a more controlled manner than with standard electrosurgical coagulation. In argon-enhanced coag, activating the handset creates an argon gas plasma between the electrode and the tissue. The presence of inert gas at the surgical site inhibits combustion with other gases (e.g., oxygen, nitrogen, etc.) and pushes residual smoke, water vapor, or fluids away from the surgical site, thereby improving visibility. The Force Argon II Unit has an overpressure system that continuously measures peritoneal cavity pressure in real-time. This system operates when the unit is in the low flow range for argon gas (0.5 - 4 LPM), i.e. the gas flow range for laparoscopic procedures. Use the overpressure system in conjunction with a carbon dioxide insufflator monitor. The overpressure system senses when the peritoneal cavity pressure meets or exceeds the user selectable setpoint (between 5 and 30 mm Hg). As the peritoneal cavity pressure approaches the setpoint, the Overpressure indicator on the front panel illuminates, and an intermittent alarm sounds. When the peritoneal cavity pressure meets or exceeds the setpoint, the Overpressure indicator on the front panel illuminates, and a continuous alarm sounds.
List of Components The Force Argon II Unit is shipped with the following components: • Force Argon II Unit • RF Jumper Cable • ESU Interface Cable • E0502-12 Active Adapter • Argon Gas Tank Regulator Assembly for Tank 1 • Power Cords (2) • Power cord retaining clip • Stabilizer rings for electrosurgical generator placement • User’s Guide, Service Manual, Reference Card
1-2
Force Argon II-8 Service Manual
Service Personnel Safety
Service Personnel Safety
General Service Precautions Caution The unit contains electrostatic sensitive components. When repairing the unit, work at a static control workstation. Wear a grounding strap when handling electrostatic sensitive components. Handle the circuit boards by their nonconductive edges. Use an antistatic container for transport of electrostatic sensitive components and circuit boards. Notice Connect the power cord to a wall receptacle having the correct voltage. Otherwise, product damage may result. If required by local codes, connect the unit to the hospital equalization connector with an equipotential cable.
Fire/Explosion Warning Do not install the Force Argon II System in the presence of flammable anesthetics, gases, liquids, or objects. Always use high purity grade (99.998% pure or better) argon gas. Do not use oxygen for any adjustments. Oxygen regulation values differ from argon regulation values, and incorrect adjustments result. For continued protection against fire hazard, replace fuses only with those having the same type and rating as the original fuse. Fire Hazard Do not place active accessories near or in contact with flammable materials (such as gauze or surgical drapes). Electrosurgical accessories that are activated or hot from use can cause a fire. Use a holster to hold electrosurgical accessories safely away from personnel and flammable materials.
Electric Shock Warning Disconnect the power cord before replacing parts. Always unplug the Force Argon II Unit before cleaning.
Force Argon II-8 Service Manual
1-3
Introduction
Before servicing the Force Argon II Unit, it is important that you read, understand, and follow the instructions supplied with the unit and with any other equipment used to install, test, adjust, or repair the unit.
Service Personnel Safety
Warning Do not connect a wet power cord assembly to the unit or a wall receptacle. Ensure that all accessories and adapters are correctly connected and that no metal is exposed. The interface cable must be connected to the Force Argon II Unit and the electrosurgical generator for operation. If the Force Argon II Unit is not being used, disconnect the power cord from the wall receptacle. Do not touch any exposed wiring or conductive surface while the unit is disassembled and energized. Never wear a grounding strap when working on an energized unit. Otherwise, damage to circuit board components may result. Take appropriate precautions (such as use of isolated tools and equipment; use of the “one hand rule,” etc.) when taking measurements or troubleshooting the unit. The front heatsink on the power supply is at an elevated voltage. Do not come in contact with it. Do not use it for ground. Otherwise, burns to service personnel may result. Damage to circuit board components may result.
Caution When attaching the ArgonPlus Handset, ensure that the RF jumper cable is disconnected from the RF Input receptacle on the Force Argon II front panel. When attaching the Argon Accessory Handset, ensure that the active adapter is disconnected from the monopolar instrument receptacle of the electrosurgical generator front panel. Otherwise, injury to service personnel may result.
High Pressure Warning Ensure that argon gas tanks and fittings used with the Force Argon II Unit have been pressure tested, certified, and filled according to applicable standards and local codes. In filling the tanks, ensure your supplier meets all local and national codes. Do not overpressurize the tanks. Do not exceed 3,000 psig. Use only the high pressure regulator supplied with the Force Argon II Unit. Order replacement regulators from Valleylab. Argon gas pressure should not exceed 434 KPa (63 psig) ± 5% at the regulator hose connection to the receptacle on the rear panel. Always ensure that the regulator tank fitting is properly connected to the tank valve outlet.
Caution Improperly secured gas tanks and/or improper connection of gas lines may result in injury.
1-4
Force Argon II-8 Service Manual
Service Personnel Safety
Argon Gas Introduction
Warning Use only high purity grade (99.998% pure or better) argon gas. Patient safety may be compromised by using low purity gas. The regulator coupling in this unit is compatible with many common gas tanks (e.g., Freon, helium, krypton, neon, nitrogen, and xenon). Only connect argon gas to the Force Argon II Unit. Using other gases may affect gas flow, create phosgene or other harmful gases, or create an explosion hazard.
Cleaning Notice Do not clean the unit with abrasive cleaning or disinfectant compounds, solvents, or other materials that could scratch the panels or damage the generator.
Force Argon II-8 Service Manual
1-5
NOTES
1-6
Force Argon II-8 Service Manual
Chapter
2
Controls, Indicators, and Receptacles
1
The controls, indicators and receptacles for accessories are located on the front and rear panels of the Force Argon II unit. This chapter describes each component of the unit and its function. Detailed specifications for the unit are in Chapter 3.
Force Argon II-8 Service Manual
2-1
Force Argon II Front Panel Descriptions
Force Argon II Front Panel Descriptions Overpressure System This system operates only when the Force Argon II System is in the low gas flow range. Use only this range for laparoscopic procedures. Overpressure Setpoint Display - The display shows the overpressure setpoint (available only when using the low flow range). Overpressure Indicator - As the peritoneal cavity pressure approaches the overpressure setpoint, this indicator illuminates and an intermittent alarm sounds. When the peritoneal cavity pressure meets or exceeds the setpoint, this indicator remains illuminated and a continuous alarm sounds. Peritoneal Pressure Display - The display indicates the peritoneal cavity pressure (available only when using the low flow range). The display flashes when the pressure is below 1 mm Hg. Overpressure On/Off Switch - Press this button to turn peritoneal cavity pressure monitoring on or off (available only when using the low flow range). Overpressure Control Knob - To increase (+) the alarm setting, turn the knob clockwise. To decrease (-) the alarm setting, turn the knob counterclockwise. Setpoint Symbol
System Purge Control Handset Tubing or Peritoneal Pressure Tubing Obstruction Indicator When a gas tubing obstruction occurs, the indicator illuminates and an alarm sounds. The Gas Flow indicator or the Overpressure indicator will also be flashing. Gas Line Purge Button - Pressing this button removes air and causes a brief discharge of argon gas through the handset tubing at a gas flow of 3.0 LPM.
Gas Flow Controls Gas On/Gas Off Button - Press this button to select gas on or gas off. Gas On Indicator - When you turn on the gas, the indicator illuminates and gas is available to the handset. Gas Off Indicator - When you turn off the gas, the indicator illuminates and gas is not available to the handset. Gas Flow Indicator - This indicator illuminates when you activate argonenhanced coag or argon-shrouded cut or when you press the Gas Line Purge button. Flow Rate Display - The display shows gas flow on a scale from 0.5 to 12 LPM. The default gas flow setting is 0.5 LPM.
2-2
Force Argon II-8 Service Manual
Force Argon II Front Panel Descriptions
Standard Gas Flow Indicator - This green LED illuminates when you select the standard gas flow range. Gas Flow Range Selector - Press this switch to the top position for standard flow range (0.5 - 12 LPM) or bottom position for low gas flow (0.5 - 4 LPM). Low Gas Flow Indicator - This green LED illuminates when you select the low gas flow range. Flow Control Knob - To increase (+) the argon gas flow, turn the knob clockwise. To decrease (-) the argon gas flow, turn the knob counterclockwise.
Tank Select Button, Tank 1 - Press this button to select tank 1. Tank Indicator, Tank 1 - The indicator illuminates when you select tank 1. Low Pressure Alarm, Tank 1 - The indicator illuminates when the tank pressure is below 10% of full tank pressure. The indicator flashes and a brief alarm sounds when all available tanks are low. % Argon in Tank 1 - The bar graph indicates percent of argon gas remaining in tank 1. Tank Select Button, Tank 2 - Press this button to select tank 2. Tank Indicator, Tank 2 - The indicator illuminates when you select tank 2. Low Pressure Alarm, Tank 2 - The indicator illuminates when the tank pressure is below 10% of full tank pressure. The indicator flashes and a brief alarm sounds when all available tanks are low. % Argon in Tank 2 - The bar graph indicates percent of argon gas remaining in tank 2.
Gas Lines and Receptacles On/Off Switch - This switch supplies power to the unit. Peritoneal Pressure Tubing Receptacle - Connect the peritoneal pressure tubing filter to this luer receptacle. Gas Line Receptacle - Connect the handset particle filter to this luer receptacle. RF Input Receptacle - Connect the RF jumper cable to this receptacle when using the Valleylab Argon Accessory. Handset Receptacle - Connect the handset three-pin connector to this receptacle.
Force Argon II-8 Service Manual
2-3
Controls, Indicators, and Receptacles
Gas Tank Indicators and Controls
Force Argon II Front Panel Descriptions
Tank Indicator, Tank 1 Overpressure Setpoint Display
Tank Select Button, Tank 1
Standard Gas Flow Indicator Overpressure Indicator
Obstruction Indicator (Handset Tubing or Peritoneal Pressure Tubing)
Tank Indicator, Tank 2 % Argon in Tank 1
% Argon in Tank 2
Gas On Indicator Peritoneal Pressure Display
Flow Rate Display
Gas Flow Range Selector
Gas On/Gas Off Button Gas Flow Indicator
Gas Off Indicator
Handset Receptacle
Gas Line Purge Button
Overpressure On/Off Switch
On/Off Switch
Low Gas Flow Indicator
Gas Line Receptacle Low Pressure Alarm, Tank 2
Overpressure Control Knob
Peritoneal Pressure Tubing Receptacle
Flow Control Knob Tank Select Button, Tank 2
RF Input Receptacle
Low Pressure Alarm, Tank 1
Force Argon II Front Panel
2-4
Force Argon II-8 Service Manual
Force Argon II Front Panel Descriptions
Tank 1 Receptacle
Power Entry Module
Connect the tank 1 regulator hose to this receptacle.
RS-232 Serial Port
Tank 2 Receptacle Connect the tank 2 regulator hose to this receptacle.
The Force Argon II Unit may be adjusted through this serial port to stop argon gas delivery when the peritoneal cavity pressure meets or exceeds the selected setpoint. Contact your Valleylab representative for further information.
Connect a power cord with a threeprong hospital grade connector to this receptacle. There are two entry module fuses in this receptacle.
Controls, Indicators, and Receptacles
WARNING: RISK OF FIRE. REPLACE FUSE AS MARKED. 250V, T1.0A (110-120/220-240)
ARGON PRESSURE NOT TO EXCEED 434 KPa (63 PSIG) ± 5% AT THIS POINT
Equipotential Grounding Lug Use an equipotential grounding cable to connect the generator to protective earth ground.
Tank 2 Transducer Receptacle Connect the tank 2 transducer cable to this receptacle.
Tank 1 Transducer Receptacle
ESU Interface Cable Receptacle
Connect the tank 1 transducer cable to this receptacle.
Connect a Valleylab electrosurgical generator to this receptacle using the ESU interface cable provided by Valleylab.
Footswitch Receptacle Connect a Valleylab electrosurgical footswitch to this receptacle. Do not plug the footswitch into the electrosurgical generator.
Force Argon II Rear Panel
Force Argon II-8 Service Manual
2-5