Operating Instructions
71 Pages

Preview
Page 1
Fii.!
Welch Allyn
PneumoCheckTM and Printer/Charger Operating Instructions
w!!
Fvi!!
Welch Allyn
Welch Allyn
Thank you for purchasing the Welch Allyn PneumoCheck. The operating and maintenance instructions found in this manual should be followed to ensure many years of accurate and reliable service. Please read these instructions thoroughly before using your Welch Allyn PneumoCheck Spirometer and Printer/Charger.
CONTENTS Introduction to Spirometry .............. Indications for Spirometry .............. Parts of the Welch Allyn PneumoCC Preliminary Operating Instructions, The FVC Test .................................... Quick FVC Reference Chart.. ........ Description.. ................................... Measurement Parameters ............. Obtaining Good FVC Results ........ Doing an FVC Maneuver ............... Doing Multiple Tests on a Patient.. Interpretation of Results ................ The MVV Test ................................... Description ..................................... Measurement Parameters ............. Obtaining Good MVV Results.. ...... Doing an MVV Maneuver .............. Doing Multiple Tests on a Patient.. Interpretation of Results ................
Parts of the PneumoCheck Printer/l Printer/Charger Operating instructi Setting Up.. .................................... Setting Report Format Options.. .... Predicted Normals.. ................... Short Form/Long Form .............. Flow/Volume or Volume/Time PI Entering Patient Data .................... Printing .......................................... Paper Feed.. .................................. Paper Jams ................................... Paper Replacement ....................... Stopping the Printer ....................... Error Conditions.. ...........................
Calibration Check and Flecalibratio **Welch Allyn gratefully acknowleges the assistance of Paul L. Enright, M.D. of the Mayo Clinic in Rochester, Minnesota for his assistance in preparing and reviewing sections of this manual.
The ATS Recommendation ........... Calibration Check .......................... Recalibration .................................. Quick Calibration Check and Reca
\w!!
Welch Allyn
CONTENTS Introduction to Spirometry.. ........................................................... .l Indications for Spirometry ............................................................. .2 Parts of the Welch Allyn PneumoCheck Spirometer................... .3 Preliminary Operating Instructions ................................................ 4 The FVC Test ................................................................................... .5 Quick FVC Reference Chart ......................................................... Description.. ................................................................................... Measurement Parameters ............................................................ Obtaining Good FVC Results ....................................................... Doing an FVC Maneuver ............................................................. Doing Multiple Tests on a Patient.. .............................................. Interpretation of Results ..............................................................
The MVV Test ................................................................................ Description .................................................................................. Measurement Parameters .......................................................... Obtaining Good MVV Results.. ................................................... Doing an MVV Maneuver ........................................................... Doing Multiple Tests on a Patient ............................................... Interpretation of Results .............................................................
.5 6 .6 .8 12 14 17
.20 .20 .20 .21 .21 .22 .22
Parts of the PneumoCheck Printer/Charger ................................ 23 Printer/Charger Operating Instructions ...................................... .24 Setting Up ................................................................................... Setting Report Format Options ................................................... Predicted Normals .................................................................. Short Form/Long Form ........................................................... Flow/Volume or Volume/Time Plot ......................................... Entering Patient Data ................................................................. Printing ....................................................................................... Paper Feed ................................................................................. Paper Jams ................................................................................ Paper Replacement .................................................................... Stopping the Printer .................................................................... Error Conditions.. ........................................................................
.24 .24 .24 .25 .25 .26 .27 .28 .28 .28 .29 .30
Calibration Check and Recalibration ........................................... 31 The ATS Recommendation ........................................................ .31 Calibration Check ....................................................................... .32 Recalibration ............................................................................... .34 Quick Calibration Check and Recalibration Reference Charts. . ..3 6
INTRODUCTION TO SPIROM
Battery Maintenance.. ................................................................... .37 Battery Recharging ..................................................................... .37 Battery Replacement .................................................................. .39
Cleaning and Sterilization ............................................................. 41 Pneumotach ............................................................................... Body of PneumoCheck ............................................................... Printer/Charger ........................................................................... Charging Transformers.. .............................................................
.41 .42 .42 .42
Accessories .................................................................................... Warranty ......................................................................................... Repair .............................................................................................. Appendix A . PneumoCheck Messages.. ....................................
43 44 44 .45
The Welch Allyn PneumoCheck is a tally designed to perform FVC and h accurately. In order to properly use y useful test results, you should be fan spirometry: A spirometer is a device that measur breathed into or out of it. To perform a spirometry test, a patie in a prescribed manner over a knowr ent types of spirometry tests can be I of which yields different information t
PneumoCheck Status Messages ............................................... .45 PneumoCheck Error Messages .................................................. .48 PneumoCheck Test Values ........................................................ .48
Appendix B - Maneuver Quality Messages .................................. 49 Appendix C - Predicted Normal Values ....................................... 51 The Ideal Study .......................................................................... Predicteds Available on Your PneumoCheck ............................. Racial Differences ...................................................................... Calculating Predicted Values Manually ......................................
.51 .51 .52 .52
Reference Tables: Knudson, 1983 2121*21 ......................................................................... .54 Knudson, 1976,13, ........................................................................ .56 Morris, Crapo, et al., 1981 144 ........................................................ 57 European Community for Coal and Steel 166 ................................. 58 Coefficients for MVV's s ................................................................ .58
Appendix D - Technical Specifications ........................................ 59 PneumoCheck ............................................................................ .59 Printer/Charger ........................................................................... .60 Standards Compliance ............................................................... .60
Appendix E - Glossary ................................................................... 61 Appendix F - Bibliography ........................................................... .64
1
INTRODUCTION TO SPIROMETRY
The Welch Allyn PneumoCheck is a hand-held spirometer specifically designed to perform FVC and MVV spirometry tests easily and accurately. In order to properly use your PneumoCheck and to obtain useful test results, you should be familiar with the basic principles of spirometry: A spirometer is a device that measures the amount of air that is breathed into or out of it. To perform a spirometry test, a patient breathes into the spirometer in a prescribed manner over a known period of time. Several different types of spirometry tests can be done using a spirometer, each of which yields different information about the patient’s lung function.
1
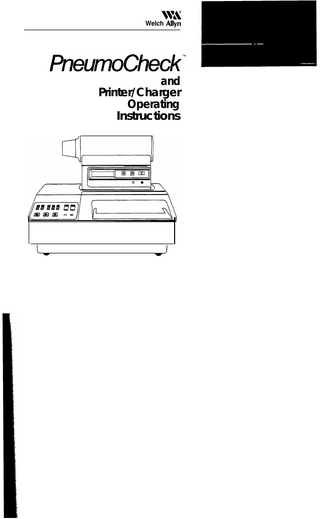
PARTS OF THE WELCH ALLYN PNEUMOCHECK SPIROMETER (#61000) PNEUMOTACH ASSEMBLY
MOUTHPIECE ON/OFF SWITCH
LIQUID ---I CRYSTAL DISPLAY I
BODY OF PNEUMOCHECK
L PNEUMOTACH ASSEMBLY
(ORANGE) SPEAKER FOR AUDITORY SIGNALS
BODY OF PNEUMOCHECK CHARGING JACK DATA/CHARGING CONTACT
3
PRELIMINARY OPERATING INSTRUCTIONS
1.
If the instrument has not been stored at room temperature, allow 45 minutes for the temperature of the instrument to stabilize.
2.
Visually check the screen of the PneumoCheck (see p. 41) and check the calibration (see p. 31).
3.
Instruct the patient about what is expected and how to perform a good test (see p. 8 for FVC or p. 21 for MVV).
4.
Ask the adult patient to attach a disposable mouthpiece using a push-and-twist motion to ensure a snug fit. For children, insert a disposable pediatric mouthpiece.
5.
Slide the ON/OFF switch to the right to turn instrument on. The word CLEAR will appear on the liquid crystal display (LCD) and a beep will sound indicating the instrument’s memory has been cleared.
THE FVC TEST /
QUICK FVC REFERENCE CHART How To Use Your PneumoCheck a
3
Enter Age, Height, Race, Sex into Printer/Charger
3
Instruct and Demonstrate Correci FVC maneuver
t
1
Visually Check Screen of PneumoCh
i
3
When SELECT is displayed, select the type of test by repeatedly depressing the TEST button:
Switch PneumoCheck ON, wait fo SELECT and press TEST
Press once and release to access FVC. Press again and release for MVV. Press again and release for CAL (calibration). Press and release a fourth time to return to SELECT.
1
With each selection the appropriate word or abbreviation will appear on the liquid crystal display (SELECT, FVC, MVV, CAL). Within three seconds that particular test will begin.
3 Good Tests?
6.
DoFVC1,2,3...
1
Place PneumoCheck into PrinterKha
i&
Wait for green DATA light to stop
Interpret 1
Results J
5
THE FVC TEST
QUICK FVC REFERENCE CHART How To Use Your PneumoCheck and Printer/Charger Enter Age, Height, Race, Sex into Printer/Charger
I
Instruct and Demonstrate Correct
I
Visually Check Screen of PneumoCheck
I
t Switch PneumoCheck ON, wait for SELECT and press TEST
DoFVC1,2,3...
Place PneumoCheck into Printer/Charger 1 Wait for green DATA light to stop flashing, then press PRINT
+ Interpret Results
5
1
DESCRIPTION The most frequently performed spirometry test is the forced expiratory vital capacity test, or FVC. It is commonly used for basic pulmonary function testing as well as managing patients with chronic obstructive pulmonary disease (COPD), asthma, emphysema, bronchitis, or other lung diseases. When doing a single maneuver, the patient inhales as much air as possible, then exhales as rapidly and as completely as possible into the spirometer. To perform a complete FVC spirometry test, the patient should complete three or more acceptable FVC maneuvers with a brief rest between each one. MEASUREMENT PARAMETERS Several characteristics of the FVC maneuver are helpful in evaluating the patient’s lung function. The two most commonly used parameters are FVC and FEV 1 : FVC Forced Expiratory Vital Capacity, the total amount of air (in liters) exhaled during an FVC maneuver. FEVl Forced Expiratory Volume in one second, the volume of air (in liters) exhaled during the first second of the FVC maneuver. FEVl is also the measure of the average flow rate during the first second of the FVC maneuver. Other commonly used FVC parameters include:
PEF Peak Expiratory Flow, the highest rat during the FVC maneuver. Once an acceptable FVC maneuver I results can be compared to establish1 determined. The norms are based OI of the patient. Lung disorders usually fall into one 01 lung diseases or restrictive disorders Obstructive lung diseases are those 1 rates or airflow limitation, such as ast Chronic Obstructive Pulmonary Disc: Restrictive disorders are those that c( reduced, such as congestive heart fa pneumonia, pleural fibrosis, pneumoc In general, it is possible to categorize these two groups and gauge its seve but it is usually not possible to identif further information. The patient’s res ment, response to various bronchodil specific pulmonary tests may be neec disorder. NOTE: During FVC maneuvers in the instrument assumes that air at body 1 saturated with water (BTPS) will be L applied.
FEVl /FVC% (also called RATIO) the ratio of the FEV 1 to the FVC, expressed as a percentage. FEF25%-75% Forced Expiratory Flow between the 25% and 75% volume points (also called Mean Mid Expiratory Flow or MMEF). A measurement of the average rate of flow (in liters/second) during the middle 50% of the FVC maneuver.
6
7
PEF Peak Expiratory Flow, the highest rate of airflow (in liters/second) during the FVC maneuver. Once an acceptable FVC maneuver has been completed, the test results can be compared to established norms and a course of action determined. The norms are based on the height, age, race and sex of the patient. Lung disorders usually fall into one of two categories: obstructive lung diseases or restrictive disorders. Obstructive lung diseases are those that cause a reduction in airflow rates or airflow limitation, such as asthma, chronic bronchitis, Chronic Obstructive Pulmonary Disease (COPD) and emphysema. Restrictive disorders are those that cause the lung volume to be reduced, such as congestive heart failure with pulmonary edema, pneumonia, pleural fibrosis, pneumoconiosis and gross obesity. In general, it is possible to categorize a lung disorder into one of these two groups and gauge its severity with a basic spirometry test, but it is usually not possible to identify the specific disorder without further information. The patient’s respiratory history, work environment, response to various bronchodilators, and results from more specific pulmonary tests may be needed to fully diagnose the disorder. NOTE: During FVC maneuvers in the normal operating mode, the instrument assumes that air at body temperature and pressure, fully saturated with water (BTPS) will be used, and a BTPS factor is applied.
7
OBTAINING GOOD FVC TEST RESULTS
Unacceptable conditions inc slow or hesitating start air leaking around the m coughing during the first mouthpiece obstruction quitting too soon l
Accuracy of spirometry testing is very dependent on the effort of the patient and is only valid if the patient cooperates and performs the test to the best of his/her ability. Properly instructing and coaching the patient throughout the maneuver is therefore critical. Your Welch Allyn PneumoCheck has a sophisticated monitoring system which will help you in deciding whether a maneuver was a valid effort.
l
l
l
l
6.
When the maneuver has been c message. If a message appear: maneuver (see p. 49), instruct ttproblem and repeat the test.
However, you must know how to properly teach your patients to perform good tests or your PneumoCheck will continually find fault with maneuvers and you and your patient will quickly become frustrated. To Obtain a Good FVC Result: 1.
Explain the test and what you expect.
2.
Demonstrate how to place the disposable mouthpiece in the mouth (teeth on the outside, forming a good seal with the lips).
3.
Demonstrate how a maneuver is done by doing one yourself. Make sure your effort is a good one by inhaling all the way and then exhaling as completely and rapidly as possible either into the instrument or simply into the disposable mouthpiece.
4.
Coach your patient throughout the test: “Now blast out hard and fast!! All you can!! More! More! Keep going a little more!”
5.
Learn to recognize poor maneuvers by closely observing the patient: An acceptable maneuver requires: adequate understanding maximal inhalation a rapid start of the effort apparent maximal effort with continuous, steady exhalation at least three seconds of exhalation (the ideal is six to ten seconds) l
l
l
l
l
8
9
Unacceptable conditions include: slow or hesitating start air leaking around the mouthpiece coughing during the first second of the maneuver mouthpiece obstruction by tongue, lips, or teeth quitting too soon l l l l
l
6.
When the maneuver has been completed, observe the quality message. If a message appears indicating an unacceptable maneuver (see p. 49), instruct the patient on how to correct the problem and repeat the test.
9
Example of Acceptable (GOOD FVC) Effort: RACE: 2 SEX: M
ACE:23 HEIGHT:7Zin ACTUAL FVC
NORMS :
Examples of Unacceptable Efforts
G o o d FVC
w:F
NORM %NORM RSN
RCTURL
NORM %NORM ABN
Pzs ?. $ 2 &0x 58$g 4.19 1 0 . 8 1 IS:02 Knudson
B:Z
E: 37 HEIGHT: bbin
1983
185
NORMS: Slow
7s 108 < VS30P30 >
maneuver.
Knudson
FVC
1983
( VS30P30 1
s t a r t : begin faster. FVC Wl
,b.,
,a. ‘6.89SEC
,*.
; ,.,. ;,,!..I .I..I. :.,I..:
FVC X l ,~r......,.......,......,..
r Mb.
‘..:.
:,.:..:.....:
,2,,....................... *&..l
SEC
’ ’
SOLU~
I~J
’
L?TER&
’
I
BAD START -:23
HEICHT:YZin ACTUAL
B:Z
B:m
E
N O R M %NORM ABN
FVC
NORMS: F V C
Knudson
1983
intrrrupted:
( VS30P30
avoid
)
F
coushins. k
7.44 SEC
10
\
COUGH 11
Examples of Unacceptable Efforts: @g:37
HEICHT:66in
RRCE.2
ACTUA N OL R
M
NORMS: Knudson 1983 Slow
FVC
ACTUAL
ASN
< VS30P30 > Fugdon t e r m i n a t i o n o f F V C . V too short: blow out longer.
FVC Wl
FVC #l
I’(_
,I.
SEC
0.86
I
BAD START -:23
HEIGHT.72in
5.60 468z
t
d: 73 0 Knudson
s:Z
18:
1983
interrupted:
SB:M
AZ:23
IAN
HFIGHT:7Zin
NORM %NORM RBN
%:02
FVC
$OLU&E
SEC
L?TER~
’
’
BAD STOP
RCTUflL
NORMS:
m:z m:rl NORM %NORM RBN
NORMS: Crapo 198 1
( VS30P30 >
s t a r t : brgin fastor.
6.89
1n
a: 23 HEIGHT: 72
B.F
%NORM
3
1
RACE,2
RCTUA N OL R
7 $6
M
B:tl
XNORM
RBN
FVC
B
avoid
( VS30P30 >
NORMS:
coughing.
Weak
Knudson
1983
F V C sffort:
FVC Xl
( VS30P30 )
blast
harder.
FVC #l
8.47 SEC ,.
7.44 SEC
COUGH
WEAK TRY 11
DOING AN FVC MANEUVER 1.
Upon selection of FVC, the PneumoCheck first measures zero airflow through the pneumotach to assure maximum accuracy. During this time (no more than seven seconds) the word STEADY is displayed and it is important to hold the PneumoCheck still so that an accurate reference can be made. If the PneumoCheck is moved during this time, the STEADY message will remain until it is held quite still for at least three seconds, or until an UNSTEADY message appears. Should an UNSTEADY message appear, depress the TEST button to start FVC again.
2.
The PneumoCheck then displays the message DO FVC 1, and beeps.
3.
The patient may sit or stand, but position should be noted,,. A sitting position is often preferred for stability.
4.
Instruct the patient to inhale deeply, put the mouthpiece in his/ her mouth and exhale as completely and with as much force as possible.
seal. The mouth should be opened w obstruction by the teeth or tongue. 5.
The PneumoCheck will then disp results. It will then provide a seri message appears automatically, patient’s effort. The message for FVC. For a complete list of the c see p. 49.
6.
Press and release the DATA but additional quality messages and parameters for the maneuver: F\ FVC%), MMEF (or FEF 25%-759 and discussion of these values, I (P. 17).
7.
Press the TEST button to return
After completely emptying the lungs, the patient removes the instrument from the mouth. The PneumoCheck will beep after about four seconds, indicating it has seen the end of the maneuver. NOTE: Inhalation should not be done through the pneumotach. Back end of pneumotach should not be blocked. In performing an FVC maneuver the patient’s lips and teeth should be placed around the mouthpiece, with the lips forming a
13
seal. The mouth should be opened wide enough to avoid any obstruction by the teeth or tongue. 5.
The PneumoCheck will then display BUSY while calculating test results. It will then provide a series of messages. The first message appears automatically, and gives an indication of the patient’s effort. The message for an acceptable effort is GOOD FVC. For a complete list of the other quality control messages see p. 49.
6.
Press and release the DATA button consecutively to see additional quality messages and each of the calculated parameters for the maneuver: FVC, FEW, RATIO (or FEV 1/ FVC%), MMEF (or FEF 25%-75%), and PEF. For a definition and discussion of these values, refer to Interpretation of Results (P. 17).
7.
Press the TEST button to return to SELECT.
13
DOING MULTIPLE TESTS ON A PATIENT
ASSESSING ACCEPTABILITY:
According to the American Thoracic Society recommendations for testing,,, the patient should perform at least three acceptable FVC maneuvers, the best two of which must match one another within 5%. The best effort is then used to assess patient status.
The PneumoCheck will determine whl performed should replace the manem as BEST test. In making this determir looks at the quality control messages “good” maneuver is one that has no ic cough in the middle of the maneuver t
No more than eight maneuvers should be obtained to avoid fatiguing the patient. This is easily accomplished with your Welch Allyn PneumoCheck as it will automatically: 1. Assess acceptability. 2. Save the best test. 3. Determine repeatability (“matching”). Following is a description of the specifics: When power is first turned on, the instrument’s memory is empty as indicated by the CLEAR message. The PneumoCheck automatically stores all test data for the best FVC and the best MVV as well as the most recent FVC and MVV maneuvers. To review BEST or LAST test: Press TEST button to access SELECT. Press DATA button once and release to access BEST FVC. Press DATA button again and release to access LAST FVC. Press DATA button and release a third time to return to SELECT. After accessing BEST or LAST memory, wait three seconds for the quality control message. Then, push and release DATA to see calculated values for that test.
14
SELECTING BEST TEST: One Acceptable, One Not If the new maneuver is acceptable an maneuver was not, then the previous1 discarded and the new maneuver is s Likewise, if the new maneuver is not I stored BEST maneuver was acceptat BEST maneuver is retained.
Both Acceptable, Both Unacceptab If the stored BEST maneuver and the acceptable or both unacceptable, the mines which is BEST based on the fo
Criterion For Best FVC Maneuver: The larger sum of the FVC and FEVl
Criterion For Best MVV Maneuver: The higher value as expressed in liter DETERMINING REPEATABILITY: In addition to selection of the best tes the tests were reproducible, that is, tc do this the currently stored best test i! test and a message appears after the
15
ASSESSING ACCEPTABILITY: The PneumoCheck will determine whether the maneuver just performed should replace the maneuver that was previously stored as BEST test. In making this determination, the PneumoCheck first looks at the quality control messages for the new maneuver. A “good” maneuver is one that has no identifiable faults, such as a cough in the middle of the maneuver or a hesitating start (see p. 8). SELECTING BEST TEST:
One Acceptable, One Not If the new maneuver is acceptable and the previously stored BEST maneuver was not, then the previously stored BEST maneuver is discarded and the new maneuver is stored in its place. Likewise, if the new maneuver is not acceptable while the previously stored BEST maneuver was acceptable, then the previously stored BEST maneuver is retained.
Both Acceptable, Both Unacceptable If the stored BEST maneuver and the new maneuver are both acceptable or both unacceptable, the PneumoCheck next determines which is BEST based on the following criteria:
Criterion For Best FVC Maneuver: The larger sum of the FVC and FEVl
Criterion For Best MVV Maneuver: The higher value as expressed in liters/minute.
DETERMINING REPEATABILITY: In addition to selection of the best test, it is important to know that the tests were reproducible, that is, to know that they matched. To do this the currently stored best test is compared to the most recent test and a message appears after the quality message.
15
Match Criteria
INTERPRETATION OF RESULTS
FVC The previously stored best maneuver and the new maneuver are compared: l
MATCH will be displayed if both FVC values are within 5% of each other and both FEVl values are within 5% of each other.
The PneumoCheck Printer/Charger VI which are abnormal, ,,. If the FEVl/f obstructive disorder is indicated. Use of the obstruction: l
An FEVl above 80% of predicte
Borderline Obstruction. If both FVC values and both FEVl values are not within 5% of each other:
l
An FEVl between 60% and 809
Mild Obstruction. l
NO MATCH will be displayed if the new maneuver is 5% less than the previously stored BEST.
l
An FEVl between 40% and 609
Moderate Obstruction. l
NEW BEST will be displayed if the new maneuver is 5% greater than the previously stored BEST.
l
An FEVl below 40% of predicte
Severe Obstruction. MVV l l
l
MATCH will be displayed if the MVV values of the two tests being compared are within 15% of each other. NO MATCH will be displayed if the MVV values compared are not within 15% of each other.
Remember that results displayed at the completion of the maneuver are for the maneuver just completed. See p.14 for instructions on accessing BEST and LAST tests. NOTE: Turn the ON/OFF switch to OFF and back to ON before beginning a test on a new patient, so that the previous patient data memory is cleared.
If the FEVI is below 80% of pre below 80% of predicted, the po: Restriction in addition to the Ob
If the FEVl/FVC ratio is normal, bu strictive disorder is indicated, and severity of the restriction: l
l
An FVC between 60% of predic normal indicates a Mild Restric An FVC between 50% and 60%
Moderate Restriction. l
An FVC below 50% of predictec
Severe Restriction. Any patient who has a normal FVC, F considered to be within normal limits obstructive lung disease can be rulec asymptomatic asthmatic who is in rer
16
17
INTERPRETATION OF RESULTS The PneumoCheck Printer/Charger will place a star beside values which are abnormal, ,,. If the FEVl/FVC ratio is abnormally low, an obstructive disorder is indicated. Use the FEVl to grade the severity of the obstruction: l
An FEVI above 80% of predicted indicates a
Borderline Obstruction. l
An FEV1 between 60% and 80% of predicted indicates a
Mild Obstruction. l
An FEVl between 40% and 60% of predicted indicates a
Moderate Obstruction. l
An FEVl below 40% of predicted indicates a
Severe Obstruction. l
If the FEVl is below 80% of predicted and the FVC is also below 80% of predicted, the possibility of a superimposed Restriction in addition to the Obstruction exists.
If the FEVl/FVC ratio is normal, but the FVC is abnormal, a restrictive disorder is indicated, and the FVC is used to grade the severity of the restriction: l
l
I
An FVC between 60% of predicted and the lower limit of normal indicates a Mild Restriction. An FVC between 50% and 60% of predicted indicates a
Moderate Restriction. l
An FVC below 50% of predicted indicates a /
Severe Restriction. Any patient who has a normal FVC, FEVl/FVC, and FEF 2575% is considered to be within normal limits, and clinically significant obstructive lung disease can be ruled out. An exception to this is the asymptomatic asthmatic who is in remission.
17
~
~
SPECIAL NOTES: l
l
l
A normal spirometry test does not preclude the existence of lung cancer or the very early stages of many of the restrictive lung disorders. If both the FEVl and FEVl/FVC ratio are normal, some pulmonary specialists will examine the FEF 2575% (MMEF). If it is low, the patient may have a ‘slight obstruction.’ There is some controversy regarding this variable and its clinical significance in indicating small airways dysfunction.’ It is risky to attempt the interpretation of results when acceptable and reproducible maneuvers were not obtained. To do so may yield false positive results.
18
INTERPRETATION OF FVC RESULTS FLOW CHART, ,,
&ii+ ,-z&j RESTRICTION FEV 1 above 80% Y of predicted?
e
Borderline s Obstruction
ti
NO FVC above 60% of predicted?
I Yes FEV 1 above 60% __) Mifd Obstruction of predicted?
Yes + Ztriction
No I FVC above 50% of predicted?
No I Yes FEV 1 above 40% + ~&Z~on of predicted?
No
Severe Obstruction FVC below 80% of predicted? Yes 1 And low vital capacity, cannot rule Out superimposed restriction.
19
*
Yes + ZZZ7
THE MVV TEST
DESCRIPTION The MVV or Maximal Voluntary Ventilation is another type of spirometry test. When doing an MVV, the patient is required to breathe in and out as deeply and as rapidly as possible for a period of 12 to 15 seconds. Specific indications for doing the test are: 1.
Social Security evaluation for total disability from COPD.
2.
Determination of coal miners’ total disability due to pneumoconiosis.
3.
Biannual pulmonary surveillance of employees exposed to cotton dust.
4.
Preoperative evaluation of overall breathing ability.
5.
Evaluation of dyspnea unexplained by the FVC maneuver,,.
MEASUREMENT PARAMETERS The parameters that are measured during an MVV maneuver are: l
l
l
The MVV: The total amount of air (in liters per minute) moved by the lungs during the test. MVV Rate: The breathing rate (in breaths per minute). MVV Time: The elapsed time (in seconds) of the usable portion of the maneuver.
NOTE: During MVV maneuvers in the normal operating mode, the instrument assumes that air at body temperature and pressure, fully saturated with water (BTPS) will be used, and a BTPS factor is applied.
20
OBTAINING GOOD MVV RESULTS
MVV results are also extremely effort-dependent. Obtaining a Good MVV Result: 1.
Explain the test and what you expect.
2.
Demonstrate how to put the disposable mouthpiece in the mouth (teeth on the outside, forming a good seal with the lips).
3.
Demonstrate how a maneuver is done by breathing in and out quickly and deeply for a few seconds.
4. Coach your patient throughout the test. 5.
Learn to recognize most poor maneuvers by observing the patient: An acceptable maneuver requires: at least six seconds of test time a rapid pace l
l
Unacceptable conditions include: air leaking around the mouthpiece mouthpiece obstruction by tongue, lips, or teeth quitting too soon l
l
l
DOING AN MVV MANEUVER 1.
Upon selection of MVV the PneumoCheck first measures zero airflow through the pneumotach to assure maximum accuracy. During this time (no more than seven seconds) the word STEADY is displayed and it is important to hold the PneumoCheck still so that an accurate reference can be made. If the PneumoCheck is moved during this time, the STEADY message will remain until the PneumoCheck is held quite still for at least three seconds, or until an UNSTEADY message appears. Should an UNSTEADY message appear, depress the TEST button to start MVV again.
2. The PneumoCheck then displays the message DO MVV 1, and beeps. 21
3. The patient performs an MVV maneuver by inhaling deeply, placing the instrument in the mouth, and then panting forcefully through the pneumotach, beginning with an exhalation. The patient should continue until the PneumoCheck beeps (15 seconds after the start of the maneuver). Patient should not block the back end of the pneumotach. 4.
Upon completion of the maneuver, the word BUSY will be displayed while the PneumoCheck calculates the results. The quality control message will then be displayed.
5.
Press and release the DATA button consecutively to see additional quality messages and MVV test parameters. (See pp. 20 and 49 for more detail.)
6.
Press the TEST button to return to SELECT.
DOING MULTIPLE TESTS ON A PATIENT See page 14. ASSESSING ACCEPTABILITY See page 15. SELECTING BEST TEST See page 15. DETERMINING REPEATABILITY See page 15. MATCH CRITERIA See page 16. INTERPRETATION OF RESULTS
MVV results have been found to correlate with the degree of dyspnea and the level of disability. An abnormal result may be caused by obstructive or restrictive lung diseases, respiratory muscle weakness, poor physical conditioning or neurological diseases. However, it should be noted that abnormal results could be produced by poor patient effort during the test.
22
PARTS OF THE PNEUMOCHECK PRINTER/CHARGER (#76100 OR #76105)
PNEUMOCHECK
STOP --.-i BUTTON
DATA INDICATOR (GREEN)
PAPER SLOT
23
PRINTER/CHARGER OPERATING INSTRUCTIONS
SETTING UP 1.
Plug the power cord into the black receptacle in the rear of the Printer/Charger. Then connect the power cord to a receptacle of appropriate voltage, frequency and plug type. The orange power indicator on the front panel will become illuminated, and a twotone beep will occur.
2.
Leave the power switch of the PneumoCheck spirometer in the ON position after a test to print a report. Turning the PneumoCheck OFF will clear the memory of all data.
3.
ONLY the results from the BEST test will be printed.
4.
If individual prints of each test are desired (e.g. for inhalation challenges, evaluations for Social Security Disability, etc.): l
l
l
Print the very first maneuver. Turn the PneumoCheck OFF and then back ON to clear memory before performing the next maneuver. Repeat above two steps for each maneuver.
SETTING REPORT FORMAT OPTIONS On the underside of the Printer/Charger is a set of four option switches. With these switches you can specify report format as * follows:
PREDICTED NORMALS (Switches 1 and 2) Four sets of predicted normal values are provided for comparing patient results. The standard factory setting is Knudson, 1983. Use option switches one and two to change this setting. For more information on predicteds see Appendix C (p. 51). 24
SHORT FORM OR LONG FORM (Switch 3) Choose between the Short Form,and the Long Form report by using the third switch. The Long Form includes a respiratory history questionnaire which allows you to record the patient’s respiratory history: SHORT FORM
LONG FORM NAME :
NAME : DATE :
DATE :
ID:
ID:
AGE 36 HEIGHT: 66in Reason
for
w:Z
B:F
test
Cough? Smoker?
Sputum?
Quit?
When?
Dyspnea?
When?
Pack-years?___________
Chest Pain? Heart Disease? Wheeze/Asthma? CutlS S u r g e r y Abn
.
Chest X - R a y ?
FLOW/VOLUME PLOT OR VOLUME/TIME PLOT (Switch 4) Choose a Flow/Volume plot or a Volume/Time plot for FVC maneuvers using the fourth switch. See examples below: FLOW/VOLUME
VOLUME/TIME
F’JC #6 ,~r.....,..,........,,,,,..
_.............._.. ,.
,z.......,...,.......,,,,..
~......
,~......, :
:
. :
:
‘9.17SEC :
:
:
~...............
.,. :
k?
~‘.............._...._
t.
:OLU?lE
I&
LI;ER&
’
25
,.
BEST FVC This value cites, per ATS recommendations,,, the largest single FVC value from all acceptable maneuvers. BEST FEV1 This value cites, per ATS recommendations,,, the largest single FEVl value from all acceptable maneuvers. ENTERING PATIENT DATA 1. Set the AGE and HEIGHT values by pressing the switches above or below each number. Height can be set in either inches or centimeters. (If the height entered is greater than 84, centimeters will be assumed.) Height should be measured accurately in stocking feet since it has the largest effect on predicted value. 2. To set the RACE switch, use the UP position for RACE 1: Blacks, Orientals, East Indians, and Pakistanis, and the DOWN position for RACE 2: all other races including Caucasians and Hispanics. 3. To set the SEX switch, use the UP position (F) for female and down (M) for male.
LAGE--I
LHEIGHTJ
FEED
STOP
l-y-l RACE SEX
2 - ALLOTHERS
+-I
I
DATA POWER 1
26
PRINTING 1.
Place the PneumoCheck in the Printer/Charger well with the display facing you. When the instrument is properly seated, the orange charging indicator on the PneumoCheck will become illuminated.
LIQUID CRYSTAL DISPLAY
CHARGING INDICATOR (ORANGE)
DATA INDICATOR (GREEN) POWER INDICATOR (ORANGE)
2.
The green DATA indicator on the Printer/Charger will flash during data transfer and the PneumoCheck Liquid Crystal Display will display SEND FVC and/or SEND MVV or SEND CAL. When data transfer is complete, the green DATA indicator will stop flashing and a triple tone beep will occur. NOTE: Instrument may be removed after data transfer; data will remain in printer memory until new data is entered or power is disconnected.
3.
Press the PRINT button momentarily to begin printing. A full FVC report takes approximately 20 seconds to print.
4.
Tear the report off by pulling the paper towards you.
5.
For a duplicate report, press the PRINT button again.
27
PAPER FEED To feed extra paper, depress the FEED button. Paper will continue to feed as long as the button is depressed. PAPER JAMS If the paper has wrapped around the gray rubber pinch roller several times, feed the paper backwards: 1.
Depress the STOP button and the FEED button simultaneously, then release the STOP button.
2.
The printer will feed backwards continuously until you release the FEED button.
For paper jams that do not involve paper wrapping around the pinch roller, cut the paper from the roll, and pull the paper out from the top of the printer. Do not pull the paper backwards through printer. PAPER REPLACEMENT 1.
Remove the printer cover by lifting up.
2.
Feed any remaining paper through the printer. Do not pull paper backwards through printer. Remove and discard old paper roll, saving black plastic spindle.
3.
Cut end of new roll squarely, and insert black plastic spindle.
4.
Pull the red lever to its forward position. 28
5.
Place the new roll of paper in the printer well, insuring that spindle is located behind retaining blocks, and that the paper feeds forward from the bottom of the roll.
6.
Insert edge of paper under the gray rubber pinch roller until paper exits top of printer.
7.
Push the red lever as far back as possible.
8.
Press the FEED button to feed through several inches of paper.
9.
Replace the printer cover taking care to feed paper through opening. NOTE: This is thermally activated paper. If paper is inserted backwards, no printing will appear on paper.
STOPPING THE PRINTER The STOP button on the Printer/Charger serves two functions: 1. Press STOP to abort current operation (report printing or data transfer). 2.
Press STOP to clear Printer/Charger of error condition. NOTE: If a test is stored in the Printer/Charger memory, it will remain there and can be printed after the STOP button has been pressed.
29
ERROR CONDITIONS If the Printer/Charger should detect an error, it will generate an audible alarm and flash the DATA light in groups of 1, 2, or 3 flashes which correspond to the error that was detected: l
l
l
1 FLASH - There is no paper in the printer, or the printer lever is in the wrong (forward) position.
2 FLASHES - A hardware malfunction has occurred. Press the STOP button to clear the problem. If the error recurs, the Printer/Charger may need servicing. 3 FLASHES - Data received from the PneumoCheck is invalid. Press STOP, and retransmit data by removing the PneumoCheck from the Printer/Charger well temporarily. If the error recurs, turn the PneumoCheck OFF, clear the Printer/Charger by pressing STOP again, and retest the patient. If the problem persists, your PneumoCheck, Printer/Charger, or both, may require servicing.
NOTE: The version of software in your PneumoCheck Printer/ Charger is printed on each printout just beneath the chart of values.
RACE:2 m:rl AGE: 23 HEIGHT: 72in ACTUAL NORM %NORM ABN
NORMS: Knudson 1983
< US30P30 ) -
G o o d FVC maneuver
30
- SOFTWARE VERSION
CALIBRATION CHECK AND RECALIBRATION
The ATS Recommendation The American Thoracic Society recommendation for recalibration is as follows: “The spirometer’s ability to accurately measure volume should be checked at least daily with a calibrated syringe with a volume of at least 3.0 liters. During industrial surveys or other field studies in which a large number of subject maneuvers are done, the equipment should be calibrated prior to testing daily if in regular use and then every 4 hours during use. Although there is minimal day-to-day variation in volume calibration, daily calibration checking is highly recommended so that the onset of a problem can be determined within one day, eliminating needless reporting of false values for several weeks or months and also to help define day-to-day laboratory variability. For survey testing where a large number of maneuvers are done, the 4-hour period of calibration checking is recommended to prevent invalidation of data from a large number of maneuvers,,.” Check calibration and recalibrate if necessary any time there has been a change in elevation of 200 feet or more. Check the calibration and recalibrate if necessary whenever the pneumotach assembly has been replaced for any reason, i.e. cleaning, sterilization, changing the battery. Examine the screen of your PneumoCheck daily. Blockage of the screen indicates the need for cleaning the screen (see p. 41) followed by a calibration check.
31
CALIBRATION CHECK
Attach a calibrated 3.0 liter syringe (stored at the same temperature as your PneumoCheck) with appropriate hose (see Accessories on p. 43).
SYRINGE PLUNGER
HOSE A
2.
Make sure that nothing is blocking the back end of the pneumotach.
3.
Flush the syringe back and forth through the PneumoCheck several times to equilibrate the temperature.
4.
Pull the syringe plunger back as far as it will go.
5. Access the TEST.MODE on your PneumoCheck: Turn vour PneumoCheck OFF. fi{ Whiledepressing the TEST button turn the
instrument ON.
Cc) The message TEST.MODE will appear briefly and a beep will sound.
Cd) The message VER X.X will be displayed. This indicates the software version used in your PneumoCheck.
H Then the CLEAR and SELECT messages will be displayed.
32
6.
Depress TEST button to select FVC.
7. When the PneumoCheck indicates DO FVC 1, push the plunger forward as far as it will go using an even, consistent motion. This forward stroke should take l-2 seconds. 8. The PneumoCheck will then display BUSY while calculating test results, and will then display TEST.MODE. 9. To review the result press the DATA button. Results between 2.91 liters and 3.09 liters indicate an accurate instrument (+3% of 3.0 liters as specified by ATS). 10. Print the TEST.MODE FVC result if documentation of the calibration check is desired. 11. Return to regular operating mode by turning the power OFF, then ON again. NOTE: There is no quality check done on calibration check
maneuvers nor is best test selected. Every test is stored, replacing the previously stored test.
33
RECALIBRATION Recalibrate your PneumoCheck anytime a calibration check shows it to be inaccurate (see ATS recommendation on p. 31). 1.
With the PneumoCheck OFF, connect the 3.0 liter syringe (stored at the same temperature as your PneumoCheck) to the pneumotach, portion of the PneumoCheck.
2.
Make sure that nothing is blocking the back end of the pneumotach.
3.
Flush the syringe back and forth several times through the PneumoCheck to equilibrate the temperature.
4.
Turn the PneumoCheck ON. When SELECT message is displayed, select the calibration (CAL) mode (see p. 4).
5.
Pull back the plunger of the syringe when a double beep occurs and the PULL.BACK message appears.
6.
The PneumoCheck will display the STEADY message, then RETRIM for approximately 45 seconds while measuring zero flow through the pneumotach to assure maximum accuracy.
7.
When a single beep and the message DO CAL 1 appears, wait one second, then push the plunger all the way forward using an even, consistent motion. This forward stroke should take less than one second.
8.
The PneumoCheck will display the message BUSY briefly and then PULL.BACK again. Three maneuvers must be completed in order to recalibrate the unit: repeat steps 5 and 7 twice more. Notice that with each subsequent calibration maneuver, the messages DO CAL 2 and DO CAL 3 will appear instead of DO CAL 1.
34
9.
Once three maneuvers have been completed, the PneumoCheck will calculate the average volume of the three maneuvers. Each maneuver is then compared to this calculated average, and if all three are within 0.5% of the calculated average, the calibration value is automatically updated and displayed as CF=xxxx, followed by, the message GOOD CAL .
10. If any of the calibration maneuvers were not within 0.5% of the dalculated average, a triple beep will occur and the message RETRY.CAL will be displayed, and the existing calibration factor will not be updated. Attempt recalibration again. 11. Do a calibration check and produce a printout if desired (see p. 32). NOTE: When checking calibration in TEST.MODE, or when recalibrating, the instrument assumes room air will be used and an Air Temperature and Pressure Dry (ATPD) factor is applied. ATPD will appear at the top of the calibration check printout.
35
QUICK CALIBRATION CHECK AND RECALIBRATION REFERENCE CHARTS Doing a Calibration Check
Doing a Recalibration
Attach syringe to PneurnoCheck
Attach syringe to PneumoCheck
Flush syringe through PneumoCheck several times
, and TEST.MODE
Follow messages to PULL.BACK and DO CAL twice more CF=XXXX followed by GOOD CAL yields a good calibration If RETRY CAL message appears, process must be repeated
36
BATTERY MAINTENANCE
The PneumoCheck will remain charged and ready for use if returned to Printer/Charger when not in use. BATTERY RECHARGING The nickel cadmium batteries in the PneumoCheck will provide approximately 8 hours of continuous operation on a full charge. When the batteries are low, the message LOW BATT will be displayed, and the PneumoCheck will not allow any tests until the batteries have been recharged. NOTE: After LOW BATT appears, printing of the most recent test in the PneumoCheck memory is still possible. A fully drained battery may be fully recharged in about 15 hours by either of these methods: PRINTER/CHARGER 1.
Connect the power plug of the Printer/Charger to a receptacle of appropriate voltage, frequency and plug type. The orange power indicator will become illuminated.
2.
Place the PneumoCheck into the charging well with the display facing you. When properly seated, the orange charging indicator on the PneumoCheck will become illuminated.
37
CHARGING TRANSFORMER ~ICAUTION: USE ONLY A WELCH ALLYN CHARG I NG T R A N SFORMER (SEE P. 43) TO AVOID HAZARDS OF FIRE, SHOCK, OR DAMAGE TO THE INSTRUMENT. To recharge: 1.
Plug the charging transformer into a receptacle of appropriate voltage, frequency and plug configuration.
2.
Place the PneumoCheck on its back and plug the output cord of the transformer into the charging jack of the PneumoCheck.
SPECIAL NOTES 1.
Slight heating of the PneumoCheck during charging is normal.
2.
Batteries will not leak.
3.
If left without charge, batteries will discharge gradually over a period of about 30 days when stored at room temperature (70” F). Storage at higher temperatures will accelerate the discharge rate.
4.
The batteries will last longer if used on a regular basis.
5.
The PneumoCheck may be charged indefinitely without damage to the batteries. 38
BATTERY REPLACEMENT The PneumoCheck batteries are intended for many charge/recharge cycles and are warranted for two years (expiration date is imprinted on each battery). For maximum battery life, always replace both batteries at the same time. To replace: 1.
Turn the PneumoCheck OFF.
2.
Using a coin, loosen the two set screws on the bottom of the PneumoCheck (these screws will loosen, but cannot be removed). PNEUMOTACH ASSEMBLY
3.
Remove the pneumotach assembly from the top of the PneumoCheck.
4.
To remove the batteries, turn the PneumoCheck upside down and tap lightly.
39
5.
Insert new batteries according to diagram inside battery compartment.
6.
Replace the pneumotach assembly and tighten the two screws on the bottom until the pneumotach is securely in place.
7.
Recalibrate the PneumoCheck (see p. 34).
ACAUTION: REPLACE W I T H WELCH ALLYN NO.72500
BATTERIES ONLY. USE OF BATTERIES OF OTHER MANUFACTURE MAY CAUSE RISK OF FIRE OR DAMAGE TO THE UNIT.
40
CLEANING AND STERILIZATION
PNEUMOTACH The screen in the pneumotach mouthpiece should be visually inspected before each use. If sputum or other foreign matter becomes lodged in the screen, it can cause erroneous readings. To clean the screen, remove the mouthpiece and scrub it with a small brush. Then check calibration (see p. 31).
The pneumotach assembly should be removed (see p. 39), cleaned and sterilized prior to any maneuvers involving inhalation, such as MVV. Routine maintenance of the pneumotach assembly should include cleaning and sterilization after every 50 maneuvers. The pneumotach will withstand the effects of cleaning and/or sterilization by any of the following methods: Steam Autoclave (270” F, 27 PSI, 6 min cycle) Ethylene Oxide CidexTM Cidex 7TM 70% Isopropyl Alcohol Boiling Water (30 min) If using steam autoclave, instrument should be wrapped. Do not assume that pneumotach is completely dry after drying cycle. See drying instructions on p. 42.
41
If Cidex, Cidex 7 or Isopropyl Alcohol is used, rinse the pneumotach assembly thoroughly afterwards by immersing it in water and agitating vigorously to remove all traces of the solution. Then shake the pneumotach to remove excess water. Regardless of the sterilization method chosen, insure that the pneumotach is completely dry before using. A wet or damp pneumotach will not be linear, and will cause inaccurate measurements: For air drying, allow 4 days. Using a hair dryer on high setting, allow 10 minutes. Note that spare pneumotach assemblies are available (see p. 43) and can be used interchangeably. THE PNEUMOCHECK SHOULD BE RECALIBRATED ANY TIME THE PNEUMOTACH HAS BEEN REMOVED/REPLACED.
BODY OF PNEUMOCHECK The body of the PneumoCheck may be cleaned by wiping with a dry cloth or a cloth that has been lightly dampened with 70% Isopropyl alcohol. Care should be taken to prevent seepage of liquid into the instrument. DO NOT IMMERSE OR STERILIZE THE BODY OF THE PNEUMOCHECK.
PRINTER/CHARGER The PneumoCheck Printer/Charger should not be sterilized. It may be cleaned by wiping with a dry cloth. CHARGING TRANSFORMERS Charging transformers must not be sterilized, but may be cleaned by wiping with a dry cloth.
42
ACCESSORIES
61050 Pneumotach Assembly. 610064-501 Pneumotach Mouthpiece 56100
Thermal Paper - 5 Rolls/Box, 12 Boxes/Case.
56120 56121 56130
Disposable 1OOlBag, Disposable Disposable
61010 61020 61030
Hose for 3.0 Liter Syringe. 3.0 Liter Calibration Syringe Only. 3.0 Liter Calibration Syringe and Hose.
72500
Two 3.6 V Rechargeable Batteries (7.2 V), Replacement.
Mouthpieces, Pediatric 5 Bags/Case. Mouthpieces, Adult - 1 0O/Bag, 5 Bags/Case. Nose Clips - 1OO/Box, 4 Boxes/Case.
Charging Transformers 71040 UL/CSA 120 V nominal line voltage - (A) IEC 220-250 V nominal line voltage- (B) 71032 IEC 220-250 V nominal line voltage- (C) 71034
El
II I I
l
0
76100 76105
Printer/Charger Only. Same as 76100, but Export. Specify Country and Voltage. 43
b
WARRANTY
Welch Allyn warrants the PneumoCheck and Printer/Charger, when new, to be free of defects in material and workmanship and to perform in accordance with manufacturer’s specifications for a period of two years from the date of purchase from Welch Allyn or its authorized PneumoCheck distributors or agents. Welch Allyn will either repair or replace any components found to be defective or at variance from manufacturer’s specifications within this time at no cost to the customer. It shall be the purchaser’s responsibility to return the instrument directly to Welch Allyn or to an authorized PneumoCheck distributor, agent or service representative. This warranty does not include breakage or failure due to tampering, misuse, neglect, accidents, modification or shipping. This warranty is also void if the instrument is not used in accordance with manufacturer’s recommendations or if repaired by other than Welch Allyn or an authorized agent. Purchase date determines warranty requirements. No other express warranty is given.
Kindly submit instrument registration card for warranty validation. REPAIR Repairs must be done by authorized Welch Allyn personnel. Failure to do so will invalidate the warranty. Return to: TECHNICAL SERVICE DEPARTMENT WELCH ALLYN, INC. 4341 STATE STREET ROAD SKANEATELES FALLS, NY 13153-0220 U.S.A. (315) 685-4445 Outside of the United States, return your PneumoCheck to your local authorized Welch Allyn distributor.
44
APPENDIX A PNEUMOCHECK MESSAGES
PNEUMOCHECK STATUS MESSAGES
The following is a tabulation of the various messages that may be displayed on the PneumoCheck’s Liquid Crystal Display: BEST FVC
The PneumoCheck has accessed the best FVC test from memory.
BEST MVV
The PneumoCheck has accessed the best MVV test from memory.
BUSY
The PneumoCheck is calculating the results of a test.
CAL
The calibration maneuver has been selected and will begin in 3 seconds. Depress TEST button to select a different test.
CF=xxxx
Shows the Calibration Factor after a successful calibration was completed. This value is now the new calibration value, replacing the old one that was previously stored in memory.
CLEAR
The power has been recycled and the memory has been cleared.
DO CAL n
The operator should perform the nth calibration maneuver.
DO FVC n
The patient should perform the nth FVC maneuver.
DO MVV n
The patient should perform the nth MVV maneuver.
FLOW LIM
Flow during a maneuver has exceeded the flow sensor’s capacity of 14 liters/second.
FVC
The FVC test has been selected and will begin in 3 seconds. Depress TEST button to select a different test.
LAST FVC
The PneumoCheck has accessed the most recent FVC test from memory.
LAST MVV
The PneumoCheck has accessed the most recent MVV test from memory. 45
LOW BATT
The battery is too low to continue testing and requires recharging. I
MVV
The MVV test has been selected and will begin in 3 seconds. Depress TEST button to select a different test.
NEW BEST
This test has an FVC and/or FEVl which is more than 5% larger than the one currently stored as BEST test. It will replace the stored BEST test. See Doing Multiple Tests.on a Patient (p. 14).
(FVC)
NEW BEST
(MVV)
This test has a greater MVV than the one currently stored as BEST test. It will replace the stored BEST test. See doing Multiple Tests on a Patient (p. 14).
NO DATA A
The maneuver was interrupted by the press of a key or a low battery.
NO DATA B
The FVC or MVV maneuver did not start within 20 seconds after the beep.
NO DATA C
The FVC terminated normally, but on analysis, no exhalation was found.
NO DATA D-G The maneuver appeared too fragmented, did not
have enough breaths to analyze, or the breaths were too inconsistent or uneven. The maneuver analysis routine failed; the PneumoCheck was unable to analyze the data. RETRIM
The PneumoCheck is establishing a baseline for future data for calibration. In the RETRIM mode, the PneumoCheck uses a more accurate (and lengthy) approach than in the STEADY mode. The RETRIM message will be displayed for about 45 seconds.
SEND FVC
The PneumoCheck is transmitting an FVC test to the Printer/Charger.
SEND MVV
The PneumoCheck is transmitting an MVV test to the Printer/Charger.
46
STEADY
Don’t move the PneumoCheck. It is referencing zero flow in order to establish a baseline.
TEST.MODE
Entrance into the test mode of the PneumoCheck. This mode is used for testing and documenting calibration. r
TEMP.LIM
The temperature range limit has been exceeded. Allow PneumoCheck to return to operating range (15 to 35°C) or (59 to 95°F). Blocked vents on Printer/Charger may cause this problem.
TOO SOON
The patient began exhaling before the instrument was ready. Repeat the test, waiting to hear the beep.
TRIM.LIM
The device cannot trim the baseline. This is usually due to an abrupt thermal change or a weak battery. Return instrument to an acceptable operating temperature range (15 to 35%) or (59 to 95°F) and fully charge before proceeding.
NOTE: Encountering either the TEMP.LIM or TRIM.LIM messages during normal operation may indicate a possible hardware failure. In this event, turn the PneumoCheck switch to OFF then ON again. Should this error persist, return your instrument to Welch Allyn. TX FAIL
Transmission failure.
UNSTEADY
The PneumoCheck has detected airflow during STEADY portion of maneuver. Repeat test. If error persists, contact Welch Allyn.
VER X.X
The software version in your PneumoCheck spirometer.
VOL LIM
The volume during a maneuver has exceeded the PneumoCheck’s capacity of 14 liters (minimum). Such an FVC volume is not possible from a human. Repeat the maneuver or recalibrate the PneumoCheck.
47