Operating Manual
40 Pages

Preview
Page 1
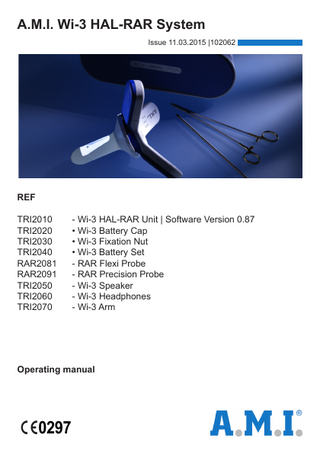
A.M.I. Wi-3 HAL-RAR System Issue 11.03.2015 |102062
REF TRI2010 TRI2020 TRI2030 TRI2040 RAR2081 RAR2091 TRI2050 TRI2060 TRI2070
- Wi-3 HAL-RAR Unit | Software Version 0.87 • Wi-3 Battery Cap • Wi-3 Fixation Nut • Wi-3 Battery Set - RAR Flexi Probe - RAR Precision Probe - Wi-3 Speaker - Wi-3 Headphones - Wi-3 Arm
Operating manual
0297
Table of contents
page
1. Scope of the Wi-3 HAL-RAR System...........................................................................4 2. Terminology..................................................................................................................4 3. Function.......................................................................................................................5 4. Clinical applications.....................................................................................................5 5. Contra indications........................................................................................................5 6. Warnings / Safety notes...............................................................................................6 7. Preventive measures...................................................................................................6 7.1. General information.....................................................................................................6 7.2. Notes on acoustic output range...................................................................................8 7.3. Right application of ultrasonic equipment....................................................................9 7.4. Notes on electromagnetic compatibility (EMC)............................................................9 7.5. Guidance and manufacturer’s declaration – electromagnetic emissions...................10 7.6. Guidance and manufacturer’s declaration – electromagnetic immunity.....................10 7.7. Guidelines for avoiding undesired electromagnetic effects on other systems...........13 8. Servicing and inspection............................................................................................13 9. Transport and storage................................................................................................13 10. Disposal.....................................................................................................................14 11. Product features.........................................................................................................14 12. Operating elements and connections.........................................................................16 13. Application.................................................................................................................17 13.1. User/patients/application area...................................................................................17 13.2. Preparation................................................................................................................17 13.3. Performing the operation...........................................................................................18 14. Overview of system functions.....................................................................................20 14.1. System check..............................................................................................................20 14.2. Lighting.......................................................................................................................20 14.3. Volume........................................................................................................................20 14.3.1. Setting the volume on the Wi-3 HAL-RAR Unit.........................................................21 14.3.2. Setting the volume on the audio receiver...................................................................21 14.4. Counting of applications.............................................................................................21 14.5. Displaying the remaining operating time....................................................................22 14.6. Bluetooth....................................................................................................................22 14.6.1. General information....................................................................................................22 14.6.2. Pairing........................................................................................................................23 14.6.2.1. General information....................................................................................................23 14.6.2.2. Setting the pairing mode on the audio receiver..........................................................24 14.6.2.3. Setting the pairing mode on the Wi-3 HAL-RAR Unit................................................24 14.6.3. Connection if pairing has already been performed.....................................................24 14.6.4. Perfect conditions for Bluetooth connection...............................................................25 14.6.6. Audio receiver requirements......................................................................................26 15. Maintenance, cleaning and sterilisation.....................................................................27
page 15.1. 15.2. 15.3. 16. 16.1. 16.2. 17. 17.1. 17.2. 17.3. 18. 19. 20. 21.
Audio receiver.............................................................................................................27 A.M.I. HAL Needleholder (AHN 006) and A.M.I. HAL Knotpusher (AHK 007)...........27 Wi-3 HAL-RAR Unit (TRI2010), Wi-3 Battery Cap (TRI2020) Wi-3 Fixation Nut (TRI2030), Wi-3 Arm (TRI2070).................................................................................29 Changing the batteries...............................................................................................31 Removing old batteries...............................................................................................31 Inserting new batteries...............................................................................................32 Troubleshooting.........................................................................................................33 General information....................................................................................................33 Malfunctions indicated by indicator LEDs..................................................................33 Other malfunctions.....................................................................................................34 Wi-3 HAL-RAR Unit specifications.............................................................................35 Ordering details..........................................................................................................36 Warranty......................................................................................................................36 Symbols.....................................................................................................................37
Manufactured in Austria
1. Scope of the Wi-3 HAL-RAR System The Wi-3 HAL-RAR System includes the following components: Wi-3 HAL-RAR Unit / TRI2010 including r Wi-3 Battery Cap / TRI2020 r Wi-3 Fixation Nut / TRI2030 r Wi-3 Battery Set / TRI2040 including probes: r RAR Flexi Probe / RAR2081 r RAR Precision Probe / RAR2091 and Bluetooth audio receiver: r Wi-3 Speaker / TRI2050 r Wi-3 Headphones / TRI2060 and other accessories: r Wi-3 Arm / TRI2070 r A.M.I. HAL Knotpusher / AHK 007 r A.M.I. HAL Needleholder / AHN 006 r A.M.I. HAL Suture / AHAL 70 2. Terminology HAL Haemorrhoidal Arteries Ligation RAR Recto Anal Repair (tightening/mucopexy of prolapsing tissue) Probe Short description of the two-part RAR Flexi Probe or the two-part RAR Precision Probe, each including probe and cover Device electronic unit (Wi-3 HAL-RAR Unit) System Wi-3 HAL-RAR System Audio receiver Bluetooth device for playing the acoustic signal
Page 4
3. Function The Wi-3 HAL-RAR System consists of several products for locating haemorrhoidal arteries, manual ligation of them and, if required, pexy of prolapsing haemorrhoidal tissue. The haemorrhoidal arteries are located using Doppler ultrasonic technology. The Wi-3 HAL-RAR Unit generates an electrical signal and can be equipped with different probes (RAR Flexi Probe, RAR Precision Probe). Each of these probes is equipped with a ultrasonic sensor converting the electrical signal into a ultrasonic signal. This ultrasonic signal is applied to the rectal area and reflected by solid particles in circulating arterial blood. The ultrasonic sensor receives the reflected signal and converts it into an electrical signal. This electrical signal is then transmitted to the Wi-3 HAL-RAR Unit. The Wi-3 HAL-RAR Unit amplifies and rectifies it and generates a signal that is transmitted for acoustic output to the audio receiver via the integrated Bluetooth interface. 4. Clinical application The Wi-3 HAL-RAR System is suited exclusively for the following clinical applications: r Locating of haemorrhoidal arteries r Ligation of haemorrhoidal arteries r Pexy of prolapsing haemorrhoidal tissue 5. Contra indications r r r
The product must not be used for any purpose other than the above mentioned intended purpose. The expiry date on the sterile barrier packaging of sterile supplied products (probes, suture material) must be observed. Check sterile barrier packaging for damage. Do not use products from open or damaged sterile barrier packaging.
Page 5
6. Warnings / Safety notes r r r
Probes and A.M.I. HAL Suture are single-use products. Do not re-sterilise or reuse. The Wi-3 HAL-RAR Unit, probes, the Wi-3 Arm, the A.M.I. HAL Needleholder, the A.M.I. HAL Knotpusher and the A.M.I. HAL Suture must exclusively be used in sterilised state. Each modification to the product may lead to a risk for the patient or the user.
7. Preventive measures 7.1. General information r r r r
r r
r r r r
r
r
Observe operating manual. This device must only be used by medically trained personnel. After application, this product imposes a biological risk. Handle this product according to the provisions of the institute or applicable laws (disposal). The system may only be used in combination with products and components approved by A.M.I. as well as ultrasonic gel. Use of other accessories may impair the function as well as electromagnetic immunity and emissions. Do not use the system’s products in combination with other devices. Exclusively use new or freshly recharged batteries for the Wi-3 HAL-RAR Unit. Battery change during application requires a restart of the device. This is no longer possible if the probe has expired i. e. has been detected as used up. Before use, check the entire Wi-3 HAL-RAR System for visible damage and wear and arrange replacement of concerned products if necessary. The probe with the ultrasonic sensor must only be used for transanal application. The probe is a very fragile component. Do not drop probes and avoid shocks. Before every application of the system, ensure that it is complete and fully operational. Keep replacement probes and a replacement device at hand in case of unpredicted breakdown (e. g. due to damage or expiry of the service life). The Wi-3 HAL-RAR Unit processes the smallest signals of the ultrasonic sensor. Check for electrostatic discharge, fast transient bursts at the power inlet of the speaker as well as influences of electromagnetic disturbance sources (e. g. other devices or mobile phones) and remove if possible. Always apply ultrasonic gel. Other creams or baby oil are not suitable. Page 6
r r r r
r r r
Apply the probe carefully under low pressure to the tissue that is to be examined. To avoid irritation to tissue, do not apply the probe longer than one hour to the patient (also refer to section 7.3.) Do not press on the catch of the battery cap during application to open it. The batteries may fall out. If the catch is pressed accidentally, immediately slide the cap back onto the battery compartment completely. After the Wi-3 HAL-RAR Unit has detected a valid probe and a connection was established to the audio receiver, the application time of the probe starts to run off (refer to section 14.4.). To prevent the probe from becoming invalid too early, perform the treatment without interruptions if possible. Do not remove the probe or switch off the Wi-3 HAL-RAR Unit before the treatment has been completed. The probe may only be removed if the Wi-3 HAL-RAR Unit is switched off. Removing the probe when the Wi-3 HAL-RAR Unit is switched on may lead to faulty information being written on the probe rendering it unusable. The Wi-3 HAL-RAR Unit features 3 LEDs lighting the probe. Do not look directly into the light. The Wi-3 Speaker has to be positioned outside the patient environment (IEC 60601-1, item 16.1) because the product has not been designed as a medical device. The Wi-3 Speaker, however, meets all safety standards applicable for speakers. Make sure the Wi-3 Speaker stands securely to prevent damage of the product which could be caused by an accidental fall.
Page 7
7.2. Notes on acoustic output range During application, the ultrasonic sensor heats up by 1.1 K. If the ultrasonic sensor is resting in stationary air (no contact to the tissue) the temperature increase is 5.9 K [1]. Temperature difference in K (Kelvin) to ambient temperature. Acoustic Output - table according to IEC 60601-2-37: TIS Index Label
MI scan
Global Maximum Index Value
0.1
TIB non scan
Aaprt 1
---
0.3**)
---
4,37
Aaprt > 1 ---
Assoc.
pra
[MPa]
Acoustic
P
[mW]
min[Pa(zs),Ita, a (zs)]
[mW]
---
zs
[cm]
---
zbp
[cm]
---
zb
[cm]
deq(zb)
[cm]
fawf
[MHz]
Parameter
Dim of Aaprt Other Information
non-scan
TIC
1.3**)
a)
4,37
---
0,19
0.62 0.1 8,2
8,2
---
X
[cm]
---
0,2
---
0.20
---
Y
[cm]
---
0,28
---
0.28
---
td
[µs]
7,73
prr
[Hz]
64000
pr @ Ipi
[MPa]
deq @ Ipi
[cm]
Ipa,a @ MI
[W/cm2]
Operating
---
8,2
---
0,2 0.1 0,78
*)
*)
Control Conditions a) not intended for transcranial or neonatal cephalic uses *) standard setting, there is no means to change the acoustic output. **) this calculation represents according to IEC 62359 the worst case for all Aob in non-scan mode. Uncertainty of measurements: Pressure: 10.7 % / Intensity: 21.4 % / Power: 21.4 %
Page 8
*)
7.3. Right application of ultrasonic equipment According to IEC 60601-2-37, the indices MI, TIS and TIB have been measured (refer to table under section 7.2.). MI (mechanical index) refers to mechanical loads (e. g. cavitation) on tissue by ultra sound. TIS (soft tissue thermal index) and TIB (bone thermal index) refer to ultra sound caused temperature increase on the tissue. Indices MI and TIS that are particularly relevant for haemorrhoidal treatment with the Wi-3 HAL-RAR Unit are very low. TIB is slightly higher (1.3), however, it is only relevant when bones are near the ultrasonic sensor. This is not to be expected during haemorrhoidal treatment using the Wi-3 HAL-RAR Unit. Even though the measured indices MI and TIS are quite low, reasonable application of ultrasonic equipment calls for keeping the ultrasonic impact on the patient as low as possible. Treatments should be kept as short as possible as the ultrasonic output of the Wi-3 HAL-RAR Unit cannot be controlled to reduce the ultrasonic impact on the patient to a minimum. 7.4. Notes on electromagnetic compatibility (EMC) The Wi-3 HAL-RAR System includes medical electrical devices that are subject to special precautions regarding electromagnetic compatibility (EMC). Wireless systems and other RF communication equipment may influence the function of the system. All products of the system have been tested for electromagnetic compatibility. Combination of products that are not part of the system with the Wi-3 HAL-RAR Unit may lead to increased emissions and reduced electromagnetic immunity impairing electrical safety.
Page 9
7.5. Guidance and manufacturer’s declaration electromagnetic emissions The Wi-3 HAL-RAR System is intended for use in the electromagnetic environment as specified below. The user of the system should assure that it is used in such an environment. Compliance
Electromagnetic environment guidance
RF emissions acc. to CISPR 11
Group 1
The Wi-3 HAL-RAR System uses RF energy only for its internal function. Therefore, its RF emissions are very low and are not likely to cause any interference in nearby electronic equipment.
RF emissions acc. to CISPR 11
Class B
Harmonic emissions acc. to IEC 61000-3-2
Not applicable
Voltage fluctuations/flicker emissions acc. to IEC 61000-3-3
Not applicable
Emissions test
The Wi-3 HAL-RAR System is suitable for use in all establishments, including domestic establishments and those directly connected to the public lowvoltage power supply network that supplies buildings used for domestic purposes.
The Wi-3 HAL-RAR System must not be used adjacent to or stacked with other electronic devices. If such operation is absolutely necessary, the system must be monitored to ensure proper function. 7.6. Guidance and manufacturer’s declaration electromagnetic immunity The Wi-3 HAL-RAR System is intended for use in the electromagnetic environment as specified below. The user of the Wi-3 HAL-RAR System should assure that it is used in such an environment.
Page 10
Immunity test
IEC 60601 - test level
Compliance level
Electromagnetic environment - guidance
Electrostatic discharge (ESD) acc. to IEC 61000-4-2
± 6 kV contact ± 8 kV air
Floors should be wood, concrete, or ceramic tile. If floors are covered with synthetic material, the relative humidity should be at least 30 %.
Not applicable
The quality of the supply voltage should be to the standard of a typical business or hospital environment.
Not applicable
The quality of the supply voltage should be to the standard of a typical business or hospital environment.
Not applicable
The quality of the supply voltage should be to the standard of a typical business or hospital environment. If the user of the Wi-3 HAL-RAR System requires continued operation during power line interruptions, it is recommended that the Wi-3 HAL-RAR System be powered from an uninterruptible power supply (UPS) or a battery.
3 A/m
Power frequency magnetic fields should be at levels characteristic of a typical location in a typical commercial or hospital environment.
Electrical fast transient/bursts acc. ± 2 kV for power supply lines ± 1 kV to IEC 61000-4-4 for input and output lines ± 1 kV voltage external-external
Surges acc. to IEC 61000-4-5
± 2 kV voltage external-ground < 5 % UT (> 95 % dip of UT) for 1/2 period 40 % UT
Voltage dips, short interruptions and voltage variations on power supply acc. to IEC 61000-4-11
(60 % dip of UT) for 5 periods 70 % UT (30 % dip of UT) for 25 periods < 5 % UT (> 95 % dip of UT) for 5 s
Power frequency (50 Hz/60 Hz) magnetic field acc. to IEC 61000-4-8
3 A/m
Note UT is the AC mains voltage prior to application of the test level. Immunity test
Conducted RF disturbances acc. to IEC 61000-4-6
IEC 60601-test level
3 V effective value
Compliance level
Recommended separation distance:
3V
Portable and mobile RF communication equipment should be used no closer to any part of the Wi-3 HAL-RAR System including cables, than the recommended separation distance calculated from the equation appropriate to the frequency of the transmitter. Recommended separation distance: 3,5 d P U 1 3,5 d P For 80 MHz to 800 MHz: E1 7 d E1
Radiated RF disturbances acc. to IEC 61000-4-3
150 kHz to 80 MHz 3 V/m 80 MHz to 2.5 GHz
3 V/m
P
For 800 MHz to 2.5 GHz:
Where P is the maximum output power rating of the transmitter in watts (W) according to the transmitter manufacturer and d is the recommended separation distance in meters (m). Field strength from fixed RF transmitters as determined by an electromagnetic site surveya should be less than the COMPLIANCE LEVEL in each frequency rang.eb. Interference may occur in the vicinity of equipment marked with the following symbol:
Page 11
Note 1 At 80 MHz and 800 MHz the higher frequency range applies. Note 2 These guidelines may not apply in all situations. Electromagnetic propagation is affected by absorption and reflection from structures, objects and people. a) Field strengths from fixed transmitters, such as base stations for telephones and land mobile radios, amateur radio, AM and FM radio broadcast and TV broadcast cannot be predicted theoretically with assurance. To assess the electromagnetic environment due to fixed transmitters, an electromagnetic site survey should be considered. If the measured field strength in the location in which the Wi-3 HAL-RAR System is used exceeds the applicable COMPLIANCE LEVEL above, Wi-3 HALRAR System should be observed to verify normal operation. If abnormal performance is observed, additional measures may be necessary, such as re-orienting or relocating the Wi-3 HAL-RAR System. b) Over the frequency range of 150 kHz to 80 MHz, field strength should be less than 3 V/m. Recommended separation distance between portable and mobile RF communication equipment and the Wi-3 HAL-RAR System The Wi-3 HAL-RAR System is intended for use in an electromagnetic environment in which radiated RF disturbances are controlled. The customer or user of the system can help prevent electromagnetic interference by maintaining a minimum distance between portable and mobile RF communication equipment (transmitters) and the Wi-3 HAL-RAR System as recommended below, according to the maximum output power of the communication equipment.
Separation distance according to frequency of transmitter (m) Rated maximum output power of transmitter in W
150 kHz to 80 MHz
0.01
0.12
0.12
0.23
0.1
0.37
0.37
0.74
1
1,17
1,17
2,33
10
3,69
3,69
7,38
100
11,67
11,67
23,33
80 MHz to 800 MHz
3,5 d P E1
3,5 d P U1
800 MHz to 2,5 GHz
7 d P E1
For transmitters rated at a maximum output power not listed above, the recommended separation distance d in meters (m) can be estimated using the equation applicable to the frequency of the transmitter, where P is the maximum output power rating of the transmitter in watts (W) according to the transmitter manufacturer. Note 1: At 80 MHz and 800 MHz, the higher frequency range applies. Note 2: These guidelines may not apply in all situations. Electromagnetic propagation is affected by absorption and reflection from structures, objects and people.
Note: The Wi-3 HAL-RAR Unit does not have any essential performance characteristics according to IEC 60601-1. The system can be disturbed by other devices even if these devices comply with the respectively applicable emission requirements according to CISPR.
Page 12
7.7. Guidelines for avoiding undesired electromagnetic effects on other systems r r r
Always keep the largest possible distance to other susceptible devices. Only use undamaged products. Check if other devices show abnormal function when being used at the same time as the Wi-3 HAL-RAR System.
8. Servicing and Inspection The housing of the Wi-3 HAL-RAR Unit is welded and cannot be opened. The device does not have any components requiring maintenance. A. M. I. recommends an annual inspection by the user. This inspection should include: r r r r r
Checking the housing for residues and damage. Checking the indicator LEDs (these briefly flash red, green and blue after switching on the device. Checking the lights. Function test (connect to probe and Bluetooth receiver and listen for unusual sounds). If rechargeable batteries are used, these are to be tested and replaced if required.
9. Transport and storage During transport, the products of the system must not be subject to extreme environmental conditions. The following limits apply: Temperature: -20 °C ... Relative humidity: 10 % ... Air pressure: 500 hPa ...
+60 °C 75 % 1060 hPa (0.5 – 1.06 bar)
Operating condition values: Temperature: +10 °C ... Relative humidity: 30 % ... Air pressure: 700 hPa ...
+35 °C 75 % 1060 hPa (0.7 – 1.06 bar)
r r r
During transport, avoid strong shocks. Store in a clean and dry environment. Protect from water and other liquids, sunlight, dust, saline etc. Page 13
10. Disposal The individual elements of the system (packaging, housing, electric components, batteries …) must be disposed of according to applicable legal guidelines. In order to ensure proper disposal of the Wi-3 HAL-RAR Unit, there is the possibility of returning it to A.M.I. This service is subject to charge.
11. Product features r r r r
The Wi-3 HAL-RAR System enables quick and precise localisation of haemorrhoidal arteries by Doppler ultrasound technology. Through the ligation window in the probe, haemorrhoidal arteries can be ligated. This is performed in a pain-free zone for the patient. The probe enables easy and pain-free introduction into the rectum. The Wi-3 HAL-RAR Unit including Wi-3 Fixation Nut and Wi-3 Battery Cap can easily be cleaned and are autoclavable.
Page 14
The Wi-3 HAL-RAR System includes the following components: Component
Application Lighting of the probe
Wi-3 HAL-RAR Unit (including: Wi-3 B Cap, Wi-3 Fixation Nut, Wi-3 Battery Set)
Generating the Doppler ultrasonic signal Transmission of the Doppler ultrasonic signal to the Bluetooth audio receiver
RAR Flexi Probe
Probe including cover for HAL-RAR treatments
RAR Precision Probe
Probe including cover for HAL-RAR treatments
Wi-3 Speaker and Wi-3 Headphones
Acoustic signal transmitted from the Wi-3 HAL-RAR Unit
A.M.I. HAL Needleholder
Holding and guiding of the needle of the A.M.I. HAL Suture
A.M.I. HAL Knotpusher
Positioning of surgical knots
A.M.I. HAL Suture
Reinforced surgical suture for ligation of haemorrhoidal arteries and tightening of prolapsing haemorrhoidal tissue.
Wi-3 Arm
Support for fixation of the cover of the probes
Operating manual
Contains important information for efficient and safe use of the Wi-3 HAL-RAR System
Page 15
12. Operating elements and connections 1. Lights Lighting of the probes 2. Ultrasonic contacts Includes two contacts for the ultrasonic sensor of the probe 3. Memory chip contacts Includes two contacts for the memory chip of the probe 4. Switch “On/Off“ Switching the Wi-3 HAL-RAR Unit on and off 5. Switch “Volume“ Setting the volume in three steps 6. Indicator LED “On/Off“ Displays the operating state of the Wi-3 HAL-RAR Unit 7. Indicator LED “Probe“ Displays problems with the probe 8. Indicator LED “Battery“ Displays the battery charge 9. Battery compartment Inserting of batteries / rechargeable batteries 10. Bluetooth transmitter Transmits the Doppler signal to the Bluetooth receiver
Page 16
13. Application 13.1. User/patient/application area This product is for application by medically trained personnel only. A special training for this device is not necessary. However, A.M.I. offers regular training courses explaining the operation process and providing details on the application of this product. The patient weight for application of the Wi-3 HAL-RAR System is not limited. The maximum weight of a patient is defined by the load capacity of the patient positioning and fixation equipment. This system can be applied in hospitals as well as in surgeries. The probe with the ultrasonic sensor is intended for transanal application. Therefore, only apply it in the rectum of the patient. 13.2. Preparation 1.
Insert batteries into the Wi-3 HAL-RAR Unit. The battery indicator “Battery“ flashes yellow to indicate that batteries have been inserted into the Wi-3 HAL-RAR Unit. These must be removed before reconditioning. Caution: Only use new or freshly recharged batteries for the Wi-3 HAL-RAR Unit. A battery change during treatment requires a restart of the unit. This is no longer possible if the probe has expired i. e. was detected as used. 2. Attach the probe to the Wi-3 HAL-RAR Unit and secure it with the fixation nut. When securing the probe with the fixation nut, ensure that it is placed straight on the thread. The thread of the Wi-3 HAL-RAR Unit may be permanently damaged and become unusable if the fixation nut is put on at an angle. 3. Switch on the audio receiver. If the audio receiver is used for the first time in combination with this Wi-3 HAL-RAR Unit, pairing needs to be performed first (refer to section 14.6.2.). 4. Switch on the Wi-3 HAL-RAR Unit with the “On/Off“ switch. 5. Check the function of the indicator LEDs and the lights. After switching on the device, the indicator LEDs briefly flash red, green and blue, followed by the lights. If one of the lights does not work, it must be checked if the power of the remaining lighting is sufficient for treatment. 6. Check the indicator LED “Battery“. If this LED flashes yellow or red, the battery is low and must urgently be replaced.
Page 17
Caution: If the LED “Battery“ is off, this does not automatically mean that the batteries are ok. Even low batteries may temporarily generate normal voltage if they have not been used for a longer period of time. 7. Wait until a connection has been successfully established to the audio receiver (for details on Bluetooth connections and possible malfunctions refer to section 17.). If an audio receiver is used that does not support A2DP but only HSP (not recommended), the acceptance button of the audio receiver must be pressed after a signal in order to establish a connection. 8. Ensure that only the indicator LED “On/Off“ is flashing green. This means that the Wi-3 HAL-RAR Unit as well as the probe are ready for application. Neither the indicator LED “Probe“ nor “Battery“ must flash and indicate a malfunction (for a list of malfunctions refer to section 17.). 13.3. Performing the operation 1. 2. 3. 4. 5.
6. 7.
8.
Distribute the ultrasonic contact gel in the anal area and on the probe, i. e. its cover, and insert the probe into the rectum. The ligation window should be positioned 2 - 4 cm proximal of the Linea Dentata. Turn the Wi-3 HAL-RAR Unit with the probe in the rectum until the Doppler signal can clearly be heard indicating a haemorrhoidal artery in the area of the ligation window. Ligate the detected haemorrhoidal artery through the ligation window. By continuous turning of the probe in the rectum, more haemorrhoidal arteries can be detected. If necessary, move the Wi-3 HAL-RAR Unit to its initial ligation position to perform one or more mucopexies for treating the prolapsing tissue. The ligation window points to the position of the prolapse to be treated. Place a first stich far proximally. By gradually turning the Wi-3 HAL-RAR Unit, more and more distal mucosa becomes visible. Place a continuous suture with a spacing of approx. 7 to 10 mm between the stitches. After the last line of stiches that ends proximal of the Linea Dentata, cut off the suture from the needle and knot it into the direction of the first stitch. This way, the prolapsing tissue is pushed upwards and fixed with the running knot. Switch off the Wi-3 HAL-RAR Unit after the operation by pressing “On/Off“ for 2 seconds. The indicator LED “Battery” will flash yellow until the batteries are removed. This is to prevent that the batteries are left in the Wi-3 HAL-RAR Unit during reconditioning.
Page 18
Rectum
Haemorrhoidal artery
Ligation window
Ultrasonic sensor Haemorrhoidal nodule
Please note: Do not press on the catch of the battery cap during treatment. The battery cap and batteries may fall out. If the catch is pressed accidentally, immediately slide the battery cap back onto the battery compartment completely. After the Wi-3 HAL-RAR Unit has detected a valid probe and a connection to the speaker has been established, the application time of the probe begins to run off (refer to section 14.4.). To avoid that the probe expires prematurely, perform the treatment without interruptions. Do not remove the probe and do not switch off the Wi-3 HAL-RAR Unit before the treatment has been completed. The probe may only be removed if the Wi-3 HAL-RAR Unit is switched off. Removing the probe when the Wi-3 HAL-RAR Unit is switched on may lead to faulty information being written on the probe rendering it unusable. After application of the Wi-3 HAL-RAR System, switch off the Wi-3 HAL-RAR Unit, remove the batteries and clean the entire system (refer to section 14.). If the system is switched off, the indicator LED “Battery” flashes yellow to remind the user that the batteries must be removed. In this state, the device still needs power. Do not forget to remove the batteries after application. Otherwise they might be damaged by total discharge (no total discharge protection) or get into the sterilisation process where they might explode or leak.
Page 19
14. Overview of system functions 14.1. System check After switching on, the Wi-3 HAL-RAR System automatically performs a system check. During this, also the three indicator LEDs are checked. These flash briefly in red, green and blue. Watch this process to see if any of the LEDs is defective. 14.2. Lighting The Wi-3 HAL-RAR Unit features 3 LEDs lighting the probe. Do not look directly into the light.
14.3. Volume The volume of the Doppler signal at the audio receiver depends on the volume setting of the Wi-3 HAL-RAR Unit as well as on the volume setting of the applied audio receiver. It is recommended to perform the following steps to adjust the volume: 1. 2. 3.
Set the volume of Wi-3 HAL-RAR Unit to maximum. Increase the volume of the audio receiver until the desired maximum volume. Now, there is the possibility to switch between the three volume settings low, medium and high directly at the Wi-3 HAL-RAR Unit without having to operate the audio receiver.
Page 20
14.3.1. Setting the volume on the Wi-3 HAL-RAR Unit Press “Volume” to set the volume in three intervals. The indicator LEDs briefly flash blue to indicate the volume setting:
Low
Mean
Loud
14.3.2. Setting the volume on the audio receiver Details can be found in the accompanying information of the audio receiver. 14.4. Counting of applications The number of applications of probes and the Wi-3 HAL-RAR Unit is limited to avoid risks due to wear. The products feature integrated counting mechanisms. Maximum applications: Probes: 1 application Wi-3 HAL-RAR Unit: 50 applications The number of remaining applications is stored in the probe or in the Wi-3 HAL-RAR Unit. If the Wi-3 HAL-RAR Unit is switched on, a valid probe has been detected and there is a connection to the audio receiver, the Wi-3 HAL-RAR Unit assumes that an application is being performed and reduces (after a short waiting period) the number of remaining applications of the probe as well as of the Wi-3 HAL-RAR Unit. As the probe is only designed for one application, this means that it already becomes inoperative after counting down one application. The treatment can be finished, however, the device cannot be restarted with this probe.
Page 21
For this reason, never switch off the Wi-3 HAL-RAR Unit before treatment has been finished. For warnings and messages concerning the number of applications of the Wi-3 HAL-RAR Unit and probes refer to section 17. 14.5. Displaying the remaining operating time Approach for showing the remaining operating time of the Wi-3 HAL-RAR Unit: 1. 2. 3. 4.
Press “Volume“. Switch on the Wi-3 HAL-RAR Unit while pressing “Volume“. Wait until the automatic indicator LED check is completed. A repeating blink sequence of the indicator LEDs (in green) follows: r Each blinking of the indicator LED “Battery“ stands for 1 application. r Each blinking of the indicator LED “Probe“ stands for 10 applications. Example: Indicator LED “Probe“ blinks 3 times Indicator LED “Battery“ blinks 8 times r
This Wi-3 HAL-RAR Unit has 38 applications remaining.
If no LED is flashing, this means that the Wi-3 HAL-RAR Unit has expired and cannot be used any more. In this case, use a new Wi-3 HAL-RAR Unit. 14.6. Bluetooth 14.6.1. General information In order to ensure best possible sound quality, the Wi-3 HAL-RAR Unit, instead of providing integrated speakers, features a Bluetooth interface compatible with many conventional Bluetooth speakers, headphones or other Bluetooth devices. This way, the Doppler signal can be put out on many audio devices with premium quality.
Page 22
Please note: r If possible, always use the same audio receiver with the same Wi-3 HAL-RAR Unit. r To enable operation of the Wi-3 HAL-RAR Unit with the audio receiver, pairing must be performed (refer to section 14.6.2.). This process must be carried out once for every combination of Wi-3 HAL-RAR Unit and audio receiver. r Each Bluetooth device has an unique Bluetooth address. Therefore, two optically identical audio receivers are detected as different Bluetooth devices by the Wi-3 HAL-RAR Unit . 14.6.2. Pairing 14.6.2.1. General information Every time, a new combination of audio receiver and Wi-3 HAL-RAR Unit is used for the first time, pairing becomes necessary. In this process, the Wi-3 HAL-RAR Unit and the Bluetooth audio receiver to be used exchange information required for establishing a connection. At every successful pairing, the Wi-3 HAL-RAR Unit stores the connection details of the audio receiver in a list (subsequently referred to as receiver list). This receiver list can contain up to three audio receivers. Adding a forth receiver leads to deletion of the audio receiver that has not been used for the longest time from the list (if this audio receiver is to be used again, pairing becomes necessary). If an audio receiver is supplied in combination with a Wi-3 HAL-RAR Unit (Wi-3 Speaker or Wi-3 Headphones), this audio receiver has already been added to the receiver list at the factory so that this process step is no longer necessary. Pairing process: 1.
2. 3. 4.
Place the Wi-3 HAL-RAR Unit and the audio receiver at an appropriate position (refer to section 14.6.4.) and ensure that no other audio receiver is near the Wi-3 HAL-RAR Unit to prevent that accidently a connection to the wrong receiver is established. Set the audio receiver to pairing mode (refer to section 14.6.2.2.). Set the Wi-3 HAL-RAR Unit to pairing mode (refer to section 14.6.2.3.). Wait until the Wi-3 HAL-RAR Unit has connected to the audio receiver (for troubleshooting, refer to section 17).
Page 23
14.6.2.2. Setting the pairing mode on the audio receiver For information on how to set the audio receiver to pairing mode, please refer to its operating manual. In most cases, the pairing mode is set by pressing a certain button (e. g. the mains switch) for 3 to 5 seconds. Wi-3 Speaker à Press the Bluetooth switch on the front for at least 3 seconds. Wi-3 Headphones à Press the switch on the right earphone for 4 seconds. 14.6.2.3. Setting the pairing mode on the Wi-3 HAL-RAR Unit Wi-3 HAL-RAR Unit switched off: Press “On/Off“ until the indicator LED “On/Off“ slowly (once per second) blinks blue. Wi-3 HAL-RAR Unit switched on: 1. Wait until the Wi-3 HAL-RAR Unit tries to establish a connection. The indicator LED “On/Off“ quickly (twice per second) blinks blue. 2. Press “Volume“ until the indicator LED “On/Off“ slowly (once per second) blinks blue. Note: If the list of the stored audio receivers is empty, the Wi-3 HAL-RAR Unit automatically switches to pairing mode to search for nearby audio receivers. 14.6.3. Connection if pairing has already been performed The Wi-3 HAL-RAR Unit automatically selects the audio receiver to be connected to and applies the following (simplified) strategy: 1. 2. 3. 4.
If the Wi-3 HAL-RAR Unit is switched on, it first tries to connect to the audio receiver to which it was recently connected. If this is not possible, the Wi-3 HAL-RAR Unit tries to connect to another receiver stored in the receiver list. Step 1-2 are continuously repeated, until a connection is established or the Wi-3 HAL-RAR Unit is switched off. The indicator LED “On/Off” blinks blue twice per second. After a connection has been established, a short signal can be heard and the indicator LED “On/Off” flashes green.
Page 24
The following measures support quick and unproblematic connection: r If possible, use the same audio receiver that has been used with this Wi-3 Unit. r Ensure optimum conditions for the Bluetooth connection (refer to section 14.6.4.). r Switch on the audio receiver first and afterwards the Wi-3 HAL-RAR Unit. 14.6.4. Perfect conditions for Bluetooth connection In most cases, it is enough to provide direct sight contact between the Wi-3 HAL-RAR Unit and the audio receiver. However, if this is not enough, the following applies: r r
r
Locate and eliminate disturbing sources as far as possible (e. g. switch off Bluetooth function of notebooks, mobile phones or other Bluetooth transmitters). Place the audio receiver to be connected as close as possible to the Bluetooth transmitter of the Wi-3 HAL-RAR Unit. The Bluetooth transmitter of the Wi-3 HAL-RAR Unit is located on the bottom of the device opposite of the “Volume” button (refer to section 12.). Do not cover the Bluetooth transmitter of the Wi-3 HAL-RAR Unit with your hand.
Page 25
14.6.6. Audio receiver requirements The Wi-3 HAL-RAR Unit is compatible with many (however not all ) conventional Bluetooth audio receivers (speakers, headphones, other Bluetooth receivers), with the following features: r r
Profile: HSP or A2DP Bluetooth version: 2.1+EDR (older versions are also supported provided the password has been set to “0000” or “1234“.)
Wi-3 Speaker and Wi-3 Headphones provided by A.M.I have already been tested for application in combination with the Wi-3 HAL-RAR Unit. However, if another (e. g. already existing) audio receiver is to be used, the following recommendations may help to make the right choice: r r r r r r
Only use high-quality audio receivers (preferred with A2DP profile). Only use audio receivers approved for use in your country. Test function and range thoroughly. Check if other devices are disturbed by the audio receiver. Place audio receiver at the largest possible distance to other switched on devices. Operate audio receivers with power connection only outside of the patient environment (patient environment example) (Source: EN 60601-1):
Please note: If the selected audio receiver is part of another medical system, special caution must be taken. In this case it is essential to ensure that this system is compatible according to its accompanying information and that no disturbances occur. Page 26
The user is responsible for safe application of the selected audio receiver. A.M.I guarantees proper function of the Wi-3 HAL-RAR Unit only in combination with the Wi-3 Speaker and Wi-3 Headphones supplied by A.M.I. In case of doubt, use this speaker or these headphones. 15. Maintenance, cleaning and sterilisation 15.1. Audio receiver The audio receiver is uncritical concerning its standard of cleanliness. It does not need to be sterile but only macroscopically clean. If no other information on cleaning is provided in the operating manual of the audio receiver, wipe it off with a soft, wet cloth. For disinfection, use disinfection wipes. Please make sure the wipes contain the active ingredients: Didecyldimethylammoniumchlorid and Benzyl-C12-18-alkyldimethylammoniumchloride. 15.2. A.M.I. HAL Needleholder and A.M.I. HAL Knotpusher Warning: After application, these products impose a biological risk. Wear and damage due to use cause the product service life to expire. Application site: Prevent residues from drying; Wipe off all surfaces with a soft cloth; Rinse with cold, demineralised water; Storage & transport: Prevent residues from drying; Perform reconditioning process within 2 h; Cleaning preparation: Clean off dry residues with a soft brush and cold, demineralised water. Automatic cleaning: Place products in a cleaning and disinfection unit; Caution: All surfaces must be fully exposed to the alkaline cleaning detergent; Cleaning programme: Vario TD programme with thermal disinfection for 5 minutes at min. 90 °C; Cleaning detergent: Neodisher MediClean forte 0.5% and neutralisation with Neodisher Z. Manual cleaning: 1. Rinse off residues on all surfaces with cold, demineralised water; 2. Soak in alkaline cleaning detergent à 15 minutes; 3. Brush off persistent residues with a soft brush; 4. Rinse off with sufficient alkaline cleaning solution;
Page 27
5. Ultrasonic cleaning if required (depending on residues) in an alkaline cleaning solution à 10 minutes; 6. Rinse off all surfaces with cold, demineralised water; 7. Drying à 1 h; 8. Place the manually cleaned products complete in a 4 % disinfectant solution à 30 minutes at 20 °C; 9. Rinse off residual disinfectant with cold, demineralised water; Disinfectant:
Neodisher Septo 3000
Inspection:
Inspection of all visible surfaces for cleanliness;
Maintenance & service: Servicing of all A.M.I. Needleholders with physiological harmless instrument oil e. g. Neodisher IP Spray. Sterile barrier system:
Pack twice in bags suitable for steam sterilisation;
Sterilisation: Sterilisation in an autoclave with a fractionated pre-vacuum method: 3 vacuum cycles with at least 60 mbar vacuum each Max. exposure time: 10 minutes Min. exposure time: 3 minutes Temperature 132 °C (do not exceed 137 °C) Min. drying time: 10 minutes at 90°C Storage:
Dry, dust-free environment The permissible storage time depends on the applied packaging material Observe manufacturer instructions;
Above instructions have been validated by A.M.I for reconditioning of A.M.I. medical devices. The reconditioning personnel is responsible for achieving the desired results in the reconditioning device under observation of equipment, materials and personnel. This usually requires validation and routine monitoring of the process. Additionally all deviations from the provided instructions by the reconditioning personnel should be evaluated for efficiency and possible negative impacts.
Page 28
15.3. Wi-3 HAL-RAR Unit (TRI2010), Wi-3 Battery Cap (TRI2020), Wi-3 Fixation Nut (TRI2030), Wi-3 Arm (TRI2070) Warning:
After application, these products impose a biological risk. Application of the products TRI2010 / TRI2020 / TRI2030 is limited to 50 applications. Premature wear and damage due to use will lead to the product service life expiring.
Application site: Screw off the Wi-3 Fixation Nut from the Wi-3 HAL-RAR Unit and remove probe. Caution: The probe is a single-use product and must be disposed of. Remove Wi-3 Battery Cap and Wi-3 Battery Set. Prevent residues from drying; Wipe off all surfaces with a cloth; Rinse with cold, demineralised water; Storage & transport:
Prevent residues from drying; Perform reconditioning process within 2 h;
Cleaning preparation: Ensure that the Wi-3 Fixation Nut has been screwed off and that the Wi-3 Battery Cap and the Wi-3 Battery Set have been removed. Clean off dry residues with a soft brush and cold, demineralised water. Automatic cleaning: Place products in a cleaning and disinfection unit; Caution: All surfaces must be fully exposed to the alkaline cleaning detergent; Cleaning programme:
Vario TD programme with thermal disinfection for 5 minutes at min. 90 °C.
Cleaning detergent: Neodisher MediClean forte 0.5% and neutralisation with Neodisher Z.
Page 29
Manual cleaning: 1. Rinse off residues on all surfaces with cold, demineralised water; 2. Soak in alkaline cleaning detergent à 15 minutes; 3. Brush off persistent residues with a soft brush; 4. Rinse off with sufficient alkaline cleaning solution; 5. Ultrasonic cleaning if required (depending on residues) in an alkaline cleaning solution à 10 minutes; 6. Rinse off all surfaces with cold, demineralised water; 7. Drying à 1 h; 8. Place the manually cleaned products complete in a 4 % disinfectant solution à 30 minutes at 20 °C; 9. Rinse off residual disinfectant with cold, demineralised water; Disinfectant:
Neodisher Septo 3000
Inspection:
Inspection of all visible surfaces for cleanliness;
Sterile barrier system:
Pack twice in bags suitable for steam sterilisation;
Sterilisation: Sterilisation in an autoclave with a fractionated pre-vacuum method: 3 vacuum cycles with at least 60 mbar vacuum each Max. exposure time: 10 minutes Min. exposure time: 3 minutes Temperature 132 °C (do not exceed 137 °C) Min. drying time: 10 minutes at 90°C
Page 30
Please note: During cleaning of the Wi-3 HAL-RAR Unit, small quantities of liquid may penetrate the cover. This is not a product defect. The liquid is removed during the following steam sterilisation process. For this reason, steam sterilisation is essential for reconditioning the Wi-3 HAL-RAR Unit and cannot be replaced by other sterilisation methods. Storage:
Dry, dust-free environment The permissible storage time depends on the applied packaging material Observe manufacturer instructions; After reconditioning, the Wi-3 HAL-RAR Unit must cool down, to be fully operational for clinical applications.
Above instructions have been validated by A.M.I for reconditioning of A.M.I. medical devices. The reconditioning personnel is responsible for achieving the desired results in the reconditioning device under observation of equipment, materials and personnel. This usually requires validation and routine monitoring of the process. Additionally all deviations from the provided instructions by the reconditioning personnel should be evaluated for efficiency and possible negative impacts. 16. Changing the batteries The battery compartment ensures low-contamination change of batteries: 16.1. Removing old batteries
1. 2. 3.
Push down the catch of the battery cap and slide it back to the stop. Tilt the battery cap upwards and pull out straight. The batteries are lying freely inside the battery compartment and can be dropped into a non-sterile area without touching them.
Page 31
16.2. Inserting new batteries
1. 2. 3. 4.
Let new batteries fall into the battery compartment without touching it. Observe polarity of the batteries (observe reference inside the battery compartment or figure under section 12.). Place battery cap behind the batteries. Push down the battery cap against the battery compartment. Keep pushing while sliding the battery cap to the front until the catch of the battery cap is clicking into the battery compartment.
Caution:
Do not push down the battery cap while the contacts of the cap are still over the batteries. The battery contacts may be deformed and the Wi-3 HAL-RAR Unit may become unusable. Only use high-quality NiMh rechargeable batteries (1.2 V) with a capacity of at least 2000 mAh or high-quality AA single-use batteries (1.5 V). Recharge batteries according to the instructions of the battery and the charging device. Do not dispose of single-use batteries or rechargeable batteries with the household waste. Empty and defective batteries must be disposed of according to national applicable guidelines. Page 32
17. Troubleshooting 17.1. General information This checklist contains the most frequent malfunctions and offers recommendations to correct them. If applying this check list does not lead to sufficient improvement or if other malfunctions occur in the system, stop application immediately to avoid risks to the patient and contact your supplier. Do not make any repairs to the system. This may lead to risks for the user and the patient and leads automatically to the expiration of any warranty rights. 17.2. Malfunctions indicated by indicator LEDs Malfunction
Possible reason
Remedy Do not begin new operation.
Indicator LED “Battery“ flashes yellow
Low battery power
Indicator LED “Battery“ flashes red
Battery is running very low
Wi-3 HAL-RAR Unit will switch off very soon.
Indicator LED “Battery“ blinks yellow
Wi-3 HAL-RAR Unit is switched off and the batteries are still inside the battery compartment.
Remove batteries from battery compartment after treatment.
Finish the operation in progress as quickly as possible.
Clean contacts of the Wi-3 HAL-RAR Unit and the probe. Indicator LED “Probe“ flashes yellow (the device does not detect the probe).
Problems with contacts
Ensure that the probe is securely attached to the Wi-3 HAL-RAR Unit. (screw tight probe fixation nut).
Probe is damaged
Use new probe.
Indicator LED “Probe“ flashes red
Probe is used up
Use new probe
Indicator LED “Probe“ flashes violet
A probe is used that is not compatible with the Wi-3 HAL-RAR Unit.
Only use RAR Flexi Probes or RAR Precision Probes.
Indicator LEDs “On/Off“ and “Probe“ Wait until the Wi-3 HAL-RAR Unit has The Wi-3 HAL-RAR Unit is too hot (e. flash red. Indicator LED “Battery“ cooled down to room temperature before g. after cleaning or sterilisation). blinks green. switching it on. Indicator LEDs “On/Off“ and “Probe“ flash red. Indicator LED “Battery“ Wi-3 HAL-RAR Unit is defective Return the Wi-3 HAL-RAR Unit to A.M.I. blinks blue or red. All three indicator LEDs flash red. A Use new Wi-3 HAL-RAR Unit and Maximum applications of the Wi-3 signal can be heard from the audio properly dispose of the old Wi-3 HAL-RAR Unit have been reached. receiver (if connected). HAL-RAR Unit. All three indicator LEDs flash tree times briefly (or 2 medium-long or Three (two or one) applications of the once long) red, while a signal can be Wi-3 HAL-RAR Unit remaining. heard (if audio receiver connected).
Page 33
Keep replacement unit at hand.
17.3. Other malfunctions Malfunction
Bad signal and/or noise
Interrupted signal (bad Bluetooth connection)
Possible reason
Remedy
Not enough contact between tissue and ultrasonic sensor
Improve contact. If required, use more ultrasonic gel.
Probe damaged
Replace probe
Check environment for disturbing sources Disturbing sources are in close vicinity and remove them if possible. Feedback between speaker and the Wi-3 Take the Wi-3 HAL-RAR Unit in the hand HAL-RAR Unit (often occurs if the probe is or place it on the table with the probe facing in contact with the table top). upwards. Separation distance between Wi-3 HALReduce distance RAR Unit and audio receiver too large. Check environment for disturbance sources Disturbance sources are in close vicinity and remove them if possible. Low battery power of the audio receiver
Insert new batteries
Temporary interruption of power supply of Wait until the device reconnects the the Wi-3 HAL-RAR Unit by impacts on the Bluetooth. Avoid impacts on the device (the battery compartment of the device. battery compartment).
Indicator LED “On/Off” flashes green but no sound can be heard.
No connection is established to the audio receiver.
Bluetooth connection interrupted
Wait up to one minute until the Wi-3 HALRAR Unit detects the interruption. Improve Bluetooth reception (refer to section 14.6.4).
The audio receiver is not in hearing distance. The volume is set too low.
Place audio receiver in hearing distance. Increase volume on the Wi-3 HAL-RAR Unit as well as on the audio receiver.
Low battery power on the audio receiver.
Insert new batteries.
Audio receiver not switched on
Switch on the audio receiver.
Distance to the audio receiver too large
Reduce distance
The Wi-3 HAL-RAR Unit does not “know” the audio receiver
Perform pairing of both devices (refer to section 14.6.2).
Other disturbing influences (e. g. other Bluetooth devices) in the environment.
Reduce disturbances as far as possible.
The audio receiver is set to the wrong mode.
Set the audio receiver to the same connection mode as the Wi-3 HAL-RAR Unit (either “normal“ or “pairing“).
The device does not support A2DP, only HSP.
Press the call acceptance button after hearing a ringing signal.
Other audio receivers are also set to pairing mode and react faster to the connection Switch off other devices until the Wi-3 HALrequest of the Wi-3 HAL-RAR Unit, or RAR Unit has connected to the right generate a stronger signal than the desired receiver. audio receiver Indicator LEDs have no influence on the ultrasonic function of the device, however, Not all indicator LEDs flash red, green and Indicator LEDs are defective not all malfunctions can be displayed blue after switching on the device. correctly contact your A.M.I. customer service. A connection to a wrong audio receiver is established.
The power supply does not work properly, although the batteries have been replaced
The contacts inside the battery compartment have been damaged.
Page 34
Order new battery compartment.
18. Wi-3 HAL-RAR Unit specifications Application: Suitable for continuous operation Service life: 50 HAL/RAR patient treatments Power supply: DC 2.4-3 V (2 alkaline or 2 NiMh AA batteries). Not suitable for batteries with different voltage (e. g. Lithium batteries). Maintenance: There are no parts that require maintenance. The Wi-3 HAL-RAR Unit is welded and cannot be opened. Electrical safety: Complies with IEC-60601-1 Device type BF Ultrasonic frequency: 8.2 MHz Dimensions: Diameter x height = 23 cm x 6 cm (without Wi-3 Fixation Nut): Weight: Approx. 390 g (including batteries) Switches: Mechanical, high-temperature resistant pressure switches Lights: 3 white LEDs Indicator LEDs: 3 RGB colour LEDs Volume: Three different volumes can be set on the Wi-3 HAL-RAR Unit. Effective volume also depends on the volume settings of the applied audio receiver. Bluetooth: Frequency range: 2.402 GHz - 2.480 GHz Bluetooth class: class 2 (transmission power: 2.5 mW) Adaptive frequency hopping to avoid undesired effects on other systems. Bluetooth Version 2.1 + EDR (older versions are also sup ported provided the password has been set to “0000” or “1234“.) Profile: HSP, A2DP Range: > 5 m (with Wi-3 Speaker) Range: > 1 m (with Wi-3 Headphones) R&TTE: the Bluetooth module built into the device corresponds to all applicable standard requirements of article 3 of the EU guideline 1995/5/EC. Memory: Internal memory (EEPROM) for storage of - connection data of up to 3 audio receivers - the number of remaining applications - volume settings of the Wi-3 HAL-RAR Unit Cleaning: Suitable for cleaning in a conventional cleaning and disinfection unit (refer to section 15.) Sterilisation: Suitable for steam sterilisation (refer to section 15.)
Page 35
19. Ordering details Designation
Quantity
Wi-3 HAL-RAR Unit* | Software Version 0.87 (Electronic unit, Wi-3 Battery Cap, Wi-3 Fixation Nut, Wi-3 Battery set)
Article number
1 item
TRI2010
Wi-3 Battery Cap*
1 item
TRI2020
Wi-3 Fixation Nut*
1 item
TRI2030
Wi-3 Battery Set (rechargeable battery 2100 mAh, 2 items)
1 item
TRI2040
Wi-3 Speaker*
1 item
TRI2050
Wi-3 Headphones*
1 item
TRI2060
RAR Flexi Probe
Box / 5 items
RAR2081
RAR Precision Probe
Box / 5 items
RAR2091
Wi-3 Arm
1 item
TRI2070
A.M.I. HAL Knotpusher*
1 item
AHK 007
A.M.I. HAL Needleholder*
1 item
AHN 006
A.M.I. HAL Suture
Box / 36 items
AHAL 70
Wi-3 HAL-RAR Set (Wi-3 HAL-RAR Unit, Wi-3 Speaker, A.M.I. HAL Knotpusher, A.M.I. HAL Needleholder)
1 item
TRI2080
Wi-3 HAL-RAR Set (Wi-3 HAL-RAR Unit, Wi-3 Headphones, A.M.I. HAL Knotpusher, A.M.I. HAL Needleholder)
1 item
TRI2090
Operating manual
1 item
20. Warranty For products of the Wi-3 HAL-RAR Systems that are marked with *, a warranty period of 24 months after the date of sale applies. Warranty claims become void if the products are not used in accordance with the provisions of the operating manual. The service life of the Wi-3 HAL-RAR Unit (including Wi-3 Battery Cap and Wi-3 Fixation Nut) is 50 applications. The end of this service life does not constitute foundation for a warranty claim. In case of a malfunction during the warranty period, please contact your supplier immediately.
Page 36
21. Symbols Symbol
Title Refer to instruction manual/booklet Type BF applied part This product has a Bluetooth interface This product emits radio waves This product must not be disposed of with household waste. Dispose of this product according to your national regulations or return it to A.M.I. for proper disposal. Manufacturer Date of manufacture Light emitting diode. Do not look into the beam. Laser class 2. Do not re-use Do not resterilize Non-sterile Do not use if package is damaged Sterilized using ethylene oxide Prescription Only Catalogue number Use by date
0297
This product complies with applicable European guidelines. Batch code
Page 37
A.M.I. Agency for Medical Innovations GmbH Im Letten 1 6800 Feldkirch Austria Phone: +43 (0)5522 90505 Fax: +43 (0)5522 90505-4006 E-Mail: [email protected] www.ami.at