Acutronic Medical Systems
MONSOON Universal Jet Ventilator Systems
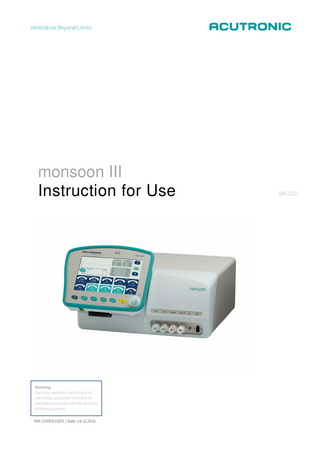
monsoon III Instructions for Use sw 2.07 Dec 2016
Instructions for Use
63 Pages
Preview
Page 1
Ventilation Beyond Limits
monsoon III Instruction for Use
Warning Carefully read the instructions of use before using the ventilator to familiarise yourself with the function of the equipment Ref: 215003.01EN / Date: 14.12.2016
SW 2.07
Manufactured by: ACUTRONIC Medical Systems AG Fabrik im Schiffli 8816 Hirzel / Switzerland Tel: +41 44 729 70 80 Fax: +41 44 729 70 81 e-mail: [email protected] www.acutronic-medical.ch
2 / 63
monsoon III | SW 2.07 Ref: 215003.01EN / Date: 14.12.2016
TABELE OF CONTENT Control Panel Variations ... 5 FOR YOUR SAFETY AND THAT OF YOUR PATIENTS ... 6
Read Instructions for Use... 6 Notices and Warnings ... 6 Identification of the Device ... 6 Safety Notices ... 7 Maintenance ... 9 Accessories ... 10 Safe Use ... 10 Liability for Proper Function and Damage ... 10 Medical Purpose ... 11 Qualification of Users ... 11 Contraindications ... 11 Indications for Use... 12 Ventilation Modes ... 13 Maintenance Intervals, Batteries ... 14 Contents ... 15
USER INTERFACE ... 16 Front View / Connectors ... 16 Control Panel Overview ... 17 Main Unit Overview ... 18 Display - Single Jet ... 19 Display - Double Jet ... 20 MONSOON III ... 21
PRESSURE LIMITS... 22 PIP Limit (Respiratory Tract Pressure) ... 22 PP Limit (Pause Pressure) ... 22 Superimposed Pressure Limit (Superimposed Ventilation) ... 22
START-UP... 23 Apparatus Preparation ... 23 Check P-Pressure and PIP Safety Limits... 24 Using the monsoon III with Single Lumen Catheter ... 25
OPERATION ... 26 Parameter Settings ... 26 Menu ... 26 Superimposed Pressure Limit (SIPL) ... 27 Double Jet (Optional) ... 27 Bypass ... 28 Humidification / Climatisation ... 28 Settings ... 31 Language ... 31 Maintenance ... 31 Disconnection ... 32 Laser Application ... 32 etCO2 – Measurement (Optional) ... 33 Video Camera (Optional, not with new control panel) ... 34 Remote Control (Optional) ... 35 Home Button (control panel with new hardware) ... 35 Automatic – Manual Operating Mode ... 36 Terminating Operation... 37
CLINICAL APPLICATIONS ... 37 Patient Data ... 37 CPAP Ventilation Set for monsoon III ... 38
LEGEND: ... 38 monsoon III | SW 2.07 Ref: 215003.01EN / Date: 14.12.2016
3 / 63
SET-UP: ... 38 APPARATUS SETTINGS: ... 39 HUMIDIFICATION: ... 39 REMARKS:... 39 DIAGRAM: ... 39 Infraglottic Catheter Jet Ventilation ... 40 Supraglottic (Catheterless) Jet Ventilation ... 41 Rigid Bronchoscopy ... 42 Infraglottic Jet Ventilation ... 42 Transtracheal Jet Ventilation ... 43
ALARMS AND ERROR CODES ... 44 Patient Alarms ... 45 System Alarms ... 46 Notices ... 49
RECOMMENDED ACCESSORIES ... 51 TREATMENT, DISINFECTING / CLEANING ... 52 ABBREVIATIONS AND SYMBOLS... 53 ABOUT ELECTROMAGNETIC COMPATIBILITY ... 55 TECHNICAL SPECIFICATION ... 59 Settings and Ranges ... 59 Dimensions ... 59 Connections / Ports ... 59 Environmental Conditions ... 60 Alarm Signal Sound Pressure Level ... 60 Disposal ... 60 Rear View / Connections ... 61 Replacing Fuses ... 62
TABLE OF FIGURES ... 63
4 / 63
monsoon III | SW 2.07 Ref: 215003.01EN / Date: 14.12.2016
Control Panel Variations The monsoon III control panel is equipped with a new hardware version. To identify the control panel version you have, please compare the following pictures: Old Control panel version with video function
New Control panel version Home Button
Figure 1. Control Panel Variations
The differences of the two versions: Actual control panel Naming: Humidification Scale Humidification: 0 – 8 (min=0, max = 8) Video Button: for camera use w/o interfering adjusted and set values and alarms
New control panel Naming: Climatisation Scale Climatisation: 0 – 10 (min = 3, max = 10) Home Button: fall back on start screen w/o interfering adjusted an set values and alarms
Important! The new hardware implements a change of the software to version 2.07. This software supports all features of the new hardware version as well as all features of the former hardware versions covered by the software version 2.03.
monsoon III | SW 2.07 Ref: 215003.01EN / Date: 14.12.2016
5 / 63
FOR YOUR SAFETY AND THAT OF YOUR PATIENTS
Read Instructions for Use Please read these Instructions for Use carefully before using the equipment; keep them in a safe place for reference. Any use of this apparatus requires full understanding and strict observation of these instructions for use. This apparatus is only to be used for purposes specified here.
Notices and Warnings The three types of information NOTE, CAUTION and WARNING draw attention to the fact that the associated text should be read carefully in order to ensure safe use. NOTICES are supplements to instructions DANGER / CAUTION indicate a not directly imminent but latent hazard which may result in death or bodily injury unless prevented. ATTENTION / WARNING indicate a risk which may result in equipment or property damage when not avoided.
Identification of the Device You can identify with the GTIn number which device type you have. See the list below: GTIN
Ref. No. Description
7640140860527
212001
monsoon +
7640140861371
212101
monsoon + with EtCO2
7640140861395
212201
monsoon + with EtCO2 and double jet
7640140860534
211001
monsoon Basic
7640140861401
211101
monsoon Basic with EtCO2
6 / 63
monsoon III | SW 2.07 Ref: 215003.01EN / Date: 14.12.2016
Safety Notices Always observe Any use of the ventilator requires full understanding and strict observation of these instructions. The apparatus is only to be used for purposes specified here. Only operate the ventilator with accessories recommended by ACUTRONIC Medical Systems AG. The ventilator is only to be operated by qualified technical staff or under their supervision to immediately provide assistance in the event of malfunction. If the new value is not confirmed by the operator by pressing the rotary pulse encoder or the touch monitor the value will automatically be reset after a few seconds. Always have an alternate ventilation system (e.g. resuscitation bag) when using the ventilator. If the life support function can no longer be ensured due to an obvious ventilator defect, immediately provide artificial ventilation to the patient via a self-contained ventilator (e.g. resuscitation bag). The ventilator may not be used in combination with inflammable gases or narcotic agents – there is otherwise an acute risk of fire and explosion! An audible signal indicates a system or patient alarm and always requires action by a medical professional. An audible alarm will sound in the event of power failure. Resetting the alarm requires the on/off switch to be pressed. Never connect the ventilator to patients if an error or malfunction is detected during equipment check! Never connect to electrical devices not mentioned in this operator’s manual without first consulting the manufacturer or an expert. Never operate the ventilator while covered or set up in a way so as to negatively impact the operation or function. Always unplug before opening the housing! Never use mobile phones within 10 metres of the ventilator. Mobile phones may interfere with the performance of electromedical equipment. Never use anti-static or electrically conductive tubes. Note: the safety and health of the users is guaranteed by the fact that the products for example do not contain any allergenic or mutagenic materials such as phthalates. The device can only be separated from the main power supply by removing the power cord completely. Please ensure the power socket is freely accessible at all times for disconnection. Do not remove the power cable unless for service purposes or transport.
monsoon III | SW 2.07 Ref: 215003.01EN / Date: 14.12.2016
7 / 63
Warning: To avoid the risk of an electric shock the equipement must only be connected to supply mains with protective earth. Warning: Do not modify the equipment without authorization of the manufacturer. Do not position the ventilator so that it is difficult to operate the disconnection device. The power supply connector is isolating the ventilator from supply mains.
8 / 63
monsoon III | SW 2.07 Ref: 215003.01EN / Date: 14.12.2016
Maintenance1 The monsoon III is a Universal Jet ventilator classified as device group IIb according to European directive.
1.) The apparatus must be safety inspected and serviced at regular 6 months intervals in compliance with the manufacturer instructions as well as §6 MPBetreibV Medical Devices Operator Ordinance dated 6/29/1998. 2.) Service must be performed by professionals trained by ACUTRONIC Medical Systems AG with the suitable measuring and testing devices. 3.) ACUTRONIC Medical Systems AG recommends obtaining a service contract with an exclusive representative of ACUTRONIC Medical Systems AG. 4.) Only use genuine ACUTRONIC Medical Systems AG replacement parts.
Definition: Inspection Service Repair Maintenance 1
= Determine actual condition = Measures to maintain desired condition = Measures to restore desired condition = Inspection, maintenance, repair
monsoon III | SW 2.07 Ref: 215003.01EN / Date: 14.12.2016
9 / 63
Accessories Use only accessories specified in the accessory list.
Safe Use Do not use in explosion-risk areas. This equipment is not approved for use in explosion-risk areas. Safe connection with electrical devices Do not connect to electrical devices not specified in this manual without consulting the manufacturers or an expert professional.
Liability for Proper Function and Damage Any and all liability for the proper function of the apparatus is irrevocably transferred to the owner or operator if the apparatus has been serviced or repaired by personnel not associated with ACUTRONIC Medical Systems AG Service or if the apparatus was used in a manner not conforming to its intended use. ACUTRONIC Medical Systems AG assumes no liability for damages caused by non-compliance with preceding notices. The warranty and liability provisions of the terms of sale and delivery of ACUTRONIC Medical Systems AG is likewise not modified by the recommendations mentioned above. ACUTRONIC Medical Systems AG
10 / 63
monsoon III | SW 2.07 Ref: 215003.01EN / Date: 14.12.2016
Medical Purpose Universal Jet ventilator is designed for use in ICU (long term applications) and in the operating theatre for laryngoscopy, rigid bronchoscopy, microsurgeries with or without laser. The apparatus is also suitable for use combined with imaging procedures to minimise organ motion due to artificial ventilation. For ICU long-term applications we recommend performing routine blood gas analyses as the applied minute volume cannot be accurately measured with Jet ventilation and could fluctuate greatly due to modified pulmonary compliance.
Qualification of Users The ventilator is only to be operated by qualified technical staff or under their supervision to immediately provide assistance in the event of malfunction. Required qualification is an adequate training in the functionality and application of this jet ventilator as well as a medical education suitable to perform medical interventions like this.
Contraindications With respect to contraindications please note Jet ventilation shall only be used by clinical specialists with extensive knowledge of Jet ventilation. There are no known contraindications in the area of laryngoscopy, bronchoscopy or laser surgery. In a few cases CO2 exhalation in heavy weight patients was associated with problems during Single Jet ventilation. In these cases Jet ventilation was temporarily suspended and conventional ventilation used until the CO2 values returned to normal. With Double Jet CO2 exhalation is supported through the low-frequency Jet, suspending Jet ventilation is therefore no longer required. Always monitor the CO2 values when using artificial ventilation. This may be done using a CO2 module for the monsoon III sold separately, a capnograph or transcutaneous CO2 measurement.
For detailed studies and experienced data please contact:
ACUTRONIC Medical Systems AG Fabrik im Schiffli 8816 Hirzel / Switzerland Tel: +41 44 72 9 70 80 Fax: +41 44 729 70 81 e-mail: [email protected] www.acutronic-medical.ch
monsoon III | SW 2.07 Ref: 215003.01EN / Date: 14.12.2016
11 / 63
Indications for Use Always have a manual resuscitator ready when using a Jet ventilator in the event of insufficient CO2 elimination or insufficient oxygenation in the patient. Oxygen saturation and CO2 should be routinely monitored via capnograph and pulse oximeter or blood gas analysis.
With long-term use of the Jet apparatus routinely check the function of the mucous membranes of the trachea for sufficient humidification to prevent desiccation. Since the monsoon III features an efficient heating and humidification system no problems have occurred in the field.
A large number of surgical procedures of the ventilation system are performed through the use of laser. This poses a risk of flammable materials (e.g. catheter, swab, residual tissue) in the operating field igniting, which could be further promoted by an increased concentration of oxygen. Laser procedures may therefore only be performed together with the Jet catheter “Laserjet”. The monsoon III features a function specifically for laser procedures allowing the user to set the oxygen concentration to be administered during a laser procedure. This feature is activated with the Laser on/off switch, the blender as quickly as possible regulates at the set default oxygen concentration of < 40 %Vol, the concentration cannot be increased with active laser function. Once the blender reaches an oxygen concentration of < 40 %Vol the notification “Laser OK” is displayed. Once the laser procedure is completed or the function is deactivated the blender automatically returns to the last O2 value setting.
The notification “Laser OK” merely refers to having reached the default oxygen concentration in the blender. An increased oxygen concentration may still be present in the respiratory tracts of the patient as the ventilation parameters or constricted respiratory tracts results in a decreased depletion of the oxygen.
12 / 63
monsoon III | SW 2.07 Ref: 215003.01EN / Date: 14.12.2016
Ventilation Modes The Single Jet version features one port, the Double Jet features two ports for Jet ventilation. The frequency, inspiration time and emission pressure are adjustable. The apparatus further features an outlet for a so-called AUX-Flow, which may be used for patient preoxygenation or emergency ventilation. Only use this apparatus under the supervision of trained medical staff to provide immediate assistance in the event of a malfunction. Never use the apparatus with flammable gasses or anaesthetics, fire hazard! Never use mobile phones within 10 metres of the apparatus! Mobile phones may interfere with the function of electromedical apparatuses. Also Note: Availability of manual ventilation If the life support function can no longer be ensured due to an obvious ventilator defect, immediately provide artificial ventilation to the patient via a self-contained ventilator (e.g. resuscitation bag).
monsoon III | SW 2.07 Ref: 215003.01EN / Date: 14.12.2016
13 / 63
Maintenance Intervals, Batteries Apparatus and/or parts must be cleaned and disinfected prior to any maintenance* - including returning the apparatus for repair. Every 6 months Maintenance and safety inspection according to IEC 60601 as amended Perform: - Check alarm and limit functions - Check pressure connections - Check electrical connections - Check safety shut-offs Every 12 months Maintenance and safety inspection according to IEC 60601 as amended - Check alarm and limit functions - Check pressure connections - Check electrical connections - Check safety shut-offs - Calibration - Replace the following components: - O2 sensor - Qty. 2 gas supply input filter - Water intake needle(s) qty. 2 on Double jet - Water tube set: Every 1000 operating hours - Replace the following components: - MATRIX Jet valve, qty. 2 on Double jet - Heating cartridge Every 3 years - Replace all internal tubing Every 10 years Replace lithium battery for data backup (dispose of used battery)
Maintenance and safety inspection must be performed by professionals trained by ACUTRONIC Medical Systems AG with the suitable measuring and testing devices.
14 / 63
monsoon III | SW 2.07 Ref: 215003.01EN / Date: 14.12.2016
Contents The monsoon III is available in the following configurations: -
monsoon III Basic o 1-channel Jet o Pause pressure monitor o Respiratory tract pressure monitor o AUX-Flow 15 lpm o Air/oxygen blender o 9” touch screen colour display o Optional: Video camera (old control panel) etCO2 module
-
monsoon III + o 1-channel Jet o Pause pressure monitor o Respiratory tract pressure monitor o Flow monitor o Built-in heater and humidification o AUX-Flow 0 -70 lpm o Air/oxygen blender o 9” touch screen colour display o Optional: Video camera (old control panel) 2nd Jet channel etCO2 module
monsoon III | SW 2.07 Ref: 215003.01EN / Date: 14.12.2016
15 / 63
USER INTERFACE Front View / Connectors
2 3 4 1
5 6
Figure 2. monsoon III – front view Legend: Element 1: Element 2: Element 3: Element 4: Element 5: Element 6:
16 / 63
Control panel (MMI = ManMachineInterface) with rotary pulse encoder Main unit Control panel connection Controls for main unit Ports for patient tubes, water supply, etCO2 measuring tube Connection cable control panel to main unit
monsoon III | SW 2.07 Ref: 215003.01EN / Date: 14.12.2016
Control Panel Overview
1 2
3
4
5
6
7
8
9 10 00
Figure 3. Control panel overview
Legend: Element 1: Element 2: Element 3: Element 4: Element 5: Element 6: Element 7: Element 8: Element 9: Element 10:
Patient alarm LED System alarm LED Display Jet on/off switch (with LED); hold key in manual mode Manual/automatic mode switch (with LEDs) Old control panel: Video channel activation for camera New control panel: Home Button Laser function on/off switch (with LED) Reset alarms and notifications Mute alarm (with LED) (2 minutes) Rotary pulse encoder
monsoon III | SW 2.07 Ref: 215003.01EN / Date: 14.12.2016
17 / 63
Main Unit Overview
1
In the event of an control panel defect ventilation will continue with the previously set parameters, the defective piece can meanwhile be replaced with a new control panel during operation. For safety reasons the Jet may only be switched off from the main unit.
2
3
4
Legend: Element 1: Element 2: Element 3: Element 4: Element 5:
Patient alarm LED System alarm LED Connected power LED Mute alarm (with LED) (2 minutes) Jet on/off switch (with LED)
5
Figure 4. Main unit overview
18 / 63
monsoon III | SW 2.07 Ref: 215003.01EN / Date: 14.12.2016
Display - Single Jet
3 5 4
2
1
6
7
Figure 5. Single Jet display
Legend: Element 1: Element 2: Element 3: Element 4: Element 5: Element 6: Element 7:
Parameter Jet channel 1 Graphics respiratory tract pressure and etCO2 Alarm and notification field Measurements Help, menu and patient data keys Oxygen, Aux and humidification parameters Respiratory tract- and pause pressure limits
monsoon III | SW 2.07 Ref: 215003.01EN / Date: 14.12.2016
19 / 63
Display - Double Jet
3 5
4
2
1
7
6
8
Figure 6. Double Jet display
Legend: Element 1: Element 2: Element 3: Element 4: Element 5: Element 6: Element 7: Element 8:
20 / 63
Parameter Jet channel 1 Graphics respiratory tract pressure and etCO2 Alarm and notification field Measurements Help, menu and patient data keys Parameter Jet channel 2 Oxygen parameter Respiratory tract- and pause pressure limits
monsoon III | SW 2.07 Ref: 215003.01EN / Date: 14.12.2016