Advanced Sterilization Products
ASP ACCESS Users Guide
100 Pages
Preview
Page 1
ar k er m at
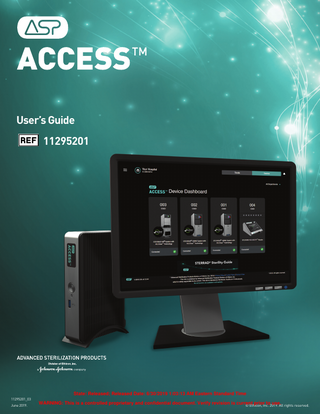
User’s Guide
Ad
lib
Ex
pr e
ss
W
11295201
11295201_03 June 2019.
State: Released; Released Date: 6/30/2019 1:03:13 AM Eastern Standard Time
WARNING: This is a controlled proprietary and confidential document. Verify revision is current prior to use.
© Ethicon, Inc. 2019. All rights reserved.
ar k
pr e
ss
W
at
User’s Guide
er m
ASP ACCESS™
Ex
1-888-STERRAD (USA only) or 949.581.5799 ASP Professional Services ASP International Customer Support (Call your local ASP Customer Support Representative) www.aspjj.com
For warranty information, please visit our website or contact ASP Professional Services.
lib
ASP ACCESS™ and STERRAD VELOCITY™ are trademarks of Advanced Sterilization Products, division of Ethicon US, LLC, a Johnson & Johnson company.
Ad
STERRAD® and ALLClear™ are registered trademarks of Advanced Sterilization Products, division of Ethicon US, LLC, a Johnson & Johnson company. The other third-party trademarks mentioned in this publication are the trademarks of their respective owners. Reproduction, adaptation, or translation of this publication without prior written permission is prohibited. ©Ethicon, Inc. 2019. All rights reserved. State: Released; Released Date: 6/30/2019 1:03:13 AM Eastern Standard Time
WARNING: This is a controlled proprietary and confidential document. Verify revision is current prior to use.
ar k
Contents
Chapter 1. Introduction... 1
at
er m
ASP ACCESS™ ... 1 ASP ACCESS™ Data Station... 1 ASP ACCESS™ Web Application... 2 How to Use This Guide... 2 Intended Use... 3 Cleaning Instructions... 3 Warnings, Cautions, and Notes... 3 Symbols Used on ASP ACCESS™ Data Station and in This Guide... 4 Cautions and Warnings... 5 Questions... 6
Chapter 2. ASP ACCESS™ Setup and Configuration... 7
pr e
ss
W
Pre-Installation Checklist... 7 Hardware Requirements... 7 Requirements to Run Web Application... 7 Power Adapter Requirements... 8 Pre-Registration... 8 Obtain Registration Code... 9 Physical Installation... 10 ASP ACCESS™ Connection Setup... 10 ASP ACCESS™ Product Setup... 13 Step 1 – Product Registration... 13 Step 2 – Setup... 15 Local Account Credentials ... 20 Setup Complete... 20 Wi‑Fi Access Point Configuration... 20
Chapter 3. Access Levels and Supervisor Tasks... 23
Ad
lib
Ex
Overview... 23 Access Levels... 23 Settings... 24 Data Station Management... 24 How to Register ASP ACCESS™ Data Stations... 24 Department Management... 26 Add Department... 27 Edit and Delete Department... 28 User Management... 28 Add a User... 29 Add Existing User... 30 Edit a User... 31 Activate/Deactivate Profile... 31
ASP ACCESS™ User’s Guide Released Date: 6/30/2019 1:03:13 AM Eastern Standard Time State: Released;
i
WARNING: This is a controlled proprietary and confidential document. Verify revision is current prior to use.
ar k
ss
W
at
er m
Device Management... 33 Add Device ... 33 Device Pairing... 34 Device Network Configuration Settings... 35 Run a Test Cycle... 37 Edit a Device... 37 Enable or Disable a Device... 37 Edit Pairing... 38 Alerts Management... 38 Alert Notification Settings... 39 Backup and Restore Management... 39 Schedule Backup... 40 Configure Backup Destination... 40 List of Backups and Restore... 41 Restore Procedure ... 41 Restore on Same Unit... 41 Restore on New Unit... 41 Patch Management... 42 Patches Pending Installation... 42 Patch Installation History... 42 Settings Management... 42 Transfer Settings... 43 Add External System... 43 Edit and Delete an External System... 44 Web API Settings... 44
pr e
Chapter 4. Operations... 45
Ad
lib
Ex
Power Up the Device... 45 Login... 45 Facility Selection ... 46 Device Dashboard Page... 46 Menu... 47 Facility Icon... 48 Department Icon... 48 Alert Icon... 48 My Profile... 49 Profile Information... 49 Change Password... 50 Security Questions... 50 Devices... 51 Cycle Log Overview... 51 STERRAD® System... 53 Statistics... 53 Cycle Log... 53
ii
ASP ACCESS State: Released; Released Date: 6/30/2019 1:03:13 AM Eastern Standard Time
™
User’s Guide
WARNING: This is a controlled proprietary and confidential document. Verify revision is current prior to use.
ar k
Cycle Summary... 54 IMS Summary... 54 Cycle Files... 54 Cycle Graphs... 54
er m
Chapter 5. Reports and Trends... 55
at
System Changes Report... 55 Facility Settings Report... 55 Device History Report... 55 Device Performance Report... 56 Trends... 56 Scheduling Reports and Trends... 56
Chapter 6. Troubleshooting... 59
W
Password Reset... 59 Troubleshooting Table... 59 Call Your ASP Representative... 62
Appendix A. ASP ACCESS™ Data Station Specifications... 63 Compliance... 63
ss
Appendix B. Cybersecurity Information... 65 Appendix C. Software License Agreement... 67 STERRAD® Sterilization System... 67
Ad
lib
Ex
pr e
Appendix D. ASP Cloud Services Terms and Conditions... 71
ASP ACCESS™ User’s Guide Released Date: 6/30/2019 1:03:13 AM Eastern Standard Time State: Released;
iii
WARNING: This is a controlled proprietary and confidential document. Verify revision is current prior to use.
ar k er m at W ss
Ad
lib
Ex
pr e
THIS PAGE IS INTENTIONALLY LEFT BLANK
iv
ASP ACCESS State: Released; Released Date: 6/30/2019 1:03:13 AM Eastern Standard Time
™
User’s Guide
WARNING: This is a controlled proprietary and confidential document. Verify revision is current prior to use.
1
ar k
Introduction
Chapter 1.
er m
Introduction
This guide is to instruct facility supervisors and lab technicians in the proper use and operation of the ASP ACCESS™ Data Station and ASP ACCESS™ Web Application. ü Note: To ensure that the latest User’s Guide and Release Notes are being accessed:
W
at
1. Enter the following URL on a web browser: https://www.asp-access.com/mercury-ui/userguide.html 2. On the “User’s Guides“ tab, select the Country and Language to view the applicable User’s Guides. Select the “Release Notes” tab to access the Release Notes by software version.
ASP ACCESS™
ss
ASP ACCESS™ is a smart information-sharing technology that links Advanced Sterilization Products (ASP) devices including Terminal Sterilization and High-Level Disinfection systems with the facility’s server and Instrument Tracking Systems (ITS). The two main components of ASP ACCESS™ are ASP ACCESS™ Data Station, and ASP ACCESS™ Web Application.
pr e
ASP ACCESS™ Data Station
lib
Ex
ASP ACCESS™ Data Station is a small computer that runs the ASP ACCESS™ Web Application.
Ad
Figure 1. ASP ACCESS™ Data Station
1. Power button and LED 2. HDD LED 3. Front Panel USB 3.0 port 4. VGA port 5. Headphone/microphone jack 6. Dual back panel USB 2.0 ports 7. Gigabit Ethernet LAN 8. Kensington lock hole 9. HDMI output port 10. 12‑19V DC back panel power connector
ASP ACCESS™ User’s Guide Released Date: 6/30/2019 1:03:13 AM Eastern Standard Time State: Released;
1
WARNING: This is a controlled proprietary and confidential document. Verify revision is current prior to use.
Introduction
ar k
1
ASP ACCESS™ Web Application
er m
ASP ACCESS™ Web Application allows for communication and data exchange between ASP ACCESS™ and the connected devices, and other external systems. The web application can be accessed via web browser. (Refer to the “Requirements to Run Web Application” section in chapter 2 for recommended browsers).
How to Use This Guide
W
at
All users are required to read the following chapters: “Introduction” (chapter 1), “Operations” (chapter 4), “Troubleshooting” (chapter 6), and the “Software License Agreement” (appendix C) prior to using the ASP ACCESS™ Data Station and the ASP ACCESS™ Web Application. This “Introduction” chapter explains the ASP ACCESS™ Data Station functions, intended use and the symbols, cautions and warnings used in this guide. The “Operations” chapter walks the user through step-by-step functionalities when configured with ASP devices. The “Troubleshooting” chapter includes a list of Warnings and Cautions the user may see when using the web application.
pr e
ss
The facility supervisor overseeing the ASP ACCESS™ Data Station operations should read the entire User’s Guide. Administrative chapters include “ASP ACCESS™ Setup and Configuration” (chapter 2), “Access Levels and Supervisor Tasks” (chapter 3), and “Reports and Trends” (chapter 5). The “ASP ACCESS™ Setup and Configuration” chapter describes how to do the initial set up of the Data Station. The “Access Levels and Supervisor Tasks” chapter describes the different user roles and Supervisor functions. The “Reports and Trends” chapter describes the reports that can be created at the facility level.
Ad
lib
Ex
This User’s Guide provides a general set of information and instructions on ASP ACCESS™ Technology and its functionality with STERRAD® Systems. Different markets have different products available from ASP. For details on other products and their functionality with ASP ACCESS™ Technology refer to that device’s user’s guide and associated ASP ACCESS™ Technology User’s Guide Supplements.
2
ASP ACCESS™ User’s Guide State: Released; Released Date: 6/30/2019 1:03:13 AM Eastern Standard Time
WARNING: This is a controlled proprietary and confidential document. Verify revision is current prior to use.
1
ar k
Introduction
Intended Use
er m
ASP ACCESS™ is a computing device that offers reliable integration and network services to ASP’s line of products. ASP ACCESS™ is intended to: 1. Enable communication among ASP devices over a closed network or over the facility’s computing network. 2. Provide data from ASP devices to the facility’s server. 3. Store and manage data in the Cloud.
at
4. Interface with external applications using Application Programing Interfaces (APIs).
Cleaning Instructions
W
ASP ACCESS™ is a medical device data system. It consists of a computer running custom software. Users access the ASP ACCESS™ Web Application to view device data and perform configuration management.
ss
To clean the ASP ACCESS™ Data Station, use a duster to remove any dirt or dust accumulated in the device. Do not use cleaning solutions.
pr e
Warnings, Cautions, and Notes For the best use of the ASP ACCESS™ Data Station, be sure to read and understand the warnings, cautions, and the notes provided in this chapter.
Ex
Warnings and cautions are accompanied by symbols surrounded by a triangle and are printed in the text in boldface italics. Warnings indicate events or conditions that can result in serious injury or death. Cautions indicate events or conditions that can result in severe damage to the ASP ACCESS™ Data Station.
lib
Notes are printed in italics and have a checkmark in front of the word “Note”. Notes highlight specific information about the proper use and maintenance of the ASP ACCESS™ Data Station.
Ad
IMPORTANT! The photos and graphics of the ASP ACCESS™ Data Station portal screens and printouts are for reference only. Your ASP ACCESS™ Data Station may look different or present different screens and/or printed messages. Text in Bold denotes the web portal command options and buttons.
ASP ACCESS™ User’s Guide Released Date: 6/30/2019 1:03:13 AM Eastern Standard Time State: Released;
3
WARNING: This is a controlled proprietary and confidential document. Verify revision is current prior to use.
Introduction
ar k
1
Symbols Used on ASP ACCESS™ Data Station and in This Guide
er m
WARNING CAUTION WARNING: Floor-level obstacle
at
Manufacturer - This symbol is accompanied by the name and address of the manufacturer.
W
Date of Manufacture ‑ This symbol is accompanied by the date of manufacture.
ss
Catalogue number - The catalogue number is placed adjacent to the symbol. CE mark. Indicates the product conforms to all legal requirements to be sold within the European Union/European Economic Area [EU/EEA].
pr e
Authorized representative in the European Community. This symbol is accompanied by the name and address of the authorized representative in the European Community.
Ex
Keep dry. Indicates a medical device that needs to be protected from moisture. Fragile, Handle with Care. Indicates a medical device that can be broken or damaged if not handled carefully.
lib
This Side Up. Indicates the orientation the package should remain in during shipping and storage.
Ad
For indoor use only.
4
ASP ACCESS™ User’s Guide State: Released; Released Date: 6/30/2019 1:03:13 AM Eastern Standard Time
WARNING: This is a controlled proprietary and confidential document. Verify revision is current prior to use.
1
ar k
Introduction
Keep away from sunlight. Indicates a medical device that needs protection from light sources.
er m
Recyclable. The packaging material in which the device is shipped are recyclable.
Regulatory Compliance Mark (RCM). Indicates compliance with applicable ACMA regulatory requirements.
W
at
The Nationally Recognized Testing Laboratory (NRTL) program of the Occupational Safety & Health Administration (OSHA) acknowledges and confirms private organizations qualification to test technical products for workplace safety according to US OSHA requirements. “US” stands for compliance with US requirements and, “C” stands for compliance with Canadian requirements. Federal Communications Commission (FCC)
ss
Waste Electrical and Electronic Equipment (WEEE). This symbol indicates that the device needs to be disposed of properly.
pr e
Cautions and Warnings WARNING: Trip and Fall
Ex
Ensure the power cord, Ethernet cable, and any additional cables connected to the ASP ACCESS™ Data Station or to any other ASP device are not obstructing the pathway or work areas. WARNING:
Ad
lib
Do not open the ASP ACCESS™ Data Station hardware. Opening the device may void the warranty. For any issues related to the device, please contact an ASP Representative.
ASP ACCESS™ User’s Guide Released Date: 6/30/2019 1:03:13 AM Eastern Standard Time State: Released;
5
WARNING: This is a controlled proprietary and confidential document. Verify revision is current prior to use.
Introduction
ar k
1
CAUTION: Power Supply
er m
Only use power supply adapter and plugs provided. Usage of a power adapter not provided by ASP may void the warranty. If unsure of the power source required, consult an IT support representative. CAUTION: Ethernet Cable Damage
W
CAUTION: Power Adapter Damage
at
Do not forcefully remove the Ethernet cable from the Ethernet port of the device or the wall. Forcefully removing the Ethernet cable may cause connectivity issues. Do not place heavy objects on top of the Ethernet cable.
CAUTION:
ss
Do not forcefully remove the power adapter from the device or from the wall. Forcefully removing the power adapter may damage the adapter’s power connections. Do not place heavy objects on top of the Power cable.
pr e
To avoid any short circuits during operations, place the ASP ACCESS™ Data Station in an open location away from large metal objects and magnets such as those found in speakers. CAUTION: Temperature
Ex
Keep this product away from excessive moisture and extreme temperatures. Operate the ASP ACCESS™ Data Station between 18°C (64.4°F) and 35°C (95°F).
Questions
Ad
lib
For questions about the ASP ACCESS™ Data Station or the ASP ACCESS™ Web Application, please call your local ASP Representative or visit our website at www.aspjj.com.
6
ASP ACCESS™ User’s Guide State: Released; Released Date: 6/30/2019 1:03:13 AM Eastern Standard Time
WARNING: This is a controlled proprietary and confidential document. Verify revision is current prior to use.
er m
Chapter 2.
ASP ACCESS™ Setup and Configuration
2
ar k
ASP ACCESS™ Setup and Configuration
Pre-Installation Checklist
at
ü Note: Setup and Configuration must be done by a facility supervisor or an ASP Field Service Engineer (FSE). If an FSE is installing and setting up the Data Station, continue to the next chapter for management instructions.
W
To start, remove the device from its packaging and ensure all of the following items are included: ASP ACCESS™ Data Station, an AC power adapter, a set of four exchangeable plug adapters, Quick Start Guide, stand, and a set of screws.
pr e
Hardware Requirements
ss
Upon purchase, a pre-installation form (F-113786) is sent to the designated contact person through e‑mail. This form should be filled out before starting the installation process. Please contact your IT department to fill out the required fields.
The following items are not included with the ASP ACCESS™ Data Station. Computing device with internet browser Wi‑Fi enabled computer or a computer with an Ethernet port Ethernet cable(s) Ethernet Hub USB to Ethernet adapter Wi‑Fi bridge adapter client (optional)
Ex
• • • • • •
Requirements to Run Web Application
Ad
lib
• • • • •
PC based Internet Browsers - IE11 and above or Chrome 54 and above Mobile Devices - Safari installed on iOS 10.2 and above A PC or a mobile device with access to the public Internet (to access the User’s Guide, Release Notes etc.) Adobe Acrobat Reader 11 and above to view result files (optional) Microsoft Excel 2010 and higher to view result files (optional)
ASP ACCESS™ User’s Guide Released Date: 6/30/2019 1:03:13 AM Eastern Standard Time State: Released;
7
WARNING: This is a controlled proprietary and confidential document. Verify revision is current prior to use.
ASP ACCESS™ Setup and Configuration
ar k
2
Power Adapter Requirements AC Input: 100–240V~, 50–60Hz, 0.9A Max DC Output: 12V
3A
er m
Socket Type: A, C, G or I Caution:
Only use power adapter and plugs provided. Usage of power adapter not provided by ASP may void the warranty. If unsure of the type of power source required, consult your IT department for support.
at
Pre-Registration
W
In order to successfully register the ASP ACCESS™ Data Station, your designated facility’s supervisor installing the device must have Supervisor-level credentials. The system will send an automatic e‑mail to the designated supervisor once the login credentials have been successfully created by ASP. The password must be reset within 5 days from receiving the e‑mail.
Ad
lib
Ex
pr e
ss
Contact your local ASP Representative if you are authorized by your facility to install this device and have not received an e‑mail with Supervisor-level credentials. It will be required to provide the 10-digit serial number located at the bottom of the Data Station (also found on the packaging label). The first four digits of the serial number begin with “5300” as shown below.
8
Serial Number Figure 2. ASP ACCESS™ Device Label
ü Note: Use the serial number on your device when referring to the serial number of your ASP ACCESS™. The Serial Number “5300151010” is used throughout this chapter for reference only.
ASP ACCESS™ User’s Guide State: Released; Released Date: 6/30/2019 1:03:13 AM Eastern Standard Time
WARNING: This is a controlled proprietary and confidential document. Verify revision is current prior to use.
2
ar k
ASP ACCESS™ Setup and Configuration
Obtain Registration Code
er m
ü Note: If a registration code has already been obtained, please skip to the next subsection.
ss
W
at
1. Open an internet browser and navigate to http://www.asp-access.com.
Figure 3. ASP ACCESS™ Login Screen
pr e
2. The page above displays the initial Login page. Please use login credentials in Username and Password fields. Then select Login. ü Note: Reset Password is required for first time login and when the password has expired. Refer to the “Troubleshooting” (chapter 6) for password reset information.
Ex
3. Read the Terms of Use and accept the terms in the agreement and Privacy Policy.
Ad
lib
ü Note: This is required during the first login and any time there has been an update to the Terms of Use.
ASP ACCESS™ User’s Guide Released Date: 6/30/2019 1:03:13 AM Eastern Standard Time State: Released;
9
WARNING: This is a controlled proprietary and confidential document. Verify revision is current prior to use.
ASP ACCESS™ Setup and Configuration
ar k
2
4. Register the ASP ACCESS™ Data Station and write down the registration code.
er m
ü Note: Refer to the “Data Station Management” section in the “Access Levels and Supervisor Tasks” (chapter 3) for more information on how to register the ASP ACCESS™ Data Station.
Physical Installation
at
1. Place the ASP ACCESS™ Data Station on a flat surface. Use the stand included with the package to keep the ASP ACCESS™ Data Station upright, if desired. 2. Connect the power adapter to the Data Station and plug in power adapter to a power outlet.
W
3. Connect the ASP ACCESS™ Data Station to an active Ethernet Port in your facility network using an Ethernet cable. Skip this step if you do not need to connect ASP ACCESS™ to your facility network/LAN.
ss
ü Note: Ethernet cable is not provided. Contact your IT department for an Ethernet Cable and an active Ethernet Port on your facility network/LAN. 4. Power on the ASP ACCESS™ Data Station by briefly pressing the Power button shown in Figure 1. The LED Power button will light up.
pr e
ASP ACCESS™ Connection Setup ü Note: The minimum recommended connection speed is 1 MBps. Choose one of the following options:
Ex
A. Setup through your facility network/LAN (Recommended)
Ad
lib
ü Note: This option is not available if you did not connect ASP ACCESS™ to your facility network/LAN during the installation process.
10
a) On a device that is connected to the facility network/LAN, open an internet browser. b) Type one of the links below in the address bar to begin the setup process: 1. http://aspaccess-xxxxxxxxxx/setup 2. http://aspaccess-xxxxxxxxxx.[networkdomainFQDN]/setup
ASP ACCESS™ User’s Guide State: Released; Released Date: 6/30/2019 1:03:13 AM Eastern Standard Time
WARNING: This is a controlled proprietary and confidential document. Verify revision is current prior to use.
2
ar k
ASP ACCESS™ Setup and Configuration
ü Note: Replace “x”s with the serial number of the ASP ACCESS™ Data Station. E.g., http://aspaccess-5300151010/setup or http://aspaccess-5300151010.[networkdomainFQDN]/setup. Contact your IT department for the FQDN (Fully Qualified Domain Name).
er m
3. http://ipaddress
ü Note: Contact your IT department to obtain the IP address assigned to the ASP ACCESS™ Data Station.
W
at
B. Setup through ASP ACCESS™ Wi‑Fi access point a) To connect your computing device to the ASP ACCESS™ Wireless Network, select the Network or icon in the notification area of your computer. b) In the list of networks, choose the network that begins with “aspaccess-”. ü Note: The full name of the Wi‑Fi network is “aspaccess-” followed by the 10-digit serial number of the ASP ACCESS™ Data Station. For example, “aspaccess-5300151010”.
ss
c) When prompted to enter the password, type the default Wi‑Fi security key/password: AspAccess53001. ü Note: Password is case sensitive.
pr e
d) Once connected to the ASP ACCESS™ Wi‑Fi Network, open an internet browser in the computing device. e) Type one of the links below in the address bar to begin the setup process: 1. http://aspaccess-xxxxxxxxxx.local/setup
Ex
ü Note: Replace “x”s with the serial number of the ASP ACCESS™ Data Station. E.g., http://aspaccess5300151010.local/setup. 2. http://172.16.1.1/setup
Ad
lib
C. Setup through ASP ACCESS™ USB Port a) Plug in the USB end of the USB to Ethernet Adapter to the USB port of the ASP ACCESS™ Data Station. b) Connect one end of an Ethernet cable to the Ethernet port of the USB to Ethernet Adapter, and the other end to a computer.
ASP ACCESS™ User’s Guide Released Date: 6/30/2019 1:03:13 AM Eastern Standard Time State: Released;
11
WARNING: This is a controlled proprietary and confidential document. Verify revision is current prior to use.
ASP ACCESS™ Setup and Configuration
ar k
2
er m
ü Note: The Ethernet Port on the ASP ACCESS™ Data Station is reserved for your facility network/LAN connectivity. The ASP ACCESS™ Data Station cannot be configured using this port. A USB to Ethernet Adapter must be used. ü Note: Contact your IT department for a USB to Ethernet Adapter and an Ethernet Cable.
at
c) Once the computer is connected to the ASP ACCESS™ Data Station, open an internet browser. d) Type one of the links below in the address bar to begin the setup process: 1. http://aspaccess-xxxxxxxxxx.local/setup
W
ü Note: Replace “x”s with the serial number of the ASP ACCESS™ Data Station. E.g., http://aspaccess-5300151010.local/setup. 2. http://172.16.1.1/setup
Ad
lib
Ex
pr e
ss
IMPORTANT INFORMATION! • All URL addresses may be accessed using a secure address protocol (https). • Contact with the IT department or ASP Field Service Engineer to build an ASP ACCESS™ Private Network via USB Ethernet + Hub or Wi‑Fi bridges. Additional computer networking equipment/accessories may be required for purchase (Ethernet Cables, Ethernet Hub, Wi‑Fi Access Bridge) to connect the ASP device to the ASP ACCESS™ Private Network. • The ASP ACCESS™ Data Station IP Address in private mode is 172.16.1.1 and hostname is aspaccess-53001[xxxxxx].local (replace “x”s with serial number of the ASP ACCESS™ Data Station). Use this information to configure the connectivity of your ASP device to the ASP ACCESS™ Data Station. • In ASP ACCESS™ Private Network Mode Only setup, ASP ACCESS™ Data Station will act as DHCP server and will assign IP Addresses to all the connected devices in the private network. The IP Address lease expiration is 12 hours. ASP ACCESS™ DHCP server will re-assign the same IP address if the IP address has not been re-assigned already. • Please refer to the “Wi‑Fi Access Point Configuration” section for updating/disabling of Wi‑Fi settings.
12
ASP ACCESS™ User’s Guide State: Released; Released Date: 6/30/2019 1:03:13 AM Eastern Standard Time
WARNING: This is a controlled proprietary and confidential document. Verify revision is current prior to use.
2
ar k
ASP ACCESS™ Setup and Configuration
ASP ACCESS™ Product Setup
at
er m
Step 1 – Product Registration
W
Figure 4. ASP ACCESS™ Product Setup
1. After navigating to one of the links shown in the previous section, the ASP ACCESS™ Product Setup page will be displayed on the web browser. Enter the required information, select Submit and continue with the onscreen instructions.
ss
Language
Time Zone Select time zone.
pr e
Select the language to display during the product registration.
Date
Ex
ü Note: This is an important setting that will determine if and when the Data Station clock must be automatically adjusted to account for time shifts (e.g., daylight savings).
Use this option to set the date. Time
Ad
lib
Use this option to set the time.
ASP ACCESS™ User’s Guide Released Date: 6/30/2019 1:03:13 AM Eastern Standard Time State: Released;
13
WARNING: This is a controlled proprietary and confidential document. Verify revision is current prior to use.
ASP ACCESS™ Setup and Configuration
ar k
2
IMPORTANT NOTES:
er m
1. The date and time on ASP ACCESS™ and on all connected ASP devices must be the same. When time shifts occur (say, due to Daylight Savings in the US), the system clocks on the connected devices must be adjusted to reflect the actual time, before the devices are used. 2. DO NOT start a cycle or begin incubating a BI if either the start time or end time will fall in the hour when time shift happens. Serial Number
at
The serial number is a 10-digit number located at the bottom of the ASP ACCESS™ Data Station. The serial number begins with “5300” and is preceded by “ (21)”. Please enter numbers only.
W
At the time when a registration code is generated for an ASP ACCESS™ Data Station, an e‑mail that includes the Serial Number, Facility Code, Facility Name and Registration Code is sent to users who have Supervisor-level privileges. If an e‑mail has not been received, please contact your ASP Representative.
ss
While registering the Data Station, enter information exactly as it appears in the e‑mail. Facility Code
Facility Name
pr e
The facility code is an identifier specific to the facility.
The facility name is the name of the facility where ASP ACCESS™ is being installed. Registration Code
Ad
lib
Ex
The registration code is a unique code specific to each ASP ACCESS™ Data Station (physical unit).
14
ASP ACCESS™ User’s Guide State: Released; Released Date: 6/30/2019 1:03:13 AM Eastern Standard Time
WARNING: This is a controlled proprietary and confidential document. Verify revision is current prior to use.