Alaris
Asena keypad replacement procedure
Technical Information Notice
8 Pages
Preview
Page 1
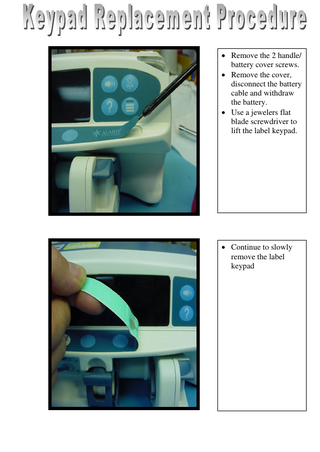
Remove the 2 handle/ battery cover screws. Remove the cover, disconnect the battery cable and withdraw the battery. Use a jewelers flat blade screwdriver to lift the label keypad.
Continue to slowly remove the label keypad
Stop removing the label keypad when the membrane tail is exposed
Carefully cut through the membrane tail with a Stanley knife. Keep tension on the label keypad.
The label keypad is totally removed. The cut end of the membrane tail is still exposed.
Use Methylated Spirits.
Dab it onto the adhesive with a tissue. Ensure that the Methylated spirits cover all the adhesive so as to soften it
As the adhesive softens start using your finger to remove the adhesive. Ensure that the surface is totally clean and ready for the new label keypad.
Remove all backing paper, especially under the membrane tail.
Feed in the new membrane tail over the old one, (Using the old one as a guide.) You may find that the old membrane tail moves into the case, this is ok.
Continue feeding the new membrane tail all the way in and position the label keypad evenly. Ensure that you haven’t creased the membrane tail.
Remove the 6 case screws. Carefully separate the front and rear case halves and disconnect the power supply to control board cable, the speaker cable and the RS.232 cable. Remove the three control board screws Remove the old membrane tail from connector PL.6.Lift the main control pcb up you should see the new membrane strip.
Pulling the old membrane tail should remove it and it’s adhesive pad. Fit new membrane with adhesive strip and reinsert back into PL6.
Completely remove the old membrane tail with adhesive pad.
Cut a length of double-sided tape, approx. 20mm x 12mm. The double-sided tape MUST be secured to the edge of the black metal bezel so as to prevent the possibility of a short circuit between the bezel and the membrane panel flexible circuit.