Operating Instructions
36 Pages
Preview
Page 1
English
Operating instructions
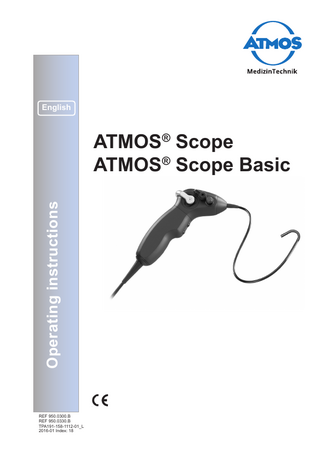
ATMOS® Scope ATMOS® Scope Basic
REF 950.0300.B REF 950.0330.B TPA191-158-1112-01_L 2016-01 Index: 18
Table of contents
Further information, accessories, consumables and spare parts are available from:
ATMOS
MedizinTechnik GmbH & Co. KG Ludwig-Kegel-Straße 16 79853 Lenzkirch Germany Tel +49 7653 689-0 Fax +49 7653 689-190 +49 7653 689-292 (Service Center) [email protected] www.atmosmed.de 2
1.0 1.1 1.2 1.3 1.4 1.5
Introduction ... 3 Notes on operating instructions... 3 Intended Use ... 4 Function ... 4 Explanation of pictures and symbols... 5 Scope of supply... 5
2.0 2.1
For your safety ... 6 Instructions for combination with other Medical Products ... 6
3.0 3.1 3.2 3.3 3.4 3.5 3.6 3.7
Setting up and starting up ... 7 Overview ... 7 Front view ATMOS® Scope controller ... 8 Rear view ATMOS® Scope controller ... 8 Overview Cables ... 9 Leakage tester and hose... 9 Assembly/First Installation ... 10 Tests ... 16
4.0 4.1 4.2 4.3
Operation ... 18 Use/Operation ... 18 Disassembly ... 20 Functions of the buttons on the handle ... 20
5.0 5.1 5.2 5.3 5.4 5.4.1 5.4.2
Cleaning ... 21 General Instructions ... 21 Manual Cleaning and Disinfection... 22 Mechanical Processing and Disinfection... 24 Sterilization... 25 General Instructions ... 25 Sterilization Methods ... 25
6.0
Maintenance and service... 27
7.0
Trouble shooting ... 28
8.0
Accessories and Spare parts ... 29
9.0
Technical specifications ... 31
10.0
Disposal ... 32
11.0
Notes on EMC ... 33
1.0
Introduction
1.1 Notes on operating instructions These operating instructions contain important notes on how to operate the ATMOS® Scope safely, correctly and effectively. Their reading helps to avoid risks, and also to reduce repair costs and down-time. That increases, amongst other things, the reliability and service-life of the device. These operating instructions serve not only for new operating personnel to be instructed in its use, but also for use as a reference manual. Reprints (also in extracts) only with permission in written form by ATMOS. These operating instructions must always be kept available near the device. Care and safety inspections in conjunction with professional execution provide for operational safety and readiness for use of your ATMOS® Scope and are therefore a must besides regular cleaning. Repair work and safety inspections may only be carried out by expert personnel authorised by ATMOS. By applying only original spare parts you will have the guarantee that operational safety, readiness for work and the value of your ATMOS® Scope will be preserved. ● The product ATMOS® Scope bears CE marking CE according to the EU guideline of the council for medical products 93/42/EEC and meets the basic requirements of annex I of this guideline. ● The product ATMOS® Scope complies with all applicable requirements of the directive 2011/65/EC restricting the use of certain hazardous substances in electrical and electronic equipment (“RoHS”). ● The declaration of conformity and our standard general terms and conditions can be obtained on our website at www.atmosmed.com. ● The quality management system applied at ATMOS has been certified according to international standards EN ISO 9001 and EN ISO 13485. ● Prior to start-up please peruse chapter 2.0 „For your safety“, in order to be prepared for any possible dangerous situations.
● These operating instructions are valid for the following devices: ATMOS® Scope...REF 950.0300.0 ATMOS® Scope Basic ...REF 950.0330.0
3
1.0 1.2
Introduction Intended Use
Name:
ATMOS® Scope / ATMOS® Scope Basic
Main functions:
During an endoscopy procedure the use of the ATMOS® Scope / ATMOS® Scope Basic is indicated for the temporary application in the mouth cavity up to the throat and in the nasal cavity. It enables the visualization of body orifices and body cavities.
Med. indications/ application: For the endoscopic visualisation and diagnosis in the mouth and the nasal cavities and in the upper airway anatomy and in the auditory canal with the eardrums. Specification of the main function: With the all-in-one handle solutions and with the innovative chip-on-tip technology, the integrated camera and integrated LED lightsource makes endoscopy and stroboscopy possible: - Bright homogenous illumination - 1/18” CMOS image sensor with a high resolution of 328 x 250 - Optical angle 85° - Distal outer diameter 3.8 mm - Working length 300mm - Angulation angle 2 x 160° - 100% waterproof Application organ:
Nasal and oral cavities to the larynx, auditory canal to the ear drums
Application time:
Temporarily
Application site:
In clinics and practices for ENT doctors and phoniatricians.
Contraindications:
The use of CMOS-Video-Nasopharyngoscope is contraindicated if endoscopic applications are contraindicated for any reason.
The product is:
Active
Sterility:
Not sterile
Single use product / reprocessing: Reprocessing is possible
1.3
Function
The ATMOS® Scope/ATMOS® Scope Basic is an all-in-one solution for the flexible endoscopy. The flexible naso-pharyngoscope with integrated camera and LED light source combines the following components in the handle:
LED light source Microphone pre-amplifier and removable microphone (optional) camera electronics mechanics for controlling the angle
The innovatively-shaped handle of the ATMOS® Scope/ATMOS® Scope Basic embodies an entirely new way of performing endoscopy/stroboscopy, allowing insertion of the probe without any problem for the fatigue free examination of ear, nose, pharynx and larynx without any signs of fatigue. Thanks to optimised video pre-settings, camera setting and white balance are no longer required. The device automatically switches to the desired stroboscopy mode. The handle provides the following keys:
Start-stop for video recording Single images storage is possible in connection with the ATMOSoft ENT
The ATMOS® Scope/ATMOS® Scope Basic fits perfectly into the ATMOS® treatment units. Networking with the ATMOS® Cam, the ATMOS® Strobo 21 LED and a video monitor is always possible. Images and videos can be saved with the ATMOSoft ENT.
4
1.0
Introduction
1.4
Explanation of pictures and symbols
Abbreviations / symbols contained in this manual Follow the arrows whilst proceeding, sequence
■
General information
Move, plug ... in this direction
Please press where dot indicates
●
Numeration
Turn, shift ... in this direction
Please read, important information
→
Subnumeration
Replace
Check
click
Engage, check correct fit
Graphic symbols contained in the manual Warning, special diligent notice!
!
Important information
ATMOS® Scope symbols SN
Serial number
REF
Order number Creation date Manufacturer
+68°F -20°C
Indicates the tolerable temperature
+158°F +70°C
95%
Indicates the tolerable air humidity
!
Dispose of properly
2nd-Edition IEC 60601-1: Caution, observe accompanying documents 3rd-Edition IEC 60601-1: Caution Observe operating instructions! Application part type BF acc. to EN 60601-1
R Only Latex
MR
The federal law of the USA restricts the sale of this device to physicians or orders on their behalf Indication that the product does not contain natural rubber latex Magnetic resonance unsafe
5% 106 kPa
Fuse
Indicates the tolerable air pressure
70kPa
The CE sign shows that this product meets the appropriate requirements of the EU guidelines.
1.5
NON STERILE
Sterilize prior to each use
Scope of supply
The ATMOS® Scope was functionally tested and carefully packed prior to delivery. Immediately after receiving the delivery check for completeness (see delivery note). ATMOS® Scope Basic: ATMOS® Scope handle, controller, leakage tester, pressure compensation cap, BNC video cable (2 pcs), silicone hose, mains cable, BNC chinch adapter (2 pcs), USB 2.0 cable, remote cable for ATMOSoft, ATMOSoft demo CD, operating instructions. ATMOS® Scope: ATMOS® Scope handle, controller, leakage tester, pressure compensation cap, microphone, stroboscope cable, BNC video cable (2 pcs), silicone hose, mains cable, BNC chinch adapter (2 pcs), USB 2.0 cable, remote cable for ATMOSoft, ATMOSoft demo CD, transport case, operating instructions.
5
2.0
For your safety
!
For your safety
The product may only be used observing the guidelines of this IFU. If instructions, warnings and precautions are not observed, this may lead to risks and serious consequences during use. Check and guarantee unrestricted function, completeness and integrity of the product and/or accessories before use. The system may only be operated with the delivered cables. Make sure that all devices operated nearby comply with the relevant EMC requirements. The image quality could be affected by the electromagnetic emissions of peripheral equipment (e. g. monitor, video equipment) which is connected. In case of extreme electromagnetic interferences, the image quality may be influenced (e. g. slight stripes, color changes on the monitor). Use in combination with MR The product is MR unsafe - in areas with magnetic resonance imaging, the product is unsafe
Unsterile parts – danger of infection Parts, which are delivered unsterile, have to be processed before use. Improper use and maintenance, as well as application in deviance to its intended use may lead to risks for patient and user or early wear and tear of the product. Endoscopic procedures may only be carried out by specialists who have corresponding training, knowledge and experience. The product is susceptible in regard to bending, heavy kinking, torsion, tension or pressure load. This may damage the optical components and thus lead to operating failure. Only operate the product within the specified operating temperature range.
When placing the product into the transport case, be careful that no parts are pinched or clamped when closing the lid. Otherwise the product could be damaged. Do not use the transport case for long-time storage. Accessories and/or peripheral devices, which are connected to the interfaces of the product must comply verifiably to the relevant normative specifications (e. g. IEC 60601-1). Furthermore, all configurations of the system standard IEC 60601-1-1 have to be fulfilled.
6
In this case, release deflection lever and carefully withdraw the videoscope.
Do not look directly into the light emission at the distal end of the endoscope. This can lead to eye injury.
Each light source can become warm due to absorption and therefore damage to the biological tissue could occure. Please make sure to keep the application period as short as necessary, to switch off the light source when not in use and if need be to check the heat generation prior to application.
To separate the device completely from the mains power supply, pull the plug out of the mains socket at the external power. The plug cap must be removed from the plug during storage and transport. Otherwise, under certain circumstances, an overpressure could occur within the connection cable and could damage the cable.
Image interferences, image breakdown or breakdown of the integrated light source could lead to risks.
The ATMOS® Scope may only be operated in rooms
used for medical purposes, but not in areas subject to explosion hazards and in oxygen rich environments.
2.1 Instructions for combination with other medical products
Multiplication of leakage current - risk for patients If the product is used with electro medical devices and/or power driven endoscopic accessories, the leakage currents could multiplicate. Check external electrical devices before use.
If the product or endoscopic accessories are used with products of different manufacturers and in combination with medical electrical products, ensure that the BF conditions (insulated, earth-free application part) are fulfilled.
Ensure that the corresponding interconnection c#onditions are kept. Also, the relevant standard and the respective national tolerances must be followed.
3.0 3.1
Setting up and starting up Overview 2
3
1
4 5
6
10
7
11
8 9
3 Fig. 1 1
Deflection lever
7
Plug
2 Pressure compensation valve with dust protection cap 8
Plug cap
3
Microphone (optional)
9
Deflectable tip
4
Button A
10 Tip cover glass
5
Button B
11
6
Connection cable
Microphone interface
7
3.0
Setting up and starting up
3.2 Front view ATMOS® Scope controller
14
13
Fig. 2
13 Socket for connection cable 6 14 ON/OFF switch
3.3 Rear view ATMOS® Scope controller
17
Fig. 3
15
16
20
18
19
15
BNC video outputs (composite/CVBS signal)
16
3.5 mm jack plug (Remote 1 signal)
17
3.5 mm jack plug (Remote 2 signal)
18
Plug for stroboscope cable
19
USB 2.0 plug
20
Fuse holder with fuses
21
Mains connection
8
21
3.0
Setting up and starting up
3.4 Overview cables
23
22
24
25 25
26
Fig. 4
22 BNC video cable
25 remote cable
23 USB 2.0 cable
26 Stroboscope cable (optional)
24 Mains cable
3.5 Leakage tester and hose
29
30 28
27
Fig. 5
27 Leakage tester
29 Pressure compensation cap
28 Silicone hose
30 Pressure release valve
9
3.0
Setting up and starting up
3.6 Assembly/First Installation Required additional devices: Monitor according to the medical device directive 93/42/EEC. Recommended monitor size: In combination with the present ATMOS® Scope the monitors described in chapter Product Description (medical 15" Neovo monitor) will give best results. Installation at the place of operation: Connecting the controller to the mains supply
!
Ensure that the correct mains cable is used for the respective country.
● Connect mains cable 24 with mains connection 21 at the controller. ●
Plug the mains cable 24 into a mains socket and thus connect the system to the mains supply.
Connecting the monitor ●
Connect BNC video cable 22 with the BNC video output 15 of the controller and composite/CVBS input of the monitor.
Connecting the PC (optional) The PC has to conform to the medical device directive 93/42/EEC. Installing the USB Driver on the PC
Connect the ATMOS® Scope to the PC using the USB 2.0 connection cable (23). Depending on the configuration of the PC, the new hardware will be identified and the Installation Assistant will start. Go to part b.
If the Installation Assistant does not start automatically, please continue the installation manually as follows:
a) Manual installation (Example Windows XP):
Click Start -> Control Panel.
Fig. 6
10
3.0
Setting up and starting up
Double click on System, choose the Hardware tab, and then click on Device Manager.
Fig. 7 Once inside the Device Manager, click on the “+” symbol next to Audio, Video and Game Controller. Double click on the USB device which has a yellow exclamation mark next to it. Search for new hardware.
Fig. 8 The ATMOS® Scope driver will be listed as USB2820. Select this device. If this is not the case, click on Properties -> Drivers -> Update.
11
3.0
Setting up and starting up
b) Normally, when the ATMOS® Scope is connected to the PC, the Hardware Update Assistant window should open automatically.
Fig. 9 Choose No, not this time. Put the Software CD, included in your set, into the CD/DVD drive and then click Next.
Fig.10
12
3.0
Setting up and starting up
Fig. 11 Here it is important to mark Search removable device (disk, CD…). Then click on Next.
Fig. 12
The driver will be installed.
13
3.0
Setting up and starting up
When it is completed, click on Finish.
Fig. 13 Thereafter, a restart will be recommended.
Fig. 14
Restart the PC. The installation is now complete. Remove software CD from the drive. PC minimum requirements depend on the used software. Follow instructions on the software CD. Recommendation when using the software on a PC and the availability of a medical grade monitor:
As an alternative to directly connecting the monitor via the BNC video output (composite/CVBS signal) (15), it is recommended to connect the medical grade monitor directly to the PC via the PC’s external VGA output. The prerequisites for this are proper connectors on the PC and monitor, as well as the proper connection cables (not included).
14
3.0
Setting up and starting up
Connect stroboscope ATMOS® Strobo 21 LED (optional) 26
back view
back view control unit
front view
Fig. 15
Connect ATMOS® Strobo 21 LED with stroboscope cable26 to the ATMOS® Scope controller: connect plug (a) with "optional connection for ATMOS® Strobo 21 LED and EndoStroboscope L (F-Out)" at the rear side of the Stroboscope. Connect plug (c) with "connection for microphone" at the front side of the stroboscope. Connect plug (b) with connection for stroboscope cable 18 at the controller of the ATMOS® Scope.
For further details, refer to ATMOS® Strobo 21 LED operating instructions. Connecting the videoscope Connect the videoscope handle with the controller, plugging the plug of connection cable 6 into the socket for connection cable 13 .
Application with the ATMOSoft ENT The ATMOSoft ENT has separate operating instructions. Please pay attention: Read these separate operating instructions very carefully.
15
3.0
Setting up and starting up
3.7 Tests Depending on the working distance (see technical data) the endoscopy image must be high-resolving, bright and clear. The following test sequence must be conducted on the device before processing and immediately before application. Testing the glass surfaces Visual inspection of the glass surfaces. The surfaces must be clean and smooth. If damages are discovered during inspection please see chapter Troubleshooting. Leakage test
30
27
8 28
7
29
2
Fig. 16
Connect plug cap 8 onto plug 7 . Close pressure release valve 30 on the leakage tester 27 . Remove dust protection cap from pressure compensation valve 2 . Screw on pressure compensation cap 29 to pressure compensation valve 2 . Connect silicone tube 28 with pressure compensation cap 29 and leakage tester 27. Pump up the system to a pressure of 300 mmHg. Wait 30 seconds. By pressing the pressure release valve 30 , drop the pressure to 160 mmHg.
Wait 30 seconds and watch the pressure. The pressure must not drop down by more than 2 mmHG. If the pressure drops more than 2 mmHg, then the system has a leak and needs to be serviced.
!
16
After the leakage test, remove pressure compensation cap 29 . Refasten dust protection cap. The leakage test must be performed after each application.
3.0
Setting up and starting up
Testing the deflection mechanism
Slowly operate the deflection lever 1 (Fig. 1), to check the function.
Check if full deflection is achieved (see chapter Technical Data).
! !
Limitations in deflection can indicate an endoscope defect. To avoid serious damage to the endoscope, only use the endoscope if the deflection works smoothly and without limitation.. Risk for patients Risk for patients due to the use of products with sharp edges or damaged surfaces.
!
Do not use these products.
Damaged products Do not use products with damaged camera chip (e. g. recognizable by image interferences), damaged glass surfaces or stubborn deposits, which cannot be removed by cleaning.
Send damaged products to the manufacturer or authorized repair center. Authorized repair centers can be inquired from the manufacturer.
17
4.0
Operation
4.1 Use/Operation Handle the system very carefully, as it contains sensible optical, mechanical and electronic components. Do not bump the distal end on hard surfaces.
!
Do not jolt or drop the ATMOS® Scope, protect it from shocks and impacts. Do not bend or kink the flexible endoscope part, nor tear or squeeze it. The outer coating and inner components could be damaged. Never move the tip of the flexible endoscope against a resistance. The tip contains optical components, which may scratch or break when used incorrectly.
Switching on and adjusting the system.
! Proper system operation cannot be guaranteed if the controller is switched on before the ATMOS® Scope handle is connected.
Ensure, that the ATMOS® Scope is connected to the controller before switching on the system.
3
11
Fig. 17 Plug the microphone 3 into the microphone interface 11 of the videoscope handle. Magnets inside the microphone automatically orientate the microphone 3 to face in the direction of the flexible endoscope part. Switch on controller with the ON/OFF switch 14 . Switch on all additional devices. Switch on the monitor in the order to receive the signal from the controller. The tip can be moved in two directions with the deflection lever 1 . Please do not press the deflection lever with violence. Switch off controller with the ON/OFF switch 14 after use.
18
4.0
Operation
Controller fine adjustment Generally the product does not need to be configured. However the user has the option to make fine adjustments. Turn the controller off by pressing the ON/OFF switch 14 . Press and hold either button A 4 or B 5 and turn controller ON. The Set-up menu will appear on the monitor. Release button A 4 or B 5 . By pressing button A 4 , the various setting options can be selected. By pressing button B 5 the selected function can be activated. When all the settings are accepted, please select "exit and save" with the button A 4 and confirm with button B 5 The settings menu is then hidden. SET-UP menu options "SHOW/HIDE FREQUENCY"
Show or hide the stroboscopy frequency on the monitor
"STROBOFUNCTION MANUAL/AUTO"
Manual Mode: The stroboscopy function is activated by operating the foot switch. If the stroboscope is not yet synchronized with the voice frequency, minimal image inference may occur. Automatic Mode: The stroboscopy function begins once the system is synchronized with the voice frequency.
"SWITCH FUNCTIONS"
Assigns different functions to buttons A and B.
“COLOUR-SATURATION”
Adjusts the colour temperature of the images in 5 steps
“FACTORY RESET”
Returns the settings back to the factory values
“EXIT”
Closes the menu and returns to live image without saving the settings
“SAVE AND EXIT”
Saves the new settings, closes the menu and returns to the live image
Standard function of Buttons A and B The buttons A 4 and B 5 only work in combination with an optional PC. With PC Button A
4 saves photo memory function on the PC or starts/stops a videofrequency.
Button B
5
has no function in this combination.
If desired, the functions of the buttons can also be programmed alternately.
19
4.0 4.2
Operation Disassembly
Pull the microphone out of the microphone interface 11 and clean the ATMOS® Scope (see chapter Cleaning and Disinfection). Disconnect connection cable 6 from the controller. Tightly fix plug cap 8 .
4.3
Functions of the buttons on the ATMOS® Scope handle
Both cables must be plugged in (see diagram). The Remote 1 in the Remote 1 and Remote 2 in Remote 2.
Control box for connecting the ATMOS® Scope with the computer (USB connection)
ATMOSoft ENT 31, ATMOSoft ENT 41 The upper butto is for recording/ freezing an image. By pressing the button the image is frozen. When the button is pressed repeatedly the camera is reactivated.
The lower operating button is for switching, that means the reset images can be recorded.
Option video recording (ATMOSoft ENT 41)
By pressing the button "camera" it will take you to the video function.
By pressing the button on the ATMOS® Scope you can start resp. stop the recording.
20