BFW Inc
Headlights and headlight Charging Stations
BayPort Storage Solution Operating Manual Rev 1.3 March 2022
Operating Manual
15 Pages
Preview
Page 1
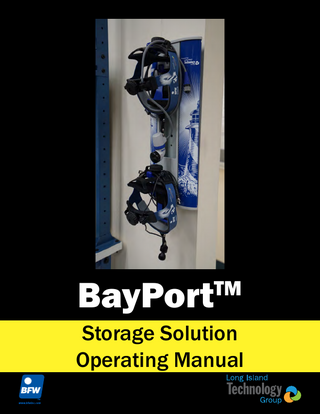
BayPort
TM
Storage Solution Operating Manual
Table of Content
Symbol Description...2 Warnings and Cautions...3
Intended Use... 3
Overview...4
System Description... 4
Installation...5 Operation...8 Cleaning and Maintenance...10 Storage Unit... 10
Specifications...11 Troubleshooting and Service...12
Symbol Description These important symbols may appear on your Long Island Technology Group BayPortTM. Please note their meaning.
CE marking of conformity indicates this device complies with Regulation (EU) 2017/745 on medical devices.
More information for this product can be found in this operating manual.
2
Warnings and Cautions Users of this product should be thoroughly trained in the appropriate medical procedures. Also they should read and understand this owner’s manual for this product and all equipment used with it.
! ! ! ! ! ! ! ! ! !
Read and understand the Operating Manual before using the unit. Use BayPortTM Storage Solution only with BFWTM/Long Island Technology GroupTM products or accessories. DO NOT subject the BayPortTM Storage Solution to strong shocks, which include but are not limited to dropping the unit on the floor. DO NOT use this unit for anything other than its intended use. DO NOT modify this equipment. DO NOT open unit. No serviceable components are inside device. DO NOT apply excessive force to the hangers. Mount the unit in a visible location. WARNING Falling Hazard: avoid sitting or standing under the unit when it is mounted. DO NOT use non-approved mounting schemes.
Intended Use
The BFWTM BayPortTM Storage Solution is intended to only store BFWTM headlight systems on BFWTM headbands. The additional storage is intended to store headband replacement pads.
3
Overview System Description
The BFWTM BayPortTM Storage Solution is constructed of a durable metal housing. Hangers allow up to two BFWTM headlight systems to be stored easily. Additional storage is provided via the center pocket. Multiple mounting solutions are available such as wall mounted and a mobile configuration.
4
Installation Wall Mount 1. Follow GCX instructions to mount the rail to the wall.
!
NOTE: Do not attach the Depressible Channel Stop provided with the GCX Rail
2. The Adjustable Stop can be moved by loosening the Set Screw using a 1/8” Hex Screw Driver.
5
Installation 3. Check that the four Rail Locking Screws are threaded as shown below. If the screws are threaded too far then it won’t slide into the rail.
4. Slide the unit onto the rail. The center block fits in the center channel of the rail.
6
Installation 5. Tighten the four Rail Locking Screws evenly.
6. Attach the Hooks to either of the two sets of mounting holes with the longer hook towards the top. The additional set of mounting holes can be used if the Hook becomes too loose.
7
Operation Mounting Headlights
1. Remove any batteries from the holster. 2. Disconnect the headlight from the holster. 3. Place the holster on the lower hook via the Access Hatch on the bottom of the holster.
4. Place the headband on the top hook through the back brace.
8
Operation 5. Wrap the headlight cable around the hook behind the headband.
6. Up to two headlights can be mounted at one time.
9
Cleaning and Maintenance Storage Unit 1. Clean the BayPortTM Storage Solution with any cleaning wipe. 2. Use a can of compressed air to clean out any dust accumulations.
!
DO NOT use any sterilization process or cleaning process using excessive heat or humidity as it will damage the unit
Note: Damaging any part of the system with the use of improper cleaning agent or cleaning process will void all warranties.
10
Specifications Mechanical
Storage Solution LxWxH Weight
19.25” x 8.25” x 2.5” 8.8 lbs
11
Troubleshooting and Service Symptom
Possible Issue
Solution
Unit is unsteady
Rail Locking Screws are loose GCX Rail is loose
Tighten Rail Locking Screws Refer to GCX Mounting Manual
Hanger pulled out
Hook Mounting Holes are stripped
Use additional Mounting holes
Adjustable Stop too low/high Adjustable Stop not installed
Move Adjustable Stop Install Adjustable Stop
Too Low/High
Warranty and Service Warranty against manufacturer’s defects applies to the BayPort™ Storage Solution under normal use for one (1) year from the date of sale from Long Island Technology Group (includes parts and labor). The warranty does not cover products damaged by the following: • Accident, misuse, abuse, or alteration • Servicing by unauthorized persons • Use with unauthorized accessories In all cases Long Island Technology Group, reserves the right to determine the cause of all malfunctions and at its sole discretion will determine the damage and/or repairs that are covered under this warranty. Send All Inquires To: Long Island Technology Group, LLC 60 Carolyn Blvd Farmingdale, New York 11735 USA www.litgp.com [email protected] Tel: (631)-270-4463 Fax: (631)-414-7078
Obelis s.a. Blvd Général Wahis 53 1030 Brussels, Belgium Tel: +(32) 2.732.59.54 Fax: +(32)2.732.60.03 Email: [email protected]
12
Scan Here to See All Long Island Technology GroupTM Manuals Or Visit: http://www.litgp.com/manuals
Contents are fragile. Handle with care.
60 Carolyn Blvd, Farmingdale NY 11735 (631) 270-4463 litgp.com
Manufactured by Long Island Technology Group, LLC 60 Carolyn Blvd, Farmingdale, NY 11735
Revision 1.3
13
3/16/2022