Quick User Guide
16 Pages
Preview
Page 1
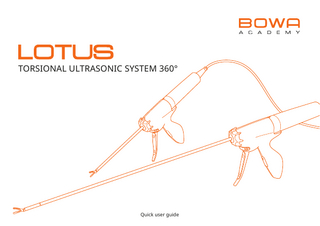
TORSIONAL ULTRASONIC SYSTEM 360°
Quick user guide
CONTENTS 1. Basics
1.1 Technology 1.2 Tissue effects 1.3 Applications
2. Set-up
2.1 System overview 2.2 Set-up of handpiece and transducer 2.3 Generator 2.4 Definition of symbols
3. Cleaning in the sterile field 4. Compatibilities IMPORTANT INFORMATION This quick guide is a brief summary of the most important working steps and information. It does not replace the instructions for use. For detailed instructions, please carefully read the instructions for use of the LOTUS series 4.
2
1.1 | TECHNOLOGY LOTUS torsional technology
Diagram showing the functional principle
Conventional ultrasonic instruments Energy is directed lengthwise through the tip of the instrument. This leads to high losses from energy dissipation at the instrument tip. Inadvertent distal drilling into the tissue is a possible consequence.
1. BASICS | 2. SET-UP | 3. CLEANING IN STERILE AREA | 4. COMPATIBILITIES
Diagram showing the functional principle
LOTUS torsional ultrasonic system The energy of the LOTUS system is directed perpendicular (90 degrees) to the axis of the blade. Coupled with the blade geometry, the energy is focused in the region of the jaw. Due to the reduction of the risk of inadvertent damage from distal energy dissipation, LOTUS also affords a higher level of safety.
3
1.2 | TISSUE EFFECTS
1.3 | APPLICATIONS LOTUS can be used for haemostatic dissection of all types of soft tissues – large pedicles, vascular structures and even tough tissue such as cervix or scar tissue. Surgical specialities:
Grasping
Coagulating / sealing
Cutting
The contact pressure exerted on the handle has a direct influence on the cutting speed of the LOTUS ultrasonic scalpel. The clear tactile feedback affords the surgeon very precise control over the cut.
4
General surgery Gynaecology Urology Thoracic surgery
1. BASICS | 2. SET-UP | 3. CLEANING IN STERILE AREA | 4. COMPATIBILITIES
2.2 | SET-UP OF HANDPIECE AND TRANSDUCER
Turn the coloured marking on rotation wheel to the 12 o’clock position
Correct alignment of the coloured markings on the transducer and rotation wheel
Open the jaw
• Open the jaw by operating the handpiece. • Turn the coloured marking on the rotation wheel to the 12 o’clock position.
• Make sure that the coloured markings on the transducer and rotation wheel are aligned with each other. • Make sure that the jaw is open and then slide the transducer and handpiece together. • This does not require any tools.
6
1. BASICS | 2. SET-UP | 3. CLEANING IN STERILE AREA | 4. COMPATIBILITIES
Shaft rotation 360°
Activation button Power select switch
1. BASICS | 2. SET-UP | 3. CLEANING IN STERILE AREA | 4. COMPATIBILITIES
7
2.3 | GENERATOR
Equipotential bonding
The service life of the transducer is limited to 250 minutes. It is stored in the instrument and can be read out on the rear of the device when the transducer is plugged in.
Main switch
Connectors for optional foot switch
LOW ULTRA LOW LOW POWER SELECTION
Volume Socket for mains cable The power switch allowing the generator to be switched on is situated on the rear of the device. Once the generator is switched on, all generator symbols light up briefly to ensure that the LED display works properly.
The switch on the rear of the device can be used to adapt the LOW power setting. You can switch between ULTRA LOW and LOW power levels. The HIGH level can then still be activated with the power select switch.
8
1. BASICS | 2. SET-UP | 3. CLEANING IN STERILE AREA | 4. COMPATIBILITIES
To connect the cable, align the coloured markings on plug and generator and then slide the plug into the connector.
If you press the activation button, the transducer symbol on the generator lights up as an indicator.
1. BASICS | 2. SET-UP | 3. CLEANING IN STERILE AREA | 4. COMPATIBILITIES
HIGH LOW
Power select switch To use the device, press the power select switch first. The system is initialised at the LOW power level. To switch to the HIGH power level, press the power select switch again.
9
2.4 | DEFINITION OF SYMBOLS
10
1. BASICS | 2. SET-UP | 3. CLEANING IN STERILE AREA | 4. COMPATIBILITIES
SYMBOLS
DESCRIPTION OF SYMBOLS
MEANING
ACTION REQUIRED
Transducer symbol does not light up.
Transducer has reached the permissible service life.
Transducer needs to be replaced.
Transducer symbol lights up briefly.
Transducer has been recognised.
Transducer symbol lights up continuously.
Transducer needs to be serviced after the surgery.
Return the decontaminated transducer for servicing.
Transducer symbol lights up when Activation symbol indicating that the activation button is pressed. the instrument is in use. Only the “L” lights up.
The generator stays in standby mode before initialisation.
Briefly press the power select switch to start up.
“LOW” lights up.
The system is switched on at the “LOW” power level.
Use the power select switch to change between “HIGH” and “LOW” energy settings.
“HIGH” lights up.
The system is switched on at the “HIGH” power level.
Use the power select switch to change between “HIGH” and “LOW” energy settings.
LOW
HIGH
1. BASICS | 2. SET-UP | 3. CLEANING IN STERILE AREA | 4. COMPATIBILITIES
11
SYMBOLS
12
DESCRIPTION OF SYMBOLS
MEANING
ACTION REQUIRED
Warning symbol, “RELEASE” and “SWITCH” light up.
- The power select button or the activation button is being pressed during initialisation. - The power select button is pressed and held after the power level was switched.
Release the power select button. The generator automatically undergoes a re-start.
Warning symbol, “RELEASE” and “SWITCH” and symbols “Handpiece” and “Clock” light up.
Long-term activation for more than 25 seconds. The device takes a short pause for safety reasons.
Release the activation button. The generator automatically undergoes a re-start.
The warning symbol and the symbols “ALLOW TO COOL”, “Thermometer” and the transducer symbol light up.
The transducer or the acoustic waveguide gets warm.
- Take the transducer out of the handpiece and wipe it down with a moist swab to cool it down immediately. - The transducer may be defective or damaged and needs to be replaced.
The warning symbol, “RELEASE JAW” and the transducer symbol light up.
Pressing too hard on the handpiece.
Release the handle lever and the activation button. The generator resets automatically after 1–2 seconds.
1. BASICS | 2. SET-UP | 3. CLEANING IN STERILE AREA | 4. COMPATIBILITIES
SYMBOLS
DESCRIPTION OF SYMBOLS
MEANING
ACTION REQUIRED
The warning symbol, the symbols “Clock”, “FINAL SURGERY” and the transducer symbol light up.
The transducer has reached more than 98% of its service life.
The surgery can be completed. After disconnecting the transducer from the generator, the transducer is deactivated and cannot be used again.
The warning symbol, “Clock”, “DO NOT USE” and the transducer symbol light up.
The transducer was inadvertently reprocessed and connected again after the message “FINAL SURGERY” had been shown. The transducer cannot be used any longer.
Please replace the transducer.
CONTRAINDICATIONS AND WARNINGS: For a complete list of the warnings, indications and contraindications, please refer to the complete instructions for use enclosed with the device.
1. BASICS | 2. SET-UP | 3. CLEANING IN STERILE AREA | 4. COMPATIBILITIES
13
3. | CLEANING IN STERILE AREA
2. Heavy soiling
Immerse the instrument in a vessel containing sterile water or saline solution and press the activation button. In order to remove any residual soiling, wipe down the acoustic waveguide of the transducer and the jaw of the handpiece with a moist cloth.
14
3. Dried soiling
ET AL
Clean the acoustic waveguide of the transducer and the jaw of the handpiece with a moist cloth. Take the transducer out of the handpiece for this purpose, if required.
M
1. Mild soiling
Take the transducer out of the handpiece. Clean the acoustic waveguide of the transducer with a moist swab. Soiling around the jaw mechanism can be removed with forceps or a wet swab as appropriate. Make sure not to damage the jaw on the handpiece through excessive force or bending. IMPORTANT: Do not use any metal objects to remove soiling from the acoustic waveguide as this may lead to scratches or other damage. WE RECOMMEND THAT YOU PREVENT ANY AND ALL CONTACT OF METAL OBJECTS WITH THE ACOUSTIC WAVEGUIDE (E.G. BLADES, CLIPS, TOUCHING GRASPING FORCEPS, ETC.).
1. BASICS | 2. SET-UP | 3. CLEANING IN STERILE AREA | 4. COMPATIBILITIES
4. | COMPATIBILITIES L (mm)
REF
LOTUS dissecting shears, rotatable 360° Open surgery 200 / 360°, curved jaw Laparoscopy 400 / 360°, curved jaw Bariatric surgery 500 / 360°, curved jaw
(disposable, 10 pcs. / PU) DS5-200CD
Transducer (reusable) ES5-200CT Handpiece
349
(disposable, 10 pcs. / PU) DS5-400CD
Transducer (reusable) ES5-400CT Handpiece
434
(disposable, 10 pcs. / PU) DS5-500CD
Transducer (reusable) ES5-500CT
LOTUS dissecting shears, rotatable 360° Open surgery 200 / 360°, straight jaw Laparoscopy 400 / 360°, straight jaw
Handpiece 176
(disposable, 10 pcs. / PU)
Handpiece
349
Open surgery 200, curved jaw Laparoscopy 400, curved jaw Bariatric surgery 500, curved jaw
Handpiece 176
(disposable, 10 pcs. / PU)
Transducer (reusable) ES4-200CT Handpiece
349
(disposable, 10 pcs. / PU)
DS4-400CD
Transducer (reusable) ES4-400CT Handpiece
434
DS4-200CD
(disposable, 10 pcs. / PU)
DS4-500CD
Transducer (reusable) ES4-500CT
LOTUS liver resector LR5-200SD
Transducer (reusable) LR5-200ST (disposable, 10 pcs. / PU)
REF
LOTUS dissecting shears
Handpiece 176
L (mm)
LR5-400SD
Transducer (reusable) LR5-400ST
1. BASICS | 2. SET-UP | 3. CLEANING IN STERILE AREA | 4. COMPATIBILITIES
Open surgery 200, straight jaw Laparoscopy 400, straight jaw
Handpiece 176
(disposable, 10 pcs. / PU)
LR4-200SD
Transducer (reusable)
LR3-200
Handpiece 349
(disposable, 10 pcs. / PU)
LR4-400SD
Transducer (reusable)
LR3-400 15
Phone +49 7072 6002-0 Fax +49 7072 6002-33 [email protected] bowa-medical.com
SRA Developments Ltd a BOWA-electronic GmbH & Co. KG company Bremridge House, Bremridge, Ashburton, Devon, TQ13 7JX, UK
BOWA-QRG-13049-LOTUS-360°-20210903-EN Printed in Germany We reserve the right to make technical and structural amendments Copyright of BOWA-electronic GmbH & Co. KG
BOWA MEDICAL BOWA-electronic GmbH & Co. KG Heinrich-Hertz-Strasse 4 – 10 72810 Gomaringen | Germany