Caesarea Medical Electronics Ltd
T and T34 Syringe Pumps
BodyGuard T and T34 Technical Service Manual SW Ver T3.2A-XX Rev.04 Feb 2021
Technical Service Manual
68 Pages
Preview
Page 1
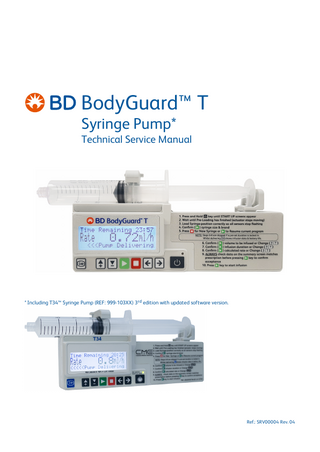
BodyGuard™ T Syringe Pump* Technical Service Manual
* Including T34™ Syringe Pump (REF: 999-103XX) 3rd edition with updated software version.
Ref.: SRV00004 Rev. 04
Caesarea Medical Electronics Ltd. 16 Shacham Street Industrial Park Caesarea North P.O.BOX 3009 Caesarea 3088900, Israel
MedNet GmbH. Borkstrasse 10 48163 Muenster Germany
BD.com This manual has been prepared for use by qualified service personnel only. Caesarea Medical Electronics Ltd. (CME) cannot accept any liability for any breakdown or deterioration in performance of parts or equipment resulting from unauthorized repair or modification. The information in this document is subject to change and does not represent a commitment on the part of BD to provide additional services or enhancements. The screens and images illustrated in this document are for reference purposes only and might be different than the screens displayed on your pump and pc. Documentation provided with this product might reference product not present in your facility or not yet available for sale in your area. BD, the BD Logo, BodyComm, BodyGuard, CME, Plastipak and T34 are trademarks of Becton, Dickinson and Company or its affiliates. All other trademarks are the property of their respective owners. © 2021 BD. All rights reserved.
2
BD BodyGuard™ T Technical Service Manual - Rev. 04
Table of Contents 1. General Information 1.1. Purpose of This Manual 1.2. Overview 1.2.1. Modes of Operation 1.2.2. Intended Use 1.3. Document History 1.4. Pump Description 1.5. Technical Overview 1.5.1. Occlusion Detection 1.5.2. Motor Control 1.5.3. Performance Verification 2. Safety Information 2.1. Warnings and Cautions 2.1.1. Document Notices 2.1.2. Warnings 2.1.3. Cautions 2.2. Safety 2.2.1. System Symbols 2.2.2. Electrical Safety and Standard Compliance 2.2.3. Electromagnetic Compatibility (EMC) 2.3. Alarms 2.3.1. Alarm Conditions 3. Configuration and Calibration 3.1. Menu Structure 3.2. Batteries 3.2.1. Backup Battery 3.2.2. Battery Operation 3.3. Locking 3.3.1. Keypad Locking 3.3.2. Program Locking 3.3.3. Maximum Rate Locking 3.4. Configuration and Calibration 3.4.1. Technician Menu 3.4.2. Change Set Up Menu 3.4.3. Occlusion Pressure Calibration 3.4.4. Syringe Travel Calibration 3.4.5. Syringe Diameter Calibration 3.5. Communication - Between PC and Syringe Pump 3.6. Event Log 4. Preventative Maintenance 4.1. Introduction 4.2. Recommended Cleaning and Storage 4.2.1. Cleaning 4.2.2. Storage BD BodyGuard™ T Technical Service Manual - Rev. 04
5 5 5 5 6 6 7 8 8 8 8 10 10 10 10 10 11 11 12 13 13 13 14 14 15 15 15 16 16 16 17 17 17 18 20 21 22 24 24 25 25 25 25 25 3
4.3. Routine Preventive Maintenance 4.4. Tools and Test Equipment 4.5. Performance Verification and Calibration Tests 4.5.1. Introduction 4.5.2. Preservice Checklist 4.5.3. Setting Up the Pump for Testing 4.5.4. Infusion Test 4.5.5. Performance Verification Workflow 4.6. Visual Inspection 4.7. Service Decision Route 4.8. Service Process Flow Chart 5. Troubleshooting 5.1. List of Events and Alarms 5.2. Failure Identification 6. Corrective Maintenance 6.1. Introduction 6.2. Access Code List 6.3. Software Burning Instructions (without Using PumpMaster Software Utility Tool) 6.3.1. Equipment 6.3.2. Burning Station Connections 6.3.3. Procedure 6.4. Disassembly 6.4.1. Tools and Test Equipment 6.4.2. Pump Disassembly/Assembly 6.5. Restore Software Default Settings 6.6. Pump Default Settings Appendix A. Service Center Recommended Part List Appendix B. Performance Verification Procedure (PVP) Appendix C. Drawings Front Assembly Block Assembly (ASSY000043) Actuator Assembly (ASSY000045) Rear Assembly (400-031S) Pump Assembly Appendix D. Specifications
4
26 26 26 26 27 27 27 28 31 31 33 34 38 38 39 39 39 39 39 40 41 45 46 46 57 57 60 63 64 64 64 65 65 66 67
BD BodyGuard™ T Technical Service Manual - Rev. 04
1. General Information
1. General Information 1.1. Purpose of This Manual This manual provides instructions for servicing the BD BodyGuard™ T Syringe Pump and its software. The instructions are applicable both to the BD BodyGuard™ T Syringe Pump (REF: 999-103BDXX) and to the T34™ Syringe Pump (REF: 999-103XX) 3rd edition with updated software version (refer to section 1.3. Document History on page 6). The following requirements and conditions apply whilst servicing CME/BD products. Failure to follow these instructions invalidates the warranty and causes unacceptable risks: l
l
l
l l
l
Servicing pumps and accessories must only be performed by BD certified technicians. Service must only be performed using the recommended equipment and BD-approved parts. This manual is intended to support BD certified technicians who are servicing the T34™ / BD BodyGuard™ T Syringe Pump. Clinical personnel, patients and other users are advised to return syringe pumps to an authorised service center for service. Refer to the pump Directions For Use for pump operation instructions, cautions and warnings. Refer to BD BodyComm™ Software Utility Tool Directions For Use (software version 3.x, latest available revision) for software operation instructions. Document the service performed in accordance with the service provider’s prevailing procedures.
1.2. Overview The BD BodyGuard™ T Syringe Pump (hereinafter referred to as 'pump') is a lightweight, battery-powered infusion pump, designed for ambulatory use in a hospital or homecare setting. It can deliver indicated medications via any common infusion route, including intravenous and subcutaneous. The pump has three-point syringe detection, by which it can identify most commonly used syringe brands. This feature enables the pump to calculate the syringe volume and, depending on the mode of operation, to deliver the contents over a specified duration or at a specified rate, in milliliters per hour, therefore minimizing the risk of programming errors. Sensors activate an alarm if the syringe is removed or displaced during infusion. Other safety features include three-level access-code protection, keypad lock, event log and full alarm protection.
Figure 1-1. BodyGuard™ T Syringe Pump in Lockbox
1.2.1. Modes of Operation The pump can be configured and locked to one of four modes of operation. The default mode of operation is Duration Lock On. The mode-of-operation options are: l
Duration Lock On: Delivers the contents of the syringe over a fixed, preprogrammed duration (the pump default is 24 hours). The pump automatically calculates the ml/hr infusion rate for the confirmed deliverable volume.
BD BodyGuard™ T Technical Service Manual - Rev. 04
5
1. General Information
l
l
l
Duration Lock Off: This mode permits the user to set a custom duration for delivery of the infusion. The pump automatically calculates the ml/hr infusion rate based on the selected duration of delivery and the confirmed deliverable volume. Rate Lock On: Delivers the contents of the syringe over a fixed, preprogrammed rate. The pump detects the volume of the syringe and calculates the duration of the infusion accordingly. Rate Lock Off: Permits the user to set the required flow rate, in ml/hr. The pump detects the volume of the syringe and calculates the duration of the infusion accordingly.
1.2.2. Intended Use The T34™ / BD BodyGuard™ T Syringe Pump is designed for infusion of medications or fluids requiring continuous or intermittent delivery at precisely controlled infusion rates through all clinically acceptable routes of administration including intravenous, subcutaneous, percutaneous, in close proximity to nerves, and into an intraoperative site (soft tissue/body cavity/surgical wound site). The system is intended for patients who require maintenance medications, analgesics, immunoglobulins, biosimilar, chemotherapeutic agents and general fluids therapy in hospital and homecare environments. Contraindications: l l l l
Infusion of blood and blood products. Infusion of insulin. Infusion of critical medications whose stoppage or interruption could cause serious injury or death. Use in ambulatory regimens by patients who do not possess the mental, physical, or emotional capability to selfadminister their therapy; or who are not under the care of a responsible individual.
1.3. Document History Revision
Date
Software Version
Description
04
February 2021
T3.2A-xx
l
l
l
6
Updated to BodyGuard T™ Syringe Pump, including T34™ Syringe Pump (REF: 999-103XX) 3rd edition with updated software version. Updated information about backup battery (refer to section 3.2.1. Backup Battery on page 15) and storage (refer to section 4.2.2. Storage on page 25). Added reference to PumpMaster Software Utility Tool (refer to section 3.5. Communication - Between PC and Syringe Pump on page 24).
BD BodyGuard™ T Technical Service Manual - Rev. 04
1. General Information
1.4. Pump Description
Icon
Description
T
T34™
1
N/A
N/A
Barrel Clamp Arm Sensor: Detects syringe size/width of barrel based on barrel diameter.
2
N/A
N/A
Syringe Collar Sensor: Detects that the syringe collar is loaded correctly.
3
N/A
N/A
Plunger Sensor: Detects that the syringe plunger is loaded correctly.
4
N/A
N/A
Actuator: Drives the syringe plunger in order to deliver syringe contents.
5
N/A
N/A
Graphic LCD Display: l 128 pixels x 32 pixels. l The backlight duration is configurable. l When any key is pressed, the backlight turns on.
6
Info Menu key: l Shows the Event Log, Volume Infused, Volume to be Infused and battery status. l A long press locks/unlocks the keypad.
7
Up key: l Increases infusion parameters during programming/use. l Scrolls between options.
8
Down key: l Increases infusion parameters during programming/use. l Scrolls between options.
9
START/OK key: Confirms selections during programming.
10
STOP/NO key: Moves back one step during programming or stops the infusion.
11
Move Actuator Forward key: Moves the actuator forward when no syringe is loaded.
12
Move Actuator Back key: Moves the actuator backward when no syringe is present.
13
ON/OFF key: Turns the pump on or off whilst in the STOP state.
14
N/A
N/A
Operation LED: l Blinking green whilst infusing. l Yellow: low priority alarm. l Red: high priority alarm and pump stops.
15
N/A
N/A
Instructions for infusion setup.
NOTE: Icons of BD BodyGuard™ T Syringe Pump are used as reference throughout the instructions.
BD BodyGuard™ T Technical Service Manual - Rev. 04
7
1. General Information
1.5. Technical Overview Syringe pumps are ideal for low-volume applications where accuracy is important. A syringe pump is often called a piston pump or syringe driver, as the fluid is moved by the syringe piston. The accuracy of the pump is determined in conjunction with the syringe used, and should only be used with syringes approved by the pump manufacturer. The driving mechanism is a lead screw, rotated either by a stepper motor or by a permanent- magnet motor with a gearbox. The pump uses a permanent-magnet motor, which can deliver the same torque as a stepper motor, but from a much smaller unit, as it draws much less current than a stepper motor of comparable rating. Both of these factors are significant in a pump for which size and battery life are important. When testing a syringe pump at low rates, it is important to let the unit run long enough to take up the system backlash before attempting to measure volumetric accuracy. The pump includes a Technician menu, which speeds up this process. Because the displacement rate is determined by the lead screw pitch and the rate of the optical shaft encoder pulses as well as the syringe data in the pump database, the need to adjust the device is eliminated.
1.5.1. Occlusion Detection The pump does not use a strain gauge to measure occlusion force. Instead, the motor current is monitored by a linear amplifier. The resulting voltage is roughly proportional to force. Whilst this system is not as accurate as a strain gauge in a bridge configuration, it is adequate for the intended application of the pump. Variations in friction of the syringe affect the occlusion pressure. Therefore, it is important to use a new syringe when verifying performance. A syringe friction rapidly increases after only a few occlusion measurements.
1.5.2. Motor Control Motor rotation is monitored by an optical shaft encoder and a rotating magnet. The microprocessor uses data from both to confirm the motor speed. The rotating magnet on the motor shaft operates a reed switch positioned just below the shaft end of the motor. A slotted disc on the end of the lead screw, together with an IR LED and photodiode, form a shaft encoder to monitor the lead screw position. Two more reed switches, one at each end of the lead screw, slow the motor as the actuator approaches the end stop (also referred to as the End of Travel). The motor can be stopped, started or reversed by means of an H-Bridge driving circuit.1 With a large syringe size and a high occlusion setting, the motor current can easily exceed 100 mA, so it is important that an alkaline battery be used. A zinc carbon-type battery cannot provide the high current required as occlusion occurs. As with most modern products, all functions are controlled by a microprocessor. The main crystal clock for the processor is checked against the RTC clock source to ensure correct timing. A watchdog timer is also employed to shut down the motor and keypad if the micro program stops executing. The motor speed is locked via the encoder to the checked crystal source and confirmed by the motor reed switch pulses. There is no provision for speed adjustment as there is no need for it. On power-up, the microprocessor carries out a self-test on most subsystems, including the motor and encoders.
1.5.3. Performance Verification There are a number of items that the microprocessor cannot test without human intervention. These are the display and LEDs, acoustic alarm, keypad matrix, syringe size potentiometer, collar micro switch, plunger micro switch and accuracy of occlusion detection. These items must be manually tested, by entering Technician mode and scrolling to the Main Self-Test menu, where several automated test routines allow rapid confirmation of all system alarms and functions.
1An H-Bridge is an electronic circuit that enables a voltage to be applied across a load in either direction, in order to allow a DC motor to run forward and backward. H-Bridges are available as integrated circuits, or they can be built from discrete components. 8
BD BodyGuard™ T Technical Service Manual - Rev. 04
1. General Information
Figure 1-2. Pump Block Diagram
Only three actual physical measurements need to be made: Volume Occlusion pressure l Syringe barrel clamp arm All of these measurements can be made using built-in test routines that are accessed via the Technician menu. l l
BD BodyGuard™ T Technical Service Manual - Rev. 04
9
2. Safety Information
2. Safety Information 2.1. Warnings and Cautions 2.1.1. Document Notices Warning: Warnings advise you of circumstances that could result in injury or death to the patient or operator. Read and understand this manual and the pump Directions For Use, taking note of all warnings before operating or performing service on the pump. Caution: Cautions advise you of circumstances that could result in damage to the device. Read and understand this manual and the pump Directions For Use, taking note of all cautions before operating or performing service on the pump. NOTE: Indicates that the information that follows is additional important information or a tip to help you when operating or performing service on the pump.
2.1.2. Warnings To avoid possible personal injury or death, observe the following warnings: Warning: An explosion hazard exists if the pump is used in the presence of flammable anesthetics. Exercise care to locate the pump away from any such hazardous sources. Warning: Read the entire Directions For Use before using the pump, since the text includes important precautions. Warning: Pump detection is based on the physical dimensions of the syringes programmed into the pump database by the manufacturer. However, the same-brand syringes may be manufactured at different sites bearing small differences that are beyond the control of the pump manufacturer. Therefore, do not use the pump if the correct syringe brand is not detected and promptly notify the pump manufacturer. Always ensure that the visual volume in the syringe matches the actual volume on the pump display. Warning: Before starting an infusion, check that all parameters that are set, especially calculated parameters, are correct. Visually check that the volume in the syringe matches the actual volume on the pump display and the calculated rate. In case the default duration is set to zero, apply the required rate of infusion. Warning: A kinked or occluded syringe extension set may impair the operation of the pump and the accuracy of the infusion. Before operation, verify that the syringe extension set is not kinked or occluded. Warning: The pump should be operated within the recommended environmental operating range. Operation at temperatures and/or humidity outside this range may adversely affect accuracy. Warning: Unsafe operation may result from using improper accessories. Use only accessories and options designed for this system and supplied or recommended by the pump distributor. Warning: Use an aseptic technique. Patient infection may result from the use of non- sterile components. Maintain sterility of all disposable components and do not re-use single-use syringe extension sets or syringes. Warning: Ensure that the syringe brands used (at the medical provider) are enabled in the software. All other syringes should be disabled. Warning: When starting a new program, allow the pump to perform a preloading procedure, as this procedure ensures correct detection of the volume in the syringe.
2.1.3. Cautions To avoid possible damage to the equipment, observe the following cautions: Caution: This pump contains static-sensitive components. Observe strict precautions for the protection of static-sensitive components when attempting to repair and service the pump. Caution: If the pump is dropped, subjected to excessive moisture, humidity or high temperature, or otherwise suspected to have been damaged, remove it from service for inspection. Caution: Do not store the pump with the battery in it. Refer to storage instructions (4.2.2. Storage on page 25).
10
BD BodyGuard™ T Technical Service Manual - Rev. 04
2. Safety Information
Caution: Avoid using chemicals that can damage the surfaces of the instrument (for example chlorinated solvents). Refer to cleaning instructions (4.2. Recommended Cleaning and Storage on page 25). Caution: Immersing the pump into liquid may cause damage to components. Do not immerse the pump into any type of liquid. Caution: Battery damage may occur if left in a temperature warmer than 50°C.
2.2. Safety 2.2.1. System Symbols The following symbols are used on the pump and its components. Labels on the system or statements in this manual preceded by any of the following words and/or symbols are of special significance and are intended to help you operate the pump safely and efficiently.
Symbols on Both Pump and Syringe Extension Set Packaging Symbol
Description The CE mark indicates conformance to the Medical Device Directive 93/42/EEC. The numeric code identifies the Notified Body. Manufacturer Authorized representative in the European Community. Manufacturer’s catalogue number.
Symbols on Pump or on Pump Packaging Only The pump is designed for infusion of medications or fluids. The pump is a reusable, serviceable medical device, intended to receive annual maintenance to preserve system accuracy. Symbol
Description Read Directions For Use for important cautionary information that cannot be presented on the pump. Read the entire Directions For Use before using the pump. Date of manufacture Do not dispose of in municipal waste. Symbol indicates separate collection for electrical and electronic equipment. (WEEE Directive 2012/19/EU). NOTE: Does not apply to the battery.
Type CF applied part (IEC 60601-1). Applied part is suitable for direct cardiac application.
Serial Number Battery Direct current Degree of particle and water ingress protection. Protection from solid objects ≥ 12.5 mm and from dripping water when tilted at 15°.
BD BodyGuard™ T Technical Service Manual - Rev. 04
11
2. Safety Information
Symbol
Description (On packaging) Indicates the temperature limits to which the medical device can be safely exposed.
(On packaging) Indicates the acceptable upper and lower limits of atmospheric pressure (altitude).
(On packaging) Indicates the acceptable upper and lower limits of relative humidity.
Symbols on Syringe Extension Set Packaging Only Symbol
Description Read the instructions for use for important cautionary information that cannot be presented on the disposable. Read the instructions for use before using the disposable. Do not reuse single-use disposable components.
Do not use the product if the package has been damaged or opened.
The fluid path is non-pyrogenic.
Indicates syringe infusion sets for single use with pressure infusion apparatus.
Sterilized with ethylene oxide (applies to syringe extension sets). Lot number Expiry date of disposable
2.2.2. Electrical Safety and Standard Compliance The pump complies with the following standards: l
l
l
l
l
l
12
IEC 60601-1, Ed. 3.1:2012: Medical electrical equipment - Part 1: General requirements for basic safety and essential performance IEC 60601-1-8: 2006, +A1:2012: Medical electrical equipment - Part 1-8: General requirements for basic safety and essential performance - Collateral Standard: General requirements, tests and guidance for alarm systems in medical electrical equipment and medical electrical systems IEC 60601-1-6, Ed. 3.1:2013: General requirements for basic safety and essential performance - Collateral Standard: Usability IEC 60601-1-11, Ed. 2.0: 2015: Medical electrical equipment - Part 1-11: General requirements for basic safety and essential performance - Collateral standard: Requirements for medical electrical equipment and medical electrical systems used in the home healthcare environment IEC 60601-2-24, Ed. 2.0:2014: Medical electrical equipment - Part 2-24: Particular requirements for the basic safety and essential performance of infusion pumps and controllers IEC 62304:2006+AMD1:2015: Medical device software - Software life cycle processes
BD BodyGuard™ T Technical Service Manual - Rev. 04
2. Safety Information
2.2.3. Electromagnetic Compatibility (EMC) l
IEC 60601-1-2, Ed. 4.0:2014: Medical electrical equipment - Part 1-2: General requirements for basic safety and essential performance - Collateral Standard: Electromagnetic disturbances - Requirements and tests
2.3. Alarms 2.3.1. Alarm Conditions At any time, when the pump detects a problem, an alarm is activated and the following occurs: l l l
The infusion stops (high-priority alarms). An audible alarm sounds. An alarm message appears on the display, stating the cause of the alarm and indicates instructions for continued use. The operation LED lights red or yellow depending on alarm priority.
Table 2-1. Alarms
Description
Alarm Type
Audio Signal as per 60601- Visual Signal as per 60601-1-8 1-8 Operational LED
Down Occlusion End Battery End Of Infusion
High Priority alarm Syringe displaced during Requires immediate user response infusion
High Priority Volume=~ 58 dBA
RED Flashing visual Operation LED Flashes RED.
Low Priority Alarm Requires user awareness
Low Priority 3 tones Volume=~ 55 dBA
Yellow solid visual Operation LED is solid Yellow (Not flashing)
Informational signal Provides information that may, or may not requires action from clinicians
1 or 2 pulses
No visual
9V Battery Power Failure
Backup alarm
Buzzer
No visual
Alarm Output Volume Failure
Backup alarm
Buzzer
Red flashing visual Operation LED flashes red
Restart Pump Switch off & On ERROR XX Pump Paused too long Low Battery Near End Bolus Started/Completed Keypad Lock/Unlock Syringe plunger hit the limit Syringe loaded Purge started/End Power On/Off Infusion started/ resumed/ Stopped by user Service interval alert
BD BodyGuard™ T Technical Service Manual - Rev. 04
13
3. Configuration and Calibration
3. Configuration and Calibration 3.1. Menu Structure User mode (Info menu and Change Set up menu) Rate Setting The maximum rate is adjusted in Technician menu Change Set up menu Info menu • Battery Level • Exit • Rate Setting (access code: 5) • Event Log • Change Set up (access code: 99)
• Exit • Language • Time & Date • Key Operation • Backlight Duration • Info Duration • Bolus Dose Rate* • Bolus Maximum Volume* • Titration Option • Default Duration • Occlusion Pressure • Program Lock * Available only if bolus delivery is enabled on Technician menu.
Technician mode
+ access code: 123 Technician options • Serial Number • Main Self-test • Manual Tests • Syringe Set Up • Pressure Calibration • Factory Press. Test • Pressure Test • Syringe Travel • Diameter Calibration • Syringe dead space • Volume Test • Factory Settings • Operating Hours • Service Interval • Access Code • Purge Vol • Maximum Rate • Microphone Level • Bolus enable/disable • Exit from Technician
14
Main Self-test • Keypad Test • Display Test • Acoustic Alarm Test • Backup Alarm Test • MIC Level Test • LEDs Test • Syringe Sensor Test • Syringe Diameter Test • Syringe Travel Test • Power Voltage Test • Exit from Technician Manual Tests • Keypad Test • Display Test • Acoustic Alarm Test • Syringe Sensors Test • Syringe Diamet. Test • Syringe Travel Test • Power Voltage Test • Backup Alarm Test • LEDs Test • MIC level test • Return to Tech. Menu
BD BodyGuard™ T Technical Service Manual - Rev. 04
3. Configuration and Calibration
3.2. Batteries 3.2.1. Backup Battery The pump has a backup battery on the motor PCB. The backup battery is a lithium CR1220 3V rechargeable battery. The backup battery powers the RTC (real-time clock), which is used to record time and date of events on the event log.
Testing the Alarm for the Backup Battery To test the alarm for the backup battery, do as follows: 1. Switch on the pump and wait for the main menu to appear. 2. Remove the 9V primary battery whilst the pump is on. The alarm beeps. 3. Verify that the alarm beeps for at least 3 minutes. Since the battery is rechargeable, there is no requirement to replace it.
Checking the Backup Battery After Storage When the pump is stored without a 9V battery, the date and time can become inaccurate, due to a partial depletion of the backup battery. The partial depletion of the backup battery may cause the RTC to lag by several hours to days. There is no alarm or warning in case of time lag, as the pump will operate normally with no effect on infusion delivery. To check the accuracy of the backup battery after storage, do as follows: Check time and date of the last entry in the event log on the Info menu (refer to sections 1.4. Pump Description on page 7) or via the BD BodyComm™ Software Utility Tool. If time and date are inaccurate, do as follows: l
1. Insert a new 9V battery (refer to Directions For Use for recommended battery brands and types). 2. Reset time and date (refer to section 3.4.2. Change Set Up Menu on page 18 or use the BD BodyComm™ Software Utility Tool). 3. To keep the correct time and date, do as follows: a. If the pump is used immediately, no action is needed. The backup battery will be charged by the 9V battery during operation or infusion, and there is no risk of delay in infusion delivery. b. If the pump is switched off after resetting time and date, keep the 9V battery in the pump for 12 hours, to fully recharge the backup battery. If you cannot wait 12 hours before delivering new pumps to customers, ship the pump with the 9V battery inside.
3.2.2. Battery Operation The pump operates on battery power. NOTE: Only use 9V alkaline, IEC 6LR61 type. Do not use batteries marked 6LP3146 or 6LF22 with the pump. 6LP3146 and 6LF22 batteries can cause issues with the operation of the syringe pump, as the physical construction and internal resistance of this type of battery are different to the 6LR61 battery. Issues arising from use of the 6LP3146 and 6LF22 batteries can include End Battery messages during Pre-Load, volume test fails, pressure test/calibration issues and reduced amount of infusions from a battery. NOTE: Verify that the battery is in good condition by pressing the Press the key to display the battery status.
key during program setup or operation.
There are two battery alarm conditions: l
l
Low Battery: The pump warns that the battery is low before the End Battery alarm activates.
End Battery: When the battery is depleted, the pump ceases operation and the End Battery alarm is activated: If the battery runs out, End Battery appears on the display. The pump stops the infusion. The pump may shut down immediately. o From the End Battery state, the user cannot restart the pump until the battery is replaced with a new one. o
BD BodyGuard™ T Technical Service Manual - Rev. 04
15
3. Configuration and Calibration
3.3. Locking The pump provides three types of locking: l l l
Keypad Locking Program Locking Maximum Rate Locking
3.3.1. Keypad Locking If the keypad is locked, all keys are disabled except the
, , and
keys.
This feature enables the operator to lock the keypad. This option is important, as locking prevents users from tampering with the pump parameters. To lock the keypad, do as follows: l
Press and hold the key until the keypad lock bar graph is filled and a beep is heard. The beep indicates that locking is turned ON.
To unlock the keypad, do as follows: l
Press and hold the key until the keypad lock bar graph is depleted and a beep is heard. The beep indicates that locking is turned OFF. Some earlier software versions require code 99 to unlock the keypad.
3.3.2. Program Locking This feature enables the operator to lock out the setting keys, so that entered parameters or set programs cannot be changed once they are set. This option is important, as locking the program prevents users from tampering with the pump parameters. This is especially important, for example, if there is the risk that a child may play with the pump and unknowingly change the program, or for home-care patients who need to repeat the same program daily. To lock or unlock the program, do as follows: 1. Press the key. 2. Use the arrow keys to scroll to Change Setup. Press
to select this option.
3. The access code for Change Setup is 99. Use the arrow keys to set this code. Press
4. Use the arrow keys to scroll to Program Lock. Press
l l
16
to enter.
to select this option.
To lock the program: The default setting is OFF. Use the arrow keys to change the setting to ON. To unlock the program: If the program lock was ON, use the arrow keys to change it to OFF and unlock.
BD BodyGuard™ T Technical Service Manual - Rev. 04
3. Configuration and Calibration
NOTE: For program locking when the pump is set to Volume over Rate, press the key whilst the program is in Setting mode or Stop mode, scroll to the Rate option and set the required rate to lock.
3.3.3. Maximum Rate Locking This feature enables the operator to set a maximum infusion rate for the pump. The program rate can then be adjusted only up to the preset limit. To set Maximum Rate Locking, do as follows: 1. Enter Technician menu, (refer to section 3.4.1. Technician Menu on page 17). 2. Use the arrow keys to scroll to Maximum Rate. Press the key to select this option.
3. The pump displays the default maximum rate. Use the arrow keys to change the maximum rate setting. Press the key to confirm and to exit. Press to exit without saving changes in the rate setting.
3.4. Configuration and Calibration The pump has adjustable operating parameters. These operating parameters and options may be viewed and adjusted to modify the operation of the pump. The operating parameters and options available are described in the following sections: 3.4.1. Technician Menu on page 17, 3.4.2. Change Set Up Menu on page 18, 3.3.2. Program Locking on page 16, and 3.3.1. Keypad Locking on page 16. If access to a specific mode of operation is required, refer to the pump Directions For Use for instructions.
3.4.1. Technician Menu To access the Technician menu, do as follows: 1. Enter Technician mode by holding down the key and then pressing the key simultaneously until the key. After several seconds, the access-code prompt displays. software version is displayed. Then, release the The display shows the software version for two seconds before the access-code prompt. 2. Using the arrow keys, set code 123 and confirm by pressing the key. The pump displays all the parameters that can be set, calibrated or tested. The technician can scroll through all parameters using the arrow keys. Table 3-1. Technician Menu Parameters
Menu Parameter/Option Item
Description
1
Serial Number
Displays the serial number and production date.
2
Main Self-Test (follow display prompt)
Proceeds in sequence through the following tests: Keypad, Display, Acoustic Alarm, Back-up alarm, Mic level, LEDs test, Syringe Sensors, Diameter, Syringe Travel Test and Power Voltage.
3
Manual Tests
Same as Main Self-Test, but with a menu to focus the user on individual tests.
4
Syringe Set Up
Enable/disable the default diameter for the list of approved syringes.
5
Pressure Calibration
Enables calibration and pressure settings.
6
Factory Press. Test
Fine-tunes pressure calibrations.
7
Pressure Test
Tests the actual pressure.
8
Syringe Travel
Calibrates syringe movement of approximately 68 mm.
9
Diameter Calibration
Tests the syringe barrel sensor.
10
Syringe dead space
Sets the actuator limitation for delivering the entire volume.
11
Volume Test
Performs a flow rate test.
12
Factory Settings
Caution: Pressing
BD BodyGuard™ T Technical Service Manual - Rev. 04
restores factory defaults.
17
3. Configuration and Calibration
Menu Parameter/Option Item
Description
13
Operating Hours
Indicates the hours that have passed since the last service.
14
Service Interval
Sets the number of hours before a Send for Service message appears.
15
Access Codes
Sets access codes.
16
Purge Vol
Sets the maximum volume that a user can purge.
17
Maximum Rate
Sets the Rate Limit (0.1 ml/h - 650 ml/h).
18
Microphone Level
Sets microphone sensitivity.
19
Bolus enable/disable
Enables bolus.
20
Exit from Technician
Exits Technician mode.
Enabling and Disabling a Predefined Syringe Type in the Pump Menu To enable/disable a predefined syringe type, do as follows: 1. Enter Technician mode, as described above. 2. Use the arrow keys to scroll to Syringe Setup. Press to select this option. 3. The pump displays a syringe default size. Scroll up or down to the correct syringe size needed. Press confirm.
4. Use the arrow keys to scroll through the list of brands to the required syringe brand. Press
l
to confirm.
Enabling: If the syringe has been disabled, Syringe Disabled-Refer to Ops Manual appears.
To re-enable this syringe, press the
l
to
key and then the
key to confirm at the Enable this syringe?
The display then shows a summary of the manufacturer’s data for that syringe. Press the key to confirm and exit Syringe Setup. Disabling: To disable the selected syringe, from the screen in which the summary of the manufacturer’s data for the syringe is displayed, press the key. When prompted to disable the syringe, press the key.
The Syringe Disabled screen displays.
5. Press the
key to exit Syringe Setup.
3.4.2. Change Set Up Menu To change setup options, do as follows:
18
BD BodyGuard™ T Technical Service Manual - Rev. 04
3. Configuration and Calibration
1. Press the key to turn on the pump. Press the key twice. 2. Use the arrow keys to scroll to Change Set up. Press to select this option.
3. The access code for Change Set up is 99. Use the arrow keys to set this code. Press
to enter.
4. Use the arrow keys to scroll through the setup options. Refer to Table 3-2. Change Setup Options on page 19 and change where necessary.
Table 3-2. Change Setup Options
Change Setup Option
Functional Description
Range
Exit
Select to exit the Change Set up menu.
Language
Changes language.
Set Time & Date
Enables you to adjust the date and time to ensure that all logged events are stamped with the correct date and time.
Key Operation
Defines the actuator’s forward movement distance when the syringe loading.
Backlight Duration
Defines the duration that the backlight is illuminated to help preserve battery life.
0–60 seconds
Info Duration
Defines the duration that the Info screen displays.
1–20 seconds
Bolus Dose Rate
Enables to set the bolusing dose rate. NOTE: This setting is available only if bolus delivery is enabled on Technician menu.
1-650 ml/h
Bolus Maximum Volume
Enables you to set the bolus maximum volume value. Setting zero (0) disables bolus administration. NOTE: This setting is available only if bolus delivery is enabled on Technician menu.
0–20 ml
Titration Option
Enables/disables titration functionality.
Enabled/Disabled
Default Duration
Defines the program’s default duration. If you set zero (0), the pump skips the duration step during programming. When the Program Lock is ON (see below), the default duration cannot be set to zero.
0:00-99:00
Occlusion Pressure
Enables you to set the pressure at which the occlusion alarm is activated.
200 mmHg– 1,500 mmHg
Program Lock
Enables you to set a lock on the program to prevent tampering with either the program duration or rate during setup (when Program Lock is ON, the Default Duration cannot be set to zero).
ON/OFF
key is pressed during 0.1 mm–100 mm
Info Mode During Operation l
Pressing the key during operation displays the total Volume To Be Infused and the Infused Volume. The screen displays for seven seconds.
BD BodyGuard™ T Technical Service Manual - Rev. 04
19
3. Configuration and Calibration
l
Pressing the
key twice during operation displays the battery status. The screen displays for seven seconds.
NOTE: To exit Info mode, press the
key or wait 10 seconds.
3.4.3. Occlusion Pressure Calibration To perform occlusion pressure calibration, do as follows: 1. Verify that a 6LR61 alkaline 9V battery type is inserted in the pump battery compartment. In Setup mode (code 99), set the pressure level to 540 mmHg. 2. Enter Technician mode, as described on page 17 (verify battery level is 8.4V in Power Voltage Test, accessed in Manual Tests). 3. Use the arrow keys to scroll to Pressure Calibration. Press to select this option. 4. The display prompts you to load a force device. Load a 50ml syringe force device labeled 1.5N - 15N.
5. Use the and keys to align the plunger’s head with the force device to the 1.5N starting-point marking line. Press the key to confirm.
Figure 3-1. Aligning the Plunger's Head to 1.5N
6. The actuator moves to set the zero pressure point. Confirm with the key. The display will summarize the results of the measured travel force minimum and maximum values. The maximum value should be equal to or less than 15 and the delta (between minimum value and maximum value) equal to or less than 5.
NOTE: This test is intended to determine the friction level of the syringe. The maximum level, in combination with the lowest and highest readings, detects faulty mechanics. 7. Press the
key. The display shows Travel Force. Do not change the setting and press the
key.
8. The same procedure is now performed with a BD 50ml syringe force device, labeled 30N – 55N. Use the and keys to align the plunger’s head with the syringe force device to the 50N starting point marking line. Press the key to confirm. Pressure Sensitive value should be between 35-100.
20
BD BodyGuard™ T Technical Service Manual - Rev. 04