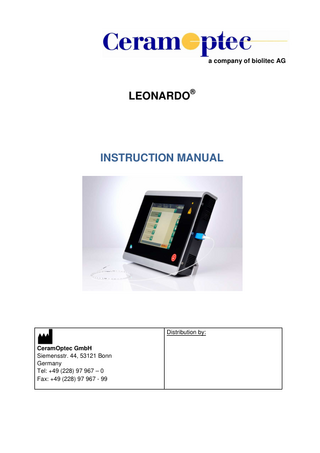
CeramOptec GmbH
LEONARDO Instruction Manual Rev F Feb 2014
Instruction Manual
70 Pages
Preview
Page 1
a company of biolitec AG
LEONARDO®
INSTRUCTION MANUAL
Distribution by: CeramOptec GmbH Siemensstr. 44, 53121 Bonn Germany Tel: +49 (228) 97 967 – 0 Fax: +49 (228) 97 967 - 99
LEONARDO® INSTRUCTION MANUAL
TABLE OF CONTENTS 1
SAFETY PROVISIONS AND REGULATIONS ...6
2
PRODUCT DESCRIPTION ...7
2.1 INTENDED USE AND INDICATIONS ... 7 2.1.1 Recommended lasers for indications ... 8 2.2 CONTRAINDICATIONS ... 9 2.3 SIDE EFFECTS ... 9 3
DESCRIPTION OF THE DEVICE... 10
3.1 CONTROLS AND CONNECTIONS ... 10 3.2 DESCRIPTION OF CONTROLS, DISPLAYS, CONNECTIONS ... 11 3.2.1 Controls ... 11 4
OPERATION ... 15
4.1 PREPARING THE LASER UNIT ... 15 4.1.1 Footswitch ... 16 4.1.2 Door interlock connection scheme ... 16 4.2 SWITCHING ON THE DEVICE ... 17 4.3 SETTINGS AND PARAMETERS FOR ALL TREATMENTS ... 19 4.3.1 Setting language ... 19 4.3.2 Configuring the aiming beam ... 20 4.3.3 Help system ... 21 4.4 EXTRAS ... 23 4.4.1 Info screen ... 23 4.4.2 User administration ... 24 4.4.3 4.4.3 Video display ... 27 4.5 TREATMENT ... 28 4.5.1 Configuring the laser output... 28 4.5.2 Selecting a treatment mode ... 33 4.6 DESCRIPTION OF THE TREATMENT MODES ... 34 4.6.1 Continuous mode CW ... 34 4.6.2 Pulse Mode ... 37 4.6.3 ELVeS® segment mode ... 41 4.6.4 ELVeS® signal mode ... 43 4.6.5 Derma mode (for LEONARDO® Dual 45 only) ... 46 4.7 SWITCHING OFF THE LASER SYSTEM ... 47 4.8 MESSAGES AND POSSIBLE CAUSES ... 48 5
ACCESSORIES ... 50
5.1
SALES PACKAGE FOR THE LASER INCLUDES ... 50
Rev.: F / 26.02.2014
User Manual: LEONARDO®
Page 2 of 70
5.2 6
LASER SAFETY EYEWEAR ... 50
APPLICATION SYSTEMS, FIBERS AND MEDICAL PROBES ... 52
6.1 6.2 7
APPLICATION FIBERS AND MEDICAL PROBES ... 52 HANDLING AND USE OF APPLICATION SYSTEMS AND MEDICAL PROBES ... 52
SAFETY ... 53
7.1 8
SAFETY ELEMENTS ... 53
MAINTENANCE AND CARE ... 54
8.1 8.2 8.3 8.4 9
ROUTINE MAINTENANCE ... 54 CLEANING ... 54 CHANGING FUSES ... 54 TECHNICAL SAFETY CHECK... 54
TECHNICAL SPECIFICATIONS AND LABELING ... 55
9.1 MODEL-SPECIFIC SPECIFICATIONS ... 55 9.1.1 LEONARDO® DUAL 45 ... 55 9.1.2 LEONARDO® 1470... 55 9.1.3 ... 55 9.2 GENERAL SPECIFICATIONS FOR ALL LEONARDO® MODELS ... 56 9.3 LABELING ... 57 9.3.1 Certification and power rating label... 57 9.3.2 Symbol key... 59 9.4 MANUFACTURER’S DECLARATION REGARDING ELECTROMAGNETIC COMPATIBILITY ... 60 10
SERVICE POLICY ... 63
11
ENVIRONMENTAL PROTECTION ... 63
12
WARRANTY POLICY ... 64
12.1
IMPORTANT CONDITIONS ... 64
13
APPENDIX ... 66
13.1
DEVICE MASTER DATA ... 66
13.2 13.3
TRAINING RECORD... 66 TECHNICAL SAFETY CHECK ... 67
Rev.: F / 26.02.2014
User Manual: LEONARDO®
Page 3 of 70
List of illustrations Figure 1: Front of the device ... 10 Figure 2: Rear of the device... 10 Figure 3: Subdivision of the operating interface ... 11 Figure 4: Application fiber connection ... 15 Figure 5: Foldable footswitch ... 16 Figure 6: Door interlock connection scheme ... 16 Figure 7: Start screen 1 ... 17 Figure 8: Start screen 2 (Selecting the language the first time the device is switched on)... 17 Figure 9: Login screen. The device activates after entering the number code ... 18 Figure 10: An example of the monitor display when CW mode was the last active mode (for dualwavelength devices) ... 18 Figure 11: An example of the monitor display when CW mode was the last active mode (for single-wavelength devices) ... 19 Figure 12: Menu item: language setting ... 19 Figure 13: Menu item: setting the aiming beam ... 20 Figure 14: Setting the aiming beam in any application mode by using the PILOT box ... 21 Figure 15: Controls for Help ... 21 Figure 16: Help for Pulse mode ... 22 Figure 17: Help for 2D Power Control™ (not available in single-wavelength devices)... 22 Figure 18: Information screen ... 23 Figure 19: Navigating document display ... 23 Figure 20: Login screen ... 24 Figure 21: User administration option menu ... 24 Figure 22: Add user ... 25 Figure 23: Edit user ... 26 Figure 24: Remove user ... 26 Figure 25: Setting the laser output for a dual-wavelength device ... 28 Figure 26: Setting the laser output for a single-wavelength device... 28 Figure 27: Setting the laser output for devices that emit one or two wavelengths ... 29 Figure 28: Laser power setting for dual wavelength without 2D Power Control™ ... 29 Figure 29: Method 2: Setting the laser power using 2D Power Control™ ... 30 Figure 30: Setting output with constant total laser power output ... 30 Figure 31: Setting the output with constant relation between two wavelengths ... 31 Figure 32: Fixing the power for the wavelength 1470 nm on the horizontal ... 31 Figure 33: Fixing the power for the wavelength 980 nm on the vertical axis... 32 Figure 34: Saving four power settings ... 32 Figure 35: Pop-up window for saving the power setting ... 33 Figure 36: New name for the button... 33 Figure 37: Selecting a treatment mode on the touchscreen ... 34 Figure 38: Screen display of Continuous mode CW in standby... 35 Figure 39: Screen display of Continuous mode CW (for devices that emit one wavelength) ... 35 Figure 40: Display of laser ready for emission ... 36 Figure 41: Examples for continuous mode ... 37 Figure 42: Screen display of Pulse mode... 37 Figure 43: Screen display of Pulse mode (for devices that emit one wavelength) ... 38 Figure 44: Screen display of Pulse mode, parameter settings ... 38 Figure 45: Pulse duration zoom settings ... 39 Figure 46: Single-pulse mode ... 40 Figure 47: Multi Pulse mode ... 40 Rev.: F / 26.02.2014
User Manual: LEONARDO®
Page 4 of 70
Figure 48: Start screen of ELVeS® segment mode for setting ... 41 Figure 49: Start screen of ELVeS® segment mode for setting parameters (for devices that emit one wavelength) ... 41 Figure 50: Setting the parameters in ELVeS® segment mode ... 42 Figure 51: Setting the parameters in ELVeS® signal mode ... 43 Figure 52: Setting the parameters in ELVeS® signal mode (for devices that emit one wavelength) ... 44 Figure 53: Setting laser power ... 44 Figure 54: Defining the energy interval ... 45 Figure 55: Screen display of Derma mode, dual laser setting ... 46 Figure 56: Setting parameters for Derma mode ... 47 Figure 57: Laser safety eyewear ... 50 Figure 58: Safety elements ... 53 Figure 59: Label for devices that emit laser power of two wavelengths ... 57 Figure 60: Label for devices that emit laser power of 15W at wavelength of 1470 nm ... 58 Figure 61: Laser warning sign... 59 Figure 62: Laser emergency stop button... 59 Figure 63: Laser aperture at distal end of fiber... 59 Figure 64: ESD warning symbol ... 59 Figure 65: Year of manufacture ... 59 Figure 66: Fuse ... 59 Figure 67: Manufacturer ... 59 Figure 68: Up ... 59 Figure 69: See user manual... 59 Figure 70: Fragile goods ... 59 Figure 71: Admissible temperature range ... 59 Figure 72: Keep away from water and dampness ... 59 Figure 73: Maximum admissible air humidity ... 59 Figure 74: CE mark ... 59 Figure 75: Atmospheric pressure limitation ... 59 Figure 76: WEEE sign (see chapter 11) ... 59 Figure 77: Applied part type B ... 59
Rev.: F / 26.02.2014
User Manual: LEONARDO®
Page 5 of 70
1
Safety provisions and regulations
The LEONARDO® laser system may only be operated by appropriately qualified and trained personnel in compliance with legislation and the safety regulations. This device may also only be implemented in a clinical setting by qualified and trained doctors. National legislation and safety regulations must be observed. In Germany, these are as follows: • The German Medical Devices Operator Ordinance (MPBetreibV) • The accident prevention regulation “Laser Radiation” (German Accident Prevention & Insurance Association safety prevention regulation no. 93) • Electrical installations in hospitals and locations for medical use outside hospitals: DIN VDE 0107 The operator or a nominated laser safety officer is responsible for ensuring compliance with these regulations. The LEONARDO® laser is a class 4 medical laser according to Directive EN 60825-1:2003. Class 4 lasers can generate dangerous diffuse reflections. They can damage the eyes and skin, and represent a fire hazard. Class 4 lasers may also ignite flammable materials. Caution: Direct eye exposure to the laser light leads to irreversible eye damage! The laser system is not suitable for ophthalmological applications. To avoid damage to the eye and retina, doctors, surgical personnel, patients and any other persons present in the room during treatment must wear appropriate protective eyewear. Only use protective eyewear provided or approved by CeramOptec. Suitable protective eyewear can also be obtained from CeramOptec (see also the recommendations in section 5.2). Safe distance – NOHD (Nominal Ocular Hazard Distance): The safe distances for the following devices are: LEONARDO® Dual45: LEONARDO® 1470 :
410 cm 63 cm
from the laser outlet or from the emitting fiber. Note that a greater distance must be maintained when using certain handpieces in derma mode (see section 4.6.5). Caution: Do not look directly at the laser beam or a laser beam that is in use with optical devices or instruments. Doing so may result in permanent damage to the eyes or to the instruments. Avoid placing reflective material, such as metal and glass, into the path of the beam. Caution: Accidental irradiation to tissue not intended as the target tissue may result in laser burn. Attention: The LEONARDO® laser may only be used with the accompanying footswitch and the specified application and light delivery systems. When operating the device, ensure that it is evenly balanced on a stable surface and that a distance of at least 25 cm is maintained between the ventilation fan and the walls. Position the device so that there are no cables or optical fibers suspended in the air between the wall socket, the device and the patient. To avoid risk of electric shock, do not open the housing. Service and maintenance may only be carried out by CeramOptec or by qualified personnel authorized by CeramOptec. The equipment must be routinely inspected and maintained in accordance with the instructions provided in the maintenance section of this manual. A technical safety check must be performed on a two year basis (see section 8.4). Unplug the device before cleaning (see section 8.2). Rev.: F / 26.02.2014
User Manual: LEONARDO®
Page 6 of 70
Caution: Do not use this device in potentially explosive atmospheres. Avoid using flammable anesthetic gases or oxidizing gases such as nitrogen oxide or oxygen. Certain materials saturated with oxygen, such as cotton, may ignite even if the laser is used in accordance with the regulations. Allow sufficient time for flammable disinfectant solutions to evaporate before you use the laser. Note that bodily gases may also ignite. Caution: Use of non-approved equipment or procedures when the device is in operation may result in dangerous exposure to radiation. Noncompliance with the safety and operating instructions provided in this manual will in all cases invalidate warranty and liability on the part of CeramOptec. Note: Ensure that the switch on the back of the unit is in the off position to prevent unauthorized use of laser devices. Note: Note also the manufacturer’s specifications regarding electromagnetic compatibility and the relevant requirements (see section 9.4).
2
Product description
LEONARDO® is a laser system with functions and ergonomics specially developed for medical applications. A touchscreen is used to set treatment parameters, such as laser power. Userfriendly menu navigation and microprocessor-supported control ensure reliable operation while allowing physicians to concentrate on the essential aspects of treatment. The fiber-coupled semiconductor laser diodes convert electrical energy to coherent laser radiation with the wavelength of 980 / 1470 nm +/-30 nm (aiming beam 635 nm +/-10 nm and 532 nm +/-10 nm). Depending on the model, your LEONARDO® laser has a maximum laser output power of 15 W (1470 nm) or 30 W (980 nm). LEONARDO® is available as a device with two wavelengths (980 nm and 1470 nm) or as a single-wavelength device with 1470 nm. All LEONARDO® lasers can be operated in two basic modes, CONTINUOUS or PULSE MODE. Additional special treatment modes for specific treatment procedures or in combination with corresponding application fibers are available, depending on the configuration of the unit. Special treatment modes are available in combination with the corresponding application fibers for dermatology ("Derma mode") and phlebology ("ELVeS signal mode" and "ELVeS segment mode"). For safety reasons, the LEONARDO® laser is equipped with a system for automatic recognition of the optical fibers used. Application fibers from CeramOptec have coding for communicating with the laser device. For delivery details, refer to section 5.1.
2.1
Intended use and indications
LEONARDO® is designed for delivering laser light to soft tissue in contact and non-contact surgical procedures, including endoscopic procedures. LEONARDO® is suitable for the following fields of application: incisions, excisions, vaporization, ablation, hemostasis or coagulation of soft tissue in the following areas: •
ENT (turbinectomy, LAUPP, septum, paracentesis, tonsillotomy, laryngeal cancer, hemangioma, adhesions, epistaxis, DCR)
•
Pulmonology (coagulation and vaporization of endobronchial tumors)
Rev.: F / 26.02.2014
User Manual: LEONARDO®
Page 7 of 70
•
Colorectal surgery (laserhemorrhoidoplasty), anal fistulas (FiLaC), soft tissue tumors, polyps (polyposis coli and/or villous adenoma), anal stenoses, condylomata accuminata, fissures, mariscae, coccygeal fistulas)
•
Endovenous ablation of surface veins (saphenous veins, magna and parva), tributaries, perforant veins, recurrences, venous leg ulcers)
•
Dermatology (DUAL 45): Telangiectases, spider naevi, hemangioma, spider veins, vascular malformations, warts, lentigo
Intended user:
Hospitals, Ops and set up physicians.
Patient population:
Ages, weight and state of health: The attending physician decides here.
Pulmonology
LAUPP
septum
paracentesis
tonsillotomy
laryngeal cancer
hemangioma
adhesions
epistaxis
DCR
coagulation & vaporization of endobronchial stenoses
coagulation & vaporization of endobronchial tumors
(laserhemorrhoidoplasty)
anal fistulas (FiLaC) soft tissue tumors polyps (polyposis coli and/or villous adenoma
anal stenoses
condylomata accuminata
fissures
mariscae
coccygeal fistulas
saphenous veins (magna and parva)
tributaries
perforant veins
reccurences
venous leg ulcers
Telangiectases, spider naevi, hemangioma, spider veins, vascular malformations, warts, lentigo
Endovenous ablation of surface veins
X
X
X
X
X
X
X
X
X
-
X
Xx
X
X
X
X
X
X
X
X
X
X
X
X
X
-
X
X
X
X
X
X
X
X
X
X
X
X
X
X X
X
X
X
X
X
X
X
X
X
X
X
X
Indication
Laser model ® LEONARDO 1470 ® LEONARDO Dual 45
Colorectal surgery
turbinectomy
ENT / Otorhinolaryngology
Dermatology
2.1.1 Recommended lasers for indications
Rev.: F / 26.02.2014
User Manual: LEONARDO®
Page 8 of 70
2.2
Contraindications
No contraindications are currently known for the LEONARDO® laser when used as intended.
2.3
Side effects
Burning of the target tissue may occur if the intensity of the laser is set too high. Swelling, bleeding or fever may occur as a result of improper use of the laser.
Rev.: F / 26.02.2014
User Manual: LEONARDO®
Page 9 of 70
3
Description of the device
3.1
Controls and connections
[1]
Screen
[2]
Emergency stop button
[3]
Laser outlet
[4]
Laser warning light
[5]
Standby button
Figure 1: Front of the device
[6]
Power connection
[7]
Footswitch port
[8]
Door interlock
[9]
On-off switch
[10]
Service Port
Figure 2: Rear of the device
Note: Detailed descriptions of labeling are provided in section 0. Rev.: F / 26.02.2014
User Manual: LEONARDO®
Page 10 of 70
3.2 Description of controls, displays, connections 3.2.1 Controls
Figure 3: Subdivision of the operating interface
1. 2. 3. 4. 5. 6.
Info area Laser status button Status messages Treatment mode options Function options Main area
Screen [1]
Key fields on the screen [1]
Rev.: F / 26.02.2014
The display is subdivided into four main key fields and shows: Status of the device (Enable/Standby) Treatment mode (Continuous mode (Continuous Wave CW), Pulse mode and additional programs (optional)) Treatment parameters (duration, energy, pulse parameter) Power settings Fiber information Aiming beam settings Settings can be changed via the key fields and the cursor on the screen screen. Switch between enable and standby status Change treatment mode (Continuous mode, Pulse mode and additional programs (optional)) Select the parameter to be configured Aiming beam (Off, On, CW mode or Pulse mode with intensity setting) Save changed treatment modes Select function
User Manual: LEONARDO®
Page 11 of 70
Emergency stop button [2] Laser standby [5]
Key fields next to the screen Pressing the emergency stop button interrupts the power supply of the laser diodes and averts an emission of laser radiation. Only press the laser stop button in case of emergency. Pressing this button switches the laser to standby mode, from which it can be reactivated. To enter standby mode, the on-off switch on the rear of the device must be in the On position. Selecting a function Treatment modes Here you can select and set the treatment mode.
Info screen Instructions for use and additional information about using lasers can be retrieved and read on screen.
Video area Treatment videos provided by biolitec biomedical technology GmbH can be viewed here (coming soon).
Online shop for accessories (coming soon).
User settings Device version number, language version, aiming beam settings.
Feature settings These settings are only to be used by the service staff of CeramOptec or other authorized personnel.
Rev.: F / 26.02.2014
User Manual: LEONARDO®
Page 12 of 70
Selecting treatment modes Continuous mode (Continuous Wave mode, CW)
Pulse mode
ELVeS® signal mode
ELVeS® segment mode
Derma mode (for LEONARDO® Dual 45 only)
Header PILOT ON / OFF The pilot beam can turned on or off and indicates if it’s turned on. Furthermore the color of the pilot beam is displayed. PILOT beam settings Pilotbeam color, intensity and operatinn mode (CW/Pulse) can be adjusted SYSTEM STATUS In standby mode, the power connection is plugged in and the main switch is in the On position. The device does not emit any laser radiation in the standby mode even if the footswitch is pressed. Pressing this button switches the device from standby mode to ready mode. If the status is switched from standby to ready, the laser device prepares for use. Duration of the preparing phase is about 3 seconds.
Indication that the laser is now ready. The laser device now emits laser radiation as soon as the footswitch is pressed. By pressing this button, the status switches from ready to standby.
Laser warning signal [4]
Rev.: F / 26.02.2014
When laser radiation is emitted, the LED warning light comes on and a warning signal is sounded.
User Manual: LEONARDO®
Page 13 of 70
Side of the device Laser outlet [3]
Application fibers
Power connection [6]
Footswitch [7]
Door interlock [8]
On-off switch [9]
Sevice Port [10]
Rev.: F / 26.02.2014
Fiber coupling for connecting application fibers. If the fibers are not fully tightened or if they loosen/detach during treatment, the error message "No fiber connected" is displayed. If this error message occurs, the laser switches to standby and can no longer be activated. Caution: Only use approved application systems, fibers, and medical probes (see section 6). The use of non-approved systems may damage the unit and result in dangerous exposure to radiation. Noncompliance invalidates the warranty. LEONARDO® is compatible with various application fibers. For the minimum fiber core diameters permitted and possible power restrictions, refer to the specifications for the different models in section 9.1. The use of application fibers with a smaller fiber diameter or lower quality and the use of non-approved systems may damage the unit and result in dangerous exposure to laser radiation. Noncompliance invalidates the warranty. Rear of the device The laser may only be used in the standard power supply configuration. Proceed as described in section 4.1. Examine the cable for visible damage prior to connecting the plug to the power supply. If the cable is damaged, do not use the cable or replace it. The footswitch must be connected to the device using the plug connector at the rear of the device. Treatment starts when you press the footswitch. The laser emits radiation for the preselected time. Treatment can be interrupted at any time by releasing the footswitch. The laser emits radiation only as long as the footswitch is pressed. Laser emission continues once you press the footswitch again. A door interlock can be connected using the port on the rear of the device. The device can only be operated if the door interlock is closed or if the blanking plug supplied is connected to the port. To ensure a correct connection, refer to section 4.1.2. Caution: You must ensure that no voltage is connected to this port. For setting the laser system into operating state, press the switch on the rear of the device. If the switch is in the On position, it is possible to switch the laser to standby mode and back by pressing the standby button (see page 10 and 12 [5]). Using the service port is reserved for persons who are authorized by CeramOptec.
User Manual: LEONARDO®
Page 14 of 70
4
Operation
4.1
Preparing the laser unit
Check the device for any obvious signs of damage after unpacking the laser. Do not use the device if any damage is detected. Before starting the laser, connect the footswitch cable to the footswitch port on the rear of the device [7]. The red markings on the plug and the socket must line up. Then connect the cable of the door interlock or the interlock connector with the port on the rear of the device [8]. Connect the power cable [6]. You must use a power cable with Earth Ground (included in delivery) and a power outlet with an approved earth ground. After that insert the application fiber approved by the manufacturer together with its plug (figure 4) into the fiber coupling of the laser outlet [3] on the side of the device. When the fiber is connected correctly, the message "No fiber connected" disappears on the display. The device is equipped with a system for automatic recognition of application fibers. If an application fiber has coding, information about the fiber is read from the coding Figure 4: Application fiber once the fiber is connected to the device. connection
If the message "Not a valid biolitec® fiber" appears, this means that the device did not recognize the coding on the fiber or identified the fiber as unsuitable for the laser unit based on the data defined for the device. Only approved application fibers may be used with this device (see section 6). Please contact our service department if further information is required. Caution: All operating steps after preparation of the laser unit may only be performed when all persons in the room are wearing appropriate laser safety goggles. Use of the operating controls or configuration options of the LEONARDO® in a manner other than that described here in the instructions manual may result in radiation hazards. Ensure that the treatment room is clearly identified and that only persons wearing the appropriate laser protective eyewear may enter the room during treatment. If this is not possible, you must install a door switch as per section 4.1.2 that switches off the laser output when the door is opened. Note that switching off the laser during treatment may result in unintended complications.
Rev.: F / 26.02.2014
User Manual: LEONARDO®
Page 15 of 70
4.1.1 Footswitch
Figure 5: Foldable footswitch
The footswitch is included in the delivery and is to be attached to the footswitch connector on the rear of the device. Warning: Do not touch the pins of the footswitch connector. Turn the device OFF before connecting or disconnecting the footswitch.
4.1.2 Door interlock connection scheme Connect the door interlock as shown in figure 6. A door interlock cable can be requested free of charge from the manufacturer. For additional connections, see also section 4.1 (Preparing the laser unit). +5V R IC
electrically separated
5V 5mA
signal lamp with separate electric circuit
S1 2 PIN Interlock
S2
LASER
S3
for example: S1: door S2: window S3: …
Figure 6: Door interlock connection scheme
Warning: Do not touch the pins of the door interlock connector. Turn the device OFF before connecting or disconnecting the door interlock connector. Recommendation: It is recomm mended that all staff receive an explanation and training in ESD procedures. The ESD precautions procedure training shall include at least the safe connection and disconnection of the footswitch and door interlock connectors.
Rev.: F / 26.02.2014
User Manual: LEONARDO®
Page 16 of 70
4.2
Switching on the device
To switch on the device, use the switch switc on the rear of the device. The laser activates and enters standby mode. Now you can switch the device on and off by pressing the touch surface (biolitec® logo). During power-up up the boot image and the first instructions appear on the start screen. After initialization, nitialization, the login screen for entering the user code pops up. This user code must be entered everytime the device is switched on.
Figure 7: Start screen 1
Figure 8: Start screen 2 (Selecting Selecting the language the first time the device is switched on) on
The language used by the user interface needs to be entered the first time the device is switched on. This setting is requested just once, and only if the device does not have a saved preset language.
Rev.: F / 26.02.2014
User Manual: LEONARDO®
Page 17 of 70
Figure 9: Login screen. The device activates after entering the number code
The access code is entered using the numeric keypad. By pressing OK the code is being submitted and the device switches to standby mode. The code will be provided upon delivery of the laser and the related introduction by a service assistant or by personnel personne authorized by CeramOptec.
Figure 10: An example of the monitor display when CW mode was the last active mode (for dualdual wavelength devices)
The monitor will display the following for single-wavelength single devices:
Rev.: F / 26.02.2014
User Manual: LEONARDO®
Page 18 of 70
Figure 11:: An example of the monitor display when CW mode was the last active mode (for single-wavelength devices)
4.3 Settings and parameters for all treatments 4.3.1 Setting language The language the user would like can be selected by pressing pressing the respective language button. This setting can be saved by tapping the save button on the control panel.
Figure 12: Menu item: language setting
Rev.: F / 26.02.2014
User Manual: LEONARDO®
Page 19 of 70
4.3.2 Configuring the aiming beam The aiming beam follows the same path as the therapeutic beam, so it also shows which area is receiving therapeutic radiation. The device starts with the aiming beam switched off. You have to press the PILOT button to switch on the aiming beam. The screen will then display whether the aiming beam is switched on and what color it is. The color of the aiming beam can be selected using the PILOT box in the top bar.
Figure 13: Menu item: setting the aiming beam
You can configure a number of different settings for the aiming beam (see illustration 14). There are options for a continuously active aiming beam and a flashing aiming beam, or it can be deactivated. Moreover, it is possible to interrupt the aiming beam as soon as the therapeutic beam is active. To change the intensity of the aiming beam, move the green bar or press the -/+ button. A numeric display also indicates the intensity selected. The operation panel can be used to set the aiming beam to green or red.
Rev.: F / 26.02.2014
User Manual: LEONARDO®
Page 20 of 70