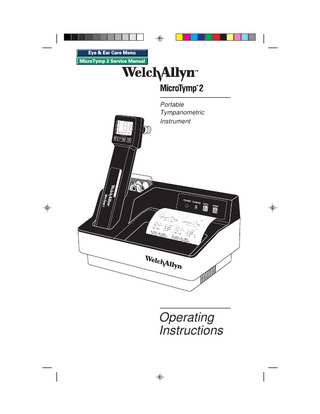
Operating Instructions
72 Pages
Preview
Page 1
Eye & Ear Care Menu
2
-400
R
GR A
1 GR C
0 -200
0
PRESSURE
- DaPa
TEST
- cc
1.0
0.5
Portable Tympanometric Instrument +200 Vea
Ya - mmh
o
MicroTymp 2 Service Manual
200
L
POWER CHAR GE
FEED
Operating Instructions
Acknowledgments Welch Allyn gratefully acknowledges the assistance of Robert H. Margolis, Ph.D. of the University of Minnesota for his assistance in preparing the Guide to Tympanometry and Glossary sections of this manual. Trademarks Welch Allyn and MicroTymp are registered trademarks of Welch Allyn, Inc. in the United States and other countries. Patents MicroTymp – U.S. Patent Number 4,688,582 Conductive Path ESD Shield – U.S. Patent Number 5,383,097
Contents MicroTymp 2 – Introduction MicroTymp 2 Handle Components ... 2 MicroTymp 2 Printer/Charger Components ... 3 Preparing to Use the MicroTymp 2 Handle and Printer/Charger ... 3 Setting up the MicroTymp 2 Handle and Printer/Charger ... 4 MicroTymp 2 – Completing a Test Obtaining a Tympanogram ... 5 Selecting a Probe Tip ... 5 Testing ... 6 Storing and Erasing Data ... 7 Displaying Memory Contents ... 8 Erasing Memory Contents ... 8 Understanding the Liquid Crystal Display (LCD) and Its Messages ... 8 Gradient (Width) Measurements ... 8 Printing Memory Contents ... 15 MicroTymp 2 Printout Formats ... 16 Description of Formats ... 16 Selecting Printout Formats ... 20 Changing from Manual to Automatic Printout ...20 Changing Printout Format ... 21 Printer Function Messages ... 23 Printer Service Codes ... 24 Appendix A – Guide to Tympanometry Basic Principles of Tympanometry ... A-25 Tympanogram Characteristics ... A-26 How the MicroTymp 2 Instrument Works ... A-27 Normative Values for the MicroTymp 2 ... A-28 Interpreting Tympanogram Results ... A-29 Obtaining a Valid Tympanogram ... A-31 Tympanometry in Young Infants ... A-31 Conditions Which Cause Too Much Artifact ... A-31 Conditions Which Artificially Flatten the Tympanogram ... A-32 The Normal Ear ... A-33 Low-Admittance Pathologies ... A-34 Tympanic Membrane Abnormalities ... A-36 Conditions Which Cause Negative Middle Ear Pressure ... A-37 Conditions Which Cause Positive Middle Ear Pressure ... A-37 Appendix B – Guidelines for Screening for Hearing Impairments and Middle Ear Disorders ... B-39 Recommended Screening Protocol ... B-41 Audiological or Medical Referral ... B-42
Appendix C – Maintaining the MicroTymp 2 Equipment The MicroTymp 2 Battery ... C-43 Recharging the Battery ... C-46 Recycling the Battery ... C-47 Paper Replacement ... C-48 Cleaning, Disinfection and Sterilization ... C-50 Cleaning the MicroTymp 2 Handle ... C-50 Printer/Charger Cleaning ... C-50 Disinfection and Sterilization of the Probe Tips ... C-50 Appendix D – Functional Checks of the MicroTymp 2 Handle and Printer/Charger Functional Checks of the MicroTymp 2 Handle ... D-51 Troubleshooting the MicroTymp 2 Handle ... D-53 Functional Checks of the Printer/Charger ... D-53 Appendix E – Service and Warranty Information Service ... E-55 Repair ... E-55 Recalibration ... E-55 Warranty ... E-56 MicroTymp 2 Instrument ... E-56 MicroTymp 2 Rechargeable Battery ... E-56 Appendix F – Technical Specifications ... F-57 Appendix G – MicroTymp 2 Replacement Parts and Accessories . G-61 References ... 63 Glossary ... 65
MicroTymp 2 – Introduction Thank you for purchasing the Welch Allyn MicroTymp 2 Portable Tympanometric Instrument. The Welch Allyn MicroTymp 2 provides portable tympanometry which is automatic, easy to use, and offers the following features: • Measures middle ear function in as little as one second • Displays results as they happen • Stores data from two ears before printing • Prints out hardcopy automatically or on demand in five seconds With MicroTymp 2 tympanometry, objective, printed documentation of otitis media with effusion and other middle ear disorders is quickly and easily obtained. This results in more thorough diagnoses, and more effective monitoring, treatment, parent consultation, and referrals. Data stored in the memory of the MicroTymp 2 Handle may be printed using the Printer/Charger. The Printer/Charger reads the information from the Handle and quietly prints out tympanograms from two ears with test results in five seconds. The MicroTymp 2 Printer/Charger also charges the rechargeable battery in the MicroTymp 2 Handle. This manual describes how to operate and maintain the MicroTymp 2 Handle and Printer/Charger. Please follow these instructions to ensure many years of accurate and reliable service. For additional information on the science of tympanometry, refer to “A Guide to Tympanometry” (Appendix A, page A-25).
1
2 GR A
1.0
1 0.5
GR C
+200 Vea - cc
Tip
Ya - mmho
MicroTymp 2 Handle Components
0 -400
-200
0
200
Liquid Crystal Display (LCD)
PRESSURE - daPa
Probe R
TEST
L
Left Memory Button Test Button Right Memory Button
Tip Ejector
Battery Cover
Charging Contacts
Infrared Data Transfer Window
Figure 1A
2
MicroTymp 2 Printer/Charger Components CHARGE Indicator Tip Box
FEED Button PRINT Button
POWER Indicator
POWER CHARGE FEED
IEC Power Cord Receptacle
Charging Well for MicroTymp 2
Printer/Charger Switches 1
TM
2
3
4
OFF
Paper Slot
Paper Access Cover
Power Cord
To IEC Power Cord Receptacle
To Power Receptacle
Figure 1B
Preparing to Use the MicroTymp 2 Handle and Printer/Charger The following is a list of important facts to note before using the MicroTymp 2. • Please complete and return the warranty registration card. It validates the warranty, and allows Welch Allyn to communicate recalibration notices and software changes.
3
• If the MicroTymp 2 set has not been stored at room temperature, allow 45 minutes for it to return to operating temperature range (15-35˚C or 59-95˚F) before using. • Do not store either the MicroTymp 2 Handle or Printer/Charger at temperatures which exceed 66˚C (150˚F). Continual exposure to extremely high temperatures can permanently damage components.
!
Refer to Operating Instructions manual. DANGER: Explosion risk if Printer/Charger is used with flammable anesthetics. CAUTION: Disassembly of the Printer/Charger presents a possible electrical shock hazard. Refer all servicing to Welch Allyn or a Welch Allyn authorized service representative listed on page E-55.
!
Disassembly of the MicroTymp 2 Handle or Printer/Charger beyond the extent described in this manual will void the warranty. Refer all servicing to Welch Allyn or a Welch Allyn authorized service representative listed on page E-55.
!
Disconnect from the mains via the appliance inlet.
!
Charge only MicroTymp 2 Handle (#23640), MicroTymp Handle (#23600), or AudioScope 3 (#23300) in the MicroTymp 2 Printer/Charger.
!
BATTERY REPLACEMENT: Replace with Welch Allyn model #72900 battery only. NOTE: The MicroTymp 2 Printer/Charger will charge and print data from the original MicroTymp Handle. However, the original MicroTymp Printer/Charger will neither charge nor print data from the MicroTymp 2 Handle. A special AudioScope Charging Stand (#71126) is available for charging only.
Setting up the MicroTymp 2 Handle and Printer/Charger • Install the MicroTymp 2 rechargeable battery in the Handle by following the instructions found on page C-43 of this manual. • Place the Printer/Charger on a flat, horizontal surface. • Plug the power cord into the receptacle in the rear of the Printer/ Charger. Then connect the power cord to a receptacle of proper voltage, indicator will illuminate frequency, and plug type. The green POWER to indicate that the Printer/Charger is operating properly. See Figure 1A and 1B (pages 2 and 3).
4
Obtaining a Tympanogram Selecting a Probe Tip 1.
After examining the subject’s ear canal opening, select a tip which is large enough to seal the entrance of the ear canal. See Figure 2. To change tips, either pull the tip off by hand or slide the tip ejector towards the tip. NOTE: Tips are not intended to be deeply inserted into the ear canal. Using an improper tip size causes leaks, and will make it difficult to complete a test.
Pinna Seal External Ear Canal Tympanic Membrane
Tip Probe Tip Ejector
Figure 2 2.
Push the tip onto the probe, making sure that the tip is fully seated.
5
MicroTymp 2 Completing a Test
MicroTymp 2 – Completing a Test
Testing 3.
Turn on the MicroTymp 2 Handle by pressing the TEST button below the Liquid Crystal Display (LCD). The word “OPEN” appears on the LCD. Figure 3 illustrates the TEST button and the OPEN message. TEST
1.0
OP
0 -20
0
PR
ES
SU
RE
TE
ST
2
GR A
1 GR C
0 -
Da
Pa
20
0
-
EN
-40
R
00 ccVea
Ya
0.5
0
+2
-
mm
ho
TEST
L
Figure 3 NOTE: The MicroTymp 2 automatically turns off 15 seconds after the last test or activation of any button.
Figure 4
Figure 5
4.
Grasp the subject’s pinna. Pull gently back to straighten the child’s ear canal (or up and back for adults). See Figure 4.
5.
While maintaining tension on the pinna, press the tip firmly against the ear canal opening. See Figure 5. Point the tip straight into the ear canal for adults and slightly anteriorly for children.
6
If a seal is not achieved, the LCD will display a LEAK, BLOCK, or OPEN message. Reposition the instrument to attempt another test. 6.
Once a seal is achieved, the TEST message appears on the LCD, followed by the volume indication on the +200 Vea scale. Data points are then displayed from right to left across the LCD as the test progresses. If the BLOCK, LEAK, or OPEN messages appear during the test, reposition the tip to restart the test.
0 -400
GR C -200
0
1 0.5 0 -400
200
PRESSURE - daPa
R
TEST
2 GR A
1.0
GR C -200
0
+200 Vea - cc
1 0.5
Ya - mmho
2 GR A
1.0
+200 Vea - cc
Ya - mmho
The test is complete when the last data point is displayed. Figure 6A illustrates the execution of a complete test (approximately 1.8 seconds). If patient or instrument movement causes a leak beyond -100 daPa, the test will be stopped (approximately 1.0 seconds), but the data will be saved. See Figure 6B.
200
PRESSURE - daPa
L
R
Figure 6A
TEST
L
Figure 6B
Storing and Erasing Data 7.
To store the results of the test, press the button which matches the tested ear, as illustrated in Figure 7.
7
MicroTymp 2 Completing a Test
NOTE: Due to changes in air pressure during a test, the subject will feel slight pressure in the ear canal. During the brief seconds when tympanometric measurements are made, it is important that the practitioner’s hand is steady, and that the subject does not talk, yawn, chew gum, cry, or make any other similar movements.
The memory buttons are labeled for the right ear and L for the left ear. When test results are stored in memory, the RIGHT STORE or LEFT STORE message (see Figure 7A) appears momentarily on the LCD. Then the tympanogram which has been stored reappears along with the or left L symbol (see Figure 7B) to indicate the contents of right that memory. R
2 GR A
1.0
1 0.5
GR C
+200 Vea - cc
Ya - mmho
R
0 -400
-200
0
200
PRESSURE - daPa
1 0.5
GR C
0 -400
1 0.5
GR C
0 -200
0
200
PRESSURE - daPa
Figure 7
2 GR A
1.0
+200 Vea - cc
1.0
Ya - mmho
2 GR A
L
Ya - mmho
TEST
+200 Vea - cc
L
R
Figure 7A
-400
-200
0
200
PRESSURE - daPa
Figure 7B
Displaying Memory Contents Information stored in memory may be recalled at any time by depressing the appropriate memory button.
Erasing Memory Contents There are two ways to erase memory contents: • When a test is stored, the previous test is automatically erased. or left L memory button for more than • Depressing either the right three seconds erases that memory. R
Understanding the Liquid Crystal Display (LCD) and Its Messages The following messages may be displayed on the LCD during MicroTymp 2 Handle operation:
Gradient (Width) Measurements When a tympanometric tracing is complete, the MicroTymp 2 measures the gradient or width of the tympanogram. If the gradient is abnormal, an for the adult’s ear (greater than 10 asterisk will appear on the LCD under GR A years of age), or GR for the child’s ear (10 years of age or younger). For more C information, see Appendix A, “Guidelines for Tympanometry”, and Appendix B, “Guidelines for Screening”.
8
MicroTymp 2 Completing a Test
LIQUID CRYSTAL DISPLAY Normal Static Admittance and TPP (Children)
2 GR A
1.0
1 0.5
GR C
+200 Vea - cc
Admittance Axis
Ya - mmho
Normal Static Admittance and TPP (Adults)
Gradient (Width) Adult Gradient (Width) Child
0 -400
-200
0
200
PRESSURE - daPa
Pressure Axis
Figure 8 A sample of the Liquid Crystal Display is shown in Figure 8.
2 GR A
1.0
1 0.5
GR C
+200 Vea - cc
Ya - mmho
OPEN
0 -400
-200
0
200
PRESSURE - daPa
Figure 9 The test has not begun since a valid ear cavity has not been detected. The ear canal volume exceeds 2.5 cc. Possible causes: • instrument is not in an ear • probe tip is not completely sealed in an ear • instrument is used on perforated tympanic membrane, an ear with patent tympanostomy tubes, or an extremely large canal (> 2.5 cc).
9
2 GR A
1.0
1 0.5
GR C
+200 Vea - cc
Ya - mmho
TEST
0 -400
-200
0
200
PRESSURE - daPa
Figure 10 The TEST message indicates that the test has started. Immediately following this message, test data will begin to appear.
2 GR A
1.0
1 0.5 0 -400
GR C -200
0
+200 Vea - cc
Ya - mmho
BLOCK
200
PRESSURE - daPa
Figure 11 The test cannot continue since the measured admittance is less than 0.2 mmho. Possible causes: • probe tip is lodged against canal wall • ear canal occluded • collapsed ear canal • extremely small ear or tortuous canal • probe tip is clogged with cerumen Possible solutions: • reposition the probe tip • perform otoscopy to check for occlusion • remove cerumen from probe tip
10
MicroTymp 2 Completing a Test
2 GR A
1.0
1 0.5
GR C
0 -400
-200
0
+200 Vea - cc
Ya - mmho
LEAK
200
PRESSURE - daPa
Figure 12 The test cannot proceed since desired pressures within the ear have not been achieved. Possible causes: • probe tip is not completely sealed in the ear canal • excessive movement of patient or practitioner • probe tip dislodged during a test Possible solutions: • reposition probe tip • patient and practitioner must remain still • use a different size probe tip • increase pressure against the ear If a leak condition occurs after -100 daPa pressure is reached, results will remain on the display. If an identifiable peak is displayed, the test need not be repeated. If no peak can be identified, repeat the test and try repositioning the tip, using a different size tip, or increasing the pressure against the ear canal opening.
GR C
0 -400
-200
0
1 0.5 0 -400
200
2 GR A
1.0
GR C -200
0
PRESSURE - daPa
PRESSURE - daPa
Figure 13A
Figure 13B
+200 Vea - cc
1 0.5
Ya - mmho
2 GR A
1.0
+200 Vea - cc
Ya - mmho
RIGHT STORE/LEFT STORE
200
Test results have been stored in the designated memory location. Immediately following this message, the newly-stored tympanogram reappears or left L symbol. For instructions on storing and along with the right erasing data, see page 7. R
11
0 -400
GR C
2 GR A
1.0
1 0.5
GR C
+200 Vea - cc
1 0.5
Ya - mmho
2 GR A
1.0
+200 Vea - cc
Ya - mmho
RIGHT CLEAR/LEFT CLEAR
0
-200
0
-400
200
-200
0
200
PRESSURE - daPa
PRESSURE - daPa
Figure 14A
Figure 14B
The designated right or left memory location contains no data. Either no data has been stored, or previously stored data has been erased. See page 7 for information on storing and erasing data. R
L
2 GR A
1.0
1 0.5 0 -400
GR C -200
0
+200 Vea - cc
Ya - mmho
LOW BATT(ery)
200
PRESSURE - daPa
Figure 15 The LOW BATT message indicates that the battery needs to be recharged. All buttons are disabled to prevent inaccurate results due to inadequate battery voltage. Normal operation may be restored by recharging the battery or replacing the battery with a charged battery. Stored data is not lost when the battery is removed. NOTE: The battery must be removed if the MicroTymp 2 Handle is to be stored or placed anywhere other than in the powered Printer/Charger for more than one month. Failure to do this can result in damage to the MicroTymp 2 Handle. See Appendix C, “Maintaining the MicroTymp 2 Equipment,” for instructions on removing and recharging the battery.
12
MicroTymp 2 Completing a Test
2 GR A
1.0
1 0.5 0 -400
GR C -200
0
+200 Vea - cc
Ya - mmho
RANGE ERROR
200
PRESSURE - daPa
Figure 16 The RANGE ERROR message indicates that a large pressure change occurred during a test. If this message appears, press the TEST button and start the test again. TEST
2 GR A
1.0
1 0.5 0 -400
GR C -200
0
+200 Vea - cc
Ya - mmho
ZERO ERROR
200
PRESSURE - daPa
Figure 17 The ZERO ERROR message indicates that a large pressure change occurred during automatic pressure compensation at the start of a test. If this message button and start the test again. appears, press the TEST TEST
13
2 GR A
1.0
1 0.5 0 -400
GR C -200
0
+200 Vea - cc
Ya - mmho
NEEDS CAL(ibration)
200
PRESSURE - daPa
Figure 18 Something has caused the MicroTymp 2 to fail an internal calibration test. All MicroTymp 2 buttons have been disabled because the instrument needs to be returned to a Welch Allyn service location for calibration. Any results already stored in the handle may be printed. Annual recalibration is recommended to insure instrument accuracy. See Appendix E, “Service and Warranty Information,” for details on service locations and recalibration.
2 GR A
1.0
1 0.5 0 -400
GR C -200
0
+200 Vea - cc
Ya - mmho
DATA XFER(transfer)
200
PRESSURE - daPa
Figure 19 The data stored in the MicroTymp 2 Handle is being transferred to the Printer/Charger.
14
Follow the steps listed below to print tympanometric data stored in the MicroTymp 2 Handle: 1.
Place the MicroTymp 2 Handle in the well with the Liquid Crystal Display (LCD) and buttons facing you. See Figure 20. When the MicroTymp 2 is properly seated in the well, the green CHARGE indicator illuminates.
2.
Press the PRINT
3.
To feed extra paper, press the FEED button. Paper continues to feed as long as the button is depressed.
button.
Figure 20
15
MicroTymp 2 Completing a Test
Printing Memory Contents
4.
To remove the printout, pull the paper forward and to the left or right to tear it along the cutting edge.
5.
To obtain an additional copy of the test results, leave the Handle in the well and press the PRINT button again. Removing the MicroTymp 2 Handle from the well causes the data to be removed from the Printer/ Charger memory. NOTE: • The Printer/Charger has been pre-set at Welch Allyn to print a complete printout as illustrated in Figure 21 on page 17, and to print in manual mode. To change formats or print in automatic mode, follow the instructions on page 20. • If only one ear has been tested, the memory for the other ear should be erased (see page 8) so as not to confound current data with data from a previous patient. • If only one memory location has data, only one result is printed. • Do not use transparent adhesive tape on the printed portions of a printout, as those portions will then fade.
MicroTymp 2 Printout Formats Description of Formats A complete tympanometric printout is shown in Figure 21. The printout is divided into three sections: tympanogram, data, and interpretive messages. Following is a detailed account of the information presented in each of these sections. For instructions on changing the format of the printout, see page 20.
16