Operating Instructions
50 Pages
Preview
Page 1
Eye & Ear Care Menu MicroTymp Service Manual
vi!K
Welch Allyn
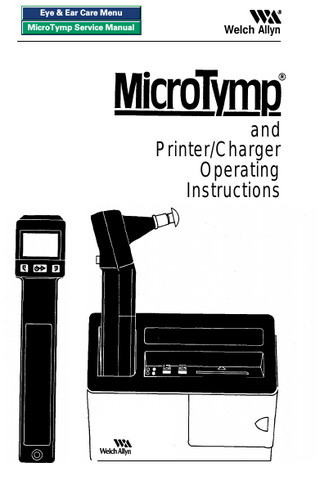
MicroTymd and Printer/Charger Operating Instructions
WA
Welch Allyn
WiN
Welch Allyn
Thank you for purchasing the Welch Allyn MicroTymp. The operating and maintenance instructions found in this manual should be followed to ensure many years of accurate and reliable service. Please read these instructions thoroughly before using your new MicroTymp. C o n t e n t s Page No. Introduction to Tympanometry ... 1 MicroTymp Parts... 4 Operation... 5 DisplaySymbols,... 9 Printer/Charger Parts...15 Operation...I 6 QuickCheck .,...18 PaperReplacementt...19 Wall Mounting Instructions ... .2 1 MicroTymp Recharging... 22 Battery Replacement ... .24 Interpretation of Results. ... .26 Guidelines for Screening ... .32 ReplacementParts...3 5 ChargingTransformers... 36 Cleaning and Sterilization ... .37 Repair and Recalibration...39 Glossary...4 0 References... 42 How the MicroTymp Works. ... .43 Technical Specifications ... .44 MicroTymp-U.S. Patent Number 4,688,582
Introduction to Tympanometry Aural acoustic immittance measurements have become an integral component of audiologic and otologic evaluation. One class of aural acoustic immittance measurement, tympanometty, has become routine in the assessment of ear disease. Since the original report of Terkildsen and Thomsen (1959) tympanometry has been used widely by physicians and audiologists as a research tool for studying the effects of ear disease on middle ear function and as a clinical test for detecting medically significant pathology. Recent technological advances provide the capability for the MicroTymp, a low-cost, portable, precision instrument that can be of significant value for determining the need for medical referral, for diagnosis of ear disease, and for monitoring the course of medical/surgical intervention. The Welch Allyn MicroTymp is a single-component aural acoustic admittance meter that records a tympanogram with a 226-Hz probe tone. In order, to properly use the MicroTymp and to interpret the results correctly, the user should be familiar with the basic principles of tympanometry! Acoustic admittance is the ease with which acoustic energy is transferred from one system to another*. If the air in the ear canal is easily set into vibration, the admittance is high. If the air is difficult to set into vibration the admittance of the system is low. The ease or difficulty of setting the air in the ear canal into vibration is determined by the volume of air and the admittance of the middle ear. Tympanometry provides a method of evaluating the physical characteristics of the middle ear by measuring the admittance of the air trapped in the ear canal.
‘For more in depth information see: Margolis, 1981; Margolis and Shanks, 1985; Van Camp et al., 1988. 2Mathematically: Ya = v P where Ya is acoustic admittance, v is volume velocity, and p is sound pressure. The unit of acoustic admittance is the acoustic millimho (mmho).
Tympanometry is the measurement of acoustic admittance as a function of ear canal air pressure. The resulting graph is a tympanogram. Because ear canal air pressure changes the admittance of the middle ear, the admittance of the air in the ear canal changes when the ear is pressurized. Positive or negative pressure, introduced into the sealed ear canal, decreases the admittance of the air in the ear canal by stiffening the eardrum. The effect of air pressure on the acoustic admittance measured in the ear canal is systematically altered by ear disease. Tympanometry is a sensitive indicator of the effects of ear disease on the acoustical/mechanical function of the middle ear. A normal tympanogram is depicted below. Four features of the tympanogram can be used to evaluate the ear under test: @Static admittance (Peak Ya) is a measure of the height of the tympanometric peak. Given appropriate norms, static admittance is a useful indicator of middle ear disease. @Equivalent ear canal volume (+ 200 Vea)* is the admittance value determined with an ear canal air pressure of + 200 daPa (dekapascals). An abnormally high equivalent ear canal volume suggests the presence of a tympanic membrane perforation, or a patent tympanostomy tube. QTympanometric peak pressure (TPP) is the position of the tympanometric peak on the pressure axis. TPP is an imprecise measure of the middle ear pressure. By itself, TPP is not an accurate indicator of middle ear disease. OTympanometric gradient (GR) or tympanometric width is a measure of the width of the tympanometric peak. Defined as the pressure interval required for a 50% reduction of peak eardrum admittance, tympanometric width is a good indicator of the presence of middle ear effusion. 0 I GR = 070 da% 4
2
Parts of the MicroTymp /
Display Memory Buttons
T i p Ejector
1
-
- Start/Run Button
Battery Cover - R e f e r e n c e Label
-
1-
- C h a r g i n g
4
Operating Instructions 1. If the instrument has not been stored at room temperature, allow 45 minutes for instrument to return to operating temperature range (1535OC or 59-95OF). 2. To turn instrument ON, momentarily depress START/RUN (&D) button. The OPEN ( =I ) symbol will flash repeatedly in the center of the screen. The RUN (=s) symbol will flash at the top of the screen. NOTE: The MicroTymp will automatically turn OFF 40 seconds after the last test or activation of any button.
3. Examine the subject’s ear canal opening. Select a tip of adequate size to seal the entrance of the ear canal. Tips are not intended to be inserted within the ear canal. Improper tip size will cause leaks. Secure tip to instrument.
Tympanic Membrane
External Ear Canal
4. Grasp the subject’s pinna. Pull gently up and back to straighten the ear canal (or straight back for children).
5. While maintaining tension on the pinna, press the tip firmly against the ear canal opening. The tip should point straight into the ear canal for adults and slightly anteriorly for children. Inadequate pressure or misalignment will cause LEAK ( = g ) or BLOCK ( z ) errors which prevent the seal necessary to complete a test.
6. Upon achieving a seal, an indication on the +200 Vea scale will appear. Points will then progress from right to left across the display. If BLOCK ( zl~ ), LEAK ( =+ ) or OPEN ( =I ) symbols 6
appear, reposition probe to start again. For further explanation, and in case of other symbols, see Display Symbols (pg. 9) for interpretation.
I.6
0 2w
100
200
-I)
a
+1w
M)
4
1.5
-I
1.0 -1
1.5
0
7. Test is complete when RUN ( =s) symbol disappears, and ON/READY ( <I> ) symbol reappears. Typical test takes approximately 3 seconds. 7
8. To store data for later review or printing: 1. Makesure unit is ON. 2. Match pattern on button with observed ear. 3. Depress appropriate MEMORY (t 3) button. 4. To insure data entry into memory observe memory symbol on screen. CAUTION: Holding the MEMORY button down for more than 3 seconds will cause memory to be erased.
9. To start new test, depress START/RUN (6-D) button. 10. Tips may be removed by hand or by sliding the white tip ejector toward the tio.
1 I. To print results, use Printer/Charger #71130 (pg. 16). 12. To display right ( F ) or left ( 3 ) memory contents, press appropriate memory button. 13. To erase right ( F ) or left ( 3 ) memory contents, depress appropriate memory button continuously for 3 seconds. BLANK MEMORY (-- ) symbol will appear. 14. The MicroTymp will turn OFF automatically 40 seconds after the last test or last actuation of any button. Contents of memory are not lost when the unit turns OFF. 8
Display Symbols The information below may be used as a guide to interpret display symbols. Symbol names are used throughout these instructions to describe the graphic display.
ON/READY The MicroTymp is on and ready for service.
RUN The test is in progress. When test is complete, this symbol is replaced by ON/READY (&s>) symbol. Results may now be stored if desired.
9
MEMORY #l (Patent’s Right Ear) The contents of Memory #l are being displayed on the screen. -
I__
4
2
1
0.
I
MEMORY #2 (Patient’s Left Ear) The contents of Memory #2 are displayed on the screen.
IO
t
1.5
.2
1.e -1 0.5
0%
OVER The admittance measurement (Peak Ya) has exceeded the scale maximum (1.5 mmho). Points which are over the limit are plotted at 0 mmho.
BLOCK The test cannot progress because the measured admittance is less than 0.2 mmho. This can be caused by: probe tip lodged against canal wall ear canal occlusion l collapsed ear canal l extremely small ear Repositioning probe tip will usually alleviate this condition. l
l
11
BLANK MEMORY The memory location indicated does not contain any data.
LEAK The test cannot proceed because desired pressures within the ear have not been achieved. This occurs when: l the tip is not completely sealed in the ear canal. l the tip becomes dislodged during a test. l the ear canal volume is abnormally large ( > 2cc but I 23x; above 2.5~~ the OPEN ( =I ) symbol will appear). To alleviate this condition: l reposition the tip. l use a different tip. l increase pressure against the ear. NOTE: If a leak condition occurs after -100 daPa pressure is reached, the pattern will be displayed with a Save the Data Symbol.
12
SAVE THE DATA Desired pressures were not reached. This happens when the tip becomes dislodged in the ear canal or if there is a very slight leak throughout the test. Though the test has been interrupted, partial results are displayed. A line at 1.4 mmho has been plotted after the leak condition occurred. Provided that an identifiable peak is present, the test need not be repeated. If no peak can be identified, follow instructions for LEAK (=i= ) condition.
OPEN The test has not begun because the total measured admittance (the sum of + 200 Vea and Ya) exceeds 3.5 mmho. This occurs when: the unit is not in an ear. the probe is not completely sealed in an ear. l used on perforated or hypermobile tympanic membrane, an ear with patent tympanostomy tubes, or an extremely large canal. Use of a different tip size may alleviate this condition. See Guidelines for Screening (pg. 32) if condition persists. l
l
13
LOW BATTERY It is necessary to recharge MicroTymp (pg. 22) as battery voltage has fallen below the level required for testing. The START/RUN (bb) button is inoperative. The MEMORY (t 9) buttons may be used and data may be printed.
PRESSURE RANGE ERROR The air pressure in the ear canal when the test began was not correct. The MicroTymp sensed this error. To alleviate this condition, restart MicroTymp. Should this symbol persist, return instrument for servicing (pg. 39). NOTE: Gradient values are computed by the Printer/Charger and will appear at time of printout.
14
Parts of the MicroTymp Printer/Charger Paper Feed Button .I
7 Print Button
Indicator (Green)
Doit
Power Plug 2
Quick Check Window
Quick Check Cavities
15
Printer/Charger Operating Instructions WARNING: NOT FOR USE IN THE PRESENCE OF FLAMMABLE ANESTHETICS. POSSIBLE EXPLOSION HAZARD. Printing To print copies of data stored in MicroTymp: 1. Place Printer/Charger on a flat, horizontal surface or mount on a flat;vertical surface (pg. 21). 2. Connect the power plug to receptacle of proper voltage, frequency and plug type (pg. 46). The green power indicator will become illuminated. 3. Place MicroTymp in the well with the tip pointing away from the cord. When MicroTymp is properly seated, the red charge indicator will become illuminated. Charge indicator may flicker during printing.
ICh3;ye Indicator
I
r------ Print Button
&
/
Power Indicator (Green) Paper Feed Button
a ,
16
4. Depress and hold PRINT ( q ) button momentarily. Once the printer starts, the handle may be removed from the well. The red indicator may flicker during printing. A two-ear print-out takes approximately 40 seconds. CAUTION: Pull paper straight up and to the right toward the back of the unit; pulling too far from side to side or in a downward motion will cause paper to jam.
5. Printed results are an exact copy of information on the MicroTymp display that was stored in memory. If only one memory had data, then only one result will be printed. For a duplicate copy of results, depress PRINT ( q ) button again after first printout is complete. 6. Other Messages: No Handle There was either no MicroTymp in the well or it was not seated properly. Reseat the MicroTymp and ensure that red indicator is illuminated. No Data Both memories were empty. PAPER FEED To feed extra paper, press FEED ( b ) button. Paper will continue to feed as long as the button is depressed. 17
Quick Check The QUICK CHECK provides a complete functional test of the MicroTymp. The QUICK CHECK should be used at least once per month and whenever there is any question regarding MicroTymp operation. This provides rapid assurance that the MicroTymp is working properly. To use the QUICK CHECK: 1. Test .5cc QUICK CHECK cavity as if it were an ear, holding unit carefully to prevent movement. Printer should not be running during the test, and stand should be located on a flat vibration-free surface. Excess noise or vibration during test will cause inaccurate results. 2. Print results for that tracing only (other memory should be empty). 3. Insert results in QUICK CHECK window. 4. Align baseline and +200 Vea axis of the printout with window. 5. The printed value of +200 Vea should fall within the 0.5~~ box on the window. If the printout is outside the box, return MicroTymp for recalibration. Check Window
6. Repeat steps 1-5 , using the 1.9cc QUICK CHECK cavity and box. NOTE: While QUlCK CHECK provides a functional test, it does not replace recalibration. As the altitude above sea /eve/ increases, the admittance of an air filled cavity also increases. Therefore, at elevations above 2,600 feet, results using QUICK CHECK will change as follows: + 200 Vea Reading Change Elevation 1.9cc .5cc + .2cc .occ 2,600 ft. (792 m) + .4cc .occ 5,000 ft. (1,525 m) 18
Paper Replacement Pink strip indicates need for immediate paper replacement. CAUTION: Failure to change paper within 4 printouts after the pink strip appears could result in damage to print mechanism. 1. Remove paper access door by sliding it to the right.
Paper Access Door
2. Remove and discard old roll of paper, but save black plastic spindle.
3. Cut end of new roll squarely and insert black plastic spindle. Torn edge will prevent paper from feeding properly and could cause paper jam.
Discard End