User Manual
36 Pages
Preview
Page 1
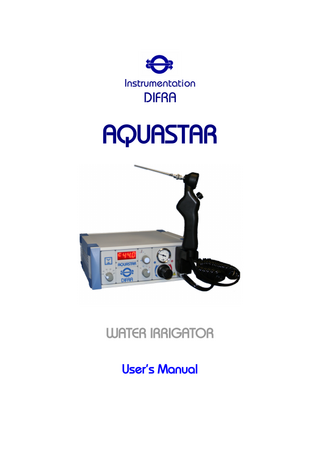
AQUASTAR water irrigator User’s Manual
7-May-2007
Copyright © 2007 Instrumentation DIFRA s.a. All rights reserved. Contents of this publication are subject to change without notice. Companies, names, and data used in examples herein are fictitious unless otherwise noted. No part of this document may be reproduced or transmitted in any form or by any means, electronic or mechanical, for any purpose, unless its entire contents are included. Trademarks are the property of their respective owners. Printed in Belgium.
DI090120/UM/01.1-E
Page 2 of 36
S.A. Instrumentation DIFRA
AQUASTAR water irrigator User’s Manual
7-May-2007
Table of Contents Chapter I... 5 General information... 5 Intended use... 5 Available models... 5 Quality control... 5 Contact information... 6 Safety information... 6 Chapter II... 7 Unpacking instructions... 7 Inspection of the shipping box... 7 Packing list – 115V model... 7 Packing list - 230V model... 7 Inspection of the device... 8 Chapter III... 9 General description... 9 Detailed description... 9 Irrigation temperature settings...9 Irrigation time settings... 9 Water flow settings... 10 Disoft software... 10 Front Panel... 11 Back Panel – 115V model... 12 Back Panel – 230V model... 12 Chapter IV... 13 Installation procedures... 13 Connect the irrigator handle... 13 Install the irrigator handle accessories... 13 Water connections... 14 Power connection – 115V model...15 Power connection – 230V model... 16 Network connections... 17 Device positioning... 17 Check the water connections... 17 Chapter V... 18 Basic instructions... 18 Turn on/off the device... 18 Adjust the display brightness... 18 Select the irrigation temperature... 19 Select the irrigation time... 19 Add the irrigation tip... 19 Perform the irrigation... 20 Safety measures... 21 Maintenance and service... 22 Advanced instructions... 23 DI090120/UM/01-E
Page 3 of 36
S.A. Instrumentation DIFRA
AQUASTAR water irrigator User’s Manual
7-May-2007
Change the preset temperatures... 23 Change the preset time interval...24 Change the preset water pressure... 25 Chapter VI... 26 Warranty and service... 26 Limited warranty... 26 Support and service... 26 Repair/replacement policy... 27 Chapter VII... 28 Replacement parts... 28 Chapter VIII... 29 Appendix... 29 Technical specifications... 29 Service and product evaluation questionnaire... 30 List of figures... 31 List of tables... 31 Certification... 32
DI090120/UM/01-E
Page 4 of 36
S.A. Instrumentation DIFRA
AQUASTAR water irrigator User’s Manual
7-May-2007
Chapter I General information You should carefully read this User’s Manual. This User’s Manual contains important notes on how to operate your AQUASTAR water irrigator safely, correctly and effectively. It is intended not only for first time users, but also as a daily reference manual. Familiarizing yourself with the instructions contained in this manual will help you avoid malfunctions, reduce down time and repair costs, and operate the device safely. For these reasons, keep this User’s Manual nearby the AQUASTAR water irrigator at all times. Following the recommended regular maintenance and yearly service will ensure the correct performance of the AQUASTAR water irrigator. Other than regular cleaning, all maintenance and repair work must be carried out only by expert personnel authorized by Instrumentation DIFRA.
Intended use The AQUASTAR water irrigator is a medical device manufactured in Belgium by Instrumentation DIFRA and it is designed to allow qualified personnel to perform bithermal caloric irrigations of the patient’s vestibular system.
Available models The AQUASTAR water irrigator comes in two different models, depending on the power supply of the destination country. Ref. Description DI 090120-115-I AQUASTAR 2.0 Water Irrigator, 115V DI 090120-230-I AQUASTAR 2.0 Water Irrigator, 230V Table 1 – AQUASTAR Water Irrigator: Available Models
Quality control The AQUASTAR water irrigator bears CE markings 1639 according to the EEC guidelines of the council for medical products 93/42/EEC and meets the basic requirements of this guidelines (refer to Chapter VIII Appendix - Certification for the actual certificate). The quality management system applied at Instrumentation DIFRA has been certified according to international standards ISO 9001-2000 and ISO 13485:2003 (refer to Chapter VIII Appendix - Certification for the actual certificates).
DI090120/UM/01-E
Page 5 of 36
S.A. Instrumentation DIFRA
AQUASTAR water irrigator User’s Manual
7-May-2007
Contact information Refer to the last page of this User’s Manual for the contact information of the AQUASTAR water irrigator manufacturer as well as that of the representative for your country. If there is no representative for your country, contact the manufacturer directly.
Safety information The AQUASTAR water irrigator is produced according to IEC 601/EN60601. The irrigator must be connected only to a power outlet with ground contact that has been properly installed and connected. If used in the EU, the AQUASTAR water irrigator must be subjected to a safetytechnical inspection according to Instrumentation DIFRA instructions. The AQUASTAR water irrigator is designed to be used in supervised operation by qualified personnel who have been properly trained in the operation of the device (IEC 601-1/EN60601-1). The AQUASTAR water irrigator must be installed on a flat and stable supporting surface. The front panel of the AQUASTAR water irrigator must be visible by the operator at all times during operation and within easy reach. The main voltage specified on the AQUASTAR water irrigator label must match the voltage of the power supply system. Before each use, make sure that the AQUASTAR water irrigator is in technically safe and good working conditions. Prior to any irrigation, check the water temperature and pressure. Always switch off the AQUASTAR water irrigator and turn off the water supply when the device is not in use. WARNING! Do not use the AQUASTAR water irrigator in any areas where there is any risk of explosion, such as areas where oxygen is in use.
DI090120/UM/01-E
Page 6 of 36
S.A. Instrumentation DIFRA
AQUASTAR water irrigator User’s Manual
7-May-2007
Chapter II Unpacking instructions Inspection of the shipping box The AQUASTAR water irrigator is shipped in a box specifically designed to guarantee the instrument’s safety during shipment. Please keep the original box and packing material to ship back the AQUASTAR water irrigator for scheduled maintenance or for any necessary service. Please inspect the shipping box for evidence of damage. If there is evident damage to the package, you should immediately advise the carrier and your Instrumentation DIFRA representative (refer to the last page of this User’s Manual for the contact information) of the damage and be sure to keep the package in case it is needed in order to substantiate any claim for damage to its contents. Refer to Chapter VI Warranty for more information.
Packing list – 115V model Quantity 1 1 1 1 1 1
1
Description Part No. AQUASTAR water irrigator DI 090120-115 Power cable IEC60320 C19 15A/125VAC 0380.120 (US market) ؾ” pipe for irrigator water supply X420 TUYAUPLAST ؽ” pipe for irrigator water drainage X420 FLEXIBLE B Water irrigation handle DI 140013 Accessories Set: 1 Needle ADI 090011-I 1 Deflector ADI 090010 1 Silicone tube (10 cm) X420 02x04 S User’s Manual DI090120/UM Table 2 – AQUASTAR Water Irrigator Packing List: 115V Model
Packing list - 230V model Quantity 1 1 1 1 1 1
1
Description Part No. AQUASTAR water irrigator DI 090120-230 Power cable IEC60320 C13 10A/230VAC X016 ALIM ؾ” pipe for irrigator water supply X420 TUYAUPLAST ؽ” pipe for irrigator water drainage X420 FLEXIBLE B Water irrigation handle DI 140013 Accessories Set: 1 Needle ADI 090011-I 1 Deflector ADI 090010 1 Silicone tube (10 cm) X420 02x04 S User’s Manual DI090120/UM Table 3 – AQUASTAR Water Irrigator Packing List: 230V Model
DI090120/UM/01-E
Page 7 of 36
S.A. Instrumentation DIFRA
AQUASTAR water irrigator User’s Manual
7-May-2007
Inspection of the device After opening the shipping box, you should carefully inspect the AQUASTAR water irrigator and all its accessories for evidence of any damage, defect or missing part. If you observe any damage, defect or missing part you should immediately contact the carrier and your Instrumentation DIFRA representative (refer to the last page of this User’s Manual for the contact information). Refer to Chapter VI Warranty for more information.
DI090120/UM/01-E
Page 8 of 36
S.A. Instrumentation DIFRA
AQUASTAR water irrigator User’s Manual
7-May-2007
Chapter III General description The AQUASTAR water irrigator is very simple to use. It is ideally suited for irrigations when water stimulation can safely be used to perform caloric testing. It is designed for caloric stimulation in settings where fresh clean water and proper drainage are available. Its micro-controller based technology makes it very flexible and provides the highest possible accuracy in regulating the temperature of the water media.
Detailed description Irrigation temperature settings The AQUASTAR water irrigator has four different programmable water temperature settings. The desired irrigation water temperature can be easily selected by rotating a temperature selection knob. By default, these temperatures are 27°C, 30°C, 37°C and 44°C. Refer to Chapter V Basic instructions for more information. If different temperatures are desired, each one can be independently programmed from 0°C to 48°C. Refer to Chapter V Advanced instructions for more information. The lowest water temperature that can be obtained is 1°C above the inlet water temperature. Once a temperature is selected, the AQUASTAR water irrigator usually takes up to one minute to warm or cool the water to the desired temperature. The heating/cooling progress can be followed on the digital display showing the current water temperature.
Irrigation time settings The AQUASTAR water irrigator has five different user-selectable irrigation times (20, 30, 40, 50 or 60s). The desired irrigation time can be easily selected by rotating an irrigation time selection knob. Refer to Chapter V Basic instructions for more information. Once the time selection knob is turn on, the irrigation starts automatically when you lift the irrigation handle from its support. When the handle is lifted, the digital display switches from showing the selected water temperature to a timer mode. Nine seconds later, the AQUASTAR water irrigator beeps, signalling the point at which you should begin the irrigation. A second beep signals the end of irrigation after the time interval you have selected. A third and a fourth beep announce the beginning and the end of ocular fixation. When you replace the handle in its support, the timer stops
DI090120/UM/01-E
Page 9 of 36
S.A. Instrumentation DIFRA
AQUASTAR water irrigator User’s Manual
7-May-2007
automatically. Refer to Chapter V Advanced instructions for more information on how to set the length of time of each phase of the irrigation.
Water flow settings The AQUASTAR water irrigator is set at the factory for a water flow of 350ml/min at a pressure of 1,5bar. The water pressure can be adjusted by rotating a pressure selection knob. A locking mechanism on the knob prevents you from accidentally changing the water pressure. The pressure can be set from 0.5bar to 3bar. Refer to Chapter V Advanced instructions for more information on how to set the water pressure.
Disoft software The AQUASTAR water irrigator comes equipped with the connectors for the NAC network that allows it to interface with the DISOFT software (purchased separately) for the caloric tests. Refer to the DISOFT User’s Manual for more information on how to control the irrigator via software.
Figure 1 – Instrumentation DIFRA DISOFT Software Interface: Caloric Testing
DI090120/UM/01-E
Page 10 of 36
S.A. Instrumentation DIFRA
AQUASTAR water irrigator User’s Manual
7-May-2007
Front Panel
D
27.0
B2
Aquastar
P
TB TA
Ma
TC TD
M
R
B1
Ra
Figure 2 – AQUASTAR Water Irrigator Front Panel ID B1 B2 D M Ma
Description Temperature selection knob Irrigation time selection knob Digital display Irrigator handle holder Irrigation water pressure manometer
P
Programming button and knob
R Ra
Pressure regulator Double connector for the irrigator handle Table 4 – AQUASTAR Water Irrigator: Front Panel
DI090120/UM/01-E
Possible values (if applicable) TA, TB, TC, TD OFF, 20, 30, 40, 50 or 60s 4 digits
Time: 0s to 60s Temperature: 0°C to 48°C 0.5bar to 3bar
Page 11 of 36
S.A. Instrumentation DIFRA
AQUASTAR water irrigator User’s Manual
7-May-2007
Back Panel – 115V model
E
A C1
I
C2
P1 Figure 3 – AQUASTAR Water Irrigator Back Panel: 115V Model ID Description A Water supply connector, ؾ” C1 NAC bus connector C2 NAC bus connector E Water discharge connector, ؽ” I Main power switch P1 Receptacle for a IEC 60320 C19 Plug Table 5 – AQUASTAR Water Irrigator Back Panel: 115V Model
Back Panel – 230V model
E
A
I C1
C2
0
1
F
P1 Figure 4 – AQUASTAR Water Irrigator Back Panel: 230V Model ID Description A Water supply connector, ؾ” C1 NAC bus connector C2 NAC bus connector E Water discharge connector, ؽ” F Two fuses (8AT) I Main power switch P1 Receptacle for a IEC 60320 C13 Plug Table 6 – AQUASTAR Water Irrigator Back Panel: 230V Model
DI090120/UM/01-E
Page 12 of 36
S.A. Instrumentation DIFRA
AQUASTAR water irrigator User’s Manual
7-May-2007
Chapter IV Installation procedures The irrigator handle and its accessories are very delicate. Be careful when handling them.
Connect the irrigator handle Connect the irrigator handle to the AQUASTAR water irrigator via the double connector: align the plug on the handle pipes with the connector on the irrigator (indicated by Ra in Figure 2) and gently push until they engage each other (a “click” sound will confirm the connection). When not in use, make sure the irrigator handle rests in its support.
Install the irrigator handle accessories Gently align the irrigator needle with the tip of the irrigator handle and lock it in place by rotating the needle clockwise (approximately half a turn) until you start feeling some resistance. DO NOT OVER-TIGHTEN the needle. Gently align the hole in the deflector with the tip of the irrigator needle and push the deflector towards the irrigator handle until it stops (approximately 13 mm (½”) past the tip of the irrigator needle). Do not drop the irrigator handle. If you do, the handle might break, and such damage is considered misuse and is NOT covered by any warranty.
DI090120/UM/01-E
Page 13 of 36
S.A. Instrumentation DIFRA
AQUASTAR water irrigator User’s Manual
7-May-2007
Water connections Note: some countries require that an anti-reflow/anti-backflow device (indicated by Ar in Figure 5) must be installed between the main water supply and your AQUASTAR water irrigator. If you have any question about whether this requirement is applicable in your country, you should contact your water distribution company. Instrumentation DIFRA also recommends that you install a stop-cock (shutoff) valve (indicated by Ro in Figure 5) between your water supply and your AQUASTAR water irrigator, to allow you to quickly and easily isolate the irrigator from the water supply system.
E
A
0
1
Ro
J2 T
TE
Ar
J1
Figure 5 – AQUASTAR Water Irrigator: Water Connections Use the supplied X420 TUYAUPLAST ؾ” pipe (indicated by T in Figure 5) to connect the AQUASTAR water irrigator to the main cold water supply system (¾” fitting). In order to enable the AQUASTAR to deliver water at 27°C, the maximum input water temperature is 25°C. The pipe is provided with 2 ؾ” standard female connectors (if you need an adapter, they are readily available in most hardware stores). Connect the straight female connector to your main water supply and the L shaped female connector to the AQUASTAR water irrigator inlet connector (indicated by A in Figure 5). Each connector is supplied with a gasket (indicated by J1 and J2 in Figure 5). To prevent any leakage, make sure each gasket is centered in the connector so you do not pinch it while screwing in the connector. NOTE: hand-tighten the connectors, using care not to cross-thread the connections. Use the supplied X420 FLEXIBLE B ؽ” pipe (indicated by TE in Figure 5) to connect the AQUASTAR water irrigator to the drainage water system (½” fitting). The pipe is provided with 2 ؽ” standard female connector connectors (if you need an adapter, they are readily available in most hardware stores). Connect either connector to your drainage water system and the other to the AQUASTAR water irrigator outlet connector (indicated by E in Figure 5). NOTE: hand-tighten the connectors, using care not to crossthread the connections.
DI090120/UM/01-E
Page 14 of 36
S.A. Instrumentation DIFRA
AQUASTAR water irrigator User’s Manual
7-May-2007
Do not over-tighten the water connectors.
DI090120/UM/01-E
Page 15 of 36
S.A. Instrumentation DIFRA
AQUASTAR water irrigator User’s Manual
7-May-2007
Power connection – 115V model
P1
P2
C
Figure 6 – AQUASTAR Water Irrigator Power Connection: 115V Model Before connecting your AQUASTAR water irrigator to the electric power supply, make sure you have a properly operating wall outlet that will supply the correct voltage. The AQUASTAR water irrigator must be connected to a 115V-60Hz wall outlet (indicated by P2 in Figure 7), with ground connector. Fully insert the IEC 60320 C19 female plug of the supplied 0380.120 power cable (indicated by C in Figure 7) into the appropriate socket of the AQUASTAR water irrigator (indicated by P1 in Figure 7) matching the metal contacts of the socket with the slots in the plug. Connect the other end of the power cable to the main power supply outlet. The maximum power consumption of the AQUASTAR water irrigator is 1500W, 15A.
DI090120/UM/01-E
Page 16 of 36
S.A. Instrumentation DIFRA
AQUASTAR water irrigator User’s Manual
7-May-2007
Power connection – 230V model
0
1
P1
P2
C
Figure 7 – AQUASTAR Water Irrigator Power Connection: 230V Model Before connecting your AQUASTAR water irrigator to the electric power supply, make sure you have a properly operating wall outlet that will supply the correct voltage. The AQUASTAR water irrigator must be connected to a 230V-50Hz wall outlet (indicated by P2 in Figure 7), with ground connector. Fully insert the IEC 60320 C13 female plug of the supplied X016 ALIM power cable (indicated by C in Figure 7) into the appropriate socket of the AQUASTAR water irrigator (indicated by P1 in Figure 7), matching the metal contacts of the socket with the slots in the plug as well as the shape of both enclosures. Connect the other end of the power cable to the main power supply outlet. The maximum power consumption of the AQUASTAR water irrigator is 1500W, 8A.
DI090120/UM/01-E
Page 17 of 36
S.A. Instrumentation DIFRA
AQUASTAR water irrigator User’s Manual
7-May-2007
Network connections Refer to the DISOFT User’s Manual for more information on how to connect your AQUASTAR water irrigator to the NAC network. Connect the AQUASTAR water irrigator ONLY to the NAC network using the cables supplied with your NAC interface.
Device positioning The AQUASTAR water irrigator is a standalone device that can be placed on any flat hard surface. Keep the AQUASTAR water irrigator away from any radiators or other heating source. The AQUASTAR water irrigator does not require external cooling while in operation. It is provided with lateral ventilation openings that provide the intake for the air used to cool the device by natural convection while in operation. DO NOT BLOCK the lateral ventilation openings. To help ensure adequate air circulation and ventilation, be sure to keep a minimum of 10 cm (about 4”) of free space on each side of the AQUASTAR water irrigator.
Check the water connections Before the first use as well as periodically, check the water connections for any leakage: Make sure both the supply and drainage pipes are firmly connected at both ends, straight, and without any occlusions preventing the water from flowing Open the stop-cock valve Turn on the AQUASTAR water irrigator, using the power switch (indicated by I in Figures 3 and 4) While the water fills the circuits, check all the water connections and pipes for any leakage In case of leakage, refer to Chapter IV Water connections.
DI090120/UM/01-E
Page 18 of 36
S.A. Instrumentation DIFRA
AQUASTAR water irrigator User’s Manual
7-May-2007
Chapter V Basic instructions WARNING! Do not use the AQUASTAR water irrigator in any areas where there is any risk of explosion, such as areas where oxygen is in use.
D
27.0
B2
Aquastar
P
TB TA
Ma
M
TC TD
B1
Figure 8 – AQUASTAR Water Irrigator Front Panel: Basic Instructions When not in use, ALWAYS switch OFF the AQUASTAR water irrigator and close the stop-cock valve on the water supply.
Turn on/off the device The AQUASTAR water irrigator is turned ON/OFF by means of the power switch located in the back of the device (indicated by I in Figures 3 and 4). Make sure the irrigation time selection knob (indicated by B2 in Figure 8) is in the OFF position when not in use.
Adjust the display brightness Depending on the light inside the examination room, you may have to adjust the brightness of the digital display (indicated by D in Figure 8) to make it easier to read. To adjust the brightness to the desired level: Switch ON the irrigator Turn the programming knob (indicated by P in Figure 8) clockwise to increase the brightness and counterclockwise to decrease it
DI090120/UM/01-E
Page 19 of 36
S.A. Instrumentation DIFRA
AQUASTAR water irrigator User’s Manual
7-May-2007
Select the irrigation temperature Before starting an irrigation, select the desired water temperature: Turn the temperature selection knob (indicated by B1 in Figure 8) to one of its four positions (TA, TB, TC, or TD) Preset temperatures are associated with each position of the knob. In general, TA and TB are used for cold caloric irrigations and TC and TD for warm caloric irrigations. When the AQUASTAR water irrigator is switched ON and you are not programming it, the digital display shows the actual water temperature. Once you have selected the desired irrigation water temperature, you may see the numbers on the digital display change until the water reaches the desired temperature (usually in less than 1 minute). Refer to Table 7 for the default temperature values. Position Default temperature value TA 27.0°C TB 30.0°C TC 37.0°C TD 44.0°C Table 7 – Default Irrigation Temperature
Select the irrigation time Before starting an irrigation, select the desired irrigation duration: Turn the irrigation time selection knob (indicated by B2 in Figure 8) from the OFF position to one of its five positions (20, 30, 40, 50, or 60) Preset irrigation times are associated with each position of the knob: the numbers indicate how many seconds the irrigation will last (respectively 20, 30, 40, 50, and 60s).
Add the irrigation tip Before starting an irrigation: Cut a piece of silicon tube (approximately 10mm (about 3/8”) long) Slide it on the tip of the irrigator needle in front of the deflector ALWAYS dispose of the irrigator tip after each patient to avoid contamination or infections.
DI090120/UM/01-E
Page 20 of 36
S.A. Instrumentation DIFRA
AQUASTAR water irrigator User’s Manual
7-May-2007
Perform the irrigation ALWAYS inspect the ear canal for the presence of cerumen that could impede the flow of water, and for damage to the tympanic membrane. DO NOT USE water caloric stimulation if the tympanic membrane is perforated. With the irrigator switched ON: Check the manometer (indicated by Ma in Figure 8) for the water pressure to make sure it is the desired value Select the irrigation water temperature Select the irrigation time Add the irrigation tip Wait for the water temperature to stabilize (less than 1 minute) Check the digital display (indicated by D in Figure 8) for the water temperature to make sure it is at the desired value Position a water collection basin under the patient’s ear Remove the irrigator handle from its housing (indicated by M in Figure 8) The digital display switches from showing the selected water temperature to a timer mode Insert the irrigator tip into the patient’s ear, being careful not to damage the ear structures After 9s, the AQUASTAR water irrigator beeps, prompting you to start the irrigation Press firmly the button on the irrigator handle to start the water flow After the pre-selected irrigation time has elapsed, a second beep prompts you to end the irrigation Release the button on the irrigator handle to stop the flow of water A third beep announces the beginning of ocular fixation A fourth beep announces the end of ocular fixation When the digital display switches from a timer mode to showing the selected water temperature, the irrigation has been completed Replace the irrigator handle in its support To stop the water flow at any time, just release the button on the irrigator handle. To stop the caloric irrigation at any time, just replace the irrigator handle in its support.
DI090120/UM/01-E
Page 21 of 36
S.A. Instrumentation DIFRA