deSoutter
MULTIDRIVE BC-600, AB-xxx and SB-xxx series Operating Instructions Ver 1.3
Operating Instructions
32 Pages
Preview
Page 1
Operating Instructions
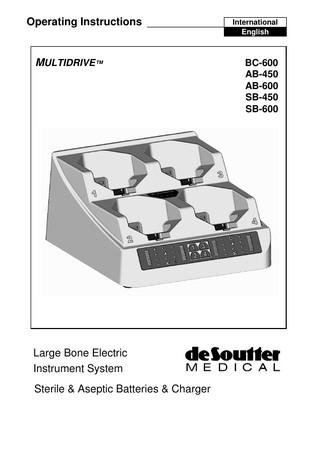
MULTIDRIVE™
Large Bone Electric Instrument System Sterile & Aseptic Batteries & Charger
International English
BC-600 AB-450 AB-600 SB-450 SB-600
DE SOUTTER MEDICAL STERILE & ASEPTIC BATTERIES & CHARGER Index
Page
Section 1: Important Safety Instructions ... 3 The Battery Systems ... 3 General Safety Guidelines... 4 Recommended Duty Cycle ... 4 Section 2: General Instructions ... 5 Product Description ... 5 Reprocessing - Sterilisable Equipment ... 6 Reprocesing – Non-Sterilisable Equipment ... 12 Sterilisation Accessory Part Number Details ... 13 Section 3: Charger Assembly & Operation ... 14 Setting up the Charger ... 14 Charging the Batteries/ Charge Indicator Lights ... 15 Battery Pack Disposal ... 15 Charging Battery Packs ... 16 SB-450 & SB-600 Sterile Battery Pack ... 16 AB-600 Aseptic Battery Pack ... 17 CA-450 Charger Adaptor ... 17 AB-450 Aseptic Battery Pack ... 17 Battery Care Guidance ... 18 Battery Pack Connection ... 19 Battery Pack Removal ... 19 Assembling the AH-610 Aseptic Housing and AB-600 Aseptic Battery Pack ... 20 Assembling the AH-450 Aseptic Housing and AB-450 Aseptic Battery Pack ... 21 Section 4: Technical information ... 24 Part Number Details ... 24 Technical Description ... 24 Battery & Battery Charger Fault Finding ... 25 Explanation of Symbols ... 26 Conditions for Transport & Storage ... 27 Service Information... 27 Repair Information ... 27 Guarantee and Liability... 27 Section 5: EMC Guidance ... 28
3
SECTION 1: IMPORTANT SAFETY INSTRUCTIONS
1.
SAVE THESE INSTRUCTIONS - This manual contains important safety and operating instructions for: Sterile Batteries SB-600 & SB-450; Aseptic Batteries AB-600 & AB-450; Aseptic Battery Housings AH-610 & AH-450; Aseptic Battery Shields AS-610 & AS-450; Charger Adaptor CA450; Battery Charger BC-600.
2.
Do not attempt to use the equipment until all the instructions and cautionary markings on the battery equipment have been studied and understood.
3.
CAUTION - To reduce risk of injury, charge only De Soutter Medical type AB-450, AB-600, SB-450 or SB-600 rechargeable batteries with the BC600 Battery Charger. Other types of batteries may burst causing personal injury and damage.
4.
Failure to follow these instructions may result in serious injury to the patient or operating staff.
5.
Refer also to operating instructions for other parts of the Large Bone Instrument System listed on page 3
The Battery System WARNING! WARNING: WARNING: WARNING: WARNING: WARNING: WARNING: WARNING: WARNING: WARNING: WARNING: WARNING: WARNING: WARNING: WARNING:
The BC-600 Battery Charger must be earthed Connect the charger to a grounded mains circuit only. Do not insert metal objects into the battery pack receptacles Do not charge De Soutter Medical SB-600, SB-450, AB-600 & AB-450 battery packs with other chargers. Do not sterilise the charger. The charger is not intended for use in the vicinity of the patient. Do not immerse the charger or battery packs. Do not expose the Charger to rain or use near water. Do not pull or bend the power cable. Always inspect the cable for damage prior to use. Do not sterilise the aseptic battery packs. Ensure that batteries are at room temperature before charging. Do not allow the fan at the rear of the charger to become obstructed. Follow the aseptic battery loading instructions in order to avoid contamination of the instrument system’s external surfaces. Do not attempt to dismantle, modify or remove any parts of the battery pack or charger. The Charger has been tested for electro-magnetic compatibility. However, if interference occurs that might cause undesirable operation, separate the components by moving further apart and, if possible, connect the mains power cords to separate outlets.
3
General Safety Guidelines Never permit untrained personnel to use this instrument system. Always check that the voltage stated on the identification plate corresponds with the electrical supply. Always check correctly rated fuses are fitted to the battery charger fuse holder. Always inspect all equipment before use. Do not use suspect, damaged or worn equipment. Only clean and sterilise the equipment as directed in these instructions. Do not immerse any part of the equipment in fluids. Always use Stericut or De Soutter Medical approved accessories. Never reuse items marked for single use, risks if reused include: Cross contamination between patients, Bone necrosis due to extra heat generation. Inaccurate cutting
Recommended Duty Cycle In order to reduce the risk of excessive and undesirable temperature rise of the cutting surfaces it is recommended that the instrument be used in short bursts. A usage/cooling ratio of 1 to 4 is recommended with a maximum continuous cutting time of 3 minutes. (i.e. if the tool is used for 1 minute it should be allowed to rest for at least 4 minutes, if it is used for 3 minutes it should be allowed to rest for at least 12 minutes).
4
SECTION 2: GENERAL INSTRUCTIONS Product Description The De Soutter Medical aseptic and sterile battery systems are designed for use with the MDX, KDX, CDX and SDX instrument systems. The batteries are charged using the BC-600 battery charger. The system is intended for use in large bone Orthopaedic and trauma surgery.
The Large Bone Modular Electric Systems consist of: BC-600 Battery Charger and Batteries: The BC-600 Battery Charger and Batteries are used as an alternative to the PS-600 Power Supply and Corded Module PS-600 Power Supply and CM-600 Corded Module: The PS-600 and CM-600 make up the corded power source for the system. The PS-600 is designed to run two handpieces simultaneously. MDX-600 Handpiece: Modular Pistol Grip instrument for use with 600 series attachments KDX/CDX Handpieces: Dedicated saws to complete the 600 series instrument system.
For more detailed information on individual parts of the system please refer to the appropriate user manual. PS-600 Power Supply and Corded Module BC-600 Battery Charger and Batteries MDX, KDX & CDX Handpieces
Ref: 1927 Ref: 1937 Ref: 1947
Mains Supply The battery charger is fitted with an IEC 60320 inlet. For details of suitable mains cordsets to use with this equipment, refer to the Part Number Details at the end of Section 3.
5
Reprocessing - Sterilisable Equipment These reprocessing instructions are suitable for the sterilisable equipment described in this user manual.
Limitations on reprocessing Repeated processing as specified in these instructions has minimal effect on this equipment. Equipment end-of-life is normally determined by wear or damage during use.
Safety Instructions WARNING: never reuse items marked for single-use
. Risks associated with reuse include: • cross contamination between patients • bone necrosis due to extra heat generation • inaccurate cutting. CAUTION: following a wet cleaning process, ensure that this equipment is dried immediately CAUTION: correct internal drying of sterilisable equipment can only be achieved by using a vacuum
steam autoclave with the vacuum assisted drying period activated CAUTION: do not immerse any part of this equipment in fluids except as required by an automatic
washer-disinfector cycle CAUTION: do not exceed temperatures of 140°C CAUTION: do not clean any part of this equipment in an ultrasonic cleaner CAUTION: do not wash or sterilise aseptic batteries, power supplies or battery chargers. Refer to
separate reprocessing instructions. CAUTION: ensure that aseptic battery housings are reprocessed in the open position NOTE: ensure that attachments and handpieces with collet mechanisms are fully open when
reprocessing NOTE: cannulations, blind holes, recesses, and other surfaces which are hard to reach, require
particular attention during reprocessing Detergents and Rinse Aids WARNING: the choice of detergent or rinse aid, and the manner in which they are used, is critical
to sustaining the reliability of the equipment. Failure to follow the instructions given in this user manual may cause premature failure of the equipment and may compromise patient safety. CAUTION: ensure the detergent or rinse aid manufacturer’s guidelines and process parameters (such as, dilution and temperature) are followed CAUTION: ensure the detergent or rinse aid used is suitable for use on anodised aluminium and
the following plastics: PEEK and PPSU CAUTION: never use detergents with a pH value greater than 11.0 NOTE: the use of pH-neutral enzymatic detergents is highly recommended
Point of Use (before reprocessing) Remove excess soil with a disposable cloth or other suitable wipe.
Containment and Transportation It is important that this equipment is reprocessed immediately after use. In order to minimise contamination risks, the handling, collection and transportation of soiled equipment should be strictly controlled. 6
Cleaning and Disinfection Manual Cleaning • Remove all attachments and accessories and wash them separately. • Dispose of single-use accessories in accordance with local guidelines. Manual cleaning should only be carried out where an automatic washer-disinfector is not available, or in order to remove large contaminant deposits. Manual cleaning should be conducted in a dedicated area, by trained personnel who are wearing protective clothing, for example: gloves, a waterproof apron, and goggles or a visor. NOTE: the use of dedicated sinks with temperature controlled water, ideally deionised or distilled, is recommended NOTE: cannulations, blind holes, recesses, and other surfaces which are hard to reach, require particular attention during reprocessing 1. Wash off excess soil with running water (maximum 35°C). NOTE: avoid fluid ingress
2. Prepare a solution of detergent according to the detergent manufacturer’s instructions. 3. Remove all visible traces of contaminant, using suitable nylon brushes to scrub the equipment thoroughly. i) Manually open and close chucks and blade clamps. ii) Ensure any trapped contaminants are removed by flushing through cannulations and other surfaces which are hard to reach. 4. Rinse off all traces of the detergent with deionised or distilled running water (45 - 65°C). 5. Shake off any excess water and dry the surfaces with a lint-free cloth. 6. Visually inspect each item. Verify that all contaminants have been removed in accordance with local reprocessing guidelines. Automatic Cleaning • Remove large contaminant deposits by manual cleaning. • Remove all attachments and accessories and wash them separately. • Dispose of single-use accessories in accordance with local guidelines. An automatic washer-disinfector, capable of meeting the relevant national and international cleaning and disinfection standards (such as, ISO 15883 or HTM 2030), should be used. NOTE: cannulations, blind holes, recesses, and other surfaces which are hard to reach, require particular attention during reprocessing CAUTION: the drying cycle should not be used with batteries. The drying cycle will adversely affect the performance and life of the battery.
1. Place the handpieces, attachments and accessories into a wire basket. i) Set chucks and blade clamps to a middle position. ii) Ensure that sterile batteries are inverted (that is, contacts facing down). iii) Ensure that aseptic battery housings are empty and open, with the open side facing down. iv) Fit washing spacers and end caps as required. v) Ensure that all items are separated. NOTE: the placement of items in automatic washer-disinfector baskets can be a critical factor in
achieving effective cleaning. The basket type and the position of the items within the basket should be managed by suitably trained personnel and be in accordance with the washerdisinfector instructions. 7
2. Follow the washer-disinfector manufacturer’s loading instructions and select the appropriate cycle. The cycle should include the following:
Cycle Stage
Minimum Recirculation Time (min:secs)
Temperature
Detergent
Pre-wash
5:00
< 35°C
-
Enzyme wash
5:00
55 - 65°C
Endozime AW Triple Plus a
Rinse 1
2:00
55 - 65°C
-
Rinse 2
2:00
55 - 65°C
-
Thermal rinse
1:00
90°C
-
Pure water rinse
0:10
66°C
-
Drying (not suitable for batteries)
20:00
110°C maximum
-
a. other brands of detergent may be used provided the suitability of the detergent is verified before use.
3. Remove the disinfected equipment from the washer-disinfector and place the equipment in a clean area. 4. Remove any washing spacers and end caps, if fitted. 5. Visually inspect each item. Verify that all contaminants have been removed in accordance with local reprocessing guidelines. Disinfection Thermal disinfection is recommended and included in the automatic cleaning process. Where the use of an automatic washer-disinfector is not possible, the equipment should be wiped with a suitable disinfectant.
Maintenance Lubricate collets and chucks using a suitable surgical instrument oil.
8
Inspection and Function Testing WARNING: inspect all equipment before use and do not use suspect, damaged or worn equipment WARNING: never reuse items marked for single-use
. Risks associated with reuse include:
• cross contamination between patients • bone necrosis due to extra heat generation • inaccurate cutting. 1. Ensure the equipment is in good working order. i) Note any unusual sounds, vibrations or operating speeds. NOTE: if operating difficulties are experienced, refer to the troubleshooting section of
this user manual 2. Inspect reusable cutting accessories (such as, drill bits and reamer shells) for damage and wear. NOTE: dispose of worn or damaged cutting accessories appropriately
Packaging Place the disinfected equipment into a sterilisation container. NOTE: if wrapping is required, use a material suitable for the chosen sterilisation method
Sterilisation of Handpieces and Accessories Steam Sterilisation CAUTION: these sterilisation instructions are not suitable for sterilisable batteries CAUTION: ensure that aseptic battery housings are open, with the open side facing down
Exposure Time and Temperature (-0°C / +3°C)
Drying Time b
optional
3-4 minutes at 134°C
30 minutes at maximum 110ºC
unwrapped
3-4 minutes at 134°C
none
wrapped
15 minutes at 134°C
30 minutes at maximum 110ºC
wrapped
50 minutes at 121°C
20 minutes at maximum 110ºC
Cycle
Wrapping
vacuum assisted vacuum assisted (flash)
a
gravity
a. for reasons of non-repeatability during transport and storage, processes involving unwrapped equipment cannot be validated beyond the sterilisation procedure. b. the drying times specified are for a full, wrapped sterilisation case containing 3 handpieces. If different quantities are used, the necessary drying time may vary.
9
Sterilisation of Sterilisable Batteries Steam Sterilisation CAUTION: high temperature can affect the performance and life of a battery. The specified drying
times should not be exceeded. CAUTION: ensure that sterile batteries are fitted to the holder in the sterilisation container. The
contacts should be facing downwards to allow any liquid to drain away freely.
Model
Cycle
Wrappinga
Exposure Time and Temperature (-0°C / +3°C)
Drying Time (maximum 110ºC)
vacuum assisted
optional
3-4 minutes maximum at 134°C
3 minutes maximum
SB-450 SB-600 SB-701 SB-702 AB-450 AB-600 AB-701
not suitable for sterilisation
AB-702 a. For reasons of non-repeatability during transport and storage, processes involving unwrapped equipment cannot be validated beyond the sterilisation procedure.
STERRAD® Sterilisation Sterrad NX Advanced cycle, wrapped.
Storage To preserve sterility, wrap the sterilised equipment with a suitable material, capable of presenting a barrier to micro-organisms and particulate contamination.
Point of Use (after reprocessing) CAUTION: do not operate this equipment while it is still warm from reprocessing CAUTION: this equipment should not be placed in a refrigerator or similar
Following sterilisation, allow this equipment to cool to room temperature before being used.
10
Additional Information Manual cleaning has been validated in accordance with AAMI TIR30. Automated cleaning has been validated, in accordance with HTM 2030 and AAMI TIR30, using an automated washer-disinfector. Vacuum and gravity steam sterilisation have been validated in accordance with HTM 2010, AAMI TIR12, ANSI/AAMI ST79, ANSI/AAMI/ISO 17665-1 and ANSMI/AAMI/ISO 17665-2. Sterrad sterilisation has been validated in accordance with ANSI/AAMI/ISO 14937. The reprocessing instructions provided in this user manual have been validated by De Soutter Medical as being capable of preparing a device for reuse. It remains the responsibility of the reprocessor to ensure that the reprocessing as actually performed, using equipment, materials and personnel in the reprocessing facility, achieves the desired result.This normally requires validation and routine monitoring of the process. Likewise, any deviation by the reprocessor from the instructions provided in this user manual, should be properly evaluated for effectiveness and potential adverse consequences.
11
Reprocessing - Non-sterilisable Equipment These reprocessing instructions are suitable for the non-sterilisable equipment described in this user manual.
Limitations on reprocessing Repeated processing as specified in these instructions has minimal effect on this equipment. Equipment end-of-life is normally determined by wear or damage during use.
Safety Instructions WARNING: ensure the equipment is disconnected from all power sources before
cleaning WARNING: inspect all equipment before use and do not use suspect, damaged or worn equipment CAUTION: do not immerse any part of this equipment in fluids CAUTION: do not clean this equipment in an automatic washer-disinfector CAUTION: do not clean any part of this equipment in an ultrasonic cleaner
Manual Cleaning NOTE: cannulations, blind holes, recesses, and other surfaces which are hard to reach,
require particular attention during reprocessing 1. Remove any attachments and accessories. 2. Using a soft brush, clean the fan grill and air vents to remove any dust or debris. 3. Wipe the surfaces of the equipment with a clean, soft cloth, dampened with a mild pH balanced detergent or alcohol. NOTE: avoid fluid ingress 4. Wipe the surfaces of the equipment with a clean, soft cloth, dampened with distilled or sterilised water. 5. Dry the equipment with a clean, soft, dry cloth.
12
Sterilization Accessory Part Number Details Description:
Part No.
Sterile System Sterilisation Case
11670
Case will contain:Any combination of Handpieces (Maximum of 3) MDX-600/601 Modular Handpiece KDX-600/601 Dedicated Sagittal Saw Handpiece CDX-600/601 Dedicated Reciprocating Saw Handpiece Plus SB-450/600 Sterile Battery Pack Various MDX System Handpiece Attachments
Quantity
3 7
Aseptic System Sterilisation Case (2 Handpieces) Case will contain:Any combination of Handpieces (Maximum of 2) MDX-600/601 Modular Handpiece KDX-600/601 Dedicated Sagittal Saw Handpiece CDX-600/601 Dedicated Reciprocating Saw Handpiece Plus AH-450/610 Aseptic Battery Housing AS-450/610 Sterile Shield Various MDX System Handpiece Attachments
14440 Quantity
2 2 7
Aseptic System Sterilisation Case (3 Handpieces) Case will contain:Any combination of Handpieces (Maximum of 3) MDX-600/601 Modular Handpiece KDX-600/601 Dedicated Sagittal Saw Handpiece CDX-600/601 Dedicated Reciprocating Saw Handpiece Plus AH-450/610 Aseptic Battery Housings Various MDX System Handpiece Attachments
13
12170 Quantity
3 7
SECTION 3: CHARGER ASSEMBLY & OPERATION Setting up the Charger Fuse Selection Before using the BC-600 charger, check that the correct fuses are fitted. The fuses are located in the fuse access drawer underneath the power inlet. To access the fuses, slide out the drawer.
Fuse Access Drawer
The correct values are as follows: Voltage 230V 120V 100V
Fuse T2A T3.15A T3.15A
When the correct fuses are fitted close the fuse access drawer. Attaching the power cord Plug the appropriate mains cordset into the receptacle on the rear of the power supply. Switching On The mains power switch is located on the back panel of the charger, adjacent to the inlet. When the correct cord is fitted, switch the charger on. The Stand By indicator lights will illuminate.
14
Charging the Batteries/ Charge Indicator Lights Insert the batteries into the charger. As the charging sequence commences, the indicator lights describe the charge status as follows: •
Standby indicator – illuminates when charger is switched on and is ready to accept battery packs.
•
Illuminates while the battery pack is charging or undergoing a recondition (see below).
•
Charging the battery pack takes from 5 to 80 minutes, depending upon the amount of residual charge in the battery pack.
•
Illuminates along with 10 bars to indicate the battery pack is ready for use.
•
Illuminates along with 2 bars to indicate the battery pack is ready for use but with a reduced run-time. The pack is due for replacement.
•
Battery failed charging cycle. Re-insert battery, ensuring it is fully inserted in the station.
•
If battery continues to fail after three attempts, dispose of battery pack in accordance with disposal instructions.
Note: The BC-600 Battery Charger is completely automatic. No user input is required. Reconditioning In order to maintain the performance level of the batteries, the charger will periodically cycle each pack through a controlled discharge (recondition). The charger automatically selects the pack that is most in need of a recondition. Typically this will occur once in every 10-20 charge cycles. When first inserting a battery, the charger waits for other packs to be inserted before assessing which battery (if any) should be reconditioned. However, if no reconditioning is due, charging will commence straight away. Only one battery will be reconditioned at a time to ensure that other inserted packs can be charged as normal. A complete recondition cycle can take up to 90 minutes and is followed by a full length charge cycle. The charger will indicate a recondition by flashing all 10 bars on and off. Battery Pack Disposal Rechargeable batteries contain substances that may be harmful and must be disposed of responsibly and safely. Do not dispose of them by throwing them into a fire or into water, as they may explode. Dispose of them either by returning them to your De Soutter Medical Distributor or by taking them to a proper refuse depot.
15
Charging Battery Packs Do Not leave the battery packs inserted in the charger when the charger is switched off or disconnected from the mains supply. SB-450 & SB-600 Sterile Battery Packs Sterile battery packs are fitted by first inverting them and sliding them into position towards the rear of the battery charger as shown in the illustration below. Ensure the battery pack is fully located to the rear of the charging station and cannot be lifted vertically from the charger. When charged, sterile battery packs should be removed by slowly sliding towards the front of the charger, in a reversal of the fitting method. Do not attempt to lift the sterile battery pack vertically from the charger.
Sterile Battery Insertion/Removal
16
AB-600 Aseptic Battery Pack Note: Ensure that aseptic batteries are removed from their housings before insertion into the battery charger. Aseptic battery packs are inserted into the charger by lowering vertically into the shaped cut out of the charging station with the contacts facing downward and aligned with the contacts at the rear of the cut out. Ensure the battery sits firmly in the charging station. To remove lift the battery pack vertically from the charging station. CA-450 Charger Adaptor To charge the AB-450 aseptic batteries the CA-450 charger adaptor has to be fitted to the BC-600 battery chargers. The charger adaptor is fitted by sliding it into position towards the rear of the battery charger as shown in the illustrations below. Ensure the charger adaptor is fully located to the rear of the charging station and cannot be lifted vertically from the charger.
AB-450 Aseptic Battery Pack AB-450 battery packs are inserted into the charger adaptor by lowering vertically into the shaped cut out of the charger adaptor with the contacts facing downward and aligned with the contacts at the rear of the adaptor as shown in the illustrations below.
Ensure the battery sits firmly in the charger adaptor. To remove lift the battery pack vertically from the adaptor.
17
Battery Care Guidance The performance and life of the battery packs can be considerably enhanced by the following measures: •
Do not leave charged battery packs connected to the handpiece for longer than necessary. Note: If you leave the batteries connected to the tool for extended periods when not in use you may unable to recharge them. Battery packs in this condition should be left to stand for 24 hours before attempting to charge.
•
Always recharge sterile batteries directly before sterilisation and use within 48 hours of the last charge.
•
New batteries take some time to reach full performance. Battery packs achieve peak performance after approximately six charge/ discharge cycles. Run times of 3 to 20 minutes, dependant on the procedure demand and battery type, can be expected.
•
Do not leave sterile batteries in the autoclave longer than recommended. See Sterilisation instruction. Leaving the batteries too long in the autoclave will reduce their charge and can damage them.
•
Keep any drying cycle when autoclaving sterile battery packs to a minimum. The heat generated in the drying cycle reduces the charge in the battery packs.
•
Leave the battery packs in the charger when not in use. This ensures that the packs will always be fully charged and ready for use. Battery packs can remain in the charger for prolonged periods without damage.
•
Do NOT leave the batteries in the charger when it is switched off.
•
Do NOT autoclave aseptic battery packs.
•
Do NOT use battery packs while warm from charging or sterilisation. Allow adequate time for cooling prior to use.
•
Protection from contamination when using aseptic battery packs is provided by inserting the fully charged aseptic battery into a sterile aseptic battery housing using a sterile aseptic battery shield. (see following instructions)
Note: Please note that use of the AB-600 Aseptic Battery Pack will give approximately 50% more useful work per charge compared with the Sterile Battery Pack.
Battery Shelf-life All batteries should be regularly used to maximise their life and performance. NiMH & NiCd batteries should not be left idle for more than 1 month.
Extreme Battery Discharge Batteries can experience extreme discharge – for example, by leaving the battery pack connected to the handpiece or in a disconnected charger for an extended period. If this occurs: •
•
Remove the battery pack from the handpiece or charger and leave the pack for 24 hours. Place the battery pack into the battery charger. If the battery pack then fails to charge, it should be removed from the charger and disposed of in accordance with the disposal instructions.
Battery Auto Recovery System Battery packs can sometimes become excessively discharged. The BC-600 has a safety feature to prevent it from charging a damaged pack, but it will also not charge a very flat battery pack if the charger suspects it may be damaged. The Battery Auto Recovery system checks and rectifies packs in this situation. The system is fully automated and requires no user intervention.
18
Battery Pack Connection Insert the battery pack into the handpiece as shown in the diagram below.
Battery Pack Removal Depress the catch and slide the battery pack towards the rear of the handpiece until fully disengaged.
19
Assembling the AH-610 Aseptic Housing and AB-600 Battery Pack Note: All functions are to be performed by a sterile operator unless otherwise stated. Loading and Replacing the AB-600 Aseptic Battery Pack Load the Aseptic Battery Pack into the sterilised Aseptic Battery Housing as follows. 1. Unlock the housing by turning the Housing Lock fully anti-clockwise.
2. With the sterile Aseptic Battery Housing open place the sterile AS-610 Aseptic Battery Shield into position. Ensure that the shield is correctly positioned with the four locating studs outside of the Housing Base.
20