deSoutter
TDZ-450 TraumaDrive Operating Instructions Ver 1.8
Operating Instructions
36 Pages
Preview
Page 1
Operating Instructions
International English
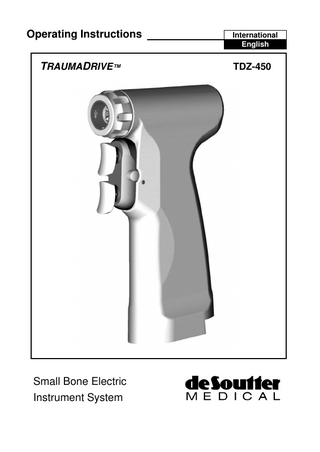
TRAUMADRIVE™
TDZ-450
Small Bone Electric Instrument System
DE SOUTTER MEDICAL TDZ INSTRUMENT SYSTEM Index
Page
Section 1: Important Safety Instructions ... 4 General Safety Guidelines... 4 Recommended Duty Cycle ... 5 Section 2: General Instructions ... 6 Product Description ... 6 Reprocessing Instructions ... 7 Section 3: Power Unit Connection ... 12 Battery/Corded Module Connection to Handpiece ... 12 Battery/Corded Module Removal from Handpiece ... 12 Section 4: TDZ-450 Handpiece ... 13 Controls ... 13 Section 5: TDZ System Attachments ... 16 Attachment Connection ... 16 Attachment Removal ... 17 DZ-450 Drill & QZ-450 Burr Attachments ... 18 RZ-450 Reamer Attachments ... 19 SZ-450 Sagittal Saw Attachment – with Blade Clamp Nut ... 20 NZ-450 Quick Release Sagittal Saw Attachment ... 21 CZ-450 Reciprocating Saw Attachment... 22 WZ-450 Wire Driver/PZ-450 Pin Driver Attachment ... 23 WZ-451 Wire/Pin Driver Attachment ... 25 Section 6: System Fault Finding ... 28 Handpiece fault finding ... 28 System Technical Description ... 29 Explanation of Symbols ... 29 Conditions for Transport & Storage ... 30 Service Information... 30 Repair Information ... 30 Guarantee and Liability... 30 Section 7: EMC Guidance ... 31
0120
3
SECTION 1: IMPORTANT SAFETY INSTRUCTIONS 1.
SAVE THESE INSTRUCTIONS - This manual contains important safety and operating instructions for the TDZ Instrument System.
2.
Do not attempt to use the equipment until all the instructions and cautionary markings have been studied and understood.
3.
Failure to follow these instructions may result in serious injury to the patient or operating staff.
IMPORTANT SAFETY INSTRUCTIONS General Safety Guidelines Never permit untrained personnel to use this instrument system. Always check that the voltage stated on the identification plate corresponds with the electrical supply. Always check correctly rated fuses are fitted to the battery charger and power supply fuse holder. Always inspect all equipment and accessories before use. Do not use suspect, damaged or worn equipment. Always ensure that the instrument and attachments are regularly serviced in order to avoid local overheating of components due to normal wear over an extended period. Always ensure accessories are correctly connected to the handpiece before use. Only use sharp cutting accessories Always set the instrument trigger mode selector to the SAFE position when changing accessories or when not in use. Always use eye protection when cutting to prevent injury from flying debris. Do not allow loose articles to be caught by the moving parts of the instrument. Never drop the instrument or its accessories; always handle with extreme care. Always allow the instrument to stop before removing from the surgical site. Only clean and sterilise the instrument and accessories as directed in these instructions. Do not immerse any part of the equipment in fluids. Always use Stericut or De Soutter Medical approved accessories. When using saw attachments: Follow local recommendations for the avoidance of possible hand-arm vibration damage. (The instrument can produce a HAV weighted vibration level of approximately 7ms-2.) Follow local recommendations for the avoidance of long-term hearing damage. (When used for the purposes intended the sound level produced when sawing poses no threat to long-term health however maximum sound levels can exceed 80dB(A).)
4
WARNING: When using the Power Supply and Corded Module. These have been tested for electro-magnetic compatibility. However, if interference occurs that might cause undesirable operation, separate the components by moving further apart and, if possible, connect the mains power cords to separate outlets.
Never reuse items marked for single use, risks if reused include: Cross contamination between patients, Bone necrosis due to extra heat generation. Inaccurate cutting
Recommended Duty Cycle In order to reduce the risk of excessive and undesirable temperature rise of the cutting surfaces it is recommended that the tool is used in short bursts. A usage/cooling ratio of 1 to 4 is recommended with a maximum continuous cutting time of 2 minutes. (i.e. if the tool is used for 1 minute it should be allowed to rest for at least 4 minutes, if it is used for 2 minutes it should be allowed to rest for at least 8 minutes). Additionally it is recommended that a suitable cooling means, such as irrigation with saline solution, be employed wherever practical.
5
SECTION 2: GENERAL INSTRUCTIONS Product Description The TDZ system is a modular electric instrument system for small bone and light-duty trauma surgery, which is powered by a sterile or aseptic rechargeable battery pack or by a mains-operated power supply via a low volt corded module. The Small Bone Modular Electric System consists of: TDZ-450 Modular Rotary Handpiece: The TDZ-450 Handpiece features a powerful reversible motor, which acts as the powerplant for the TDZ-450 system. The handpiece may be fitted with the following attachments: CZ-450 - Reciprocating Saw Attachment DZ-450 - Drill Attachments NZ-450 – Quick Release Sagittal Saw Attachment PZ-450 – Pin Driver Attachment RZ-450 - Reamer Attachments SZ-450 - Sagittal Saw Attachment WZ-450 - Wire Driver Attachment The handpiece may be powered by the following battery options: AB-450 & AH-450 – Small Battery Pack & Aseptic Housing AB-600 & AH-610 – Large Battery Pack & Aseptic Housing SB-600 – Large Sterile Battery Pack Important Note: The AB-450 and SB-450 Small Battery packs are recommended for applications where low weight and size is of prime importance. They are NOT suitable for use where extended periods of high torque are required. (e.g. Acetabular reaming). The Large Battery packs, as well as having greater capacity, will provide additional power and torque if required. BC-610 Battery Charger and Batteries: The BC-610 Battery Charger will charge all of the battery options listed above. PS-600 Power Supply and CM-600 Corded Module: The PS-600 and CM-600 make up the corded power source for the system. The PS600 is designed to run two handpieces simultaneously. For more detailed information on individual parts of the system please refer to the appropriate user manual. PS-600 Power Supply and Corded Module BC-610 Battery Charger and Batteries
Ref: 1927 Ref: 1937 6
REPROCESSING INSTRUCTIONS WARNINGS: Limitations on reprocessing:
The following reprocessing instructions refer to the handpieces, attachments, and accessories described in these operating instructions. When reprocessing electric handpieces it is essential that the handpiece is subsequently thoroughly dried internally as soon as possible after reprocessing otherwise reduced performance, malfunction and/or premature failure may result. Note: Correct internal drying and sterilisation can only be achieved by using a Vacuum Steam Autoclave with the vacuum assisted drying period activated. Do not immerse the handpieces in water other than when automatic reprocessing. Do not exceed temperatures 140 °C. Do not clean any part of the equipment in an ultrasonic cleaner. Do not wash or sterilise Aseptic Battery Packs, Power supplies, or Battery Chargers. Refer to separate cleaning and maintenance instructions. Ensure that Aseptic Battery Housings are sterilised in the open position. Ensure that attachments with collet mechanisms are fully open when reprocessing. Long narrow cannulations and blind holes require particular attention during cleaning. Repeated processing as specified in these instructions has minimal effect on this equipment. End of life is normally determined by wear or damage during use.
Detergents: Only use detergents that are declared by the manufacturer as safe for use on anodised aluminium components. Only use detergents with a maximum pH value of 11.0. Ensure the detergent manufacturers guidelines are closely observed.
7
INSTRUCTIONS: Point of use:
Do not operate the equipment while still warm.
Containment and transportation:
It is important that the equipment is reprocessed immediately following surgical use. The handling, collection and transportation of soiled equipment should be strictly controlled to minimise risks.
Preparation for Remove all attachments and accessories for cleaning, wash separately, or dispose of as per instructions. cleaning:
Manual Cleaning:
Equipment: Manual cleaning should only be carried out where automatic washer/disinfection is not available. It should be conducted in a dedicated area by trained personnel wearing protective clothing e.g. gloves, waterproof apron and goggles or visor. Use suitable detergents (see note on detergents) and Nylon scrubbing brushes. Dedicated sinks with temperature controlled water, ideally deionised or distilled and a Lint-free cloth for drying. Method: 1. Wash off excess contaminant with running water (maximum 35°C) avoiding fluid ingress. Scrub the parts thoroughly using a suitable detergent and nylon brushes to remove all visible traces of contaminant. Pay attention to recesses, blind holes and cannulations. Note: Manually open and close chucks and blade clamps. Use suitable nylon brushes to reach difficult surfaces and inside cannulations. Flush through these areas to ensure any trapped contaminants are removed. 2. Rinse off all traces of the detergent with de-ionised or distilled running water (45-65°C). 3. Shake off excess water and dry surfaces with a lint-free cloth. 4. Visually inspect each item to verify that all contaminants are removed in accordance with local reprocessing guidelines.
8
Automatic Cleaning:
Equipment: Automatic Washer/Disinfector capable of meeting relevant national and international cleaning and disinfection standards i.e. ISO 15883 or HTM2030. Method: 1. Large contaminant deposits should be removed manually using the method described in Manual Cleaning: - item 1. Pay particular attention to recesses, blind holes, chucks, clamps and cannulations. Note: It is recommended that chucks be set to a middle position following the above pre-wash. This facilitates the automatic washer/disinfection process. 2. Place the handpiece, attachments and accessories onto the wire basket. Ensure that the Sterile battery packs are inverted (i.e. contacts facing down). Ensure all items are separated. Ensure that empty Aseptic battery housings are open with the open side down. Note: The placement of items in automatic washer/disinfector baskets can be a critical factor in achieving effective cleaning. Selection of the basket type and position of the items to be cleaned should be done by suitably trained personnel in accordance with the manufacturer’s instructions for the washer/disinfector. 3. Follow manufacturers loading instructions and select the appropriate cycle recommended. The cycle should include: •
Pressurised cold water rinse (maximum 35 °C).
•
Hot water wash (minimum 55 °C) See note regarding detergents.
•
Warm water rinse.
•
Disinfection rinse (minimum 80 °C for 1 minute) with deionised water.
•
Drying cycle.
4. Remove disinfected equipment from the washer/disinfector to a clean area. Remove the sagittal saw blade clamp washing spacer if fitted. 5. Visually inspect each item and verify the cleaning process is complete and all contaminants have been removed in accordance with local reprocessing guidelines.
9
Disinfection:
Thermal disinfection is recommended and included in the automatic washer/disinfection cycle. See above.
Maintenance:
Lubricate collets and chucks using mineral oil such as Blitz™
Inspection and function testing:
Ensure the handpiece, attachments and non-cutting accessories are in good working order. Note any unusual sounds, vibrations or operating speeds. If operating difficulties are experienced and are not already covered in these operating instructions, refer to the Repair and Servicing Information section of this manual. Re useable cutting accessories (drill bits, reamer shells etc.) Inspect for damage and wear. Cutting edges should be sharp and free from damage. Discard worn or damaged cutting accessories into a suitable sharp’s disposal bin. Single use accessories (Sterile saw blades, burrs, K wires etc.) Accessories marked for single use only must not be re-used. Dispose of these items in a sharp’s bin or other suitable disposal method.
Packaging:
Place cleaned handpieces, attachments and accessories into the appropriate sterilization container. If wrapping is used, material conforming to EN868 allowing rapid penetration of steam should be used.
Sterilization:
Preferred Method: • Vacuum steam autoclave, Wrapped or Unwrapped, minimum 3 minutes @ 134°C (+3°C/ -0°C), 8 minute minimum drying time.
Handpieces and accessories (not battery packs)
Other Validated methods. •
Gravity steam autoclave, wrapped 35 minutes at 134°C (+3°C/ -0°C), 8 minute minimum drying time.
•
Gravity steam autoclave, wrapped 50 minutes at 121°C (+3°C/ -0°C), 8 minute minimum drying time.
•
Gravity steam autoclave, unwrapped 10 minutes at 134°C (+3°C/ -0°C), 8 minute minimum drying time.
Always ensure that the Aseptic battery housings are open, with the open side down.
10
Sterilization: Sterilisable battery pack
Wrapped or Unwrapped. Vacuum steam autoclave, minimum 3 minutes @ 134°C (+3°C/ -0°C). Note: High temperature may affect the performance and life of the battery. It is recommended, the drying cycle, if necessary, is kept to a minimum or omitted. Longer than 3 minutes is NOT recommended. Always ensure that the Sterile battery packs are inverted (i.e. contacts facing down).
Storage:
Wrapping sterilised equipment in accordance with EN868 is recommended to preserve sterility. The material should present a barrier to micro-organisms and particulate contamination.
Additional Information:
Automated cleaning was validated in accordance with HTM 2030 using an automated washer/disinfector. Vacuum steam sterilization was validated in accordance with HTM2010. Gravity sterilisation was validated based on AAMI guidelines. Note: Manual cleaning is not validated for reasons of non-repeatability.
The instructions provided above have been validated by De Soutter Medical Ltd. as being capable of preparing a device for re-use. It remains the responsibility of the reprocessor to ensure that the reprocessing as actually performed using equipment, materials and personnel in the reprocessing facility achieve the desired result. This normally requires validation and routine monitoring of the process. Likewise any deviation by the reprocessor from the instructions provided should be properly evaluated for effectiveness and potential adverse consequences.
11
SECTION 3: POWER UNIT CONNECTION Battery Pack/Corded Module Connection to Handpiece Insert the battery pack into the handpiece as shown in the diagram below.
Battery Pack/Corded Module Removal from Handpiece Depress the catch and slide the battery pack towards the rear of the handpiece until fully disengaged.
12
SECTION 4: TDZ-450 HANDPIECE Controls Trigger Mode Selector: The trigger mode selector determines the function of the triggers As well as selecting the high speed (Drilling) range or low speed (Screwing) range, the trigger mode selector determines whether the instrument enters the Oscillating or Tapping mode when both triggers are depressed simultaneously. It also turns on the Torque Limiting function when Screwing is selected. Torque Limiting Function: In low speed (Screwing) mode the maximum torque available in the forward (Clockwise) direction is limited to approximately two thirds of the torque available in the reverse (Anti-clockwise) direction. This is to ensure that screws inserted using the screw function can always be un-inserted when reverse is engaged.
Required Function High Speed Range: Drilling / Oscillating
Off / SAFE
Low Speed Range: Screwing / Tapping
Triggers: The triggers control the speed of the instrument. The speed of the instrument increases progressively as the trigger is depressed. Refer to the diagram on the following page.
13
Trigger Function Options: Top • Reverse Bottom • Forward (Torque limited in low speed mode.) Both • Oscillating (In high speed mode) Both • Tapping (In low speed mode) Top Trigger Bottom Trigger
Trigger Mode Selector Important Notes:
The instrument is capable of delivering considerable torque. Consequently, the low speed capability should be utilised, and great care taken when tapping threads, or inserting screws. To avoid possible damage when tapping threads or tightening screws in delicate materials it is recommended that hand tools are used.
When using both triggers to enter either the Oscillating or Tapping mode the speed is controlled by whichever trigger signals the lower speed. Consequently, if desired, one trigger can be kept fully depressed and the speed controlled using the other trigger.
After using either the Oscillating or Tapping mode the tool will NOT return to single trigger mode until BOTH triggers have been fully released. This is to prevent a sudden unexpected increase in speed when performing delicate procedures.
To avoid excessive discharging of the battery pack the tool will begin to stop momentarily when the battery pack is coming to the end of its charge. This indicates that the battery should be replaced with a fully charged unit. (The tool can also stop if a small battery pack is being used for procedures requiring inappropriately high levels of torque. In this case the use of the larger AB-600 or SB-600 batteries or PS-600 Power Supply is recommended.)
In order to protect the patient from excessive temperatures the instrument incorporates an over-temperature cutout, which may operate if the recommended Duty Cycle is exceeded (See Section 1). In the event of the cutout operating release both triggers and wait a short while for the instrument to cool down and reset.
14
Technical Description & Part Number Details
Ref
Part No.
TDZ-450 Handpiece
1286004
Speed:
High Speed Mode 75-1000 rpm Low Speed Mode 75-200 rpm
Cannulation Diameter: 4.1mm
15
SECTION 5: TDZ SYSTEM ATTACHMENTS Attachments All the attachments for the TDZ system connect to the handpiece in the same way. Attachment Connection: • • • •
Ensure that the mode selector is set to the SAFE ( ) position. Grip the handpiece and attachment as shown. Align the slots on the attachment spigot with the pins in the handpiece. Push the attachment fully into the handpiece until the locking ring snaps back into its original position. • Check that the attachment is locked into the handpiece by gently pulling the attachment away from the handpiece. Refer to the diagram.
16
Attachment Removal: • Ensure that the trigger mode selector is set to the SAFE position. • Grip the handpiece and attachment as shown. • Using thumb and forefinger rotate the locking ring. • When the locking ring reaches full rotation pull the attachment away from the handpiece. Do not drop the attachment out of the handpiece. Refer to the diagram below.
17
DZ-450 Drill Attachments Chuck Operation Keyed:
Insert the drill bit into the chuck and tighten with the chuck key.
Keyless:
Insert the drill bit into the chuck, grip the smaller chuck ring and rotate the chuck body to tighten. Note: Do not operate in reverse, as this will un-tighten the chuck.
Quick Release (AO):
Pull the chuck sleeve back and insert the drill bit. Rotate the drill bit until it enters the chuck fully. Release the chuck sleeve. Check that the drill bit is locked in the chuck by pulling the drill bit away from the attachment.
Refer to the diagram below.
Part No.
DZ-450 0.7- 7.4mm Keyed DZ-450 0-4mm Keyed DZ-450 Small AO Synthes DZ-450 0-3.2mm Keyless DZ-450 0.6-7.4mm Keyless DZ-450 Trinkle DZ-450 Hudson Zimmer QZ-450 (Burr) ISO 6360
14240 14110 14140 14130 14120 15050 15040 15800
Speed
Capacity
Cannulation
rpm
mm 0.7-7.4 0-4 QR shank 0 – 3.2 0.6 – 7.4 QR shank QR shank QR shank
mm 4.1 3.1 1.9 2.4 4.1 4.1 4.1 4.1
0-1000
0 - 7000
Technical Description & Part Number Details Supplied Accessories DZ-450 Keyed: Chuck Key for 0.7-7.4mm Chuck Chuck Key for 0-4mm Chuck
Part No. 30062 Part No. 8780
18
RZ-450 Reamer Attachments Chuck Operation Keyed: • Insert the drill bit into the chuck and tighten with the chuck key. Hudson/Zimmer and AO: The Hudson/Zimmer and AO reamer chucks operate in the same manner. • Pull the chuck sleeve back and insert the reamer shaft. • Rotate the reamer shaft until it enters the chuck fully. • Release the chuck sleeve. • Check that the reamer is locked in the chuck by pulling it away from the attachment. Refer to the diagram below.
Technical Description & Part Number Details Part No. RZ-450 0.7-7.4 Keyed
14160
RZ-450 Hudson/Zimmer
14170
RZ-450 AO Synthes Large
14150
Cannulation Diameter
Speed
4.1mm
20-250 rpm
Adaptor Chucks Description
Keyed/Keyless Drive Part No.
Hudson Drive Part No.
AO Drive Part No.
0.7-7.4mm Keyed Chuck
Not Applicable
5440
7970
Zimmer Chuck
10060
5450
6590
Harris Chuck
10010
5460
6550
Hudson Chuck
10020
Not Available
6560
Trinkle Chuck
10240
7910
6580
AO Synthes Small
10280
5470
7980
AO Synthes Large
10190
5480
Not Available
DIN 58 809 Reamer Chuck
10150
5490
6570
Not Available
11260
7770
DHS Chuck
19
SZ-450 Sagittal Saw Attachment – with Blade Clamp Nut
Blade Clamp Operation Insertion: • Rotate the blade clamp anti-clockwise with the tool provided. • Insert Blade into the blade holder. • Rotate the blade clamp clockwise, with the tool provided, to tighten the blade clamp mechanism. Check that the blade is correctly located whilst tightening clamp screw. • Check that the blade is secure. Removal • Rotate clamp screw anti-clockwise to release blade. • Gently pull blade from attachment
Technical Description and Part Number Details
Part No. Speed Blade Hub Type Blade Wrench (Supplied)
SZ-450 14210 1800-22000 cpm De Soutter Medical S85 9590
For full details of suitable saw blades refer to Stericut data sheets.
20
NZ-450 Quick Release Sagittal Saw Attachment Blade Clamp Operation Insertion: • Fit the Sagittal Saw attachment to the handpiece. • With the blade clamp in the open position insert the blade. • Push the blade clamp down. • Tighten the blade clamp using the clamp nut. • Check that the blade is secure in the blade clamp. Refer to diagram below.
Removal: • Grip the instrument and pull the clamp nut and turn anticlockwise to unscrew the blade clamp. • Lift the blade slightly and remove it from the clamp. Refer to the diagram below.
Technical Description & Part Number Details
Part No. Speed Blade Hub Type
NZ-450 14230 2000-25500 cpm De Soutter Medical S88 21