Instructions for Use
68 Pages
Preview
Page 1
Inhalt
Contents
Inhalt
Contents Seite
Page
Zu Ihrer und Ihrer Patienten Sicherheit... 3 Hinweise für den Umgang mit Sauerstoffund Druckgasflaschen... 4
For Your Safety and that of Your Patients...3 Recommendations on handling oxygen and compressed-gas cylinders... 4
Zweckbestimmung... 5
Intended Use...5
Monitoring... 6
Monitoring... 6
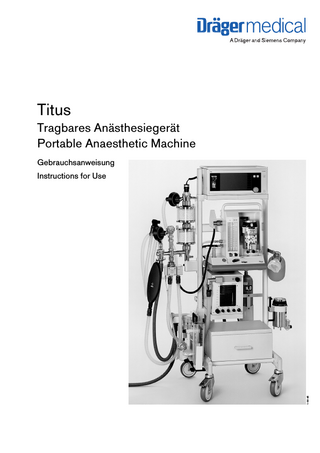
Modellbeschreibung... 7
Description of Models...7
Titus aufrüsten... 10 Gasversorgung...10 Kreissystem aufbauen...13 Messung des exspiratorischen Atemvolumens... 13 Schlauchverbindungen herstellen...14 Ventilog mit Druckgas versorgen...15 Kombination mit Ventilog 2...16 Kombination mit Ventilog 3...17 Vapor aufsetzen...18 Überwachungen... 19 Anästhesiegas-Fortleitungssystem (AGS) montieren... 22 Manuelle Beatmungsvorrichtung... 23 Potentialausgleich...23 Für den Notfalleinsatz... 24
Assembling Titus...10 Gas supply... 10 Assembling the circle system...13 Measuring the expiratory minute volume...13 Connecting hoses... 14 Compressed gas supply for Ventilog...15 Combination with Ventilog 2... 16 Combination with Ventilog 3... 17 Fitting Vapor...18 Monitoring... 19 Connecting to anaesthetic gas scavenging system...22 Manual ventilation bag... 23 Equipotential bonding... 23 For emergency use only...24
Titus NMR für den Einsatz in der Kernspintomographie... 25
Titus MRI for Use with MRI... 25
Geräte-Check...31
Equipment Check...31
Checkliste... 32
Checklist... 34
Betrieb...37 Frischgasversorgung... 37 Betriebsarten...39 Notfalleinsatz... 41 Gebrauchsdauer überwachen...42 Maßnahmen bei Gasausfall...42 Zusätzliche Hinweise... 43 Betriebsende... 44
Operation... 37 Fresh gas supply... 37 Operating modes...39 For emergency use only...41 Checking use... 42 What to do if gas supply fails... 42 Additional instructions...43 End of use... 44
Pflege... 45 Gerät abrüsten... 45 Magill-Inhalationseinrichtung... 45 Pflegeliste für Anästhesiegerät Titus...46 Reinigung und Desinfektion... 50 Sterilisation...51 Wartungs-/Instandhaltungsintervalle...51
Care...45 Stripping down machine... 45 Magill inhalation device... 45 Care list for Titus anaesthetic apparatus... 48 Cleaning and disinfection...50 Sterilisation...51 Service/Maintenance intervals...51
Betriebsbereitschaft prüfen... 52
Testing Readiness for Operation... 52
Anhang... 58 Funktionsschema...58 Sicherheitseinrichtungen...61 Technische Daten...63
Appendix... 58 Functional Diagrams... 58 Safety Features... 61 Technical Data...63
2
Zu Ihrer und Ihrer Patienten Sicherheit
For Your Safety and that of Your Patients
Zu Ihrer und Ihrer Patienten Sicherheit
For Your Safety and that of Your Patients
Gebrauchsanweisung beachten
Strictly follow the Instructions for Use
Jede Handhabung an dem Gerät setzt die genaue Kenntnis und Beachtung dieser Gebrauchsanweisung voraus. Das Gerät ist nur für die beschriebene Verwendung bestimmt.
Any use of the apparatus requires full understanding and strict observance of these instructions. The apparatus is only to be used for purposes specified here.
Instandhaltung
Maintenance
Das Gerät muß halbjährlich Inspektionen1) und Wartungen1) durch Fachleute unterzogen werden (mit Protokoll). Instandsetzungen1) am Gerät nur durch Fachleute. Für den Abschluß eines Servicevertrags sowie für Instandsetzungen empfehlen wir den DrägerService. Bei Instandhaltung1) nur Original-Dräger-Teile verwenden. Kapitel “lnstandhaltungsintervalle“ beachten.
The apparatus must be inspected1) and serviced1) by experts at regular 6 month intervals (and a record kept). Repairs1) and general overhaul of the device may only be carried out by experts. We recommend that you take out a service contract with DrägerService and ensure that all repairs are carried out by them. Only original Dräger parts must be used for maintenance1). Observe the chapter on "Maintenance Intervals".
Zubehör
Accessories
Nur das in der Zubehörliste aufgeführte Zubehör verwenden.
Only use the equipment itemized on the list of accessories.
1) Inspektion = Feststellen des Ist-Zustandes Wartung = Maßnahmen zur Bewahrung des Soll-Zustandes Instandsetzung = Maßnahmen zur Wiederherstellung des SollZustandes Instandhaltung = Inspektion, Wartung, ggf. Instandsetzung
1) Inspection Service Repair Maintenance
= examination of actual condition = measures to maintain specified condition = measures to restore specified condition = inspection, service and, if applicable, repair
3
Monitoring
Monitoring
Monitoring
Monitoring
Die Europanorm (EN 740)* fordert für AnästhesieArbeitsplätze Überwachungs- und Alarmeinrichtungen zum Schutz gegen gefährliche Ausgangszustände:
For anaesthetic workstations, the European Standard (EN 740)* requires monitoring and alarm in order to protect against dangerous initial conditions:
–
Atemwegsdruckmessung mit oberer Alarmgrenze (untere Alarmgrenze empfohlen)
- airway pressure measuring with alarm upper limit (alarm lower limit is recommended).
–
exspiratorische Atemvolumenmessung (untere Alarmgrenze empfohlen)
- expiratory tidal volume measuring (alarm lower limit is recommended).
–
inspiratorische Sauerstoffkonzentration mit unterer Alarmgrenze
- inspiratory oxygen concentration with alarm lower and upper limit.
–
Narkosemittelkonzentrationsmessung mit unterer und oberer Alarmgrenze
- measuring of the concentration of anaesthetic agents with alarm lower and upper limit.
–
CO2-Konzentrationsmessung mit unterer und oberer Alarmgrenze
- CO2 concentration measuring with alarm lower and upper limit.
–
Diskonnektion- und Stenoseüberwachung bei Verwendung eines automatischen Beatmungsgerätes
- checking of disconnection and stenosis in case of automatic ventilation.
Diese Einrichtungen sind nicht Bestandteil des Titus und müssen durch geeignete Zusatzgeräte bereitgestellt werden. Die entsprechenden Schnittstellen sind in den technischen Daten beschrieben. Wird der Titus als Notfallgerät eingesetzt, gelten die obigen Forderungen nur als Empfehlung. Titus mit integrierter Druckluft-Zusatzeinrichtung darf aus Sicherheitsgründen nur mit inspiratorischer O2-Messung eingesetzt werden. Werden Überwachungsgeräte eingesetzt, muß der Anwender nachprüfen, ob diese Geräte den gesetzlichen Bestimmungen entsprechen und ob sie die vom NarkoseBeatmungsgerät gelieferten Leistungen zuverlässig überwachen können.
*) Anästhesie-Arbeitsplätze und ihre Module – Besondere Festlegungen –
6
These facilities are not part of the Titus. Therefore adequate additional appliances have to be provided. Relevant interfaces are described in the technical data. Is the Titus deployed as a First Aid unit, the requirements above are only recommendations. For reason of safety, Titus with integrated auxiliary compressed-air unit must be used with an inspiratory O2 monitor. If monitoring equipment is used, the user must check that the equipment conforms to legal requirements, and reliably monitors the efficiency of the anaesthetic ventilator.
*) Anaesthetic workstations and their modules – particular requirements –
Titus aufrüsten Kombination mit Ventilog 2
Assembling Titus Combination with Ventilog 2
Kombination mit Ventilog 2
Combination with Ventilog 2
Ventilog 2 mit Kreissystem 9 verbinden
Connecting Ventilog 2 with Circle System 9
Gebrauchsanweisung für Ventilog 2 beachten!
Follow the Ventilog 2 Instructions for Use!
max. 134°C
10 50
5 30 70
1 Pneumatisches Umschaltventil am Kreissystemträger anschrauben – 2 Atemschlauch 1,1 m am Ventilog 2 und am Umschaltventil anschließen – 3 Steuerleitung anschließen – Tülle Frontseite Ventilog 2 und Tülle Rückseite Umschaltventil – 4 Frischgasschlauch anschließen – 5 Atembeutel mit Atemschlauch an das Umschaltventil anschließen – Atembeutel anhängen.
1 Screw the pneumatic changeover valve to circle system arm –
1
5
4
2 Connect the 1.1 m breathing hose to the Ventilog 2 anaesthetic ventilator and connect to the changeover valve –
2 3
3 Connect the control line – one nozzle to the front panel of the Ventilog 2 anaesthetic ventilator and the other to the rear of the changeover valve – 4 Connect the fresh gas hose – 5 Connect the breathing bag with the breathing hose to the changeover valve – hang up the breathing bag.
16
Titus aufrüsten Kombination mit Ventilog 3
Assembling Titus Combination with Ventilog 3
Kombination mit Ventilog 3
Combination with Ventilog 3
Ventilog 3 mit Kreissystem 9 verbinden
Connecting Ventilog 3 with Circle System 9
Gebrauchsanweisung für Ventilog 3 beachten!
Follow the Ventilog 3 Instructions for Use!
max. 134°C
10 50
5 30 70
1
1 Pneumatisches Umschaltventil FGE am Kreissystemträger anschrauben –
4
3
2 Atemschlauch 1,1 m am Ventilog 3 und am Umschaltventil FGE anschließen – 3 Frischgasschlauch anschließen – von Titus zum Umschaltventil FGE – 4 Atembeutel mit Atemschlauch an das Umschaltventil FGE anschließen – Atembeutel einhängen – 5 Steuerleitung einkuppeln – Rückseite Ventilog 3 und am Umschaltventil FGE – 6 Steuerleitung für PEEP einkuppeln – Rückseite Ventilog 3 – und am Umschaltventil FGE – Stecker in die Buchsen drücken bis zum Einrasten.
1 Screw the FGE pneumatic changeover valve to the circle system support arm – 2 Connect the 1.1 m breathing hose to the Ventilog 3 anaesthetic ventilator and to the FGE changeover valve –
2
3 Connect the fresh gas hose – from Titus to the FGE changeover valve –
5 6 5
6
4 Connect the breathing bag with the breathing hose to the FGE changeover valve – hook up the breathing bag – 5 Connect the control line – to the back of the Ventilog 3 anaesthetic ventilator and to the FGE changeover valve – 6 Connect the control line for PEEP – back of Ventilog 3 – and to the FGE changeover valve – press the plugs into the sockets until they click into place.
17
Titus aufrüsten Überwachungen
Assembling Titus Monitoring
PM 8050/PM 8060 Sensoren einbauen und anschließen
Installing and connecting PM 8050/PM 8060 sensors
1
1 T-Stück: Probenleitung fest auf Filter und Wasserfalle schrauben –
2 Optional: Temperatur-Sensor in die inspiratorische Seite des Y-Stücks –
1 T-piece: screw the test line tightly to the filter and water trap –
2 Optional: temperature sensor in the inspiratory side of the Y-piece –
2 3 4
3 O2-Sensor für inspiratorische O2-Messung aufsetzen – (entfällt bei PM 8060)
5
3 Fit the O2 sensor for inspiratory O2 measurement – (not required for the PM 8060)
4 Druckmeßleitung für inspiratorische Atemwegsdruckmessung –
4 Fit the pressure measuring line for inspiratory airway pressure measurement –
5 Flow-Sensor für exspiratorische Volumenmessung – Elektroanschluß –
5 Flow sensor for expiratory volume measurement – electrical connection –
Sensorleitungen an der Rückseite des Monitors nach Gebrauchsanweisung "PM 8050" oder "PM 8060" anschließen.
Connect the sensor lines to the back panel of the monitor in accordance with the "PM 8050" or "PM 8060" Instructions for Use.
●
Netzkabel einstecken – erst am Atemgasmonitor, dann in die Steckdose.
●
Überwachung der inspiratorischen O2-Konzentration
6
z. B. mit Oxydig
Connect the mains cable, firstly to the breathing gas monitor and then in the electrical socket.
Monitoring the inspiratory O2 concentration e.g. with Oxydig
7 6 Meßgerät auf den Halter stecken, Netzanschluß nicht erforderlich, Gerät wird durch Batterien betrieben.
8
6 Place the measuring device on the holder. No mains connection required. Device operated by batteries.
max. 134°C
10 50
5 30 70
7 O2-Sensor mit Oxydig verbinden.
8 O2-Sensor aufstecken.
20
7 Connect the O2 sensor with Oxydig. 8 Fit the O2 sensor.
Titus aufrüsten Anästhesiegas-Fortleitungssystem (AGS)
Assembling Titus Connecting to anaesthetic gas scavenging system (AGSS)
Anästhesiegas-Fortleitungssystem (AGS)
Connecting to anaesthetic gas scavenging system (AGSS)
●
●
●
AGS mit entsprechendem Rüstsatz befestigen. Transferschläuche an das Überdruckventil und (wenn vorhanden) Ventilog anschließen. Absaugeschlauch am Fortleitungssystem anschließen.
●
Fix the AGSS with the relevant kit.
●
Connect transfer hoses to the over pressure valve and (if available) Ventilog.
●
Connect the scavenging hose to the scavenging system.
Narkosegasfortleitung Anaesthetic gas scavenging
PM 8050 / 8060
Die unten beschriebenen Systeme erfüllen nicht die Forderungen der Europanorm 740 und sollten nur dann zum Einsatz kommen, wenn besondere Vorsichtsmaßnahmen getroffen worden sind, wie z. B. gute Raumdurchlüftung und Handhabung durch geschultes Personal.
Narkosegasfortleitung montieren
According to the European Standard EN 740, an Anaesthetic Workstation can be used only with the AGSS. The following systems below do not fulfill the requirements.
Connecting to anaesthetic gas scavenging 82 90 287
Absaugeschlauch auf die Tülle unter dem Überdruckventil stecken (Bild: Ansicht von hinten).
●
Fit scavenging hose to the nozzle below the relief valve (picture: view from the back).
●
Stecker des Absaugeschlauches erst bei Narkosebetrieb in die Kupplung der Absaugeanlage stecken.
●
Connect the probe on the scavenging hose to the terminal unit on the scavenging system only when anaesthesia is about to commence.
PM 8050 / 8060
●
Ventilog
Wenn Ventilog vorhanden: ●
If Ventilog is being used:
zusätzlich Schlauch auf die Tülle an der Rückseite des Ventilog stecken.
●
also connect hose to the nozzle on the back of Ventilog.
82 90 287
If no scavenging system is available:
Wenn keine Absaugeanlage vorhanden ist: ●
Je eine »Narkotikafilter-Ausrüstung 2« aufstecken (Faltenschlauch mit eingeknüpftem Narkotikafilter 633).
Achtung: Die Filter sättigen sich und müssen rechtzeitig gewechselt werden! Durch die Filter wird kein N2O gebunden. Der dadurch entstehende schädliche Einfluß kann, wie bereits oben erwähnt, durch eine verstärkte Raumdurchlüftung reduziert werden.
22
●
Fit an »anaesthetic filter set 2« to each unit (corrugated hose fitted with Anaesthetic Filter 633).
Ventilog
Attention: The filters saturate and have to be changed in time. There is no N2Obinding by the filters. The therefore developed dangerous influence can be reduced buy increased ventilation of the room as mentioned above.
Titus aufrüsten Für den Notfalleinsatz
Assembling Titus For emergency use only
Für den Notfalleinsatz
For emergency use only
Magill-lnhalationseinrichtung anschließen.
Connection of a Magill Inhalation Device.
Das Bild zeigt die Magill-lnhalationseinrichtung ISO- M 26130.
The picture shows the Magill Inhalation Device ISO- M 26130.
1 Magill-Anschlußstück auf den Frischgasausgang ISO schrauben.
1 Screw the Magill connector onto the ISO fresh-gas outlet.
6 1
3 2 Atembeutel 2,3 L aufstecken.
3 Atemschlauch 1,1 m aufstecken.
4 Maskentülle in den Atemschlauch stecken.
5 Maske auf Maskentülle stecken.
6 Hebel in vertikale Position nach oben drehen.
2 Attach the 2.3 L reservoir bag.
2 3 Connect on a 1.1 m breathing hose.
5 4
4 Push the mask nozzle into the breathing hose.
5 Push the mask onto the mask nozzle.
6 Turn the lever to the vertical position.
Geräte-Check
Checking the machine
unmittelbar vor der Inbetriebnahme.
immediately before use.
Es muß eine Checkliste am Narkosegerät angebracht sein.
A checklist must be fixed to the anaesthetic machine.
Erklärungen zur Checkliste: siehe Seite 31.
For further information, see page 31.
24
Titus NMR
Titus MRI
Sicherheitsvorschriften und Hinweise für den Betrieb am Kernspintomographen
Safety regulations and recommendations for use in MRI scanning
●
Druckgasflaschen im Untersuchungsraum nicht zulässig.
●
Compressed gas cylinders are not allowed in examination rooms.
●
Laufrollen an Fahrgestellen immer feststellen.
●
Always lock castors on trolley.
●
Nur das für die Kernspintomographie zugelassene Zubehör verwenden.
●
Only accessories approved for use in scanning may be used.
●
Batteriewechsel an Monitoren (z. B. Oxydig) nur außerhalb des Untersuchungsraumes.
●
Batteries must not be changed on monitors (such as Oxydig) in the examination room.
●
Vapor-Wechsel nur außerhalb des NMR-Untersuchungsraumes vornehmen.
●
Vapor must always be changed away from the MRI examination room.
●
O2-Meßgerät Oxydig nicht am Titus-Gehäuse befestigen, wenn Titus im Bereich größer als 30 mTesla steht.
●
Do not attach an Oxydig O2 measuring device to the Titus housing if the Titus is placed in a field higher than 30 mTesla.
●
Verlängerte Atemschläuche (3 ... 4 m) verursachen eine erhöhte Compliance des Atemsystems.
●
Extended breathing hoses (3 … 4 m) result in increased compliance of the breathing system.
Bei Atemschläuchen für Erwachsene kann im Bereich zwischen 100 ... 600 mL Atemvolumen (VT) eine Erhöhung des eingestellten Volumens (VT) um ca. 5 ... 10 % zweckmäßig sein.
When using ventilation hoses for adults, increasing the set volume (VT) by about 5 … 10 % may be appropriate within a range of 100 … 600 mL tidal volume (VT).
●
Bei Beatmung von Kindern: Keine Atemschläuche mit Metalleinlagen verwenden, Metalleinlagen verursachen Störungen des NMR-Bildes.
●
When ventilating children: do not use ventilating hoses with metal inserts. Metal inserts result in a distortion of the MRI picture.
●
Für den Einsatz in der Anästhesie unterliegen Silikonschläuche speziellen Aufbereitungszyklen. Hinweise auf dem Beipackzettel beachten.
●
Silicone hoses used in anaesthesia require special cleansing treatment cycles. Follow the manufacturer's instructions.
●
Kein Intubationszubehör aus ferromagnetischem Metall im Diagnoseraum verwenden, z. B. Endotrachealkatheter, Mundtuben, Laryngoskope usw.
●
●
Halbjährliche Inspektionen mit Funktionskontrolle am Kernspintomographen sind vorgeschrieben. Zu prüfen sind das Anästhesiegerät mit Monitoring inklusive Sensor-Verlängerungskabeln.
Do not use any intubation accessories made of ferromagnetic metal in the MRI examination room, such as endotracheal catheters, mouth tubes, laryngoscopes etc..
●
A Half-yearly functional inspection at a MRI scanner is required. The anaesthetic machine and the monitoring equipment, including sensor extension cables, must also be checked.
26
Titus MRI with PM 8050 MRI
Hand-over record and machine installation plan Titus MRI with PM 8050 MRI for MRI scanning Manufacturer of anaesthetic machine:
Dräger Medical AG & Co. KGaA, Lübeck
Machine type:
Titus MRI
Manufacturer of MRI scanner:
_________________________________________________
Machine type:
_________________________________________________
Place of installation:
_________________________________________________ _________________________________________________
Date of installation of anaesthetic machine:
_________________________________________________ Signatures
Dräger-representative:
_________________________________________________
User:
_________________________________________________
20 mT
MRI Scanner
PM 8050 MRI with Titus MRI
Distances (cm)
1,
Machine locations
5 m
x=
Minimum 1,5 m
This page is also a copy master.
30
Geräte-Check
Equipment Check
Geräte-Check
Equipment Check
Eine Checkliste aus Kunststoff liegt dem Gerät bei.
A plastic checklist is supplied with the machine.
●
Checkliste in der Gebrauchsanweisung (S. 32/33) dem Typ und dem Ausrüstungsstand des Gerätes und der Zusatzgeräte anpassen – durch Streichungen und Ergänzungen.
●
Die Checkliste enthält dann die Prüfungen, die am Gerät vor jedem Einsatz durchgeführt werden müssen.
●
Außerdem eintragen: Modellbezeichnung und Fabrikationsnummer des Gerätes.
●
Auf die Checkliste aus Kunststoff alle bleibenden Eintragungen mit wasserfestem »Permanent«-Filzstift übertragen.
●
By deleting and adding, adapt the checklist in the Instructions for Use (pages 34/35) to cover the types and variants of the equipment and accessories used.
This checklist will then contain all the checks which have to be carried out on the equipment before each use.
●
In addition, add the following: Model designation and serial number of the machine.
●
All permanent entries on the plastic checklist must be made in waterproof »permanent« felt-tip pen.
●
Attach the checklist to the machine with the bead chain.
Checkliste kann mit der Kugelkette am Anästhesiegerät befestigt werden.
Geräte-Check unmittelbar vor jedem Einsatz des Gerätes durchführen!
Carry out equipment check immediately before each use!
●
Alle Prüfungen in die Kunststoffcheckliste eintragen – mit Bleistift – in die IST-Spalte – mit Datum – und abzeichnen.
●
Enter all checks on the plastic checklist – in pencil – in the ACTUAL column – including date – and sign.
●
Eintragungen vor der nächsten Prüfung ausradieren.
●
Rub out all entries before the next check.
●
Checkliste aus Kunststoff nicht mit Reinigungs- oder Desinfektionsmitteln, Alkohol oder ähnlichen Lösungsmitteln abwischen: der wasserfeste Filzstift ist gegen diese Mittel nicht beständig.
●
Do not wipe the plastic checklist with cleaning agents, disinfectants, alcohol or similar solvents, because the waterproof felt-tip pen may be removed by these agents.
31
Check List for Titus, Sulla 909, Trajan 808, Livius M All checks must be carried out before the equipment is used. The person who carries out the checks must be fully conversant with the Instructions for Use . Checks marked with a P must be carried out before use on each patient. Anaesthesia machine, Serial No: Ventilator, Serial No: Monitor, Serial No: Tick each function when checks have been satisfactorily completed.
●
Disconnect Air probe: No AIR flow present in N2O/AIR flowmeter.
Pre-conditions
● ●
Connect AIR probe, Turn AIR/N2O selector switch to N2O.
– Inspection intervals for machines and accessories not exceeded, eg. see check labels – Machine fully assembled – 2.3 L breathing bag fitted to patient connector as test lung on the Y-piece or filter, whichever is being used – Anaesthetic gas scavenging hose connected to terminal unit and to waste gas sockets on machine – Monitor (O2, P, V, CO2, anaesthetic agent) switched on, self-test carried out satsifactorily, sensor calibrated, sampling line for gas monitoring connected to Luer lock on the Y-piece, correct anaesthetic agent selected – Devapor (when being used) switched on
S-ORC Function Shut-down ● O2 flow-control valve: No N2O flow. Control ● Set O2 flow -control valve to 1.5 L/min.: N2O flow 3 to 5 L/min. ● CloseO2 and N2O flow-control valves.
Tests Gas supply Open reserve gas cylinders (when present): O2 pressure more than 50bar, N2O more than 30bar. ● Close reserve gas cylinders. Medical gas pipeline (when present): Probes for O2, AIR, N2O connected to terminal units ●
Flowmeters ● ● ● ● ● ● ● ● ● ● ●
34
for Sulla 909, Trajan 808 and Livius M: Turn AIR/N2O selector switch to N2O, Open O2 flow-control valve fully: O2 flow present. Open N2O flow-control valve fully : N2O flow present. Turn AIR/N2O selector switch to AIR: No N2O flow present. Open AIR flow-control valve fully: AIR flow present. Close AIR flow-control valve, Turn AIR/N2O selector switch to N2O. forTitus: Turn AIR/N2O selector switch to N2O, Open O2 flow-control valve fully: O2 flow present. Open N2O/AIR flow-control valve fully: Flow present in N2O/AIR flowmeter. Turn AIR/N2O selector switch to AIR: Flow present in N2O/AIR flowmeter.
Vapor 19.n / Vapor 2000 Fastening Latched down firmly and set vertically Handwheel In zero position and engaged P Filling level between min. and max. Interlock (when present) P Locking function OK Key-indexed filling system Sealing key or pin inserted and close tightly or Quik Fil system or Funnel filling system Locking screw tight P
Devapor (when present) Fastening Latched down firmly and resting evenly on surface Handwheel In zero position and engaged P Filling level between half full and max. "Operation" light lit Key-indexed filling system Filling opening locked shut and pointing downwards P
Circle system
Pressure-limiting valve
Valve disks, valve supports in proper condition Retaining nut screwed tight Soda lime Replaced or no discolouration Leak-tightness P ● Switch-pressure limiting valve to "MAN" and set to 70 mbar, For Sulla 909, Trajan 808 und Livius M: P ● Set O2 flow-control valve to 0.12 L/min., P ● Press O2 flush; let presssure build up to ca. 30 mbar: P Pressure remains constant or rises. ● Switch pressure-limiting valve to"SPONT": Pressure drops. ● Switch pressure-limiting valve to "MAN", ● Set Vapor to lowest concentration shown on handwheel, Press O2 flush; let pressure build up to ca. 30 mbar: Pressure remains constant or rises. ● Reset Vapor to 0. ● Release pressure: Push lever on pressure-limiting valve. For Titus: P ● Remove test lung, P ● Detach hose from breathing bag and connect to patient connector or to filter. P ● Press O2 flush; let pressure build up to ca. 30 mbar: P Pressure change from 30 mbar to 20 mbar takes at least 16 seconds. ● Switch pressure-limiting valve to "SPONT": Pressure drops. ● Switch pressure-limiting valve to "MAN", ● Set Vapor to lowest concentration shown on handwheel, ● Press O2 flush; let pressure build up to ca. 30 mbar: Pressure change from 30 mbar to 20 mbar takes at least 16 seconds. P ● Detach hose from Y-piece or filter and fit to breathing bag, P ● Keep Y-piece sealed, P ● Press O2 flush; let pressure build up to ca. 30 mbar: Breathing bag does not empty when squeezed. ● Reset Vapor to 0. P ● Reconnect test lung.
●
Inspiratory and expiratory valves ● Set pressure-limiting valve to 30 mbar, ● Press O2 flush; let pressure build up to ca. 30 mbar: Breathing bag for manual ventilation fills. O2 concentration on monitor more than 80 Vol.%. Valve disc in insp. valve moves when breathing bag is squeezed during manual ventilation. Valve disc in exp. valve moves when breathing bag is released. Test lung on patient connection fills and empties rhythmically during manual ventilation. No resistance during manual ventilation which might indicate stenosis.
Set O2 flow-control valve to 5 L/min.: Display on monitor: 25 to 35 mbar.
Ventilator ● Set stroke volume to 600 mL, ● Set frequency to 10/min., ● Set PEEP to "12 o'clcok position", ● Set other parameters to "green dot":
Display on monitor should be: Stroke volume 450 to 750 mL Frequency 8 to 12/min PEEP present.
● ● ● ●
Switch off ventilator, Set PEEP to 0, Close O2 flow-control valve, Switch monitor to Standby.
Secretion suction P ● Switch on suction, P ● Kink suction hose: Display on pressure gauge between – 0.5 and – 0.9 bar. P ● Set negative pressure to suit patient's needs and swich off suction.
Breathing bag for emergency ventilation Present and ready for use
Anaesthetic gas scavenging Float in AGS flowmeter between minimum and maximum
Before connecting to patient P ● Pre-set tidal volume and frequency to suit patient's needs. P ● Set alarm limits for O2 , P, V, CO2 and anaesthetic agent to suit patient's needs. P ● Set pressure-limiting valve to suit patient's needs. P ● Set monitor to anaesthetic agent being used. P ● For monitors with sidestream gas measurement empty water trap. P ● When there is electrical contact to patient: Establish potential equalisation between machines.
If any check cannot be carried out satisfactorily, the machine must not be used.
Machine check carried out Name: Date:
35
Betrieb Frischgasversorgung
Operation Fresh gas supply
Betrieb
Operation
Voraussetzungen für die Inbetriebnahme des Anästhesiegerätes:
Before operating the anaesthetic machine, make sure that:
●
Betriebsbereitschaft geprüft (Seite 52 bis 57),
●
Readiness for operation has been checked (pages 52 to 57),
●
Check nach Checkliste durchgeführt (Seite 32 bis 33),
●
Checks have been carried out according to the checklist (pages 31, 34, 35)
●
Kenntnis der Gebrauchsanweisungen aller Zubehörgeräte, wie Kreissystem, Vapor, Beatmungsgerät, Monitore usw.
●
Instructions for Use of all accessories, such as the Circle System, Vapor, anaesthetic machines, monitors, etc. are understood.
Frischgasversorgung
Fresh gas supply
Nur, wenn Titus zusätzlich mit Air als Drittgas versorgt ist: 1 Wahlschalter in gewünschte Stellung bringen: »N2O« (O2 + N2O können dosiert werden) oder »Air« (O2 + Air können dosiert werden) Mischtabelle Air/O2 und Air-Einstellungen auf der nächsten Seite.
Only for Titus, which has air supplied as a third gas: 1 Move selector switch to the desired position: »N2O« (O2 + N2O can be metered) or »Air« (O2 + Air can be metered) For Air/O2 mixtures, see table on the following page. Depending on the setting of the selector switch, N2O or Air flows through the right-hand flowmeter tube.
Je nach Stellung des Wahlschalters strömt durch die rechte Meßröhre N2O oder Air. Bei integrierter Druckluftzusatzeinrichtung ist eine inspiratorische O2-Messung erforderlich.
If an additional compressed air device is integrated in the system, inspiratory O2 measurement is required.
2 Mit den Dosierventilen Mischungsverhältnis und Flowmenge des Frischgases einstellen. Erst nach dem Einstellen des Frischgasflows:
50
Only when fresh gas flow has been set:
3
max. 134°C
10
5 30 70
3 Vapor einschalten: weiße Taste gedrückt halten und mit dem Handrad gewünschte Konzentration einstellen oder »Aus« = Handrad auf »0«, Taste für Nullpunktarretierung eingerastet. ●
2 Set mixing ratio and flow of fresh gas with flow control valves.
Y-Stück des fertig aufgerüsteten Kreissystems über Maske oder Tubus mit dem Patienten verbinden.
2 1
3 Switch Vapor on: keep white button pressed and set desired concentration with handwheel or switch Vapor off: turn handwheel to zero, with button for zero-point lock engaged. ●
Connect Y-piece of the completely assembled circle system to patient via mask or tube.
37
Betrieb Betriebsende
Operation End of use
Betriebsende
End of use
●
Zuerst Vapor abschalten: Handrad in Stellung »0«, Taste »0« muß einrasten.
●
First, switch off Vapor: Handwheel in »0« position, »0« button must engage.
●
Patientenanschluß diskonnektieren.
●
Disconnect breathing hoses.
●
Dosierventile schließen in der Reihenfolge N2O – O2.
●
Close flow valves in the sequence N2O – O2.
Ständiger Frischgasflow durch den CO2-Absorber trocknet den Atemkalk aus!
Continuous fresh gas flow through the CO2 absorber dries out the soda lime.
Beim Unterschreiten einer Mindestfeuchte kommt es unabhängig von der Kalkart und dem angewandten Inhalationsanaesthetikum zu unerwünschten Reaktionen:
Does the moisture fall below minimum, undesired reactions, independent of the kind of lime and the used inhalation anaesthetic agent, arise:
- Verminderte CO2-Absorption,
- reduced CO2 absorption,
- Bildung von CO,
- formation of CO,
- Absorption und Zersetzung von Inhalationsanaesthetikum,
- absorption and decomposition of the inhalation anaesthetic agent,
- erhöhte Wärmeentwicklung im Absorber und damit erhöhte Atemgastemperatur.
- increased heat development in the absorber and with this increased respiratory gas temperature.
Diese Reaktionen können zur Gefährdung des Patienten in Form von CO-Vergiftung, nicht ausreichender Narkosetiefe und Verbrennungen in den Atemwegen führen.
These reactions can endanger the patient in form of CO poisoning, insufficient depth of anaesthesia and burns of the respiratory tracts.
N2O belastet die Umwelt!
N2O is detrimental to the environment!
Unnötigen Frischgasverbrauch vermeiden!
Do not use more fresh gas than necessary!
●
Drehknopf am Ventilog in Stellung »0«.
●
Turn rotary knob on Ventilog to »0« position.
●
O2-, N2O- und Air-Stecker in »Parkstellung« bringen oder ziehen.
●
Put O2, N2O and air probes in »standby position« or disconnect.
Bei Versorgung aus Flaschen:
When supply is from cylinders:
●
Flaschenventile schließen.
●
Close cylinder valves.
●
Zur Druckentlastung des Anästhesiegerätes zuerst N2O-Dosierventil öffnen, danach O2-Dosierventil öffnen, bis die Meßröhrenschwimmer vollständig abgesunken sind.
●
To relieve pressure on the anaesthetic machine, open N2O flow valve first, then open O2 flow valve until the floats in the flowmeter tubes have dropped completely.
●
Dosierventile wieder schließen.
●
Close flow valves again.
●
Monitore abschalten.
●
Switch off monitors.
44
Care list for Titus anaesthetic apparatus Only for non-infectious patients. When used with infectious patients, all parts in contact with breathing gas must additionally be sterilized after desinfection and cleaning.
What
How often
Components which can be conditioned
Conditioning intervals 1) with Filter on Y-piece
Titus Basic Power cable, compressed gas hoses, equipotential bonding lead
without Filter
daily monthly
Anaesthetic vaporiser Vapor 19.n / Vapor 2000 Circle system 9 Metal parts CO2-absorber with insert ISO changeover valve FGE changeover valve Valve disks Breathing bag with breathing hose connector Breathing hoses Masks Fresh gas hose Y-Piece Water trap Pressure gauge hose Probe scavenging hose or Probe return hose
with Filter on inspiration and exspiration port
daily weekly weekly weekly weekly weekly daily daily per patient weekly daily daily weekly
weekly weekly weekly weekly weekly daily per patient per patient weekly per patient per patient weekly weekly
daily daily daily daily daily per patient per patient per patient weekly per patient per patient daily
Monitor PM 8050, PM 8060 Volumeter 3000 Volumeter 2000 K (for children) Oxidig Flow-sensor O2-sensor Temperature sensor Water trap (monitoring)
weekly weekly weekly daily weekly weekly weekly daily
weekly weekly weekly daily weekly weekly daily daily
weekly daily daily daily daily daily daily daily
Filter Filter of the measured gas recirculation system Microbial filter 645 St
weekly -
weekly daily
daily -
AGS-System Scavenging hose with connector AGS housing Container for AGS buffer volume AGS transfer hose AGS flow tube (without filter) Waste gas connector with tube Emergency breathing Emergency breathing bag, its diaphragm and upper and lower valve parts (Dräger Resultator 2000) silicone sleeve of secretion collecting bottle and rinsing bottle, their lid with float, suction hose and inspection window
monthly weekly weekly weekly weekly weekly after each use
as requirement, but at least daily
1) The conditioning intervals depend on the use and position of the filters. the table is merely intended as a rough guide. Zhe instructions of the hospital´s hygiene officer shall prevail! 2) Only use cleaning agents, no alkaline or chlorine-releasing substances. Risk of corrosion. 3) Surface disinfectants based on aldehydes, alcohols and quaternary ammonium compounds, such as Buraton 10 F (Schülke & Mayr GmbH) or Incidin Perfekt (Henkel Hygiene GmbH) can be used to ensure compatibility.
48
Desinfizieren und reinigen vorzugsweise in der Waschmaschine durchführen, sonst baddesinfizieren. Titus und seine Komponenten nicht in Formaldehyd-Dampf und nicht in Ethylenoxid behandeln.
How Desinfection and cleaning
Sterilization
Washing machine 2) 93 °C 10 minutes
Wiping 3)
Immersion 4)
Steam 134 °C 10 minutes
no no
only outside yes
no no
no no
no
only outside
no
no
yes yes possible7) possible7) yes yes yes yes no yes yes yes yes
no no no no no no no no only outside no no no no
possible possible possible possible possible possible possible possible up to 50 °C possible possible possible possible
yes yes yes yes yes yes yes yes no yes yes yes yes
no no no no no no no yes
yes only outside only outside yes only outside yes no no
no only rinse 5) only rinse 5) no possible 6) no no possible
no 120 °C, 20 min no no no no yes yes
no no
only outside only outside
no no
yes, max. 24 times yes, max. 10 times
yes yes yes yes no yes
no no no no yes no
possible possible possible possible no possible
no no yes no no no
yes
no
possible
yes
yes
no
possible
yes
4) Do not use any agents containing alcohol. 5) Do not submerge in water. 6) Disinfect the flow sensor in 70%ethanoll solution for approx 1 hour and leave to dry in air for at least 30 minutes. 7) Use only pH-neutral detergent and distilled water.
49
Pflege Reinigung und Desinfektion
Care Cleaning and disinfection
Reinigung und Desinfektion
Cleaning and disinfection
●
Grobe Verunreinigungen mit Einwegtüchern abwischen.
●
Wipe off heavy dirt with disposable cloths.
Zur Desinfektion Präparate aus der Gruppe der Flächendesinfektionsmittel verwenden – materialverträglich sind Präparate auf der Wirkstoffbasis von:
For disinfecting, use preparations of the surface disinfectants group – to avoid damaging the materials, use preparations based on the following active substances:
– Aldehyden
– Aldehydes
– quaternären Ammoniumverbindungen.
– Quaternary ammonium compounds.
Nicht verwenden, weil sie möglicherweise materialschädigend sind:
Do not use the following products, because they may damage the material:
– Präparate auf der Basis von halogenabspaltenden Verbindungen
– Preparations based on halogen-separating compounds
– starken organischen Säuren
– Strong organic acids
– sauerstoff-abspaltenden Verbindungen.
– Oxygen-separating compounds.
Empfehlung für Anwender in Deutschland:
Recommendation for users in Germany:
●
Desinfektionsmittel, die in der DGHM-Liste eingetragen sind – die Liste nennt auch die Wirkstoffbasis jedes Desinfektionsmittels – DGHM – Deutsche Gesellschaft für Hygiene und Mikrobiologie – DGHM-Liste – mhp-Verlag GmbH, Wiesbaden. Für Länder, in denen die DGHM-Liste nicht bekannt ist, werden die vorher genannten Wirkbasen empfohlen.
●
Disinfectants entered in the DGHM list – this list also specifies the active substance on which each disinfectant is based – DGHM – Deutsche Gesellschaft für Hygiene und Mikrobiologie – DGHM-List available from mhp-Verlag GmbH, Wiesbaden. For countries where the DGHM list is not known, the active bases specified above are recommended.
Wischdesinfizieren
Wipe disinfecting
Titus, Vapor, Ventilog, Druckgas-Anschlußschläuche und Steuerleitung des Umschaltventils
Titus, Vapor, Ventilog, medical gas connection hoses and control line of the changeover valve:
●
keine alkoholhaltigen Mittel verwenden – Empfehlung: z. B. Buraton 10 F – Schülke & Mayr, Norderstedt – Anwendungsvorschriften des Herstellers beachten.
●
Do not use any cleaning agents containing alcohol – recommendation: e.g. Buraton 10 F – Schülke & Mayr, Germany – observe the manufacturer's Instructions for Use.
Im Reinigungs- und Desinfektionsautomaten
In cleaning and disinfecting machines
naßthermisch desinfizieren
disinfect in liquid medium at high temperature
Verbindungsschlauch, Faltenbalg, Patientensystem, Umschaltventil FGE, Umschaltventil und Abgastülle –
Connecting hose, bellows, patient system, FGE changeover valve, changeover valve and waste gas nozzle –
●
93 °C – 10 Minuten –
●
93 °C – 10 minutes –
●
nur mit Reinigungsmittel – kein Desinfektionsmittel zusetzen – Teile können korrodieren!
●
only with cleaning agent – do not add disinfectant – parts may corrode!
●
Umschaltventil FGE nach dem naßthermischen Desinfizieren immer bei 134 °C in Heißdampf sterilisieren. Sonst gestörte Funktion weil sich noch Restflüssigkeit in den Steuerkanälen befinden kann!
●
After disinfection in washing machine, always sterilise the FGE changeover valve at 134 °C in autoclave. Otherwise, operation may be disrupted because residual liquid may remain in the control channels!
50
Pflege Sterilisation Wartungs-/Instandsetzungsintervalle
Care Sterilisation Service/Maintenance intervals
Sterilisation
Sterilisation
in Heißdampf (s. entspr. Spalte in Tabelle Seite 47).
Steam autoclaving (see appropriate column in Table, page 49).
Dampfsterilisation beschleunigt den natürlichen Alterungsprozeß von Gummiteilen. Eine häufige Untersuchung auf Dichtheit und festen Sitz ist notwendig. Mikrobenfilter nur in Dampf 134 °C sterilisieren. Mehrmalige Sterilisation ist möglich (s. zugehörige Gebrauchsanweisung). Jede Sterilisation auf dem Filter markieren.
Steam autoclaving accelerates the natural ageing process of rubber parts. Frequent checks for leaks and firm connection are essential. Sterilise microbial filter in steam at 134 °C only. Multiple sterilisation is possible (see relevant Instructions for Use). Mark each sterilisation on the filter.
Nach der Pflege: Gerät zusammenbauen und Betriebsbereitschaft prüfen wie ab Seite 52 beschrieben!
After care: Assemble the device and check readiness for operation as described on page 52ff!
Wartungs-/Instandhaltungsintervalle
Service/Maintenance intervals
Gerät bzw. Geräteteile vor jeder Instandhaltungsmaßnahme – auch bei Rücksendung zu Reparaturzwecken – reinigen und desinfizieren!
Clean and disinfect device or device parts before each maintenance operation, including when returning for repair!
Geräte-Inspektion
halbjährlich durch Fachleute
Apparatus Inspection
Every 6 months by an expert
Sicherheitstechnische Kontrollen
halbjährlich durch Fachleute
Safety inspection
Every 6 months by an expert
O2-Sensor
austauschen,wenn Haltbarkeitsdatum überschritten oder wenn keine Kalibrierung mehr möglich alle 4 Jahre austauschen durch Fachleute
O2 Sensor
Replace on reaching expiry date or when calibration is no longer possible
Control membrane of the O2 shortage threshold signal
Should be replaced every 4 years by an expert
Membran des S-ORC
alle 5 Jahre austauschen durch Fachleute
Membrane of S-ORC
Should be replaced every 5 years by an expert
Membran der Druckminderer
alle 6 Jahre austauschen durch Fachleute
Membrane of the pressure Should be replaced every reducer 6 years by an expert
Steuermembran des O2-Mangelsignals
51
Betriebsbereitschaft prüfen
Testing Readiness for Operation
Betriebsbereitschaft prüfen
Testing Readiness for Operation
– nach jeder Gerätepflege
– after completion of each care procedure
Das Gerät ist vollständig aufgerüstet, mit Druckgasen versorgt (Flaschen – wenn vorhanden – gefüllt), CO2-Absorber gefüllt.
Completely re-assemble the machine and supply with compressed gases (cylinders – if available – filled); CO2 absorber filled.
O2-Flaschen sind vollständig gefüllt, wenn der O2-Druckmesser 200 bar anzeigt. Bei diesem Druck enthält eine 3-L-Flasche 600 Liter, eine11-L-Flasche 2200 Liter entspanntes Gas.
O2 cylinders are completely charged if the O2 pressure gauge indicates 200 bar. At this pressure, a 3-L cylinder contains 600 litres and 11-L cylinder contains 2200 litres of expanded gas.
Der N2O-Druck beträgt etwa 50 bar, solange flüssiges Lachgas in der Flasche vorliegt. Bei der Gasentnahme und der damit verbundenen Temperaturabsenkung kann der Flaschendruck zwischenzeitlich unter 50 bar absinken. Der Flüssigkeitsvorrat von Lachgasflaschen kann nur durch Wiegen festgestellt werden. Eine gefüllte 3-L-Flasche (2,25 kg Füllgewicht) enthält etwa 1125 Liter, eine 11-L-Flasche (8 kg Füllgewicht) enthält etwa 4000 Liter entspanntes Lachgas.
The N2 O pressure amounts to about 50 bar, as long as liquid nitrous oxide is available in the cylinder. When gas is extracted, the cylinder pressure may temporarily drop below 50 bar, as a function of the related temperature reduction. The liquid content of nitrous oxide cylinders can only be determined by weighing. A charged 3-L cylinder (2.25 kg charging weight) contains about 1125 litres, and a charged 11-L cylinder (8 kg charging weight) contains about 4000 litres of expanded nitrous oxide.
Druckgasanschlüsse prüfen
Checking compressed gas connections
Alle Versorgungsschläuche (aus zentraler Versorgungsanlage oder aus Flaschen) auf festen Sitz, Dichtheit und einwandfreien Zustand prüfen (Sichtprüfung).
Check all supply hoses (from pipeline system or cylinders) for firm connection, leaks and general condition (visual check).
Sicherheitseinrichtungen prüfen
Checking safety features
(Beschreibung der Sicherheitseinrichtungen Seite 61).
(Description of safety features, page 61).
Für alle Geräte – mit oder ohne S-ORC, ob zusätzlich mit Air versorgt oder nicht – gilt:
For all devices – with or without S-ORC, and with or without an additional air supply:
●
N2O darf nicht fließen, wenn die O2-Druckgasversorgung unterbrochen oder ausgefallen ist = Wirkung der N2O-Sperre bei Geräten ohne S-ORC = Wirkung von S-ORC, wenn Gerät damit ausgerüstet ist (siehe Aufkleber »S-ORC« neben der N2O -Meßröhre).
●
N2O must not flow if the O2 compressed gas supply has been interrupted or has failed = effect of N2O cut-out for machines without S-ORC = effect of S-ORC if machine is equipped with it (see label »S-ORC« next to the N2O measuring tube).
●
Bei O2-Mangel oder -Ausfall ertönt ein akustisches Warnsignal.
●
If there is an O2 shortage or failure, an acoustic alarm sounds.
52