Service Manual
38 Pages
Preview
Page 1
GE Healthcare
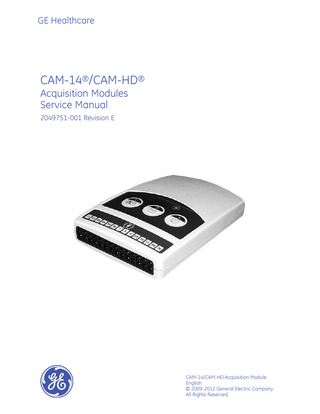
CAM-14®/CAM-HD® Acquisition Modules Service Manual 2049751-001 Revision E
CAM-14/CAM-HD Acquisition Module English © 2009-2012 General Electric Company. All Rights Reserved.
Publication Information This manual refers only to version 2 of the CAM–14 Acquisition Module (Product Code SK9 and RNC) and version 1 of the CAM-HD Acquisition Module (Product Code RNB). Due to continuing product innovation, specifications in this manual are subject to change without notice. CAM–14, CAM-HD, and MAC are trademarks owned by GE Medical Systems Information Technologies Inc., a General Electric Company going to market as GE Healthcare. All other trademarks contained herein are the property of their respective owners. The document's part number and revision appear at the bottom of each page. The following table summarizes the document's revision history.
Revision History Revision
Date
Comment
A
18 December 2009
Initial release
B
17 March 2010
Updated Functional Checkout Requirements and Parts List
C
17 March 2011
Added information about the CAM HD acquisition module.
D
11 June 2012
Per ECR19621-004, CAM-14 Acquisition Module (P/N 900995-004) was added to the Part Lists and Drawings chapter.
E
4 September 2012
Per ECR19621–004, the newest version of CAM-14 Acquisition Module with new main board P/N 2028778-003 will be released to production as CAM-14 P/N 900995-002 with product code SK9. The use of P/N 900995-004 for this purpose was scrapped. Removed the legacy Battery Compartment Cleaning section in the Maintenance chapter.
To access other GE Healthcare Diagnostic Cardiology manuals, go to the Common Documentation Library (CDL), located at http://www.gehealthcare.com/usen/service/biomed_tech_selfservice/services_user_doc/products/support.html, and click Cardiology.
Service Manual Language Information
2
WARNING
This service manual is available in English only.
(EN)
•
If a customer's service provider requires a language other than English, it is the customer's responsibility to provide translation services.
•
Do not attempt to service the equipment unless this service manual has been consulted and is understood.
•
Failure to heed this warning may result in injury to the service provider, operator, or patient, from electric shock, mechanical or other hazards.
ПРЕДУПРЕЖДЕНИЕ
Това упътване за работа е налично само на английски език.
(BG)
•
Ако доставчикът на услугата на клиента изиска друг език, задължение на клиента е да осигури превод.
•
Не използвайте оборудването, преди да сте се консултирали и разбрали упътването за работа.
•
Неспазването на това предупреждение може да доведе до нараняване на доставчика на услугата, оператора или пациент в резултат на токов удар или механична или друга опасност.
警告
本维修手册仅提供英文版本。
ZH-CN
•
如果维修服务提供商需要非英文版本,客户需自行提供翻译服务。
•
未详细阅读和完全理解本维修手册之前,不得进行维修。
•
忽略本警告可能对维修人员,操作员或患者造成触电、机械伤害或其他形式的伤害。
CAM-14®/CAM-HD®
2049751-001E 4 September 2012
Contents
1
Introduction Product Information... 11 Indications for Use... 11 General Description... 11 Equipment Identification... 12
Regulatory and Safety Information... 14 Safety Conventions... 14 Responsibility of the Manufacturer... 14
Service Information... 15 Service Requirements... 15 Additional Assistance... 15
Manual Information ... 15 Manual Purpose... 15 Intended Audience... 15 Document Conventions... 16
2
Maintenance Visual Inspection ... 18 Cleaning ... 18 Cleaning and Disinfecting Acquisition Modules... 18 Cautions... 19 Storage... 19
Built-In Diagnostic Tests ... 20 Functional Checkout Procedures ... 20 Tools... 21 Visual Inspection... 21 Operational Checks... 21 Electrical Safety Checks... 22
3
Troubleshooting General Information... 25 ECG Data Noise... 25 Typical Problems and Solutions... 25 Einthoven’s Triangle... 26
Servicing the Acquisition Module... 27 Disassembling the Acquisition Module... 28 Reassembling the Acquisition Module... 29
4 2049751-001E
Parts Lists and Drawings CAM-14®/CAM-HD®
9
Upper Level Drawing... 32 CAM-14 Acquisition Module P/N 900995-002 with Product Code SK9 ... 33 CAM-14 Acquisition Module P/N 900995-002 with Product Code RNC ... 34 CAM-HD Acquisition Module (P/N 900995-003) ... 35
10
CAM-14®/CAM-HD®
2049751-001E
1
Introduction
This chapter provides general information required for the proper use of the system and this manual. Familiarize yourself with this information before using the system.
Product Information This section provides the indications for use, general description, and identification information for both the CAM-14 and CAM-HD acquisition modules. Except where differences between the two products are noted, the terms acquisition module and device refer to both products.
Indications for Use The acquisition module is intended to acquire, digitize, and transmit analog ECG signals to a host unit. The circuitry is designed to protect the host unit against the effects of cardiac defibrillator discharge to ensure device recovery. The acquisition module is intended to be used under the direct supervision of a licensed health care practitioner.
General Description The acquisition module performs high resolution ECG data acquisition for use with host equipment (resting ECG analysis systems and exercise systems). The acquisition module has the following features: • AC leadfail bias • lead off detection • patient isolation • function key control of host equipment functions The acquisition module provides patient electrical isolation for the host equipment. The minute ECG signals from the patient’s skin are received by the electrodes and sent to the acquisition module via leadwires. The acquisition module then amplifies, digitizes, and performs processing on the signals.
2049751-001E
CAM-14®/CAM-HD®
11
Introduction
Equipment Identification Every GE Healthcare device has a product label that identifies the product name, part number, manufacturing information, and unique serial number. This information is required when contacting GE Healthcare for support. The product label is located on the back of the acquisition module, as shown in the following illustrations.
Product Label The product label is laid out in the following format. Depending on the product, the label may vary slightly in format, but it contains the same information.
Product Label Format
12
Item
Description
1
Product description
2
Product part number
3
Date of manufacture in YYYY-MM format
4
Device serial number (See “Serial Number Format” on page 13 for more information.) CAM-14®/CAM-HD®
2049751-001E
Introduction
Product Label Format (cont'd.) Item
Description
5
Manufacturer name and address
6
Product bar code
Serial Number Format Each device has a serial number that uniquely identifies the device and provides important information about the device. The serial number format is shown in the following illustration:
Serial Number Format Item
Name
Description
1
Product Code
A three-letter code that uniquely identifies the product line. Refer to “” on page for more information.
2
Year Manufactured
A two-digit code identifying the year the device was manufactured. Values range from 00 to 99. For example: 00 = 2000, 04 = 2004, 05 = 2005 (and so on).
3
Fiscal Week Manufactured
A two-digit code identifying the week the device was manufactured. Values range from 01 to 52. GE Healthcare's fiscal weeks correspond to the calendar week. For example, 01 = the first week in January.
4
Product Sequence
A four-digit number identifying the order in which this device was manufactured. Values range from 000 to 9999.
5
Manufacturing Site
A one-letter code identifying the site where the device was manufactured. For example, F = Milwaukee, N = Freiburg, P = Bangalore
6
Miscellaneous Characteristic
For example, P = the device is a prototype, R = the device was refurbished, U = the device was upgraded to meet the specifications of another product code.
Product Codes The product code identifies specific system platforms. You need the product code before servicing or requesting support for your device. You can identify the product using the serial number listed on the product label on the back of the device. 2049751-001E
CAM-14®/CAM-HD®
13
Introduction
Regulatory and Safety Information This section provides information about the safe use and regulatory compliance of this device. Familiarize yourself with this information and read and understand all instructions before attempting to service this device. NOTE: Disregarding the safety information provided in this manual is considered abnormal use of this system and could result in injury, data loss, or a voided warranty.
Safety Conventions A Hazard is a source of potential injury to a person, property, or the system. This manual uses the terms DANGER, WARNING, CAUTION, and NOTICE to point out hazards and to designate a degree or level of seriousness. Familiarize yourself with the following definitions and their significance. Definitions of Safety Conventions Safety Convention
Definition
DANGER
Indicates an imminent hazard, which, if not avoided, will result in death or serious injury.
WARNING
Indicates a potential hazard or unsafe practice, which, if not avoided, could result in death or serious injury.
CAUTION
Indicates a potential hazard or unsafe practice, which, if not avoided, could result in moderate or minor injury.
NOTICE
Indicates a potential hazard or unsafe practice, which, if not avoided, could result in the loss or destruction of property or data.
Responsibility of the Manufacturer GE Healthcare is responsible for the safety, reliability, and performance of hardware supplied by GE Healthcare only if the following conditions are met: • Assembly operations, extensions, readjustments, modifications, or repairs are carried out by persons authorized by GE Healthcare. • The electrical installation of the relevant room complies with the requirements of the appropriate local, state, and other government regulations. • The equipment is used in accordance with the instructions for use.
14
CAM-14®/CAM-HD®
2049751-001E
Introduction
Service Information This section provides information pertaining to the maintenance and servicing of the system. Familiarize yourself with this information before requesting service from GE Healthcare or its authorized representatives.
Service Requirements Regular maintenance, irrespective of usage, is essential to ensure that the components of this system are always functional when required. Failure on the part of the responsible individual, hospital, or institution using this equipment to implement a satisfactory maintenance schedule may cause undue equipment failure and possible safety hazards. Refer equipment servicing to GE Healthcare service personnel or authorized service agents only. Any unauthorized attempt to repair equipment under warranty voids that warranty. It is the user’s responsibility to report the need for service to GE Healthcare or one of their authorized agents.
Additional Assistance GE Healthcare maintains a trained staff of application and technical experts to answer questions and respond to issues and problems that may arise during the installation, maintenance, and use of this system. Contact your local GE Healthcare representative to request additional assistance.
Manual Information This section provides information for the correct use of this manual. Keep this manual with the equipment at all times and periodically review it. You should request training assistance from GE Healthcare, if needed.
Manual Purpose This manual supplies technical information for service representatives and technical personnel so they can maintain the equipment to the assembly level. Use it as a guide for maintenance and electrical repairs considered field repairable. Where necessary the manual identifies additional sources of relevant information and/or technical assistance. See the operator manual of the host system for instructions necessary to operate the equipment safely in accordance with its function and intended use.
Intended Audience This manual is intended for persons who use, maintain, or troubleshoot this equipment.
2049751-001E
CAM-14®/CAM-HD®
15
Introduction
Document Conventions This manual uses the following conventions.
Typographical Conventions Convention
Description
Bold Text
Indicates keys on the keyboard, text to enter, or hardware items such as buttons or switches on the equipment.
Italicized-Bold Indicates software terms that identify menu items, buttons or options in Text various windows. CTRL+ESC
Indicates a keyboard operation. A plus (+) sign between the names of two keys indicates that while holding the first key, you should press and release the second key. For example, Press CTRL+ESC means to press and hold the CTRL key and then press and release the ESC key.
<space>
Indicates that you must press the spacebar. When instructions are given for typing a precise text string with one or more spaces, the point where you must press the spacebar is indicated as <space>. This ensures that the correct number of spaces is inserted in the correct positions within the literal text string. The purpose of the < > brackets is to distinguish the command from the literal text within the string.
Enter
Indicates that you must press the Enter or Return key on the keyboard. Do not type Enter.
>
The greater than symbol, or right angle bracket, is a concise method to indicate a sequence of menu selections. For example, the statement “From the main menu, select System > Setup > Options to open the Option Activation window” replaces the following: 1. From the main menu, select System to open the System menu. 2.
From the System menu, select Setup to open the Setup menu.
3.
From the Setup menu, select Options to open the Option Activation window.
Illustrations All illustrations in the manual are provided as examples only. Depending on system configuration, screens in the manual may differ from the screens on your system. All patient names and data are fictitious. Any similarity to actual persons is coincidental.
Notes Notes provide application tips or additional information that, while useful, are not essential to the correct operation of the system. They are called out from the body text through a flag word and indentation, as follows: NOTE: The tip or additional information is indented below the NOTE flag word.
16
CAM-14®/CAM-HD®
2049751-001E
2
Maintenance
Other than daily cleaning and occasional maintenance checks as outlined in this chapter, the acquisition module requires no maintenance. Only qualified service personnel should attempt to repair components and assemblies internal to the acquisition module. Contact GE Healthcare Customer Support for repair and replacement options. WARNING: PROPER MAINTENANCE - Failure on the part of all responsible individuals, hospitals, or institutions employing the use of this device, to implement the recommended maintenance schedule may result in equipment failure and possible health hazards. The manufacturer does not, in any manner, assume the responsibility for performing the recommended maintenance schedule unless an equipment maintenance agreement exists. The sole responsibility rests with the individuals, hospitals, or institutions utilizing the device. Maintenance and Repair
2049751-001E
Item
Description
Maintenance Frequency
The end user should visually inspect and clean the device daily. Qualified technical personnel should perform routine maintenance checks and test procedures per the Functional Checkout Procedure annually.
Repair Guidelines
Equipment descriptions and service information to repair field replaceable parts are available in this service manual for use by qualified technical personnel.
CAM-14®/CAM-HD®
17
Maintenance
Visual Inspection Inspect the acquisition module each time you clean it or if you suspect a problem. • Check the leadwires and leadwire adapters for wear and loose connections. Replace these parts at the first sign of wear. • Check the pins that the leadwires plug into. They should not be bent or loose. Contact GE Healthcare Customer Support for any repairs needed. • Check the acquisition module plastic case for any damage. Contact GE Healthcare Customer Support for any repairs needed.
Cleaning The exterior and leadwires of the acquisition module should be cleaned daily.
Cleaning and Disinfecting Acquisition Modules Proper cleaning and disinfecting prolongs the life of acquisition devices. Failure to use the proper cleaning solutions or to follow proper procedures can result in the following: • Appearance of waveforms when not connected to a patient, resulting in false alarms instead of lead failure alarms • Brittle and cracked device case • Melting, dulling, or distortion of the case • Total device failure, requiring replacement • Unit malfunction • Voided warranty Use the following procedure to clean and disinfect the cables and leadwires. 1.
Remove cables, leadwires, and batteries from the device before cleaning. Make sure to firmly close the battery door after removing the batteries.
2.
To clean, wipe with a lightly moistened cloth. Use a mild soap and water solution to moisten the cloth. Do NOT use any of the following cleaning products, or products that contain the same active ingredients and solutions, which are known to cause the problems previously listed: • Sani-Cloth® Wipes • Ascepti® Wipes • HB Quat® • Clorox® Wipes (they do not contain bleach) • Over-the-counter detergents (such as Fantastic®, Tilex®, and so on)
18
CAM-14®/CAM-HD®
2049751-001E
Maintenance
3.
To disinfect, wipe with a soft, lint-free cloth moistened with an appropriate disinfectant. Use the following solutions, as recommended in the APIC Guidelines for Selection and Use of Disinfectants (1996): • Sodium hypochlorite (5.2% household bleach) minimum 1:500 dilution (minimum 100 ppm free chlorine) and maximum 1:10 dilution. • Any sodium hypochlorite wipe product that meets the previous guidelines can be used.
4.
Allow the cleaning solution/disinfectant to remain on the device for a minimum of one minute, or per hospital guidelines.
5.
Wipe off the cleaning solution/disinfectant with a clean, moistened cloth.
6.
Dry with a clean cloth or paper towel.
Cautions • Follow the cleaning instructions exactly. • Wring excess disinfectant from wipe before using. • Never immerse the device, cables, or leadwires in any liquid, as this may corrode metal contacts and affect signal quality. • Do not allow fluid to pool around connection pins. If this happens, blot dry with a soft, lint-free cloth. • Never use conductive solutions or solutions that contain chlorides, wax, or wax compounds to clean the device, cables, or leadwires. • Never use solutions or products that contain any type of Ammonium Chloride such as, but not limited to: • Dimethyl Benzyl Ammonium Chloride • Quaternary Ammonium Chloride solutions • Abrasive cleaners or solvents of any kind • Acetone • Ketone • Betadine • Alcohol-based cleaning agents • Sodium salts • Never autoclave or steam clean the device, cables, or leadwires. • Do not use until thoroughly dry.
Storage Use the following guidelines when storing acquisition modules: • Always remove the batteries when the device is not in use, even for short periods of time. • Store in a dry, well-ventilated area. • Hang the device, using a holder if available. 2049751-001E
CAM-14®/CAM-HD®
19
Maintenance
• If leadwires are attached, they should hang straight. • Do not coil leadwires or cables around the device.
Built-In Diagnostic Tests The host equipment generally contains built-in diagnostic tests to verify the operation of the electrocardiograph. These built-in diagnostic tests verify the operation of the acquisition module, as well. For example, there is a test that records raw ECG data on the thermal paper. This test checks for noise and gain in the acquisition module. Another test is a serial link test that determines if the microprocessor in the host equipment is communicating with the acquisition module. For details on using these tests, see the field service manual for the host equipment.
Functional Checkout Procedures The following table identifies the tools and procedures required to perform a functional checkout after replacing the specified FRU or performing the specified task. To use the table, locate the relevant FRU or task in the first column and note the required Tools, Visual Inspections, Operational Check, and Electrical Safety Check. Then, locate the referenced instructions in the corresponding sections that follow the table. NOTE: The field replaceable unit (FRU) checkout procedure for any listed FRU also applies to its internal PCBs and components. In addition to the following procedures, you should also perform any checkout procedures required by the host system. Refer to the host system's field service manual for the host system's checkout procedures. Functional Checkout Requirements FRU Description Tools
Visual Inspection
Operational Check
Electrical Safety Check
FRU Repairs CAM-14
1, 6
1 ,2, 3
1, 2, 3
not applicable
CAM-HD
1, 6
1 ,2, 3
1, 2, 3
not applicable
All internal FRU's/parts, Covers, and fastener replacements
1, 2, 3, 4, 5, 6
1 ,2, 3
1, 2, 3
1, 2
1,5,6
1,2,3
1,2,3
not applicable
Non-FRU Repairs No parts replaced
Annual electrical Per Host Device Requirement safety checkout
20
CAM-14®/CAM-HD®
2049751-001E
Maintenance
Tools 1.
ECG Simulator
2.
Standard hand tools including a #6 Torx driver
3.
Current leakage tester
4.
Hipot tester
5.
Anti-static wrist strap
6.
Applicable service and/or operator manual as needed for reference
Visual Inspection Inspect the following for excess wear and/or any visual signs of damage. 1.
Inspect for defective or broken patient cable/leadwires or out-of-date electrodes.
2.
Review electrode placement, skin prep, and patient related requirements with the ECG Tech.
3.
Inspect external surfaces.
Operational Checks
2049751-001E
1.
Complete power-up self-test.
2.
Run a simulated recorded rhythm strip.
3.
Run a simulated recorded ECG.
CAM-14®/CAM-HD®
21
Maintenance
Electrical Safety Checks 1.
Conduct current leakage and ground continuity tests. Perform electrical safety checks when indicated in the preceding table. All indicated electrical safety checks require a pass/fail indication for the steps performed. Record the measurement values in your debrief. Refer to “Leakage Tests” on page 22 for additional information.
2.
Conduct the dielectric withstand test. Refer to “Dielectric Withstand Test” on page 24 for additional information.
Leakage Tests The leakage tests are safety tests to ensure that the equipment poses no electrical health hazards. Use the following table to determine which tests apply to the unit under test and the maximum allowable leakage currents. For international leakage limits, refer to the internal standards agencies of that particular country. If the unit under test fails the leakage tests, do not allow the customer to use the equipment. Call GE Healthcare Customer Support for assistance. GE Healthcare recommends that you perform these tests with the following frequency: • Before applying power for the first time • Every year as part of routine maintenance • Whenever internal assemblies are serviced You need a leakage tester to perform the leakage tests. NOTE: The accuracy of the leakage tests depends on a properly-wired wall outlet. Do not proceed until you verify the integrity of the power source. WARNING: Total system leakage current must not exceed 100 microamperes.
22
CAM-14®/CAM-HD®
2049751-001E
Maintenance
Electrical Safety Checks Step
Condition1
UUT - ON2
Result
Leakage Current Limits
Patient Leakage Current to Ground 1.
Forward Polarity
NC
______ µA
Pass/Fail
10 µA
2.
Neutral open, Forward Polarity
SFC
______ µA
Pass/Fail
50 µA
3.
Ground open, Forward Polarity
SFC
______ µA
Pass/Fail
50 µA
4.
Ground open, Reverse Polarity
SFC
______ µA
Pass/Fail
50 µA
5.
Neutral open, Reverse Polarity
SFC
______ µA
Pass/Fail
50 µA
6.
Reverse Polarity
NC
______ µA
Pass/Fail
10 µA
Patient Leakage Current Mains on Applied Part3
1. 2. 3.
1.
Forward Polarity Neutral / Ground Closed
SFC
______ µA
Pass/Fail
5000 µA
2.
Reverse Polarity Neutral / Ground Closed
SFC
______ µA
Pass/Fail
5000 µA
NC= Normal Condition SFC= Single Fault Condition N/A= Not Applicable UUT= Unit Under Test All SIPs/SOPs grounded
2049751-001E
CAM-14®/CAM-HD®
23
Maintenance
Dielectric Withstand Test The dielectric withstand test (or hipot test) is a test that verifies that the isolation of a product or component is sufficient. If the unit under test fails the hipot test, do not allow the customer to use the equipment. Call GE Healhcare Customer Support for assistance. GE Healthcare recommends that you perform this test whenever internal assemblies are serviced or replaced. You need a hipot tester and shorting bar to perform this test. WARNING: BODILY INJURY - Power down the hipot tester before touching lead wires. With power applied, the hipot voltage will appear on all lead wire connectors 1.
Connect the acquisition module to a host device using the interface cable.
2.
Connect all of the leadwires together using a shorting bar.
3.
Disconnect the host device from AC power and turn off the unit.
4.
Attach the red lead of the hipot tester to the shorting bar.
5.
Attach the black lead of the hipot tester to the host device's rear equipotential plug. Do not attach to the AC socket ground lug.
6.
Set the hipot tester cutoff current to 2 µA and the output to 3000 volts RMS AC.
7.
Apply the voltage for a minimum of two seconds. If the tester does not indicate a failure, the unit passed the test.
8.
24
Power down the hipot tester and disconnect it from the test circuit.
CAM-14®/CAM-HD®
2049751-001E
Troubleshooting
3
This chapter addresses problems with ECG data acquisition and the quality of ECG data. The troubleshooting information in this chapter will help you narrow problems to one of the field replaceable assemblies. NOTE: A copy of a good 12-lead report generated from an ECG simulator is very useful when trying to determine if the data is correct on a report.
General Information The following sections provide general information to help identify problems with the acquisition module.
ECG Data Noise If the acquired ECG data displays unacceptable noise levels: • Verify proper electrode placement. • Verify proper electrode application. (Perspiration and dead skin must be removed from the electrode site.) • Check for defective or out-of-date electrodes. • Check for defective, broken, or disconnected leadwires. • Check the patient’s position. The patient should remain motionless during the acquisition of a resting ECG.
Typical Problems and Solutions The following table identifies some typical acquisition module problems and solutions:
2049751-001E
CAM-14®/CAM-HD®
25
Troubleshooting
Troubleshooting Symptom
Troubleshooting
The host device displays the message Acquisition Module Disconnected
• Check the acquisition cable connection. • Check the host cable interface flex in the module.
The lead tracings appear inverted or at the wrong amplitude All leads have excessive noise
Check the position of the leadwires on the acquisition module and the patient. • Examine the RA and RL leadwires and replace them if necessary. • Check the lead preparation site. • Refer to Einthoven's Triangle to determine which lead or leads are causing the noise. • Move the acquisition module to an area where there is less electrical noise. • Try another acquisition module.
Control switch buttons on the acquisition module fail or are intermittent
• Check that the Switch Flex Cable is plugged into the PCB. • Replace the switch label. • If there is still a failure, replace the main PCB.
Einthoven’s Triangle The following illustration shows Einthoven's Triangle and the definitions of the standard 12 leads. Some find this information useful when troubleshooting noisy leads or lead groups.
26
CAM-14®/CAM-HD®
2049751-001E