Engstrom
Anaesthesia System Aisys
Aisys Advanced Breathing System Cleaning and Sterilization Users Reference Manual Rev C March 2017
Cleaning and Sterilization Users Reference Manual
72 Pages
Preview
Page 1
Cleaning and Sterilization User's Reference Manual
User responsibility Datex-Ohmeda, Inc. a General Electric Company, doing business as GE Healthcare. This product will perform in conformity with the description thereof contained in this User’s Reference manual and accompanying labels and/or inserts, when assembled, operated, maintained, and repaired in accordance with the instruction provided. This Product must be checked periodically. A defective Product should not be used. Parts that are broken, missing, plainly worn, distorted, or contaminated should be replaced immediately. Should repair or replacement become necessary, Datex-Ohmeda recommends that a telephonic or written request for service advice be made to the nearest DatexOhmeda Customer Service Center. This Product or any of its parts should not be repaired other than in accordance with written instructions provided by Datex-Ohmeda and by Datex-Ohmeda trained personnel. The Product must not be altered without the prior written approval of Datex-Ohmeda. The user of this Product shall have the sole responsibility for any malfunction which results from improper use, faulty maintenance, improper repair, damage, or alteration by anyone other than Datex-Ohmeda.
CAUTION
U.S. Federal law restricts this device to sale by or on the order of a licensed medical practitioner. Outside the U.S.A., check the local laws for any restriction that may apply.
Table of Contents Reprocessing information Intended use... 2 ISO 17664 compliance... 2 General information... 3 Serial numbers... 3 Trademarks... 3 Component processing compatibility... 4 Circuit O2 cell... 5 Cleaning accessories... 6 Compatible chemical agents... 7 Reprocessing overview...8 Advanced Breathing System components... 9 Breathing system removal... 10 Removing the breathing system bag hose...10 Absorber canister... 10 Removing the absorber canister...11 Removing the absorber canister from an EZchange canister module...12 EZchange canister module and condenser (optional)... 13 Removing the EZchange canister module and condenser... 13 Removing the breathing system...16 Disassembling the breathing system components... 17 Absorber canister (reusable) disassembly overview... 17 Disassembling the absorber canister (reusable)... 17 Disassembling the breathing system... 19 Bellows housing disassembly...24 Disassembling the bellows housing assembly...25 Manual cleaning... 27 Soaking method... 27 Flow sensor cleaning... 28
2094883-001
i
Cleaning and Sterilization Flow sensor manual cleaning... 29 Automated cleaning... 31 Automated washing... 31 Bellows assembly base - automated washing using cleaning accessory... 32 Breathing circuit module - automated washing using cleaning accessory... 34 EZchange canister module - automated washing using cleaning accessory... 36 EZchange canister module and condenser automated washing...38 Condenser module and condenser - automated washer using cleaning accessory...39 Sterilization (Autoclave)... 41 Assembling the breathing system... 43 Assembling the bellows assembly... 43 Bellows assembly test... 45 Assembling the reusable multi absorber canister... 47 Assembling the breathing system... 50 Breathing system installation... 55 Installing the breathing system...55 Installing the EZchange canister module or condenser module and condenser... 56
AGSS Removing the AGSS...60 Removing the AGSS receiver filter...63
Index
ii
2094883-001
Reprocessing information Reprocessing information
Clean and sterilize the breathing system prior to the first use after installation. Immediately clean potentially infectious material, for example blood or secretions, from the system by wiping the contaminated area using a disposable cloth and an approved chemical agent. See "Compatible chemical agents" for a list of the approved cleaning agents.
WARNING
Obey infection control and safety procedures. Used equipment may contain blood and body fluids.
WARNING
Moveable parts and removable components may represent a pinch or a crush hazard. Use care when moving or replacing system parts and components.
CAUTION
To help prevent damage: • • • • • • • •
2094883-001
Refer to the manufacturer's data if you have questions about a cleaning agent. Follow hospital procedures for cleaning areas of the machine not specified in this manual. Do not use abrasive cleaning agents (such as steel wool, silver polish or cleaner). Keep all liquids away from electronic parts. Do not permit liquid to go into the equipment housings. Do not soak parts for more than 30 minutes unless indicated. Swelling or accelerated aging can occur. Parts marked 134°C are autoclavable. Do not exceed 134° C. Cleaning solutions must have a pH of 7.0 to 10.5. Do not use organic, halogenated or petroleum-based solvents, anesthetic agents, glass cleaners, acetone, and other harsh cleaning agents.
1
Cleaning and Sterilization
Intended use Use this manual along with the anesthesia system User’s Reference manual. Always perform a preoperative checkout before using the anesthesia machine after reassembly. The anesthesia system User’s Reference manual contains a preoperative checkout list and preoperative test instructions.
ISO 17664 compliance The process for sterilization of the breathing system has been validated and found to be in compliance with ISO17664:2004. These instructions have been validated by the manufacturer of the medical device as being capable of preparing a medical device for reuse. It remains the responsibility of the processor to make sure that the reprocessing is actually performed using equipment, materials, and personnel in the reprocessing facility to the desired result. This requires validation and routine monitoring of the process. Any deviation by the processor from the instructions provided should be properly evaluated for effectiveness and potential adverse consequences. The manufacturer recommends the use of filter(s) that protect both the inspiratory and expiratory ports to reduce the risk of crosscontamination.
2
2094883-001
General information
Serial numbers Datex-Ohmeda products have unit serial numbers with coded logic which indicates a product group code, the year of manufacture, and a sequential unit number for identification. The serial number can be in one of two formats. AAAX11111
AAAXX111111AA
The X represents an alpha character The XX represents a number indicating the year the product was indicating the year the product was manufactured; H = 2004, J = 2005, manufactured; 04 = 2004, 05 = 2005, etc. I and O are not used. etc.
Trademarks Advanced Breathing System, Disposable Multi Absorber, EZchange, and Reusable Multi Absorberare registered trademarks of Datex-Ohmeda, Inc. Other brand names or product names used in this manual are trademarks or registered trademarks of their respective holders.
2094883-001
3
Cleaning and Sterilization
Component processing compatibility The table shows the compatibility of component material with reprocessing methods. All parts must use the manual cleaning/ soaking process or the automated washer process (if appropriate) before sterilization. Important
If a cell contains an x, the processing method is compatible with the corresponding component. If a cell is blank, the processing method is not compatible with the component. .
Component
Manual cleaning
Automatic washer without cleaning kit/ accessory
Automatic washer with Autoclave at cleaning kit/accessory 132° C
Bellows housing assembly •
Bellows housing
•
Bellows
•
Rim
•
Pressure relief valve assembly
•
Latch (rim)
•
Seal (bellows base)
x
x
x
x
x
x
x
x
x
x
x
x
Bellows assembly base •
APL valve ramp
•
APL valve diaphragm (includes APL valve poppet and cage)
Bag elbow port (reusable only)
x
x
x
x (as part of the Bellows x assembly base)
x
x (as part of the Bellows x assembly base)
x
x
Breathing circuit module (without O2 cell)
x x
x
O2 cell plug
x
x
Absorber canister (reusable only)
x
x
Flow sensor cover
x
x
Flow sensor module (without flow sensors)
x
x
Flow sensor (metal) 1503-3244-000 Condenser module
4
x
x x
x
2094883-001
Component
Manual cleaning
Automatic washer without cleaning kit/ accessory
Automatic washer with Autoclave at cleaning kit/accessory 132° C
Condenser
x
x
EZchange canister module
x
x
Circuit O2 cell Only surface clean the circuit O2 cell. Clean the circuit O2 cell by wiping it with a damp cloth. Do not get the circuit O2 cell wet.
2094883-001
CAUTION
Do not autoclave the circuit O2 cell or damage will occur.
CAUTION
Do not place the circuit O2 cell in liquid or damage will occur.
WARNING
The circuit O2 cell cannot be disinfected. Be aware that cross-contamination is possible.
5
Cleaning and Sterilization
Cleaning accessories The accessories are intended to aid in the cleaning of the Advanced Breathing System (ABS) and aid in cleaning flow sensors. Part number
Description
M1086464
Flow sensor cleaning rack (sold separately). Helps prevent flow sensor connectors from becoming wet. The cleaning rack can hold a total of 10 flow sensors.
M1086468
Flow sensor cleaning rack with tub. Insert rack into tub and pour solution up to rack fill line. Flow sensor cleaning rack (also sold separately - M1086464) helps prevent flow sensor connectors from becoming wet.
M1107966
Cleaning cassette. Use for automated washing of the breathing circuit module, EZchange canister module, and condenser.
M1107970
Multi-cap cleaning accessory. Use with Cleaning cassette (M1107966) for automated washing of the breathing circuit module and EZchange™ canister module.
M1107973
Bellows plug. Use for automated cleaning of the bellows assembly base.
AC.27.008
AC.27.007
AC.27.006
AC.27.003
AC.27.005
Accessory
6
2094883-001
Compatible chemical agents The compatible chemical agents listed have been tested and found not to cause harm to the Advanced Breathing System (ABS) parts. Read the material safety data sheet (MSDS) for each chemical agent. Use of these chemicals will not damage the components when used as suggested, but efficacy of cleaning has not been demonstrated in all cases. The compatible chemical agents listed may not be available or approved for use in all countries. Follow hospital guidelines for cleaning and chemical agent use.
CAUTION
Cleaning solutions not shown in the chemical agents list must have a pH of 7.0 to 10.5. Organic, halogenated or petroleum-based solvents, anesthetic agents, glass cleaners, acetone, and other harsh chemical agents are not recommended.
•
Use of any chemical agents other than listed in this table may degrade system performance. Chemical agent/ Detergent External surfaces of Bleach the ABS
1:10 dilution of 5.25% - 6.5% sodium hypochlorite
Isopropyl alcohol
70%
Prolystica 2x Concentrate Neutral Detergent
• •
4 ml per liter of water 1/2 oz per gallon of water
Automated cleaning Prolystica Ultra Concentrate Neutral Detergent
• •
0.8 ml per liter of water 1/10 oz per gallon of water
Manual cleaning
2094883-001
Concentration
7
Cleaning and Sterilization
Reprocessing overview This User’s Reference manual provides information and instructions for the Advanced Breathing System™ (ABS) assembly and disassembly, manual cleaning, automated washing, and sterilization. For reliable operation of the advanced breathing system, clean and sterilize the system according to the information in this manual. An overview of the reprocessing process is described below. Detailed instructions for each step are provided within this manual. All parts must use the manual cleaning/soaking process or the automated washer process (if appropriate) before sterilization. 1. 2.
Remove the absorber canister and breathing system. Disassemble the breathing system.
3.
Manually clean parts that are not allowed in the automated washer and inspect parts for damage. Attach the cleaning accessories to the breathing system parts. Wash the breathing system using the cleaning accessories in the automated washer. Remove the parts from the automated washer and remove the cleaning accessories from the breathing system parts. Inspect parts for damage. Wrap parts prior to sterilization. Perform sterilization (check parts for 134°C). Allow parts to completely dry and cool. Visually inspect parts for deformations, cracking, and cleanliness before reassembly. Reassemble the bellows and breathing system parts, install the breathing system, and the absorber canister.
4.
5.
6. 7. 8. 9.
8
2094883-001
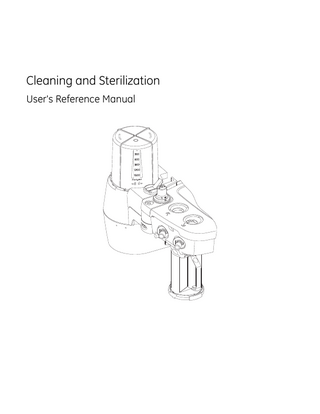
Advanced Breathing System components 8
1
12
13
9
2 14
3 7
4
10
5 6 11 19 15
18 14 16
AB.82.139
17
1. 2. 3. 4. 5. 6. 7. 8. 9. 10.
Bellows housing Bellows Rim Pressure relief valve assembly Latch, rim Seal, bellows base Bellows assembly base APL valve ramp APL valve ramp diaphragm Breathing circuit module
11. 12. 13. 14. 15. 16. 17. 18. 19.
O2 cell plug Bag elbow port Condenser module** Condenser** EZchange canister module** Absorber canister (reusable) Flow sensor cover* Flow sensor module Flow sensors
Figure 1 • Advanced breathing system components *This part is not interchangeable between some anesthesia systems. **Part is optional.
2094883-001
9
Cleaning and Sterilization
Breathing system removal The breathing system bag hose and the absorber canister must be removed before removing and disassembling the breathing system.
Removing the breathing system bag hose 1.
Disconnect the bag hose (1) from the bag hose connector (2). Remove the hose from the clip (3). 2
1
AB.82p.039
3
2.
If the bag arm option is connected, remove the bag port elbow from the bag arm support. Push down on the release latch and slide the bag port elbow out of the holder.
Absorber canister The absorber canister is available in two versions: Disposable Multi Absorber™ and Reusable Multi Absorber™. Both absorber canisters are installed and removed on the breathing system or EZchange canister module (optional) the same way. Only the reusable absorber canister can be cleaned using the automatic washer and autoclave.
10
2094883-001
Removing the absorber canister Remove the absorber canister from the ABS system. Hold the canister by the handle and push the release latch to unlock the canister.
2.
Remove the canister by tilting it downward and off the two support pins. See "Disassembling the absorber canister (reusable)").
AB.74p058
1.
3.
2094883-001
11
Cleaning and Sterilization
Removing the absorber canister from an EZchange canister module 1.
Hold the absorber canister by the handle and push the release latch (2) to unlock the canister cradle from the EZchange module (1).
AB.75p137
1 2
Slide the canister up and out of the cradle.
3.
See "Disassembling the absorber canister (reusable)".
AB.75p089
2.
12
2094883-001
EZchange canister module and condenser (optional) The EZchange canister module and condenser are each optional features and can be removed for cleaning and sterilization. They can be removed as part of the breathing system or individually.
1
AB.82p007
2
3
4 1. 2. 3. 4.
EZchange canister module release latch EZchange canister release latch Condenser Condenser reservoir
Figure 2 • EZchange canister module and condenser option
Removing the EZchange canister module and condenser 1.
Note 2.
2094883-001
With the absorber canister removed, push the EZchange module release latch and pull down on the unit to remove it from the breathing system. Skip steps 2 through 5 if using the automatic washer with a cleaning kit. For systems with the EZchange canister module only, pull the release latches out to remove the cap.
13
AB.75p078.cl
Cleaning and Sterilization
For systems with a condenser or a combination EZchange canister module with a condenser, pull the release latches out to remove the condenser from the module.
4.
Remove the condenser reservoir by pulling the lip of the gasket away from the reservoir around the edges.
AB.75p079
3.
14
2094883-001
AB.75p085
5.
As part of cleaning the condenser, push the condenser reservoir drain button (1), and wipe the rubber seal (2) and adjacent plastic surface clean of any residue.
AB.82p010
1
2
2094883-001
15
Cleaning and Sterilization
Removing the breathing system 1.
Remove the EZchange canister module and condenser if attached. •
2.
See "Removing the EZchange canister module and condenser" for removal instructions.
Push the release button (1) and gently pull the latch handle (2) to release the breathing system.
AB.74p059
1
2
Grasp the rear handle to support the breathing system. Slide the breathing system away from the workstation by pulling under the latch.
AB.74p058
3.
16
2094883-001