Ethicon Inc
Generator G11 System Service Manual V2.0
Service Manual
62 Pages
Preview
Page 1
Generator G11 (GEN11) Service Manual V 2.0
This page should be blank.
Table of Contents Overview ... 1 Scope ... 1 Standard Conventions Used ... 1
Chapter 1 - General Information ... 1 Indications ... 1 Contraindications ... 1 Device Description ... 1 How Supplied ... 2 General Warnings ... 3 General Cautions ... 4 Maintenance and Repair ... 4 Customer Service ... 4
Chapter 2 - Theory of Operation... 5 Generator G11 Functionality Overview ... 5 Generator G11 Theory of Operation ... 5 Main PCB I/O Diagram... 6
Chapter 3 - Repair and Replacement Procedures ... 7 Bottom Cover and EPAC Removal Procedure ... 7 Main PCB Disassembly Procedure ... 8 Power Module Disassembly Procedure... 15 Speaker Removal Procedure ... 16 Connector / Device Receptacle Removal Procedure... 17 Front Panel Disassembly Procedure ... 18 Footswitch Receptacle Removal Procedure ... 20 Heat Sink Fan Removal Procedure ... 20 Power Cord Receptacle Removal Procedure ... 21
Chapter 4 - Generator G11 Functional Test ...22 Device Description ... 22 To Verify the Energy Output of the Generator G11 ... 22 Output Drive Specifications ... 23 Output Verification Procedure ... 24 Final Inspection ... 29 Generator G11 Functional Test Results ... 29
Chapter 5 - Assembly Diagram and Spare Parts List ...30 Main Assembly Diagram... 30 Spare Parts List... 31 Cart (CRT11) ... 33 Cart (CRT11) Parts List ... 33
Appendix...34 Electrical Safety Test Parameters ... 34 Schematic Diagrams ... 35 Additional Hardware Troubleshooting Information ... 42 Power versus Load Curves ... 48 System Specifications ... 51 Conformance to Standards ... 55
Symbols ...56
This page should be blank.
Generator G11 Service Manual Overview Please read all information carefully.
Go to www.e-ifu.com for the latest version of this manual. Failure to properly follow the instructions may lead to serious surgical consequences. Important: This manual is designed to provide service and repair instructions for the Generator G11. It is not a reference to surgical techniques. HARMONIC® and ENSEAL® are trademarks of Ethicon Endo-Surgery.
Scope This Service Manual contains operational and diagnostic information, repair and replacement procedures and functional test information, which has been designed to assist the Service Representative in the isolation and repair of faults as well as maintenance of the Ethicon Endo-Surgery Generator G11. This documentation assumes that the service representative is familiar with the electrical and mechanical standards applicable to medical devices. This documentation also assumes that the service representative is familiar with the use of any special tools that are required to service the Generator G11.
Standard Conventions Used The Use of Caution, Warning, and Note Statements Information relative to the completion of a task in a safe and thorough manner will be supplied in the form of a Caution, a Warning, or a Note statement. These statements are found throughout the documentation. These statements should be read before continuing to the next step in a procedure. Warning: A Warning statement indicates an operating or maintenance procedure, practice, or condition that, if not strictly observed, could result in personal injury or loss of life. Caution: A Caution statement indicates an operating or maintenance procedure, practice, or condition that, if not strictly observed, could result in damage to or destruction of the equipment. Note: A Note statement indicates an operating or maintenance problem, practice, or condition that is necessary to accomplish a task efficiently.
Chapter 1 - General Information Indications The Generator G11 provides radiofrequency power to drive ENSEAL electrosurgical instruments that are used during open or laparoscopic general and gynecological surgery to cut and seal vessels and to cut, grasp, and dissect tissues. In addition, the generator provides power to drive HARMONIC ultrasonic surgical instruments that are indicated for soft tissue incisions when bleeding control and minimal thermal injury are desired. ENSEAL and HARMONIC instruments when used with the Generator G11 have not been shown to be effective for sterilization procedures or tubal coagulation. Do not use these instruments for these procedures.
Contraindications •
The use of the Generator G11 and the attached instruments are contraindicated, when in the judgment of the physician, radiofrequency or ultrasonic surgery would be contrary to the best interest of the patient.
•
The instruments are not indicated for incising bone.
Device Description The Generator G11 supplies energy to the HARMONIC and ENSEAL surgical instruments. The generator uses a touchscreen display interface and has a unique receptacle port that accepts either a HARMONIC or an ENSEAL device. Connectors (HGA11 for HARMONIC and EGA11 for ENSEAL) are used to enable the generator to power legacy devices.
Go to www.e-ifu.com for latest revision of manual 1
Generator G11, V 2.0 2011 - 12
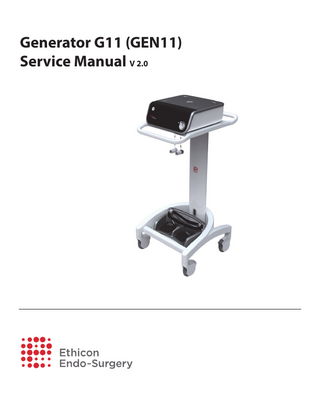
Generator G11 Service Manual How Supplied The Generator G11 is supplied in a semi-ready-to-use state. The shipping box contains the Generator G11, power cord and operator’s manual. The disposable Ethicon Endo-Surgery ENSEAL or HARMONIC instruments are not included in this packaging and must be purchased separately. The HARMONIC device connector (HGA11), ENSEAL device connector (EGA11), footswitch (FSW11), cart (CRT11) and verification key (GEN11VK) are also available separately.
Illustration and Nomenclature Front Panel of the Generator
Figure 1 1
POWER ON/OFF SWITCH
Glows green when the generator is powered up.
2
DISPLAY/ TOUCH SCREEN
Displays system information and serves as interface for adjusting controls and settings.
3
CONNECTOR/ DEVICE RECEPTACLE
Receptacle used to attach the connectors or devices to the generator.
Back Panel of the Generator
Figure 2 4
POWER CORD RECEPTACLE
Receptacle used to attach the power cord to the generator.
Go to www.e-ifu.com for latest revision of manual 2
Generator G11, V 2.0 2011 - 12
Generator G11 Service Manual 5
FOOTSWITCH RECEPTACLE
Receptacle used to connect the footswitch to the generator.
6
POTENTIAL EQUALIZATION TERMINAL
Provides means for connection to a potential equalization conductor.
Footswitch
Figure 3 7
MIN (LEFT PEDAL)
Activates power for ENSEAL or minimum power for HARMONIC.
8
MAX (RIGHT PEDAL) Activates maximum power for HARMONIC.
General Warnings •
Read instructions prior to energy activation, and use proper electrical safety and hospital procedures when working on the generator unit. Servicing should be performed by qualified personnel only.
•
Always disconnect the device from the electrical power source before servicing.
•
After removing the cover, inspect the internal components for obvious damage or foreign debris. Never remove or install any parts with the power on.
•
Verify that the unit is fully operational prior to administering power output.
•
High voltages may be present on surfaces inside the generator. Never touch an exposed conductive surface while the cover is removed and the unit is energized.
•
This equipment is for use only by qualified medical personnel trained in the use of ultrasonic surgery or electrosurgery. Inappropriate use of the equipment by untrained medical personnel may result in hazardous electrical output.
•
The Generator G11 contains components that are sensitive to electrostatic discharge (ESD). Proper ESD precautions must be taken while servicing the Generator G11. Repair work must be done at a static controlled workstation. Use an antistatic container for the transport of ESD sensitive circuit boards and components.
•
Do not activate in the presence of oxidizing gases such as nitrous oxide (N2O) and oxygen as explosion may occur.
•
Non-flammable agents should be used for cleaning and disinfection wherever possible.
•
Do not energize the Generator G11 in a moist environment as a shock hazard may exist. If liquids have entered the Generator G11 the unit must be returned to the manufacturer for testing prior to use.
•
Do not activate the unit in close proximity to volatile solvents such as methanol or alcohol as explosion may occur.
•
Avoid activation of Generator G11 adjacent to or stacked with other equipment. If adjacent or stacked use is necessary, monitor the Generator G11 and the other equipment to assure normal operation.
Go to www.e-ifu.com for latest revision of manual 3
Generator G11, V 2.0 2011 - 12
Generator G11 Service Manual •
Interference produced by the operation of high-frequency surgical equipment may adversely affect the operation of other electronic medical equipment such as monitors and imaging systems.
•
Activation with accessories and cables other than those specified may result in unpredictable performance, increased electromagnetic emissions, or decreased electromagnetic immunity. No customer modification of this equipment is allowed; modification of this equipment could have a negative impact on electrical safety and electromagnetic emissions.
•
To avoid the risk of electric shock, this equipment must only be connected to a supply main with protective earth.
•
To isolate the Generator G11 from supply mains power, disconnect the power cord either from the back panel of the generator or from the wall. Ensure access to these points are kept clear.
General Cautions •
The touch screen display of the generator is very sensitive. Do not use sharp metal objects on the touch screen.
•
During servicing, when the bottom screws are removed and the device is open exercise proper caution as a hazardous condition may exist.
•
Replace fuses only with the appropriate type and rating. See System Specifications.
•
Do not sterilize the Generator G11. Sterilization will damage the unit.
•
Do not restrict the openings on the bottom and the back panel of the Generator G11, as they provide the required airflow for cooling.
•
If electromagnetic interference with other equipment is suspected, reorient the device or remove possible sources of interference (for example, cellular phones, radios, etc.) from the room.
•
Activation of a radiofrequency device when not in a position to test energy activation may cause capacitive coupling.
•
Use of the Cart (CRT11) is recommended if Generator G11 is moved out of the operating room. Maintain control of the generator and cart when moving over thresholds.
•
Do not replace both the main PCB and Bezel PCB simultaneously. Doing this will compromise internal electronic information stored within the generator. Replace one board and power-up the unit prior to removal of the other board.
Maintenance and Repair Periodic calibration is not required for Generator G11. Periodic check of output using GEN11VK is recommended per facility guidelines. Service of the Generator G11 would be required if GEN11VK shows the generator is out of tolerance. See GEN11VK instructions for use for guidance on performing the output check. For servicing activities, Generator G11 may also be returned to an authorized EES service facility at any time.
Customer Service Warranty This warranty and the rights and obligations hereunder shall be construed under and governed by the laws of the State of Ohio, U.S.A. Ethicon Endo-Surgery warrants this product to be free from defects in material and workmanship under normal use and preventive maintenance for the respective warranty period shown below. Ethicon Endo-Surgery’s obligation under this warranty is limited to the repair or replacement, at its option, of any product, or part thereof, which has been returned to Ethicon Endo-Surgery or its distributor within the applicable time period shown below and which examination disclosed, to Ethicon Endo-Surgery’s satisfaction, to be defective. This warranty does not apply to any product, or part thereof, that has been: (1) adversely affected due to use with devices manufactured or distributed by parties not authorized by Ethicon Endo-Surgery (2) repaired or altered outside Ethicon Endo-Surgery’s factory in a way so as to, in Ethicon Endo-Surgery’s judgement, affect its stability or reliability, (3) subjected to improper use, negligence or accident, or (4) used other than in accordance with the design and use parameters, instructions and guidelines for the product or with functional, operational or environmental standards for similar products generally accepted in the industry. Ethicon Endo-Surgery’s products are warranted for the following periods after delivery to the original purchaser: Generator and power cord
One (1) year, parts and labor
Footswitch
One (1) year, parts and labor
Cart
One (1) year, parts and labor
UNLESS SUPERCEDED BY APPLICABLE LOCAL LAW, THIS WARRANTY IS IN LIEU OF ALL OTHER WARRANTIES, EXPRESS OR IMPLIED, INCLUDING THE WARRANTIES OF MERCHANTABILITY AND FITNESS FOR A PARTICULAR PURPOSE, AND OF ALL OTHER OBLIGATIONS OR LIABILITIES ON THE PART OF ETHICON ENDO-SURGERY AND IS A PURCHASER’S EXCLUSIVE REMEDY. IN NO EVENT SHALL ETHICON ENDO-SURGERY BE LIABLE FOR SPECIAL, INCIDENTAL OR CONSEQUENTIAL DAMAGES INCLUDING, WITHOUT LIMITATION, DAMAGES RESULTING FROM LOSS OF USE, PROFITS, BUSINESS OR GOODWILL, OTHER THAN AS EXPRESSLY PROVIDED BY A SPECIFIC LAW. Ethicon Endo-Surgery neither assumes nor authorizes any other person to assume for it any other liability in connection with the sale or use of any of Ethicon Endo-Surgery products. There are no warranties that extend beyond the terms hereof. Ethicon Endo-Surgery reserves the right to make changes to products built
Go to www.e-ifu.com for latest revision of manual 4
Generator G11, V 2.0 2011 - 12
Generator G11 Service Manual and/or sold by them at any time without incurring any obligation to make the same or similar changes on products previously built and/or sold by them.
Customer Service Contact the Ethicon Endo-Surgery Customer Service Department or your local representative for any customer or technical support. Call 1-800-USE-ENDO (1-800-873-3636) in the U.S. only.
Chapter 2 - Theory of Operation Generator G11 Functionality Overview The HARMONIC and ENSEAL instruments that connect to the generator are surgical devices that combine high compression and low heat to quickly create strong vessel seals while generating minimal smoke, tissue char, or thermal injury.
Generator G11 Theory of Operation The GEN11 generator is a flexible, high-power, wide band electrical surgical instrument power source. The main component of the system is a push-pull power amplifier that drives an output transformer. The output transformer is capable of stepping up the output voltage of the amplifier to a maximum of 420 Vrms @ 0.75 Arms for HARMONIC instruments, or, via an intermediate tap on the secondary coil, 100 Vrms @ 3.0 Arms for RF instruments. Different instruments will utilize different ranges of the generator’s output. Therefore, depending on the particular instrument used, the maximum output of the generator may not be achieved during instrument activation. The output transformer also provides the necessary isolation from earth ground (per IEC 60601-1) of the outputs that can potentially come in contact with patients. There are DC-blocking capacitors in series with the RF output, as required by medical regulation IEC 60601-2-2. The input to the amplifier is fed by a high-speed digital-to-analog converter (DAC) that is in turn controlled by a digital signal processor (DSP) through a field-programmable gate array (FPGA). The DSP digitally controls the wave shape, amplitude, and frequency of the output signal in closed-loop fashion by monitoring the output voltage and current through two high speed analog-to-digital converters (ADC). The output voltage and current are fed to the ADC through isolation transformers that cross the patient-isolation barrier. The wave shape is generated by the DSP using direct digital synthesis within the FPGA. The amplitude is controlled on a fine scale directly through the high-speed DAC, and on a coarse scale through a lower-speed DAC which sets the full-scale range of the high-speed DAC. Additionally, the DSP controls a switch-mode converter which provides power to the amplifier, in order to optimize the efficiency of the system. It does this by dynamically adjusting the DC output of the converter to provide just enough overhead voltage for the amplifier to produce its currently commanded output level. The DSP also sets and periodically adjusts the bias levels of the four output FET (field effect transistors) via dedicated low-speed DAC and ADC hardware. Other functions on the patient isolation side such as monitoring handswitch states, reading and writing to EEPROM (electrically erasable programmable read-only memories) contained in handpieces, instruments, and security keys, and monitoring the health of the RF DC-blocking capacitors are performed by a second FPGA on the isolated side, under control of the DSP via a bidirectional optical communication link which conforms to the IrDA (Infrared Data Association) standard. A user interface (UI) processor controls all other user interactions with the generator including the LCD (liquid crystal display) output, capacitive touch-screen input, and audio output. The only exception to this is the capacitive touch on/off button, which is controlled by the on/off processor located on the Bezel board, and powered by separate 5 VDC standby power that is present whenever the generator is plugged in. The on/off processor controls power to the rest of the system via a power supply enable signal to the main 48 VDC power supply. A serial port and two USB (universal serial bus) ports are also provided for data transfer. These ports are not user accessible.
Go to www.e-ifu.com for latest revision of manual 5
Generator G11, V 2.0 2011 - 12
Generator G11 Service Manual Main PCB I/O Diagram
POWER SUPPLY AC LINE
SYSTEM VOLTAGES
POWER SUPPLY ENABLE
SWITCH-MODE CONVERTER BIAS
PATIENT ISOLATED CIRCUITS
ADC
H1
DAC
E1
DAC
AMP ADC RS PR
HS* DAC
MEMORY
DSP PROCESSOR
HS* ADC
FPGA
SERIAL I/O PORT
HS* ADC
POWER SUPPLY ENABLE MEMORY UI PROCESSOR USB PORTS (2)
XFM ADC
SIGNAL COND. CKT.
HS
XFM I R D A
I R D A
SR P
FPGA
ON / OFF PROCESSOR
DCI DATA CKT. INTERFACE
ID
ON/OFF BUTTON LCD
AUDIO AMP
TOUCH SCREEN INTERFACE
TOUCH SCREEN
BEZEL BOARD
* HS - High Speed H1 - HARMONIC Power Output E1 - ENSEAL (RF) Power Output PR - Power Return P - Presence HS - Hand Switch ID - Identification / EEPROM DCI - Data Circuit Interface
Figure 4 Main PCB I/O Diagram
Go to www.e-ifu.com for latest revision of manual 6
Generator G11, V 2.0 2011 - 12
Generator G11 Service Manual Chapter 3 - Repair and Replacement Procedures Bottom Cover and EPAC Removal Procedure 1.
Turn the unit upside down.
Figure 5 2.
Remove the four mounting screws as shown in the image. Note: During disassembly and assembly, metal shavings may be generated when screwing and unscrewing screws. Be sure to clean up any metal shavings.
Figure 6 3.
Remove the bottom enclosure by sliding it backwards.
Figure 7
Go to www.e-ifu.com for latest revision of manual 7
Generator G11, V 2.0 2011 - 12
Generator G11 Service Manual 4.
Separate the bottom EPAC.
Figure 8
Main PCB Disassembly Procedure Note: The main PCB contains information that is electronically stored. Once a new PCB has been installed in the generator and powered up, it cannot be used in another generator. Please be sure you want to replace the PCB before installing the new one. Caution: Do not replace both the main PCB and Bezel PCB simultaneously. Doing this will compromise internal electronic information stored within the generator. Replace one board and power-up the unit prior to removal of the other board. 1.
Disconnect the J4 DC Connector and Power Grounding Cable as shown.
Figure 9
Figure 9a
Go to www.e-ifu.com for latest revision of manual 8
Generator G11, V 2.0 2011 - 12
Generator G11 Service Manual
Figure 9b
Figure 9c 2.
Disconnect the following as shown in the images: -
J5 Footswitch
Figure 10
Go to www.e-ifu.com for latest revision of manual 9
Generator G11, V 2.0 2011 - 12
Generator G11 Service Manual
Figure 10a -
J8 Enclosure Fan
Figure 11
Figure 11a
Go to www.e-ifu.com for latest revision of manual 10
Generator G11, V 2.0 2011 - 12
Generator G11 Service Manual 3.
Separate the PCB from the generator.
Figure 12 4.
Remove the following electrical connections and route wires: -
J21 Power Supply IO
Figure 13 -
J23 Speaker
Figure 14
Go to www.e-ifu.com for latest revision of manual 11
Generator G11, V 2.0 2011 - 12
Generator G11 Service Manual -
J27 Heat sink Fan
Figure 15 -
J25 Backlight
Figure 16 -
J28 Receptacle 9 pin
Figure 17
Go to www.e-ifu.com for latest revision of manual 12
Generator G11, V 2.0 2011 - 12
Generator G11 Service Manual -
J24 Receptacle 5 pin
Figure 18 -
J29 LCD Flat Connector
Figure 19
Figure 19a
Go to www.e-ifu.com for latest revision of manual 13
Generator G11, V 2.0 2011 - 12
Generator G11 Service Manual
Figure 19b -
J30 Bezel Flat Connector
Figure 20
Figure 20a
Go to www.e-ifu.com for latest revision of manual 14
Generator G11, V 2.0 2011 - 12
Generator G11 Service Manual
Figure 20b
Power Module Disassembly Procedure 1.
Remove the power module ground connector from the module terminal.
Figure 21 2.
Take out the power module from the unit.
Figure 22
Go to www.e-ifu.com for latest revision of manual 15
Generator G11, V 2.0 2011 - 12
Generator G11 Service Manual Speaker Removal Procedure 1.
Remove the top EPAC from the top chassis.
Figure 23
Figure 23a
Figure 23b
Go to www.e-ifu.com for latest revision of manual 16
Generator G11, V 2.0 2011 - 12