Fresenius Medical
Hemodialysis Machine
5008 Service Manual Part no F40003409 Sw Ver 4.58 Edition 18A-2016
Service Manual
398 Pages
Preview
Page 1
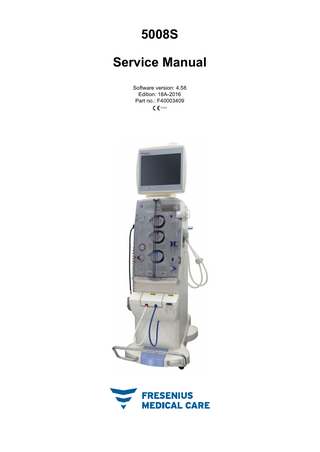
5008S Service Manual Software version: 4.58 Edition: 18A-2016 Part no.: F40003409 0123
Table of contents 1
Index
2
Important information
3
2.1
How to use the Service Manual... 2-1
2.2
Significance of warnings ... 2-2
2.3
Significance of notes ... 2-2
2.4
Significance of tips... 2-2
2.5
Considerations for working on the device... 2-3
2.6 2.6.1
Warnings ... 2-4 Warnings, electrical ... 2-4
2.7
Addresses ... 2-5
Installation 3.1 3.1.1 3.1.2 3.1.3 3.1.4
Initial start-up... 3-1 Important information on initial start-up ... 3-1 Important information for operation in the home healthcare environment ... 3-2 Initial start-up report... 3-2 Explanatory notes for completing the initial start-up report ... 3-6
3.2
Transporting the device... 3-26
3.3 3.3.1 3.3.2 3.3.3 3.3.4
Decommissioning... 3-29 Important information on decommissioning... 3-29 Accessories required for decommissioning ... 3-29 Decommissioning report and identification sheet ... 3-29 Explanatory notes for completing the decommissioning report and identification sheet ... 3-32
3.4 3.4.1 3.4.2 3.4.3 3.4.4
Decommissioning extension... 3-37 Important information on decommissioning extension ... 3-37 Accessories required for decommissioning extension... 3-37 Decommissioning extension report ... 3-37 Explanatory notes for completing the decommissioning extension report... 3-39
3.5 3.5.1 3.5.2 3.5.3
Recommissioning after decommissioning ... 3-41 Important information on recommissioning after decommissioning... 3-41 Recommissioning report after decommissioning... 3-41 Explanatory notes for completing the recommissioning report after decommissioning ... 3-43
3.6 3.6.1
Disposal... 3-47 Important information on disposal ... 3-47
Fresenius Medical Care
5008S
SM-EN
18A-2016
iii
4
5
iv
Specifications 4.1
Dimensions and weight... 4-1
4.2
Identification label (device marking)... 4-1
4.3
Electrical safety ... 4-2
4.4
Electrical power supply... 4-2
4.5
Fuses ... 4-3
4.6 4.6.1 4.6.2
Information on electromagnetic compatibility... 4-3 Minimum distances between radiation source and device ... 4-3 EMC guidance and manufacturer's declaration ... 4-5
4.7
Operating conditions... 4-8
4.8
Consumption and energy data ... 4-9
4.9
Storage conditions ... 4-9
4.10
External connection options ... 4-10
4.11
Operating programs ... 4-11
4.12
Dialysate circuit and safety systems ... 4-13
4.13
Extracorporeal blood circuit and safety systems... 4-16
4.14
DIASAFE® plus ... 4-18
4.15
OCM ... 4-18
4.16
ONLINEplus™ ... 4-19
4.17
Network... 4-20
4.18
Radio (option) - in monitor... 4-20
4.19
Single-Needle (option)... 4-21
4.20
VenAcc (option) monitoring unit... 4-21
4.21
BPM (option) ... 4-21
4.22
BTM (option)... 4-22
4.23
Home-HD (option) – remote control... 4-23
4.24
Residual-current device* (option) ... 4-23
4.25
Materials used... 4-23
Setup / service program 5.1 5.1.1
SYSTEM menu ... 5-1 Parameters in the SYSTEM menu... 5-2
5.2 5.2.1 5.2.2 5.2.3 5.2.4
SETUP menu (Service setup) ... 5-3 Settings Hydraulics menu option ... 5-4 Settings EBM menu option... 5-5 Settings Air bubble detector menu option... 5-7 Define cleaning parameters menu option ... 5-8 5.2.4.1 Define cleaning parameters menu option (page 1) ... 5-8 5.2.4.2 Define cleaning parameters menu option (page 2) ... 5-8
Fresenius Medical Care
5008S
SM-EN
18A-2016
5.2.5 5.2.6 5.2.7 5.2.8 5.2.9 5.3 5.3.1 5.3.2 5.3.3
5.3.14 5.3.15 5.3.16 5.3.17 5.3.18 5.3.19 5.3.20
USER SETUP menu ... 5-15 Blood line menu option ... 5-16 Blood pump menu option... 5-16 Rinse / reinfusion volume menu option (only if preparation performed with NaCl solution) ... 5-17 Anticoagulation menu option... 5-17 5.3.4.1 Define syringe types menu sub-item ... 5-18 Dialysate menu option ... 5-19 5.3.5.1 Define concentrates menu sub-item ... 5-20 5.3.5.2 New concentrate menu sub-item... 5-21 Ultrafiltration menu option ... 5-24 Alarm processing menu option ... 5-25 User interface menu option... 5-26 5.3.8.1 Graphics menu sub-item... 5-27 5.3.8.2 Define options menu sub-item ... 5-27 5.3.8.3 Define controls menu sub-item ... 5-28 Cleaning menu option... 5-28 Auto On menu option... 5-29 Emergency menu option (reaction after pressing the Emergency button) ... 5-30 Extended safety menu option ... 5-31 ONLINE menu option ... 5-32 5.3.13.1 Define dialyzers menu sub-item ... 5-33 OCM menu option ... 5-33 Single-Needle (option) menu option... 5-34 Miscellaneous menu option ... 5-34 BPM (option) menu option... 5-34 BTM (option) menu option... 5-35 Home-HD (option) menu option ... 5-36 VenAcc (option) menu option ... 5-36
5.4 5.4.1 5.4.2 5.4.3
APPLICATIONS menu ... 5-37 PatientCard menu option... 5-37 Training menu option... 5-38 Fluid sampling menu option with sampling set... 5-38
5.5
Service Software (Quick Guide) ... 5-40
5.3.4 5.3.5 5.3.6 5.3.7 5.3.8
5.3.9 5.3.10 5.3.11 5.3.12 5.3.13
6
Miscellaneous menu option ... 5-10 5.2.5.1 Installing additional languages ... 5-11 Network menu option... 5-12 5.2.6.1 Address parameter ... 5-13 BTM (option) menu option... 5-13 Radio (option) menu option... 5-13 Software options menu option... 5-13
Technical safety checks / maintenance procedures 6.1
Important information on TSCs / MAs ... 6-1
6.2
Accessories required for the TSCs / MAs ... 6-2
6.3
TSC / MA report ... 6-2
6.4
Explanatory notes for completing the TSC / MA report ... 6-7
6.5
TSC report ... 6-46
Fresenius Medical Care
5008S
SM-EN
18A-2016
v
7
Error messages
8
Test equipment and accessories
9
Calibration / Adjustment 9.1
SERVICE menu ... 9-1
9.2 9.2.1
Flow diagram menu ... 9-2 Setting the max. water inflow... 9-2
9.3 9.3.1 9.3.2 9.3.3
CALIBRATE menu ... 9-3 Calibrate touch screen menu option ... 9-4 Pressure transducer (S03/S07/S15/S16) menu option ... 9-4 Degassing (A02/P01) menu option ... 9-5 9.3.3.1 Loading pressure test menu sub-item ... 9-5 9.3.3.2 Negative pressure test menu sub-item ... 9-5 9.3.3.3 Start calibration menu sub-item ... 9-5 Flow pump (A03) menu option ... 9-7 Temperature (PT7/PT8/PT9) menu option ... 9-8 Conductivity (CD7/CD9) menu option ... 9-9 Volumes menu option ... 9-9 Blood leak menu option... 9-10 OCM menu option... 9-10 ECMP configuration menu option (eccentric membrane pumps)... 9-11
9.3.4 9.3.5 9.3.6 9.3.7 9.3.8 9.3.9 9.3.10 9.4 9.4.1
vi
9.4.2 9.4.3 9.4.4 9.4.5 9.4.6 9.4.7 9.4.8 9.4.9 9.4.10 9.4.11
DIAGNOSTICS menu ... 9-13 Monitor – Info menu option ... 9-14 9.4.1.1 Checking the screen failure sensor ... 9-14 EBM – Info menu option ... 9-14 EBM – Sensors / actuators menu option... 9-14 EBM – Pneumatics menu option... 9-16 Hydraulics – Info menu option ... 9-16 Hydraulics – Flow diagram: Individual control menu option ... 9-16 Hydraulics – Test menu option ... 9-17 Power supply unit – Info menu option ... 9-18 Radio – Info (option) menu option ... 9-19 BPM – Info / Test (option) menu option... 9-20 BTM – Info / Sensors (option) menu option ... 9-20
9.5
SETUP menu ... 9-20
9.6 9.6.1
MODULE menu... 9-20 Novram menu option... 9-20
9.7 9.7.1
VARIOUS menu... 9-21 Preservation menu option ... 9-21
9.8 9.8.1 9.8.2 9.8.3 9.8.4
UPDATE menu ... 9-22 Updating the software version in a replaced module... 9-22 Updating the software version of the device with a new CF card ... 9-23 Updating the software version of the device with the PC Service Software 5008 ... 9-24 Software version of the operating system in the monitor (M1) ... 9-25
9.9
Remote maintenance... 9-25
Fresenius Medical Care
5008S
SM-EN
18A-2016
10 Servicing / repair 10.1
Important information on servicing / repair ... 10-1
10.2 10.2.1 10.2.2 10.2.3
Component overview ... 10-1 Monitor... 10-2 Extracorporeal Blood Circuit Module (EBM)... 10-3 Hydraulics... 10-4 10.2.3.1 Front view... 10-4 10.2.3.2 Left side view ... 10-5 10.2.3.3 Right side view ... 10-6 10.2.3.4 Rear view ... 10-7 10.2.3.5 Rear view with connectors ... 10-8
10.3 10.3.1 10.3.2 10.3.3 10.3.4 10.3.5 10.3.6 10.3.7 10.3.8 10.3.9
Basic procedures ... 10-9 Performing the T1 test ... 10-9 Performing the EBM T1 test ... 10-9 Measuring the protective earth resistance... 10-10 Measuring the device leakage current... 10-11 Laying the device on its back ... 10-14 Installing components with SNAPLOC attachments... 10-15 Fitting components with self-cutting screws ... 10-16 Closing and opening the tube clamp ... 10-16 Connecting the tubing to the adapter ... 10-18
10.4
Wrench torques ... 10-18
10.5
Tube clamps... 10-19
10.6 10.6.1 10.6.2 10.6.3 10.6.4 10.6.5 10.6.6 10.6.7 10.6.8 10.6.9
Housing ... 10-20 Removing and installing the IV pole ... 10-20 Removing and installing the shunt interlock ... 10-20 Removing and installing the microswitch in the installed shunt interlock ... 10-22 Removing and installing the shunt interlock mark ... 10-23 Removing and installing the dialyzer coupling... 10-23 Removing and installing the dialyzer holder ... 10-24 Removing and installing the blood pressure monitor (BPM) (option) ... 10-25 Opening and closing the media supply rail... 10-26 Opening and closing the side panel ... 10-27
10.7 10.7.1 10.7.2
Trolley... 10-28 Removing and installing the concentrate container holder... 10-28 Removing and installing the braking mechanism ... 10-30
10.8 10.8.1 10.8.2
Rechargeable batteries ... 10-31 Removing and installing the battery pack... 10-31 Removing and installing rechargeable battery for remote control (Home-HD option) ... 10-32
10.9 10.9.1 10.9.2 10.9.3
Monitor ... 10-33 Removing and installing the monitor rear with monitor support arm ... 10-33 Adjusting monitor movements ... 10-37 Transport protection for monitor support arm ... 10-40
10.10 10.10.1 10.10.2 10.10.3
Power supply unit and power cable ... 10-40 Removing and installing the power cable ... 10-40 Removing and installing the power supply unit ... 10-41 Removing and installing the power plug fuse (UK version only) ... 10-42
10.11 Extracorporeal Blood Circuit Module (EBM)... 10-43 10.11.1 Removing and installing the EBM doors... 10-43
Fresenius Medical Care
5008S
SM-EN
18A-2016
vii
10.11.2 Opening and closing the EBM ... 10-44 10.11.3 Removing and installing the EBM... 10-44 10.11.4 Replacing the pneumatic tubings in the EBM ... 10-48 10.11.5 Removing and installing the arterial pressure measurement unit... 10-50 10.11.6 Removing and installing the venous and arterial occlusion clamp ... 10-50 10.11.7 Resetting the zero point of the pressure transducers (EBM)... 10-52 10.11.8 Verification / repair procedure in case of ingress of blood or fluid via the pressure line... 10-54 10.11.9 Checking the pneumatics of the arterial pressure measurement unit... 10-56 10.11.10 Checking the venous pressure transducer for leakage ... 10-57 10.11.11 Checking the Single-Needle pressure transducer with compliance chamber for leakage... 10-58 10.11.12 Removing and installing the catch of the occlusion clamps... 10-59 10.11.13 Removing and installing the air bubble detector (ABD) ... 10-60 10.11.14 Removing and installing the heparin pump stock ... 10-61 10.11.15 Removing and installing the heparin pump length sensor ... 10-62 10.11.16 Removing and installing the heparin pump... 10-63 10.11.17 Removing and installing the level detector ... 10-68 10.11.18 Removing and installing the online module ... 10-69 10.11.19 Removing and installing the blood temperature monitor (BTM) (option) ... 10-70 10.12 Hydraulics ... 10-72 10.12.1 Removing and installing the pressure reducing valve A04, water inlet... 10-72 10.12.2 Removing and installing the heat exchanger... 10-73 10.12.3 Removing and installing the float switch S01 of the water inlet chamber ... 10-75 10.12.4 Removing and installing the degassing orifice... 10-77 10.12.5 Removing and installing the heater rod ... 10-78 10.12.6 Removing and installing the concentrate pump... 10-80 10.12.7 Removing and installing the bicarbonate pump... 10-81 10.12.8 Removing and installing the UF pump... 10-82 10.12.9 Removing and installing the gear pump drive... 10-84 10.12.10 Removing and installing the gear pump ... 10-85 10.12.11 Removing and installing the balancing chamber ... 10-86 10.12.12 Removing and installing the blood leak detector ... 10-87 10.12.13 Removing and installing the flap lid ... 10-90 10.12.14 Removing and installing the bibag® connector... 10-91 10.12.15 Removing and installing the concentrate rinse chamber ... 10-92 10.12.16 Removing and installing the bicarbonate rinse chamber ... 10-95 10.12.17 Removing and installing the CDS block... 10-97 10.12.17.1 Vent valve of CDS block... 10-99 10.12.18 Temperature and conductivity sensors, calibration after replacement ... 10-100 10.12.19 Disinfectant valves (yellow labels) V20 and V34 ... 10-101 10.12.20 Deactivating the Flush function... 10-104 10.13
Checking the network interface ... 10-106
10.14 Printed circuit boards... 10-108 10.14.1 PCB LP 1102 Controller board (C167) ... 10-108 10.14.2 PCB LP 1104 Monitor power supply board... 10-111 10.14.3 PCB LP 1105 Power supply CPU... 10-114 10.14.4 PCB LP 1106 Power supply distribution board... 10-116 10.14.5 PCB LP 1107-4 EBM I/O board ... 10-118 10.14.6 PCB LP 1126 Heparin pump control board ... 10-123 10.14.7 PCB LP 1131 Monitor operating mode indicator ... 10-124 10.14.8 PCB LP 1131-2 Monitor operating mode indicator with wireless module ... 10-125 10.14.9 PCB LP 1134 Monitor card reader... 10-126 10.14.10 PCB LP 1140 Hydraulic sensors ... 10-127 10.14.11 PCB LP 1141-3 Hydraulics actuators ... 10-129 10.14.12 PCB LP 1142 External I/O board... 10-131
viii
Fresenius Medical Care
5008S
SM-EN
18A-2016
10.14.13 PCB LP 1145-1 Monitor distribution board ... 10-135 10.14.14 PCB LP 1150 Screen failure sensor... 10-138 10.14.15 PCB LP 1152 EBM door sensor ... 10-139 10.14.16 PCB LP 1169 Remote control (Home-HD option) ... 10-140 10.14.17 PCB LP 1170 Charging cradle (option) ... 10-141 10.14.18 PCB LP 1202 Controller board (C167) ... 10-142 10.14.18.1 Combination of PCB LP 1202 with PCBs LP 1107 / LP 1141... 10-144 10.14.19 PC board ... 10-145 10.14.20 Connector pin assignment on electronics chassis... 10-147 10.15 Troubleshooting ... 10-148 10.15.1 Troubleshooting with dark display ... 10-148 10.15.2 Troubleshooting in case of unclear crashes and suspected CAN bus problems ... 10-151
11 Functional description 11.1
Complete system... 11-1
11.2
Overview of PCBs... 11-2
11.3
Monitor ... 11-3
11.4
Power supply unit... 11-5
11.5
Extracorporeal Blood Circuit Module (EBM)... 11-7
11.6
Pneumatics ... 11-8
11.7
Hydraulics (block diagram / description) ... 11-12
11.8
Hydraulics (flow diagram, legend, description)... 11-14
12 Appendix
Fresenius Medical Care
5008S
SM-EN
18A-2016
ix
x
Fresenius Medical Care
5008S
SM-EN
18A-2016
Chapter 1: Index
1
Index
A Accessories and test equipment 8-1 Accessories required – Decommissioning 3-29 – Decommissioning extension 3-37 – TSC / MA 6-2 Addresses 2-5 Adjusting monitor movements 10-37 Adjustment 9-1 Air bubble detector 4-17 Air bubble detector (ABD), removing and installing 10-60 Alarm output 4-11 Antifreeze 4-10 APPLICATIONS menu 5-37 – PatientCard 5-37 – Sampling 5-38 – Training 5-38
bibag® connector – switch position 10-128 bibag® connector, removing and installing 10-91 Bicarbonate pump, removing and installing 10-81 Bicarbonate rinse chamber, removing and installing 10-95 Block diagrams – EBM 11-7 – Hydraulics 11-12 – Monitor 11-3 – Pneumatics 11-8 – Power supply unit 11-5 Blood leak detector 4-13 Blood leak detector, removing and installing 10-87 Blood pressure monitor (BPM) 4-22 Blood pressure monitor (BPM) (option), removing and installing 10-25
AquaUNO / AquaC UNO H 4-11
Blood pump 4-16
Arterial occlusion clamp, removing and installing 10-50
Blood temperature monitor (BTM) (option), removing and installing 10-70
Arterial pressure measurement 4-16
Calibration 9-1 Catch of the occlusion clamps, removing and installing 10-59 CDS block, removing and installing 10-97 Central delivery system (option) 4-8 Checking the pneumatics of the arterial pressure measurement unit 10-56 Checking the Single-Needle pressure transducer with compliance chamber for leakage (option) 10-58 Checking the venous pressure transducer for leakage 10-57 Circulation 4-12 Cleaning programs 4-12 Closing plugs 8-5 Component overview – EBM 10-3 – Hydraulics 10-4 – Monitor 10-2 Concentrate pump, removing and installing 10-80 Concentrate rinse chamber, removing and installing 10-92
Arterial pressure measurement unit, removing and installing 10-50
BPM (option) 4-21 – BPM version 6-35 – BPM2 version 6-35
Atmospheric pressure 4-8
BPM version 6-35
Audible alarm 4-18
BPM2 version 6-35
Authorized persons 2-3
BTM (option) 4-22
Conductivity sensors – Calibration after replacement 10-100
C
Connecting the tubing to the adapter 10-18
AutoFlow 4-15
B Balancing chamber, removing and installing 10-86 Basic procedures 10-9 Batteries – PC board 4-2, 10-146 – PCB LP1105 4-2 – PCBLP1105 10-115 – TSC / MA 6-27 – VenAcc (option) 4-3, 4-21 Battery pack, removing and installing 10-31
Fresenius Medical Care
5008S
CALIBRATE menu 9-3 – Blood leak 9-10 – Calibrate touch screen 9-4 – Conductivity (CD7/CD9) 9-9 – Degassing (A02/P01) 9-5 – ECMP configuration 9-11 – Flow pump (A03) 9-7 – OCM 9-10 – Pressure transducer (S03/S07/S15/S16) 9-4 – Temperature (PT7/PT8/PT9) 9-8 – Volumes 9-9
SM-EN
18A-2016
Concentrate supply 4-8 Concentration of disinfectant 4-16
Connector pin assignment on electronics chassis 10-147 Considerations for working on the device 2-3 Consumption data 4-9 Converting g/l to mmol/l 5-24
D Deactivating Flush (option) 10-104 Decommissioning 9-21 – Accessories required 3-29
1-1
Chapter 1: Index
– Explanatory notes for completing the report 3-32 – Identification sheet 3-31 – Important information 3-29 – Report 3-30 Decommissioning extension – Accessories required 3-37 – Explanatory notes for completing the report 3-39 – Important information 3-37 – Report 3-38
– Zero point of the pressure transducers, resetting 10-52
Flush (option) 4-13, 10-104
EcoFlow 4-15
Functional description 11-1
Electrical power supply 4-2
Fuses – PCB LP1104 10-150 – PCB LP1106 10-117 – PCBLP1104 10-112 – PCBLP1107-4 10-121 – PCBLP1141-3 10-130 – PCBLP1142 10-131 – Power plug, UK version 10-42 – Power switch 4-3 – Rechargeable battery 4-3, 10-7 – TSC / MA 6-7, 6-40
Electrical safety 4-2, 6-40 – Measuring the device leakage current 10-11 – Measuring the protective earth resistance 10-10 Electrical safety check 6-40
Degassing orifice, removing and installing 10-77
Electromagnetic compatibility (EMC) 4-3
Descriptions – EBM 11-8 – Hydraulics 11-13, 11-18 – Monitor 11-4 – Pneumatics 11-9 – Power supply unit 11-6
EMC – Electromagnetic compatibility 4-3 – Electromagnetic emissions 4-5 – Electromagnetic immunity 4-5 – Guidance and manufacturer's declaration 4-5 – Minimum distances between radiation source and device 4-3 – Recommended separation distances 4-7
Device, tilting 10-14 DIAGNOSTICS menu 9-13 – BPM – Info / Test (option) 9-20 – BTM – Info / Sensors (option) 9-20 – EBM – Info 9-14 – EBM – Pneumatics 9-16 – EBM – Sensors / actuators 9-14 – Hydraulics – Flow diagram Individual control 9-16 – Hydraulics – Info 9-16 – Hydraulics – Test 9-17 – Monitor – Info 9-14 – Power supply unit – Info 9-18 – Radio – Info (option) 9-19 Dialyzer coupling, removing and installing 10-23
Energy data 4-9 Error messages 7-1 ESD precautions 2-3 Explanatory notes – Decommissioning extension report 3-39 – Decommissioning report 3-32 – Identification sheet 3-32 – Initial start-up report 3-6 – Recommissioning report after decommissioning 3-43 – TSC report 6-7 – TSC/MA report 6-7
Flow diagram menu 9-2
G Gear pump drive, removing and installing 10-84 Gear pump, removing and installing 10-85
H Heat exchanger, removing and installing 10-73 Heater rod, removing and installing 10-78 Heparin pump 4-17 Heparin pump length sensor, removing and installing 10-62 Heparin pump stock, removing and installing 10-61 Heparin pump, removing and installing 10-63 Home dialysis 3-2
DIASAFE®plus 4-18
External connection options 4-10
Home healthcare environment 3-2
Dimensions of the device 4-1
Extracorporeal Blood Circuit Module EBM 10-43
Housing 10-20
Disinfectant valves V20 and V34 (yellow labels) 10-101
How to use the Service Manual 2-1 Hydraulics 10-4, 10-72 – Block diagram 11-12 – Description 11-13, 11-18 – Flow diagram 11-14
Disposal – Important information 3-47
F
E
Flap lid, removing and installing 10-90
I
Float switch S01 of the water inlet chamber, removing and installing 10-75
Illustrations 2-2
EBM – Block diagram 11-7 – Description 11-8 – Doors, removing and installing 10-43 – Opening and closing 10-44 – Removing and installing 10-44
1-2
Final tasks after working on the device 2-3
Flow diagram 11-14 – Description 11-18 – Legend 11-15
Identification label 4-1 Important information 2-1 – Decommissioning 3-29 – Decommissioning extension 3-37
Fresenius Medical Care
5008S
SM-EN
18A-2016
Chapter 1: Index
– Disposal 3-47 – Initial start-up 3-1 – Operation in a domestic environment 3-2 – Recommissioning after decommissioning 3-41 – Repair 10-1 – Servicing 10-1 – TSC 6-1 – TSC / MA 6-1
Materials used 4-23 Measuring the device leakage current 10-11 Measuring the protective earth resistance 10-10 MODULE menu 9-20 – Novram 9-20
Inclination during operation 4-8
Monitor 10-33 – Block diagram 11-3 – Description 11-4
Ingress of blood or fluid via the pressure line 10-54
Monitor compatibility matrix 10-136
Initial start-up – Explanatory notes 3-6 – Important information 3-1 – Operation in a domestic environment 3-2 – Report 3-3
Monitor operating system (M1) 9-25
Installation altitude 4-8
Monitor rear with monitor support arm, removing and installing 10-33
N Network 4-20
IV pole 4-8
Network interface, checking 10-106
J
Note symbol, significance 2-2
Jumpers – PCBLP1102 10-109 – PCBLP1104 10-112 – PCBLP1141-3 10-130 – PCBLP1142 10-132
O OCM 4-18 Online module, removing and installing 10-69
L
ONLINEplus™ 4-19
LAN 4-10
Opening and closing the media supply rail 10-26
Laying the device on its back 10-14 LEDs – PCBLP1102 10-109 – PCBLP1104 10-112, 10-150 – PCBLP1105 10-115 – PCBLP1107-4 10-121 – PCBLP1131 10-124 – PCBLP1131-2 (wireless module) 10-125 – PCBLP1141-3 10-130 – PCBLP1202 10-143 Level detector, removing and installing 10-68
M Maintenance procedures (MA) 6-1 Manufacturer 2-5 Materials 4-23, 4-26
Fresenius Medical Care
Opening and closing the side panel 10-27 Operating conditions 4-8 Operating programs 4-11 Operating temperature range 4-8 Operation in the home healthcare environment – important information 3-2 Optical detector 4-17
P PC board – Battery 10-146 – Calibration after replacement 10-146 – Installation location 10-146 – Required tests 10-146 PCB LP1102
5008S
SM-EN
18A-2016
– Connectors 10-109 – Jumpers 10-109 PCB LP1104 – Jumpers 10-112 PCB LP1105 – Battery 10-115 – Installation location 10-115 – LEDs 10-115 PCB LP1107-4 – Fuses 10-121 – Installation location 10-120 – LEDs 10-121 – Required tests 10-121 PCB LP1131-2 – Required tests 10-125 PCB LP1134 – Required tests 10-126 PCBLP1102 – Calibration after replacement 10-110 – Installation location 10-109 – LEDs 10-109 – Required tests 10-110 PCBLP1104 – Calibration after replacement 10-112 – Fuses 10-112 – Installation location 10-111 – LEDs 10-112 – Required tests 10-113 – Solder bridges 10-112 PCBLP1105 – Calibration after replacement 10-115 – Required tests 10-115 PCBLP1106 – Calibration after replacement 10-117 – Fuses 10-117 – Installation location 10-116 – Required tests 10-117 PCBLP1107-4 – Calibration after replacement 10-121 PCBLP1126 – Calibration after replacement 10-123 – Installation location 10-123 – Required tests 10-123 PCBLP1131 – Calibration after replacement 10-124 – Installation location 10-124
1-3
Chapter 1: Index
– LEDs 10-124 – Required tests 10-124 PCBLP1131-2 – Calibration after replacement 10-125 – Installation location 10-125 – LEDs 10-125 PCBLP1134 – Calibration after replacement 10-126 – Installation location 10-126 PCBLP1140 – Calibration after replacement 10-128 – Connector pin assignment 10-147 – Installation location 10-127 – Required tests 10-128 PCBLP1141 – Connector pin assignment 10-147 PCBLP1141-3 – Calibration after replacement 10-130 – Fuses 10-130 – Installation location 10-129 – Jumpers 10-130 – LEDs 10-130 – Required tests 10-130 PCBLP1142 – Calibration after replacement 10-133 – Fuses 10-131 – Installation location 10-131 – Jumpers 10-132 – Required tests 10-133 PCBLP1145-1 – Calibration after replacement 10-136 – Installation location 10-136 – Monitor compatibility matrix 10-136 – Required tests 10-137 PCBLP1150 – Calibration after replacement 10-138 – Installation location 10-138 – Required tests 10-138 PCBLP1152 – Calibration after replacement 10-139 – Installation location 10-139 – Required tests 10-139 PCBLP1169
1-4
– Calibration after replacement 10-140 – Installation location 10-140 – Required tests 10-140 PCBLP1170 – Calibration after replacement 10-141 – Installation location 10-141 – Required tests 10-141 PCBLP1202 – Calibration after replacement 10-143 – Installation location 10-142 – LEDs 10-143 – Required tests 10-143 PCBs, overview 11-2 Performing the EBM T1 test 10-9
– PCBLP1126 10-123 – PCBLP1131 10-124 – PCBLP1131-2 (wireless module) 10-125 – PCBLP1134 10-126 – PCBLP1140 10-127 – PCBLP1141-3 10-129 – PCBLP1142 10-131 – PCBLP1145-1 10-135 – PCBLP1150 10-138 – PCBLP1152 10-139 – PCBLP1169 10-140 – PCBLP1170 10-141 – PCBLP1202 10-142 – PCBs, overview 11-2 Pulse 4-22
Performing the T1 test 10-9
Q
Pneumatic tubings in the EBM, replacing 10-48
Quick Guide – Service Software 5-40
Pneumatics – Block diagram 11-8 – Control states 11-10 – Description 11-9
R
Power cable, removing and installing 10-40 Power plug fuse (UK version only), removing and installing 10-42 Power supply unit – Block diagram 11-5 – Description 11-6 Power supply unit, removing and installing 10-41 Precautions 2-3 Preparation 4-11 Pressure holding test 4-14 Pressure reducing valve A04, water inlet, removing and installing 10-72
Rechargeable battery – Decommissioning 3-31, 9-21 – Fuse 4-3 – Initial start-up 3-13 – Maintenance 4-10 – Removing and installing 10-31, 10-32 – Specifications 4-2 – Transporting the device 3-27 – TSC / MA 6-27 – Voltage 4-2, 9-18 Recommissioning after decommissioning – Explanatory notes for completing the report 3-43 – Important information 3-41 – Report 3-42 Reinfusion 4-12
Priming and rinsing 4-11
Relative humidity 4-8
Printed circuit boards – Combination, PCBLP 1202 with PCBs LP1107 / LP1141 10-144 – PC board 10-145 – PCB LP1107-4 with attached PCB LP1158 10-118 – PCB LP1107-4 with integrated PCB LP1158 10-119 – PCBLP1102 10-108 – PCBLP1104 10-111 – PCBLP1105 10-114 – PCBLP1106 10-116
Relocating a device used in a home healthcare environment 3-2 Remote control (HomeHD option) – Decommissioning 9-21 – Initial start-up 3-13 – PCBLP1169 10-140 – Removing and installing 10-32 – Transporting the device 3-27 – TSC / MA 6-29 – Voltage 9-19 Remote maintenance 9-25
Fresenius Medical Care
5008S
SM-EN
18A-2016
Chapter 1: Index
Removing and installing – Air bubble detector (ABD) 10-60 – Arterial occlusion clamp 10-50 – Arterial pressure measurement unit 10-50 – Balancing chamber 10-86 – Battery pack 10-31 – bibag® connector 10-91 – Bicarbonate pump 10-81 – Bicarbonate rinse chamber 10-95 – Blood leak detector 10-87 – Blood pressure monitor (BPM) (option) 10-25 – Blood temperature monitor (BTM) (option) 10-70 – Braking mechanism 10-30 – Catch of the occlusion clamps 10-59 – CDS block 10-97 – Concentrate container holder 10-28 – Concentrate pump 10-80 – Concentrate rinse chamber 10-92 – Conductivity sensors 10-100 – Degassing orifice 10-77 – Dialyzer coupling 10-23 – Dialyzer holder 10-24 – Disinfectant valve V20 (yellow label) 10-101 – Disinfectant valve V34 (yellow label) 10-101 – EBM 10-44 – EBM doors 10-43 – Flap lid 10-90 – Float switch S01 10-75 – Gear pump 10-85 – Gear pump drive 10-84 – Heat exchanger 10-73 – Heater rod 10-78 – Heparin pump 10-63 – Heparin pump length sensor 10-62 – Heparin pump stock 10-61 – IV pole 10-20 – Level detector 10-68 – Monitor rear with monitor support arm 10-33 – Online module 10-69 – Pneumatic tubings in the EBM 10-48 – Power cable 10-40 – Power plug fuse (UK version only) 10-42
Fresenius Medical Care
5008S
– Power supply unit 10-41 – Pressure reducing valve A04 10-72 – Rechargeable battery for remote control (HomeHD option) 10-32 – Shunt interlock 10-20 – Shunt interlock mark 10-23 – Shunt interlock microswitch 10-22 – Temperature sensors 10-100 – UF pump 10-82 – Venous occlusion clamp 10-50 Removing and installing the braking mechanism 10-30 Removing and installing the concentrate container holder 10-28 Removing and installing the dialyzer holder 10-24 Removing and installing the IV pole 10-20 Removing and installing the microswitch in the installed shunt interlock 10-22 Removing and installing the remote control rechargeable battery (HomeHD option) 10-32 Removing and installing the shunt interlock 10-20 Removing and installing the shunt interlock mark 10-23
SERVICE menu 9-1 – CALIBRATE 9-3 – DIAGNOSTICS 9-13 – Flow diagram 9-2 – MODULE 9-20 – SETUP 5-3 – UPDATE 9-22 – VARIOUS 9-21 Service Software – Quick Guide 5-40 Setting the max. water inflow 9-2 SETUP menu (Service setup) 5-3 – BTM (option) 5-13 – Define cleaning parameters 5-8 – Miscellaneous 5-10 – Network 5-12 – Radio (option) 5-13 – Settings Air bubble detector 5-7 – Settings EBM 5-5 – Settings Hydraulics 5-4 – Software options 5-13 Single-Needle chamber (option) 4-21 Single-Needle Click-Clack 4-18 SNAPLOC attachment 10-15 Software version of the operating system in the monitor (M1) 9-25 Software version update 9-22 – in a replaced module 9-22 – with a new CF card 9-23 – with the PC Service Software 5008 9-24
Repair procedure in case of ingress of blood or fluid via the pressure line 10-54
Solder bridges – PCBLP1104 10-112
Reports – Decommissioning 3-30 – Decommissioning extension 3-38 – Identification sheet (decommissioning) 3-31 – Initial start-up 3-3 – Recommissioning after decommissioning 3-42 – TSC 6-47 – TSC / MA 6-3
Specifications 4-1
Residual-current device 4-23 Rinse and disinfection flow 4-16
Stability 4-8 Stationary equipment 3-2 Stopping a disinfection program 2-3 Storage conditions 4-9 Styles used in the document 2-1 SYSTEM menu 5-1 – APPLICATIONS 5-37 – SERVICE 9-1 – USER SETUP 5-15
T
S Self-cutting screws 10-16 Service / diagnostics 4-11
SM-EN
Spare parts 2-3
18A-2016
T1 test 4-11 Technical safety checks (TSCs) 6-1
1-5
Chapter 1: Index
Temperature at water drain 4-8 Temperature sensors – Calibration after replacement 10-100 Test equipment and accessories 8-1 Tilting tool 8-6 Tip symbol, significance 2-2 Transmembrane pressure 4-13 Transport protection for monitor support arm 10-40 Transporting a device used in a home healthcare environment 3-2
– – – – – – – – – – – – – – –
Cleaning 5-28 Define concentrates 5-20 Dialysate 5-19 Emergency 5-30 Extended safety 5-31 HomeHD (option) 5-36 Miscellaneous 5-34 New concentrate 5-21 OCM 5-33 ONLINE 5-32 Rinse / reinfusion volume 5-17 Single-Needle (option) 5-34 Ultrafiltration 5-24 User interface 5-26 VenAcc (option) 5-36
Treatment 4-11 Trolley 10-28 Troubleshooting in case of unclear crashes and suspected CAN bus problems 10-151 Troubleshooting with dark display 10-148 TSC – Accessories required 6-2 – Explanatory notes for completing the report 6-7 – Important information 6-1 – Report 6-47 TSC / MA – Accessories required 6-2 – Explanatory notes for completing the report 6-7 – Important information 6-1 – Report 6-3 Closing and opening the tube clamp 10-16 Tube clamps 10-19
U UF pump, removing and installing 10-82 UFC measurement 4-14 Ultrafiltration 4-13 UPDATE menu 9-22 USER SETUP menu 5-15 – Alarm processing 5-25 – Anticoagulation 5-17 – Auto On 5-29 – Blood lines 5-16 – Blood pump 5-16 – BPM (option) 5-34 – BTM (option) 5-35
1-6
V VARIOUS menu 9-21 – Preservation 9-21 Venous occlusion clamp, removing and installing 10-50 Venous pressure measurement 4-17 Vent valve of CDS block 10-99 Verification procedure in case of ingress of blood or fluid via the pressure line 10-54
W Warning symbol, significance 2-2 Warnings – relating to electricity 2-4 Water drain 4-8 Water inlet pressure 4-8 Water inlet rate 4-8 Water inlet temperature 4-8 Weight of the device 4-1 Working on the device 2-3 Wrench torques 10-18
Z Zero point of the pressure transducers (EBM), resetting 10-52
Fresenius Medical Care
5008S
SM-EN
18A-2016
Chapter 2: Important information
2
Important information
2.1
How to use the Service Manual Device type
In this document, unless otherwise stated, the word "device" on its own always refers to the 5008S device.
Purpose
This document is intended for service technicians and is to be used for initial study (to acquire a basic knowledge) and for reference purposes (for Technical Service Checks, maintenance procedures and repairs). The document does not replace the training courses offered by the manufacturer.
Identification
The document can be identified by the following information on the title page and on the labels, if any: – Document edition – Document part number
Footer
The footer displays the following information: – Company name – Device type – The English abbreviation for the document type and the international abbreviation for the document language, e.g., SM-EN means Service Manual in English. – The edition identification, for example, 4A-2013 refers to edition 4A released in 2013 – The page identification, for example, 1-3 refers to chapter 1, page 3
Organization of the chapters
To facilitate the use of documents from Fresenius Medical Care, the organization of the chapters has been standardized in all manuals. There may therefore be chapters within this document without any content. Chapters without content are marked accordingly.
Styles used in the document
The following text styles may be used in the document: Style
Description
Keys and buttons
Keys and buttons on the device are shown in bold type. Example: Example button.
Message text
Messages displayed by the device are shown in italic type. Example: Message: Example of a message.
Instruction
Instructions are indicated by an arrow . Instructions must be followed. Example: Carry out instruction.
Fresenius Medical Care
5008S
SM-EN
18A-2016
2-1
Chapter 2: Important information
Style
Description
1. Numbered instruction
Long passages containing instructions can be shown as numbered lists. Instructions must be followed.
2. ... 3. ...
2.2
Example: 1. Carry out instruction.
Illustrations
The illustrations used in the documents may differ from the original if this does not have any influence on the function.
Changes
Changes to documents will be released as new editions or supplements. In general, this manual is subject to change without notice.
Reproduction
Reproduction, even in part, is only permitted with written approval.
Significance of warnings Warning Advises the operator that failure to observe this information can result in personal injury.
2.3
Significance of notes Note Advises the operator that failure to observe this information can result in the following: – Damage to the device – Required functions will not be executed at all or not executed correctly
2.4
Significance of tips Tip Information providing useful tips for easy handling.
2-2
Fresenius Medical Care
5008S
SM-EN
18A-2016
Chapter 2: Important information
2.5
Considerations for working on the device Requirements
Knowledge of the current Instructions for Use of the respective device. Background experience in mechanical, electrical and medical engineering.
Authorized persons
Start-up, extensions, adjustments, calibrations, maintenance procedures, modifications or repairs must only be carried out by the manufacturer or persons authorized by the manufacturer.
Test equipment and accessories
The activities described in this document require the availability of the necessary technical test equipment and accessories.
Specifications
The information contained in the Specifications chapter must be observed.
Precautions
Before switching on the power, repair any visible damage. Before opening the device and when working on the open device, the following precautions must be observed: – Protect the components against ingress of fluids. – Do not touch live parts. – Plugs, connections and components must only be disconnected or connected when the device is switched off. – There is a risk of chemical burns and scalding when working on the hydraulics.
ESD precautions
When repairing the device and replacing spare parts, observe the relevant ESD safety measures.
Monitor support arm
If the device needs to be placed in a horizontal position for servicing, the monitor support arm must be locked in place with the transport protection mechanism to prevent it from swiveling.
After stopping a disinfection program Warning The device must be disconnected from the water supply no later than 3 days after stopping a disinfection program or putting it into preservation mode. When the system is recommissioned, check that the pressure of the water supply meets the prescribed minimum pressure. Spare parts
Use only original spare parts. For identifying and ordering spare parts, test equipment and tools, always use the electronic spare parts catalog.
After working on the device
Check that the current Instructions for Use are readily available at the point of operation of the device. Ensure the operator is given the necessary additional instructions on any changes made. There are certain final tasks to be performed after work has been carried out on the device. Depending on the type of work performed, one of more final tasks must be performed.
Fresenius Medical Care
5008S
SM-EN
18A-2016
2-3
Chapter 2: Important information
In addition to any final tasks defined in the relevant component descriptions (see Servicing / repair on page 10-1), the following table applies. Type of work
Final tasks
Purpose
Device opened.
Measure the protective earth resistance.
To reestablish the electrical safety
Measure the device leakage current. Fluid-carrying component or connection opened.
Run a disinfection program.
To eliminate any contamination and make sure the hydraulics are working properly
You only need to wait for the disinfection program to complete successfully if you are also using it to test the proper function of the hydraulics. Component replaced.
2.6
Warnings
2.6.1
Warnings, electrical
Perform error-free T1 test.
To make sure the device is working properly
Warning Lethal electric shock hazard Touching live parts will cause an electric shock. Unplug the power plug before opening the device.
2-4
Fresenius Medical Care
5008S
SM-EN
18A-2016
Chapter 2: Important information
2.7
Addresses Manufacturer
Fresenius Medical Care AG & Co. KGaA 61346 Bad Homburg Germany Phone: +49 6172 609-0 www.fmc-ag.com
Service support, international
Fresenius Medical Care Deutschland GmbH Service Support International Hafenstraße 9 97424 Schweinfurt Germany Phone: +49 9721 678-333 (hotline) Fax: +49 9721 678-130
Service support, local
Fresenius Medical Care
5008S
SM-EN
18A-2016
2-5