GE Healthcare
Datex-Ohmeda S5 Monitor Series
S5 EEG and Headbox Module Technical Reference Manual Slot June 2001
Technical Reference Manual
34 Pages
Preview
Page 1
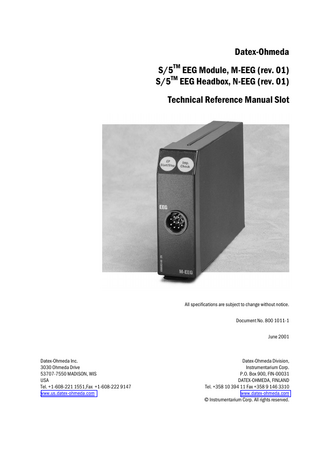
Datex-Ohmeda S/5TM EEG Module, M-EEG (rev. 01) S/5TM EEG Headbox, N-EEG (rev. 01) Technical Reference Manual Slot
All specifications are subject to change without notice. Document No. 800 1011-1 June 2001
Datex-Ohmeda Inc. 3030 Ohmeda Drive 53707-7550 MADISON, WIS USA Tel. +1-608-221 1551,Fax +1-608-222 9147 www.us.datex-ohmeda.com
Datex-Ohmeda Division, Instrumentarium Corp. P.O. Box 900, FIN-00031 DATEX-OHMEDA, FINLAND Tel. +358 10 394 11 Fax +358 9 146 3310 www.datex-ohmeda.com Instrumentarium Corp. All rights reserved.
Table of contents
TABLE OF CONTENTS EEG Module, M-EEG and EEG Headbox, N-EEG TABLE OF CONTENTS
I
TABLE OF FIGURES
II
INTRODUCTION
1
1 SPECIFICATIONS
2
1.1 General specifications ...2 1.1.1 Headbox ...2 1.1.2 Module ...2 1.2 Technical specifications...2 1.2.1 EEG ...2 1.2.2 AEP...3 1.2.3 EMG ...3 1.2.4 Impedance measurement...3
2 FUNCTIONAL DESCRIPTION
4
2.1 Measurement principle ...4 2.1.1 EEG ...4 2.1.2 FEMG...4 2.1.3 AEP...4 2.1.4 Impedance measurement...5 2.2 Main components...5 2.2.1 Neuro board...5 2.2.2 Headbox board...6 2.3 Connectors and signals...7 2.3.1 Module bus connector ...7 2.3.2 Module front panel connectors...8 2.3.3 Headbox input connector...8
3 SERVICE PROCEDURES
9
3.1 General service information...9 3.2 Service check ...10 3.2.1 Recommended tools ...10 3.3 Disassembly and reassembly...14 3.3.1 M-EEG ...14 3.3.2 N-EEG...14
4 TROUBLESHOOTING
15
4.1 Troubleshooting chart ...15 4.2 Troubleshooting flowcharts...16
5 SERVICE MENU
18
5.1 EEG & EP service menu ...19
6 SPARE PARTS
23
6.1 Spare part list...23 6.1.1 M-EEG rev. 00 ...23 i Document No. 800 1011-1
Datex-Ohmeda S/5 monitors 6.1.2 S/5 M-EEG rev. 01...23 6.1.3 N-EEG rev. 00 ...24 6.1.4 S/5 N-EEG rev. 01 ...24 6.1.5 Front panel stickers ...25
7 EARLIER REVISIONS
26
APPENDIX A
27
SERVICE CHECK FORM
A-1
TABLE OF FIGURES Figure 1
Measurement setup ... 1
Figure 2
Neuro board block diagram ... 5
Figure 3
Audio stimulator circuitry ... 6
Figure 4
EEG headbox board block diagram... 6
Figure 5
EEG module troubleshooting flowchart ...16
Figure 6
Headbox troubleshooting flowchart ...17
Figure 7
Exploded view of module box and EEG module ...23
Figure 8
Exploded view of headbox...24
ii Document No. 800 1011-1
S/5 EEG Module, M-EEG and S/5 Headbox, N-EEG
INTRODUCTION This Technical Reference Manual Slot provides information for the maintenance and service of the Datex-Ohmeda S/5 EEG Module, M-EEG and Datex-Ohmeda S/5 EEG Headbox, N-EEG. The EEG module is a single width plug-in module designed for use with the S/5 monitors. Later in this manual modules can be called w/o system name S/5. Please see also related Technical Reference Manual for information related to system e.g. related documentation, conventions used, symbols on equipment, safety precautions, system description, system installation, interfacing, functional check and planned maintenance. The EEG module and the EEG headbox together measure: •
electroencephalography (EEG)
•
spontaneous facial muscular activity with frontal electromyography (FEMG)
•
auditory evoked potentials (AEP)
The EEG Headbox, N-EEG, is responsible for EEG and FEMG signal amplification, filtering and digitalization and electrode impedance measurement. It is situated close to the patient’s head. The Headbox has connectors for the EEG leads, either for a referential or a bipolar montage, and for the AEP stimulation earphones. The EEG module M-EEG creates auditory stimulus pulses and takes care of AEP signal processing. It has one connector for the EEG headbox.
3
1
4
2 5
Figure 1
Measurement setup
(1)
EEG module measuring EEG and EP
(2)
Module-headbox cable
(3)
EEG Headbox
(4)
Organizer
(5)
Earphones (for AEP measurement only)
1 Document No. 800 1011-1
Datex-Ohmeda S/5 monitors
1
SPECIFICATIONS
1.1 General specifications 1.1.1 Headbox Box size, W × D × H Box weight Power consumption
96 × 170 × 34 mm/3.8 × 6.7 × 1.3 in 0.5 kg/1.1 lbs 1.9 W
Module size, W × D × H Module weight Power consumption
37 × 180 × 112 mm/1.5 × 7.1 × 4.4 in 0.37 kg/0.8 lbs 3.1 W
1.1.2 Module
1.2 Technical specifications 1.2.1 EEG Amplification Resolution Max amplitude Sampling frequency Range Frequency range Input impedance Noise level CMRR Parameters from power spectrum Burst suppression Defibrillation protection Allowable Input Offset
2 Document No. 800 1011-1
10 000 60 nV 800 µVpp 100 Hz per channel ±400 µV 0.5...30 Hz 8 MΩ @ 10 Hz <0.5 µV rms from 0.5 Hz to 30 Hz >100 dB @ 50 Hz SEF, MF, relative power in frequency bands calculated burst-suppression ratio (BSR) 5000V, 360 J ±300 mV
S/5 EEG Module, M-EEG and S/5 Headbox, N-EEG
1.2.2 AEP Amplification Resolution Max amplitude Stimulation Click (condensating) Frequency
10 000 60 nV 1000 µVpp
Intensity
duration 100 µs 1.1...9.1 Hz (1 Hz steps) @ 10 ms measurement 1.1...8.1 Hz (1 Hz steps) @ 100 ms measurement 10...90 dB nHL, 10 dB steps
Measurement Sampling frequency Frequency range Highpass filter
2400 Hz for MLAEP/ 4800 for BAEP 0.5...1000 Hz off/10/30/50/75/100/150 Hz
Single average: Averaged responses
100...2000 stimuli
Moving average: Gross average Update interval
100...2000 stimuli after every 100 stimuli (200, when gross average is 2000)
Amplification Resolution Max amplitude Frequency range Amplitude
50 000 100 nV 100 µVpp 60...300 Hz Root Mean Square (RMS)
1.2.3 EMG
1.2.4 Impedance measurement Measurement frequency Current Range Resolution Accuracy Measurement time, all leads Start of measurement Leads off detection
75 Hz 10 µA 0...30 kΩ 100 Ω ±1k or ±10 % whichever is greater 3s manual/automatic >3 MΩ, continuous
3 Document No. 800 1011-1
Datex-Ohmeda S/5 monitors
2
FUNCTIONAL DESCRIPTION
2.1 Measurement principle 2.1.1 EEG EEG is differential voltage signal measured from electrodes attached to the patient’s skin. EEG measures the spontaneous electrical activity of the brain. This electrical activity reflects the state of the brain. Electrode connections can be made with two different principles: bipolar or referential montage. In bipolar montage every channel has two electrodes and the signal is the potential difference between these two electrodes. In referential montage the referential electrode delivers its potential to every channel’s minus-input. The signal is the potential difference between this common reference electrode and the electrode connected to plus input. Purpose of the ground electrode is to reduce common mode noise. It cannot be used as referential electrode.
Bipolar connection
Referential connection
The EEG signal is amplified, antialias filtered, digitised and software filtered. After that the EEG signal is shown on the screen and various characteristics are calculated out of it. These include spectrum, rms amplitude, spectral edge frequency, median frequency, burst-suppression ratio and percentage of total power in four different bands: theta (1...4 Hz), delta (5...9 Hz), alpha (9...13 Hz) and beta (>13 Hz).
2.1.2 FEMG FEMG is electrical signal originating from facial muscles. In the headbox the signal of channel 1 is divided to two different amplification and filtering paths. One is the EEG path and the other is the FEMG path. FEMG signal has much broader spectrum than EEG and it overlaps with EEG at low frequencies. Because of this the rms amplitude of FEMG signal is calculated from band 60...300 Hz. Mains power frequency and its harmonics are digitally filtered away to reject interference noise from power lines.
2.1.3 AEP AEP is an electrical response of the nervous system to external auditory stimulus. It is measured using same electrodes as in EEG measurement, but the sampling frequency and bandwidth are different. The electrical signal resulting from one stimulus is weaker than the spontaneous activity 4 Document No. 800 1011-1
S/5 EEG Module, M-EEG and S/5 Headbox, N-EEG of the brain. To overcome this the stimulus is repeated several times (100...2000), and average of all responses is calculated. Responses containing big artefacts are removed from the average to improve the signal to noise ratio.
2.1.4 Impedance measurement The impedance measurement is done from one channel at a time and the EEG or EP measurement is stopped during the impedance measurement. Differences in electrode impedance of the electrodes causes common mode noise coupling to measured signal. To minimise this the electrode impedance is measured and a warning of unsatisfactory impedance level is generated when necessary. The impedance of an electrode is measured by applying a known current through the electrode and measuring the voltage drop over the electrode. This way the impedance of a single electrode can be resolved instead of a sum impedance of an electrode pair.
2.2 Main components 2.2.1 Neuro board The Neuro board consists of the following functional sections: •
audio stimulator
•
microprocessor for stimulation and measurement control, and for counting the measurement results
•
two serial communication drivers
The serial bus speed to monitor is 500 kbps and the bus itself is half duplex, i.e. data can be transferred to both directions but only one way at a time. The serial bus speed to the headbox is 500 kbps and the bus is full duplex i.e. data can be transferred to both directions at the same time.
Power supply
Module Bus
Patient Isolation 5 kV
Power +15 V
±5 V ±12V
EEPROM
Module Keys
+15 V
CPU 3048
RS-422 driver
RAM
Data AEP stimulus
To EEG Headbox
Reset
Opto RS485 Data Isolation Driver
Figure 2
AEP Stimulator
Neuro board block diagram
5 Document No. 800 1011-1
Datex-Ohmeda S/5 monitors
Earphones Audio level adjustment
PWM H83048
CTRL
Figure 3
Audio generator
Timing control
Headbox
Audio stimulator circuitry
2.2.2 Headbox board The Headbox board consists of the following functional sections: • • • • •
input protection EEG amplifiers and filters FEMG amplifier and filter current feeding circuitry and amplifiers for impedance measurement microprocessor serial communication
+15 V
±5 V ±12V
Power supply Isolation kV
•
RS Opto 422 AEP stimulus Isolation driver
CPU 3048
Data
A / D
Headbox Keys
Figure 4
6 Document No. 800 1011-1
EEG headbox board block diagram
1
1-4
1-4
Impedance check
p a EEG t signal i e n AEP stimulus t
S/5 EEG Module, M-EEG and S/5 Headbox, N-EEG
2.3 Connectors and signals 2.3.1 Module bus connector 1
13 25
14
Table 1
Module bus connector (X1) pin description
Pin No.
I/O
Signal
1 2 3 4 5 6 7 8 9 10 11 12 13 14 15 16 17 18 19 20 21 22 23 24 25
I I I I I/O I/O I I O I O I I I O I O I I
RESET_RS485 -15 VDC +15 VDIRTY +15 VDC -DATA_RS485 DATA_RS485 Ground & Shield -RESET_RS485 CTSB RTSB RXDB TXDB Ground & Shield +32 VDIRTY GroundDIRTY CTSC RTSC RXDC TXDC ON/STANDBY PWM_ECG RXDD_RS232 TXDD_RS232 +5 VDC +5 VDC
7 Document No. 800 1011-1
Datex-Ohmeda S/5 monitors
2.3.2 Module front panel connectors Table 2
Headbox connector Pin No. 1 2 3 4 5 6 7 8 9 0
3 6 1 2
4
7
5
8
9
0
Signal Ground Ground +15 V TXD+ EP Audio Power sync 43 kHz RXD+ EP Sync RXDTXD-
2.3.3 Headbox input connector Table 3
8 Document No. 800 1011-1
Headbox input connector
1
5
6
10
Pin No.
Signal
1 2 3 4 5 6 7 8 9 10
Lead set id 1+ 2+ 3+ 4+ Ground 1- / Ref 234-
S/5 EEG Module, M-EEG and S/5 Headbox, N-EEG
3
SERVICE PROCEDURES
3.1 General service information Field service of the M-EEG and N-EEG is limited to replacing faulty circuit boards or mechanical parts. Faulty circuit boards should be returned to Datex-Ohmeda for repair. Datex-Ohmeda is always available for service advice. Please provide the unit serial number, full type designation, and a detailed description of the fault. The Datex-Ohmeda EEG Simulator (order No. 90502) is recommended for functional checks.
CAUTION
Only trained personnel with appropriate equipment should perform the tests and repairs outlined in this section. Unauthorized service may void warranty of the unit.
9 Document No. 800 1011-1
Datex-Ohmeda S/5 monitors
3.2 Service check These instructions include complete procedures for a service check. The service check is recommended to be performed after any service repair. However, the service check procedures can also be used for determining possible failures. The procedures should be performed in ascending order. The instructions include a check form, Appendix A, which should be filled in when performing the procedures. The mark
? in the instructions means that the check form should be signed after performing
the procedure.
The procedures are designed for monitors with S/5 monitor software of revision 01. However, most of the procedures also apply to monitors, which contain some other monitor software type/revision.
3.2.1 Recommended tools Tool
Order No.
EEG simulator
90502
Notes
Screwdriver Earphones • •
1.
Detach the module box by removing the two screws from the back of the module. Be careful with the loose latch and spring pin for locking. Detach also the cover of the EEG headbox by removing the four screws from the bottom of the box. Be careful with the two wired connectors in the circuit board attached to the cover. Check internal parts of the module and the headbox: −
screws are tightened properly
−
cables are connected properly
−
the EMC cover is attached properly in the module
−
there are no loose objects inside the module or the headbox
? 2.
Check external parts of the module: −
the front cover and the front panel sticker are intact
−
connectors are intact and are attached properly
−
the module box, latch and spring pin for locking are intact
? 10 Document No. 800 1011-1
S/5 EEG Module, M-EEG and S/5 Headbox, N-EEG 3.
Check external parts of the headbox −
cover and the base of the headbox are intact
−
the headbox sticker is intact
−
connectors are intact and attached properly
? • • •
Reattach the module box and the cover of the EEG headbox. Turn the monitor on and wait until the normal monitoring screen appears. Configure the monitor screen so that information regarding the EEG measurement is shown:
Monitor Setup - Screen 1 Setup - Waveform Fields - Field 1 - EEG1 Monitor Setup - Screen 1 Setup - Waveform Fields - Field 2 - EEG2 Monitor Setup - Screen 1 Setup - Waveform Fields - Field 3 - EEG3 Monitor Setup - Screen 1 Setup - Waveform Fields - Field 4 - EEG4 Others - EEG - Montage - EEG Channels - 4 Others - EEG - Montage - Montage type - Bip Others - EEG - EEG Setup - Numeric 1 - MF Others - EEG - EEG Setup - Numeric 2 - Ampl. 4.
Plug in the module. Check that it goes in smoothly and locks up properly
5.
Check that the module is recognized, i.e. the EEG header with related information appears in the chosen waveform fields and ‘Headbox off’ message is shown on the four fields.
? ?
6.
Connect the headbox to the module. Check that the headbox is recognized i.e. message ‘EEG measurement off’ is shown on the four waveform fields. If the EEG leads are connected ‘EEG measurement off’ message disappears after 15 seconds.
?
7.
Enter the service menu:
Monitor Setup - Install/Service (password 16-4-34) - Service (password 26-23-8) Record the information regarding the software of M-EEG and N-EEG by selecting SCROLL VERS and turning the ComWheel.
?
11 Document No. 800 1011-1
Datex-Ohmeda S/5 monitors 8.
Enter the EEG module service menu: Parameters - More… - EEG & EP Check that the ‘Timeouts’, ‘Bad checksums’ and ‘Bad c-s by mod’ values in the module view are not increasing faster than by 50 per second. Check that the memories of the module have passed the internal memory test, i.e. ‘RAM’, ‘ROM’ and ‘EEPROM’ all state OK.
?
9.
Check that the ‘HB Mod Timeouts’, ‘HB Mod Bad Checksum’ and ‘Mod HB Bad Checksum’ values are not increasing faster than by 50 per second. Check that the memory of the headbox has passed the internal memory test, i.e. ‘HB Rom Error’ in the headbox view states 0.
?
10. Check the EP Start/Stop and Imp. Check membrane keys both of the module and the headbox. Go to module view and press each key for at least one second and check that the key being pressed is identified, i.e. the corresponding text is highlighted in the service menu. Repeat in headbox view with headbox keys.
?
11. Select 10 kΩ as imped. pos. and imped. neg. value on the simulator. Go to EEG & EP service menu and select Check Electr. From the headbox view check that the impedances in all four channels are 10 kΩ ±1 kΩ.
?
12. Connect the EEG simulator to the headbox. Select 2 kΩ as imped. pos. and imped. neg. value on the simulator. Select 10 Hz 200 µV sinewave on the simulator and check that all the four waveforms have same form. Check that the size of the waveforms is 200 µVpp ±5 µV. Check that the MF value is 10 ±0.5 Hz. Check that the amp value is 71 µV ±3 µV.
?
13. Select 75 Hz 50 µV signal on the simulator. Check that the FEMG value is 16 ±3 µV.
?
•
Preset the AEP measurement settings:
Others EP - Cycle - Cont. EP - AEP Setup - AEP Channels - 2 EP - AEP Setup - Responses -100 EP - AEP Setup - Stim. Frequency - 1.1Hz EP - AEP Setup - Stim. Intensity - 60 dB EP - AEP Setup - Sweep length - 100 ms 12 Document No. 800 1011-1
S/5 EEG Module, M-EEG and S/5 Headbox, N-EEG 14. Plug in the earphones to the headbox. Be careful with load stimulation from the earphones when starting AEP stimulation. Start AEP stimulation by pressing the EP Start/Stop button on the module. Check that the clicking sound comes from the earphones in 1.1 Hz frequency. Stop the stimulation by pressing again the EP Start/Stop button on the module. Check that the clicking stopped.
?
•
Modify the AEP measurement settings:
Others EP - AEP Setup - Stim. Frequency - 8.1Hz EP - AEP Setup - Stim. Intensity - 90 dB EP - EP Size - 1 15. Connect the AEP testing cable between the simulator and the headbox. Select 2 kΩ as imped. pos. and imped. neg. value on the simulator. Select 40 µV amplitude in the EP waves menu on the simulator and start AEP measurement in the Others - EP menu. Wait until you get the response on the display. Check that the shape of the response is one period of a sine wave. Save EP and adjust the markers to minimum and maximum level of the response curve in both channels. Check that the amplitude is 40 µV ±5 µV.
?
16. Perform an electrical safety check and a leakage current test.
?
17. Check that the module functions normally after performing the electrical safety check.
?
18. Clean the module with suitable detergent.
?
•
Fill in all necessary documents.
13 Document No. 800 1011-1
Datex-Ohmeda S/5 monitors
3.3 Disassembly and reassembly 3.3.1 M-EEG Disassemble the M-EEG in the following way. See Figure 7 EEG module
Exploded view of module box and
1.
Remove the two screws from the back of the module.
2.
Pull the module box slowly rearward and detach it from main body. Be careful with the loose latch and spring locking pin.
3.
Detach the Neuro board by removing the two screws located near the front panel frame, disconnect the cable and pull out the front panel frame.
To reassemble the module, reverse the order of the disassembly steps.
CAUTION
When reassembling the module, make sure that the cables are reconnected properly.
3.3.2 N-EEG Disassemble the N-EEG in the following way. See Figure 8
Exploded view of headbox.
1.
Remove the four screws from the bottom of the headbox.
2.
Lift off the cover and disconnect the two cables connected to the EEG headbox board.
3.
Disconnect the module-headbox cable and the headbox input unit connectors from the EEG headbox board.
4.
Remove the four screws on the corners of the EEG headbox board and detach the EEG headbox board.
To reassemble the N-EEG, reverse the order of the disassembly steps.
CAUTION
When reassembling the headbox, make sure that the cables are reconnected properly.
14 Document No. 800 1011-1
S/5 EEG Module, M-EEG and S/5 Headbox, N-EEG
4
TROUBLESHOOTING
4.1 Troubleshooting chart Trouble
Cause
Treatment
No EEG waveforms on screen.
EEG waveforms not selected on screen.
No EEG waveforms on screen and ‘EEG measurement off’ message shown in the number field. All EEG Waveforms not drawn on screen even if electrodes and cables are OK.
Electrodes not attached properly to skin or electrode cables not connected to headbox.
Press Monitor Setup key and select EEG waveforms on the screen. Check electrodes and electrode cables.
Number fields show ‘---‘ and message ‘High EMG’ is displayed.
Patient has high muscle activity in the head region or noise from some equipment is coupling to electrode cables. Electrodes are poorly connected or electrical interference is coupling to electrode cables.
EEG signal looks noisy and artefact message is displayed in the number fields.
The number of channels chosen on montage setup is smaller than the number of channels connected to patient.
Leads off message is shown on other channels than channel 1 in referential connection. Electrode impedance measurement is not available on menus. Electrode impedance measurement is not available on menus. Electrode impedances show ‘---‘ and check ground electrode message is displayed on number fields after impedance measurement.
The montage chosen in monitor is not referential.
Electrode impedances show ‘---‘
The electrode impedances are too high and out of measurement range. The EEG measurement is off.
Start EP measurement not available on EP menu. EP measurement parameters cannot be changed. All or most of the EP epochs are rejected (Rej. counter on EP screen increases more rapidly than Ave. counter).
EP wave is shown only on one channel even if two channels EP measurement is selected. No clicks can be heard from earphones.
EEG measurement is off. EP measurement is on. Ground electrode is poorly connected to patient or ground electrode cable is not connected to headbox.
The EP measurement is on. The signal has too much noise/artefacts in EP measurement band. Especially coupled 50/60 Hz is not shown on EEG waveform because of filtering, but may be present in EP signal. Leads are off in the channel where the EP wave is not shown. The earphones connector is not in place.
Check that the number of channels in menu Others -EEG - Montage is same as the number of channels connected to patient. Relax the patient or remove the noise source. Check the electrodes and electrode impedances. Remove noise sources if necessary. Change the montage to referential from monitor menu Others -EEG - Montage. EEG measurement starts 15 seconds after first electrode pair is connected. Wait until EP measurement ends or stop EP measurement. Check the electrode and cable. If the electrode has too high impedance (>50k) the measurement fails even if the electrode is properly attached. Cure for this is to use better electrodes or prepare the skin better. Prepare the skin better or use better electrodes. Connect electrodes and wait 15 seconds and the measurement starts. Stop EP measurement. Check that electrode impedances are below 5k and the impedances of the same channel are close to one another. If this does not help then try to remove noise sources. Check the electrodes and electrode cables. Check that the earphones plug is firmly pushed into the headbox’s earphone connector.
15 Document No. 800 1011-1
Datex-Ohmeda S/5 monitors
4.2 Troubleshooting flowcharts Possibly faulty EEG module.
Take all modules out of the frame.
Insert M-EEG and turn power on
Does fault still appear?
No
Fault not in EEG module
Yes Enter the EEG Service menu No
Check are the Timeouts, Bad checksums or Bad c-s by mod running?
OK?
No
Does another module work in the same slot?
Yes Check RAM, ROM and EEPROM Yes
OK?
No
Replace Neuro board
Yes Connect headbox into module connector Yes Check from headbox view are the Timeouts, HB Mod Bad Checksums or Mod Hb Bad Checksums running
OK?
No
Does another module work with headbox?
No
Fault not in EEG module
Is the keypad connected?
No
Connect the keypad
Yes
Replace the keypad
Yes Check front panel key functions
OK?
No
Yes
Does the test pass with another keypad?
Yes
No
Replace Neuro board
Connect earphones into the headbox and start AEP measurement
Can clicks be heard?
No
No
Can clicks be heard with another headbox?
Yes
Fault not in EEG module
WHITE
Figure 5 16 Document No. 800 1011-1
EEG module troubleshooting flowchart
S/5 EEG Module, M-EEG and S/5 Headbox, N-EEG
Possibly faulty EEG headbox.
Take all modules out of the frame.
Insert M-EEG and EEG headbox and turn power on
Does fault still appear?
No
Fault not in EEG headbox
Yes
Does the headbox work with another module?
Yes
No Enter the EEG Service menu
Check from headbox view are the Timeouts, HB Mod Bad Checksums or Mod Hb Bad Checksums running
OK?
No
Try with another headbox - module cable or check the cable by hand
Fault in cable?
Yes
Replace the headbox module cable
No
Is earphone jack intact and connected to headbox circuit board?
Yes
Check HB Rom Error
No
OK?
Replace the Headbox board
No
Yes Check front panel key functions
OK?
No
Is the keypad connected?
No
Connect the keypad
Yes
Replace the keypad
Yes
Does the test pass with another keypad?
Yes
No Connect earphones into the headbox and start AEP measurement
Can clicks be heard?
Replace Neuro board
No
Try with another headbox - module cable or check the cable by hand
Yes
Fault in cable?
Yes
No
Yes Replace the headbox module cable
Check EP waveforms with EEG simulator
Connect or replace the earphones jack
Yes
OK?
No
Try with another headbox - module cable or check the cable by hand
Fault in cable?
No
Replace Neuro board
Yes Check EEG waveforms, FEMG reading, impedance measurement and lead off detection with EEG simulator
Replace the input connector
No
Check the headbox input connector and input board
OK?
OK?
Yes
Replace the Headbox board
Text
Figure 6
Headbox troubleshooting flowchart 17 Document No. 800 1011-1