Genevac
Modular Concentrator Systems
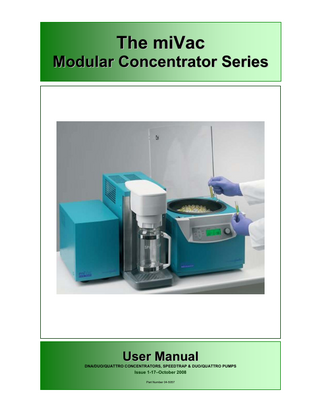
The miVac Modular Concentrator Series User Manual Issue 1 Oct 2008
User Manual
24 Pages
Preview
Page 1
miVac Series Contents GENERAL ... 2 1 Introduction ... 2 Details... 2 2 Safety and Maintenance Notes ... 3 2.1 Symbols ... 3 2.2 Safety... 3 3 System Description and Options ... 4 3.1 Scope of delivery and installation... 4 3.2 Checking the delivery... 4 3.3 Installing the system... 4 DNA ... 4 DUO/QUATTRO, SPEEDTRAP and PUMP ... 4 HOSES ... 5 CABLES... 5 3.4 Good procedural practice... 6 3.5 Routine Checks:... 6 3.6 List of acceptable solvents ... 6 miVac Systems and Combustible Solvents: ... 6 Genevac and the ATEX Directive:... 6 DNA/DUO/QUATTRO CONCENTRATOR ... 7 4 Getting started ... 7 5 Controls ... 8 5.1 Setting Chamber Temperature... 9 5.2 Setting Run Type ... 9 5.3 Setting Total Run Time ... 9 5.4 Setting Heat Time ... 9 5.5 Display mode in AUTO run... 9 5.6 Getting the best from miVac solid aluminium rotors ...10 SPEEDTRAP... 11 6 Introduction ... 11 DUO/QUATTRO PUMP... 13 7 Introduction. ... 13 8
Error messages & Troubleshooting... 14
TECHNICAL DATA ... 16 9 General ... 16 Concentrator: ... 16 SpeedTrap: ... 16 Vacuum pump:... 16 Dimensions: ... 16 Power Consumption:... 17 Environment:... 17 Emissions: ... 17 10 11 12 13 14 15
EC Declaration of Conformity ... 18 Safety ... 19 Accessories... 19 Warranty Statement ... 22 Contact information ... 22 Disposal and Recycling... 22
These instructions are subject to change without notice. No part of these instructions may be reproduced in any form or be processed, duplicated or distributed by electronic or optical means without the written permission of Genevac Limited. All rights reserved. © Genevac Limited. These operating instructions should be read fully before you use the miVac system. Keep them near the system for easy reference. Your attention is drawn in particular to Safety and Maintenance Notes. 04-5057 Issue 1-17 – October 2008
Page 1 of 22
miVac Series
GENERAL 1
Introduction
Drawing on extensive experience in the drug discovery field, the miVac Series is designed to provide very high performance coupled with ease of use, occupying the minimum of laboratory space Simple to use controls enable the run type, run time and temperatures to be set in an instant. This manual will guide you through the start up requirements, set up needs and operation of the system to facilitate the most efficient procedure to protect your product’s integrity and to ensure optimum performance at all times. Details The miVac Series is supplied as three modular units that can be combined to suit your needs and requirements, examples below:
CONCENTRATOR
SPEEDTRAP
PUMP
Models available are: • • • • • •
DNA Concentrator (Combined Concentrator and Pump) Duo Concentrator (Concentrator) Quatro Concentrator (Concentrator) SpeedTrap (Condenser) Duo Pump (Low Vacuum Pump) Quatro Pump (High Vacuum Pump)
The simple control panel provides easy access to all run settings and also provides you with the current status of the concentrator, details are provided on page 7.
CONCENTRATOR CONTROL PANEL The LCD display is also used to advise you of any problems that may occur either with the run settings or the concentrator. These messages are defined later on in this manual (Page 13). Page 2 of 22
04-5057 Issue 1-17 –October 2008
miVac Series
2
Safety and Maintenance Notes
2.1
Symbols
The following safety symbols are used throughout this manual and can be found on the equipment. The definitions and scope of each symbol is as described below. WARNING THIS SYMBOL INDICATES HAZARDS THAT CAN LEAD TO SERIOUS MATERIAL DAMAGE OR POTENTIAL SERIOUS INJURY. THIS SYMBOL MEANS THAT YOU SHOULD NOT TOUCH SURFACES IN THESE AREAS. THESE SURFACES CAN BE VERY HOT AND MAY LEAD TO BURNS. This symbol indicates that you should refer to the relevant part of the User Manual for additional information. THESE 2 SYMBOLS COMBINED INDICATES HAZARDS THAT CAN LEAD TO SERIOUS MATERIAL DAMAGE OR POTENTIAL SERIOUS INJURY AND THAT YOU SHOULD READ THE RELEVANT PART OF THE USER MANUAL. 2.2
Safety BEFORE OPERATING THE SYSTEM, IT IS IMPORTANT THAT THE FOLLOWING NOTES ARE READ TO ENSURE THAT THE IMPLICATIONS TO THE SAFETY OF PERSONNEL OPERATING THE SYSTEM AND FOR THE PROTECTION OF SAMPLE INTEGRITY ARE UNDERSTOOD.
Samples in the concentrator chamber are subjected to accelerations of up to 250G. The following precautions should therefore always be observed. 2.3
Safe loading of concentrator •
Always balance the rotor within 10g for the DNA, Duo and Quattro.
•
Only use miVac rotors with your system.
•
Only load tubes or vials into the rotors that are specified on the rotor.
•
Always locate tubes/vials correctly in the rotor.
•
Only use a maximum of THREE Shallow Well Microplates (with Stackers) or ONE Deepwell microplate per location on the Duo 2 Position Swing Rotor.
•
Only use a maximum of FIVE Shallow Well Microplates (with Stackers) or TWO Deepwell microplates per location on the Quattro 4 Position Swing Rotor.
•
Only fill wells of Microplates to 66% of their maximum fill level.
•
Always load opposite swings with the same or similar type of plates.
•
Always rotate a swing rotor by hand after loading to check that all plates are correctly located before starting a run and before re-starting an interrupted run.
04-5057 Issue 1-17 – October 2008
Page 3 of 22
miVac Series 2.4
Limitations of use
Your concentrator system is unsuitable for use under the following circumstances: •
With strong acids such as HCl, TFA and HBr at all concentrations – See page 6 for approved list.
•
For use as a pressure vessel.
Rotary vane oil vacuum pumps are not recommended for use with miVac systems because vapours from the system may cause damage to the pump. However, for users wishing to use their miVac system with rotary vane oil pumps we recommend that the pump is run with the gas ballast set to position 1 to help prevent vapour damage to the pump. Oil pumps should then be run for 1 hour after the end of the concentration process (with ballast still engaged) to ensure that there is no condensed vapour in the pump. Ultimately, it is the responsibility of the user to check with the pump manufacturer as to how the pump should be operated.
3
System Description and Options
3.1
Scope of delivery and installation
On delivery, it is advisable to unpack your system at the point of receipt, to ease the movement of the component parts to the point of use. It would be advisable to retain the packaging as Genevac and its Distributors will only accept returns in the original packaging. 3.2
Checking the delivery
Check the contents of the delivery as soon as possible against the delivery note and notify your Distributor immediately of any missing or damaged parts. Refer to our web site for up to date contact details. 3.3
Installing the system
DNA The DNA Concentrator with its built in Pump can be easily positioned on most benches. Fit the Catchpot to the upper vent holes on the Concentrator; connect the short tube between the exhaust connector on the pump and the Catchpot. Fit the mains power cable that was supplied.
EXHAUST CONNECTOR UPPER VENT HOLES MAINS POWER
DUO/QUATTRO CONCENTRATOR, SPEEDTRAP and PUMP Below is an example of the Duo Concentrator, SpeedTrap and Duo Pump as positioned on a bench.
If you have purchased the Cart from your Distributor, and are using the Concentrator, SpeedTrap and Pump, then the Pump should be positioned on the lower shelf with the hose from the SpeedTrap to the Pump routed accordingly. Page 4 of 22
04-5057 Issue 1-17 –October 2008
miVac Series NOTE: The system is to be positioned so that there is a 50mm air gap between each unit and the next object; wall, fume hood etc. After installation leave the SpeedTrap in the upright position for 24hrs before connecting power. HOSES HOSE CLIPS EXTRACTION SYSTEM
CATCH POT
PUMP
SPEEDTRAP
CONCENTRATOR
NOTE: Ensure that the Catchpot is fitted to the upper row of vent holes on the Pump; Follow the diagram above to connect the units together using ½” Vac hose cut to length using the hose cutter. Secure hose with hose clips as indicated. The hose, hose clips and the hose cutter are available in the miVac Connection Kit – Part Number: MCK-00000-Y00. Extra lengths of hose are available separately – Vacuum hose Part Number:04-4783 – Exhaust hose Part Number: 04-5016, specify length when ordering. If you do not have the SpeedTrap, just connect the hose between the concentrator and the pump. The arrows on the diagram indicate the direction of vapour flow. CABLES Once you have fitted the hoses, you then need to connect the electrical supply cables. There are only 3 cables required. Just follow the diagram below:
PUMP
SPEEDTRAP
CONCENTRATOR
Connect the interconnecting cable A (supplied in Connection Kit) between the connector on the Concentrator and the connector on the Pump. Do not use the Mains Power Cable supplied with the pump, this is supplied for standalone use of the pump only. Connect Mains Power Cable B supplied with the SpeedTrap to the connector on the SpeedTrap and your Mains Supply. Connect Mains Power Cable C supplied with the Concentrator to the connector on the Concentrator and your Mains Supply. NOTE: The interconnecting cable is only to be used between the Concentrator and the Pump.
04-5057 Issue 1-17 – October 2008
Page 5 of 22
miVac Series 3.4
Good procedural practice
A few general rules for safe operation of a system: •
Ensure only users familiar with all the issues outlined in this document are permitted to operate the equipment.
•
Only load rotors that have been approved by Genevac or your Distributor.
•
The System should be loaded and started by the same person.
•
Never leave system unevenly loaded with the lid closed. Someone may start it.
•
Never start, or restart a system without checking it is evenly loaded and all swings swing freely.
•
Do not place any objects on top of any of the system components during a run
Misloading may result in damage to samples and the machine, and could void the warranty. 3.5
Routine Checks: •
Check all hose joints on a regular basis to ensure that they are secure.
•
Always ensure that the condenser jar is emptied before every run.
•
Clean the condenser jar at regular intervals.
•
Check the catch pot connected to the pump exhaust on a regular basis and drain as necessary.
•
Clean the lid, lid seal, exterior paintwork and inside of the chamber with a soft, lint free cloth using one of the following: Detergent solution - e.g. fairy liquid Bleach solution (if using biological agents) Methanol Ethanol
3.6
List of acceptable solvents Acetic Acid Acetonitrile (ACN) Acetone Ammonium Hydroxide (NH3OH) Butan-1-ol Butan-2-ol Butyl Acetate Chloroform (TCM)
Methyl Tertiary Butyl Ether Methylene Chloride (DCM) Propan-1-ol or Propanol Propan-2-ol or isopropyl alcohol (IPA) THF Toluene Water
1,2-Dichloroethane Dioxane Ethanol (EtOH) Ethyl Acetate Formic Acid Heptane Hexane (Hex) Methanol (MeOH)
SOLVENTS IN RED CAN ONLY BE USED IN COMPLETE SYSTEMS WHERE ALL UNITS (CONCENTRATOR, SPEEDTRAP AND PUMP) HAVE A DATE OF APRIL 2007 OR LATER ON THE SERIAL PLATE. miVac Systems and Combustible Solvents: Please note it remains the responsibility of the user to consider safety when evaporating any combustible solvents and ensure the system is placed in a well ventilated environment. Genevac and the ATEX Directive: This Statement is applicable only to Member Countries of the EU. Please note that it remains the responsibility of the user to consider any solvents being evaporated within the context of the ATEX directive. The presence of solvents on the list above indicates only that they will not damage the system. If further information is required, please contact your Sales Representative or visit http://www.miVac.co.uk Page 6 of 22
04-5057 Issue 1-17 –October 2008
miVac Series
DNA/DUO/QUATTRO CONCENTRATOR 4
Getting Started
1.
Refer to “Safety and Maintenance Notes” and “Installation Instructions”.
2.
Open Lid. (For Quattro Concentrator ensure that the latch engages).
3.
Fit rotor by carefully sliding it on to shaft.
4.
Load the rotor with your samples, ensure evenly balanced.
5.
Close Lid. (For Quattro Concentrator lift lid to disengage latch)
6.
Set Chamber Temperature, refer to Para 5.1 (if no temperature is selected, the unit will run at the current chamber temperature).
7.
Set Run Type, refer to Para 5.2 (if no type is set, the unit will use the current settings).
8.
Set Total Run Time, refer to Para 5.3 (if no time is set, the unit will use the current settings).
9.
Set Heat Time, refer to Para 5.4 (if no time is set, the unit will use the current settings).
10.
Press MANUAL or AUTO button to start the run.
11.
If the MANUAL button was pressed, the STOP button will need to be pressed to stop the run.
12.
If the AUTO button was pressed, the run will stop after the TOTAL time has passed.
13.
The end of run is confirmed by the system emitting 4 long beeps and unlocking the lid.
NOTE: The rotor may continue to spin slowly after the run has ended. WHEN REMOVING YOUR SAMPLES CARE SHOULD BE TAKEN AS THE CHAMBER AND SAMPLE HOLDERS WILL BE AT THE SAME TEMPERATURE THAT WAS SET FOR THE RUN.
04-5057 Issue 1-17 – October 2008
Page 7 of 22
miVac Series
5
Controls
Let’s take a closer look at the controls and what they do: Switch the unit on and the LCD screen will temporarily illuminate to display:
This is a test to ensure that all LCD segments are functioning correctly; it will then revert to the ready mode: o The display will indicate the current run settings. For example, with a current chamber temperature of 24 C and a TOTAL run time of 1 hour, the display will indicate:
There are 4 buttons and a rotary selector. PRE-HEAT When pressed this allows you to pre-heat the chamber to 40oC prior to starting the run, when selected the LED is illuminated. Pre-heat is cancelled when you press either of the start buttons, the STOP button or the PREHEAT button again. MANUAL – Runs until you push STOP. When pressed this emits a single beep and starts the run and will continue to run until the STOP button is pressed. When this mode is selected the LED is illuminated and the time counts UP to indicate the time accumulated. AUTO – Runs for the time set and then stops When pressed this emits a single beep and starts the run. The system will shut down when the TOTAL time set has elapsed. When this mode is selected the LED is illuminated and the time counts DOWN to indicate the time remaining. STOP When pressed this emits a single beep and stops the run. The STOP button can be pressed at any time and the system will safely shutdown. If the STOP button is pressed again when the system is idle it will cause the system to enter standby. Pressing any button will bring the system out of standby. SELECT This is a rotary selector and switch unit that is used to set and adjust the various run parameters to suit your needs. These are: Maximum Temperature, Run Type, Run Time and Heat Time.
Page 8 of 22
04-5057 Issue 1-17 –October 2008
miVac Series To adjust and set the required parameters rotate the knob to move to the desired position, the display changes with [ ] appearing at each position in turn. To adjust the value, press the knob to select it (the [ ] will flash), then turn the knob to increase or decrease the value. Once the correct value is attained, press the knob to accept it. NOTE:
The selected value will be accepted automatically after 30 seconds if you do not press the knob.
Repeat the procedure for all parameters. 5.1
Setting Chamber Temperature
Note: Once you press the selector to accept the new value, the display reverts back to displaying the current chamber temperature (We have used 24oC as the current temperature for all examples).
Select Parameter
Adjust Value
After Accepting Value
5.2 Setting Run Type Choose H2O for water only, -OH for alcohols and alcohol mixes and --- for all other solvents.
Select Parameter
Adjust Value
After Accepting Value
The run types are designed to vent air through the concentrator at a rate optimised for the solvent group selected: --- No venting, H2O Low vent rate and -OH High vent rate. 5.3
Setting Total Run Time
Allows you to set the duration of the run.
Select Parameter 5.4
Adjust Value
After Accepting Value
Setting Heat Time
Allows you to control the amount of time that chamber heating is applied, this is only available if Chamber Temperature is set to 30°C or above.
Select Parameter 5.5
Adjust Value
After Accepting Value
Display mode in AUTO run.
The display is factory set to show TOTAL TIME, but it can be changed to display HEAT TIME when using the AUTO run function. To change the factory setting; whilst in the Heat Time setting, hold down the selector for 5 seconds until a single beep is heard. The display will now indicate HEAT TIME until it has counted down to 00:00, it will then revert to display the remaining TOTAL TIME. To revert back, carry out the same, but for TOTAL TIME. 04-5057 Issue 1-17 – October 2008
Page 9 of 22
miVac Series 5.6
Getting the best from miVac solid aluminium rotors.
Aluminium rotors are fast because, compared to your tubes, they're better at collecting heat from the concentrator. This heat is then transferred to your tubes so speeding evaporation. If you can start a run with the system pre-heated it will be faster still. Have a look at the graph to see typical differences depending on how the system is used.
If you really care about getting the fastest speed then try to get into the habit of leaving your empty rotor in the concentrator with the lid shut and pre-heat enabled. Short runs particularly, benefit from this. The software has also been modified to optimise the benefits from the new rotors (V1.09 on). See below: DO NOT PRE-HEAT WITH YOUR SAMPLES LOADED • • •
Rather than the pre-heat function being fixed at 40°C, pre-heat now heats to your control temperature. You can choose to latch on pre-heat by holding down the pre-heat button for 5 seconds. The system then automatically remains warm between runs. (You can cancel this as usual with a short press of the pre-heat button). The [H2O] function for Duo and Quattro concentrators has been optimised for aluminium rotors. Always use this function when you have more than a few tubes of water. However you might find full vacuum, [---], faster with just a few tubes.
Always use the [H2O] function on DNA system when evaporating water or solvents with similar boiling points. Note for existing users: •
Existing systems will still benefit from the new aluminium rotors, even without the new software you'll still get 80%-90% of the improvement shown on the graphs.
Page 10 of 22
04-5057 Issue 1-17 –October 2008
miVac Series
SPEEDTRAP
6
Introduction.
The miVac SpeedTrap offers you the following features: • • • • 6.1
Unique frost free cold trap. No defrosting required, all solvents (including water) collect as liquids. Easy to empty - collection jar is removed by quarter turn. Ideal for use on all concentrators, except freeze driers.
Safety.
NOTE: After installation leave the SpeedTrap in the upright position for 24hrs before connecting power. Please be assured that sudden boiling of solvent within the jar is normal and it will recondense. You may also see ice forming in the jar, this is normal under certain conditions. The collection jar is only to be emptied at the end of a run when the Concentrator has stopped. If ice forms in the Condenser jar, allow it to thaw naturally. Do not use implements to try and break the ice as this may damage the jar. Cold water may be added to the jar to accelerate the thawing process. THE DRIP TRAY IS TO BE EMPTIED REGULARLY TO AVOID THE RISK OF SPLASHING. CARE IS TO BE TAKEN WHEN REMOVING THE COLLECTION JAR, AS IT IS HEAVY, ESPECIALLY WHEN FULL OF SOLVENT. INSPECT THE COLLECTION JAR BEFORE EVERY USE FOR DAMAGE, CRACKS ETC. DO NOT ALLOW TO FILL ABOVE “MAX” LINE AS IT MAY CAUSE DAMAGE TO THE PUMP AND STOP CONCENTRATION. EMPTY THE COLLECTION JAR AFTER EVERY RUN. REFER TO LIST OF ACCEPTABLE SOLVENTS BEFORE USE 6.2
Cleaning.
Exterior surfaces can be cleaned using a lint free cloth, the following also apply: • • •
Do not use abrasives. Collection jar is Dishwasher safe. Collection jar is not suitable for an Autoclave.
04-5057 Issue 1-17 – October 2008
Page 11 of 22
miVac Series 6.3
Setting up.
If you are using the SpeedTrap as part of a miVac system, refer to Pages 3 to 6 inclusive. If you are using the SpeedTrap as a “Stand Alone” miVac unit in conjunction with other equipment please refer to Safety and Maintenance notes on Page 3 of this manual. Connect the SpeedTrap to your existing equipment as detailed below: FOR USE IN JAPAN, BEFORE CONNECTING TO MAINS POWER SUPPLY, ENSURE THAT THE FREQUENCY ADJUSTER ON THE REAR OF THE SPEEDTRAP IS SET TO THE CORRECT POSITION FOR YOUR MAINS SUPPLY, REFER TO DIAGRAM BELOW:
EXTERNAL VACUUM SOURCE
Connect Mains Power Cable A supplied with the SpeedTrap to the connector on the SpeedTrap and your Mains Supply. Connect existing equipment’s Mains Power Cable B to your Mains Supply. Switch the SpeedTrap ON. 6.4
Collection jar – fitting and removing.
To fit the jar, position so that the handle is to the front, lift the jar and rotate to the right a quarter turn until resistance is felt. The collection jar is removed by rotating the jar to the left a quarter turn, refer to Paragraph 6.1 Safety before attempting. 6.5
LED – indication of condition.
The blue LED on the front of the SpeedTrap indicates the current condition. LED FAST FLASH SLOW FLASH STEADY
CONDITION DEFROSTING CHILLING CONDENSING
The system will defrost for 3 minutes every hour; this is perfectly normal and requires no user intervention. Page 12 of 22
04-5057 Issue 1-17 –October 2008
miVac Series
DUO/QUATTRO PUMP UPPER VENT HOLES (SAME BOTH SIDES)
7
Introduction.
The miVac Duo and Quattro pumps offer you the following features: • • • • 7.1
Oil free operation. Low maintenance. Low vacuum (DuoPump). High Vacuum (QuattroPump).
Safety.
Refer to Page 3 Safety and Maintenance Notes. 7.2
Cleaning.
Exterior surfaces can be cleaned using a lint free cloth. • • • 7.3
Do not use abrasives. Catch Pot is Dishwasher safe. Catch Pot is not suitable for an Autoclave.
Setting up.
If you are using the pump as part of a miVac system, refer to Pages 3 to 6 (of this manual) inclusive. If you are using the pump as a “Stand Alone” miVac unit in conjunction with other equipment please refer to Safety and Maintenance notes on Page 3 of this manual. Irrespective of what model miVac pump you have, the connections and function are the same. When used with the miVac series of concentrators the electrical power is controlled and supplied by the concentrator using the interconnecting lead. When used with non miVac concentrators the power lead is connected to your mains power supply. Connect the pump to your existing equipment as detailed below:
If using a Catch Pot, ensure that the Catch Pot is fitted to the lower row of opening of the upper vent and empty after every run. If you are not using a Catch Pot connect a length of suitable hose from the pump exhaust to a waste container. 04-5057 Issue 1-17 – October 2008
Page 13 of 22
miVac Series
8
Error messages & Troubleshooting
Errors may be displayed on the LCD display when problems are detected by the internal self check routine; see example below:
Error codes will not be displayed during a run NOTE: If you experience any of the Errors listed below, always switch the system power OFF, wait 5 seconds and then switch the power back ON and try again. If the problem is still apparent contact your Distributor or Genevac Service. Er CODE 01 02
CAUSE OF ERROR Software Error – Memory failure Lid not closed during run
03
Lid not locked during run
04 05 06
Motor drive error Rotor failed to spin Rotor failed to reach speed
07
Rotor stops unexpectedly
08
Lid failed to lock
09
Lid failed to unlock
10 11 12
Software Error – Sensor read error Software Error – Chamber temperature low Software Error – Chamber temperature high
RECTIFICATION See NOTE above Ensure lid is closed and engaged with latch Check lid seal is fully seated Ensure lid is closed and engaged with latch Check lid seal is fully seated See NOTE above Ensure Rotor spins freely Ensure Rotor spins freely Check mains power supply within tolerance Ensure Rotor spins freely Check mains power supply within tolerance Ensure lid is closed and engaged with latch Check lid seal is fully seated Ensure lid is closed and engaged with latch Ensure user not lifting lid against latch Check lid seal is fully seated See NOTE above See NOTE above See NOTE above
The following tables list some possible symptoms and their corrective actions: Concentrator/Pump SYMPTOM Display blank Lid will not open/difficult to open
CAUSE No power Dirty lid seal
Rotor will not spin/double beep
Lid not fully closed
Excessive vibration/noise Chamber fails to reach programmed temperature Solvent splashes/condensation
Page 14 of 22
Rotor jammed Rotor imbalanced Missing exhaust silencer/muffler Uneven work surface Heat time not set or insufficient
CORRECTIVE ACTION Check power supply/lead Clean lid and seal External control valve (if fitted) wrong way round Open and close lid Check lid seal fully seated Check for obstructions Check for freedom of rotor Check and rebalance rotor Replace exhaust silencer/muffler Take corrective action Adjust
SpeedTrap not operating correctly Poor vacuum Overfull plates
See “SpeedTrap” See “Vacuum problem” See loading limits
04-5057 Issue 1-17 –October 2008
miVac Series Concentrator/Pump (continued) SYMPTOM Vacuum problems
CAUSE Pump not running Lid seal leaks Hoses Control valve (if fitted) not opening Condenser jar not sealed Pump inefficient
Excessive concentration times Excessive solvent in pump miVac pump runs continuously Excessive sample odour
Exhaust silencer/muffler blocked SpeedTrap Condenser jar full Pump needs servicing Poor vacuum SpeedTrap not operating correctly Insufficient Chamber heat SpeedTrap not operating correctly Incorrect run settings Connected directly to mains power Solvent vapour exhausting in to lab
CORRECTIVE ACTION Check connections/mains power supply Check for damage/dirt. Clean if required. Check for leaks Check for blockages Check connections Check connected to concentrator “pump outlet” Check vapour flow direction Remove jar and check seal for damage/debris. Replace Run system without samples for 5 minutes. Repeat 3 times then reload samples Replace exhaust silencer/muffler See “SpeedTrap” Empty jar Contact your distributor See “Vacuum problem” See “SpeedTrap” Adjust Heat time See “SpeedTrap” Select run settings suitable for your solvent Connect to concentrator using interconnecting lead Check connections Check pump/system exhaust ducted to suitable fume extraction point
SpeedTrap SYMPTOM No LED illumination
CAUSE No mains supply
Excessive boiling of solvent in jar
Warm solvent
No solvent in jar
Excessive vacuum Incorrect run type Poor cooling
Poor recovery rate
Excessive vacuum Incorrect run type Poor cooling
04-5057 Issue 1-17 – October 2008
CORRECTIVE ACTION Check SpeedTrap mains power supply lead Stop run and empty jar. Restart run. Check vacuum appropriate to application Select suitable run type Allow SpeedTrap to cool for 30 minutes with no concentration, then Restart run Check LED status Check air flow, ensure vents are clear from obstruction Check vacuum appropriate to application Select suitable run type Allow SpeedTrap to cool for 30 minutes with no concentration, then restart run Check LED status Check air flow, ensure vents are clear from obstruction Page 15 of 22
miVac Series
TECHNICAL DATA 9
General Concentrator: DNA Max rotor speed Max Force Drive system
1465 RPM 250G Permanent magnet electronic drive
Duo Max rotor speed Max Force Drive system
1465 RPM 250G Permanent magnet electronic drive
Quattro Max rotor speed Max Force Drive system
1130 RPM 250G Permanent magnet electronic drive
SpeedTrap: Condenser temperature Minimum Maximum defrost Jar capacity Rapid defrost Condenser jar Refrigerant
-50°C +60°C 1 litres (2.0 litres Optional) Yes Borosilicate Glass R404a
Vacuum pump: Duo Pump Flow rate
10.0 mbar (nominal) – (7.5 torr) 38 l/min (1.34 cf/m)
Quattro Pump Flow rate
< 2.0 mbar (nominal) – (1.5 torr) 33 l/min (1.16 cf/m)
Dimensions: Including pipework at back DNA Concentrator (W x D x H) Weight
360 (501 with Catchpot) x 602 x 300 mm 37 Kg
Duo Concentrator (W x D x H) Weight
360 x 424 x 300 mm 20 Kg
Quattro Concentrator (W x D x H) Weight
480 x 594 x 300 mm 32.5 Kg
SpeedTrap (W x D x H) Weight
212 x 563 x 450 mm 25.8 Kg
Duo Pump (W x D x H) Weight
215 x 389 x 315 mm 17 Kg
Quattro Pump (W x D x H) Weight
215 x 389 x 315 mm 17.5 Kg
Page 16 of 22
04-5057 Issue 1-17 –October 2008
miVac Series Electrical: Volts (V): 120V (±10%) 230V (±10%) 100V (±10%) 220V (±10%)
60Hz 50Hz 50/60Hz 60Hz
(USA) (UK + Europe) (Japan) (Saudi Arabia, Korea)
Power Consumption: Amps (A): 230V 50Hz
220V 60Hz
120V 60Hz
100V 50/60Hz
2.6 1.6 3.9 1.1 0.60 1.8
2.6 1.6 3.9 1.1 0.60 2.3
4.7 2.8 7.2 2.1 1.2 4.1
4.5 2.5 6.2 2.5 1.5 4.8
230V 50Hz
220V 60Hz
120V 60Hz
100V 50/60Hz
650 400 950 250 150 550
650 400 950 250 150 550
650 400 720 250 150 550
500 250 720 250 150 550
DNA Concentrator Duo Concentrator Quattro Concentrator Duo Pump Quattro Pump SpeedTrap Volt-Amperes (VA): DNA Concentrator Duo Concentrator Quattro Concentrator Duo Pump Quattro Pump SpeedTrap
NOTE: The systems may momentarily take current in excess of the figures quoted above. Genevac therefore recommends the use of appropriately rated type C or D circuit breakers on the main supply. Always assume that all power is dissipated as heat. Environment: The following figures apply:
Ambient Temperature: Relative Humidity: Altitude:
Operating
Storage
0°C to 30°C 0 – 95% Sea Level to 1,600m
-10°C to 55°C 0 – 95% Sea Level to 12,000m
Emissions: Noise levels do not exceed 70dBA at one metre from the concentrator.
04-5057 Issue 1-17 – October 2008
Page 17 of 22
miVac Series
10 EC Declaration of Conformity
EC Declaration of Conformity - miVac Products Manufacturer’s Name: Genevac Ltd Manufacturer’s Address: Farthing Road Ipswich Suffolk IP1 5AP UK Type of Equipment: Laboratory Equipment This is to certify that the following miVac products: DNA Concentrator, models: DNA-23050-x00 1 Duo Concentrator, models: DBP-23050-x00, DUC-23050-x00, DPP-23050-x00 Quattro Concentrator, models: QLP-23050-x00, QUC-23050-x00, QHP-23050-x00 SpeedTrap, models: MST-23050-x00 Duo Pump models: DUP-23050-x00 Quattro Pump models: QUP-23050-x00 Super Vacuum Pump model: SVP-23050-x00 Control Valve model: UOP-00000-Y00 Serial Numbers from/to: Individual declarations are available on request Conform to the Essential Health and • Safety requirements of European • Directives: •
Machinery Directive (98/37/EEC), EMC Directive (2004/108/EEC) and Low Voltage Directive (73/23/EEC) as amended
Conformity is demonstrated by • compliance to the following standards: • • • • •
BS EN ISO 12100 pts 1 & 2:2003, EN 60204-1: 1998, EN 294: 1992, (Not Pump or SpeedTrap) EN1088: 1996, (Not Pump or SpeedTrap) IEC 61326: 1997 and BS EN 61010-1: 2001
Signed:
Position: Director of Technology and Business Development
Name: Bob Evans
Date: 5th May 2005
Being the person appointed on behalf of Genevac Ltd to sign on their behalf 1
Where ‘x’ = A, B, D, E or F and denotes power lead code appropriate to destination EC country
Page 18 of 22
04-5057 Issue 1-17 –October 2008
miVac Series
11 Safety
WARNING! THIS SYSTEM MUST BE EARTHED THIS SYSTEM IS A SAFETY CLASS 1 PRODUCT ACCORDING TO IEC CLASSIFICATION. IT MUST NEVER BE USED WITH ANY INTERRUPTION TO THE SAFETY EARTH CONDUCTOR. IT IS AN INSTALLATION CATEGORY II PRODUCT AND IS INTENDED TO OPERATE FROM A NORMAL SINGLEPHASE SUPPLY. THIS SYSTEM HAS BEEN DESIGNED TO BE USED IN A POLLUTION DEGREE 1 ENVIRONMENT (NO POLLUTION, OR ONLY DRY NON-CONDUCTIVE POLLUTION). ANY MAINTENANCE OR REPAIR OF THIS PRODUCT SHALL BE CARRIED OUT BY GENEVAC PERSONNEL (OR APPROVED REPRESENTATIVES OF GENEVAC) USING ONLY APPROVED SPARE PARTS.
12 Accessories Part Number
Description
D of Q
General STJ-10000-000
1 litre jar for miVac SpeedTrap
1
STJ-20000-000
2 litre jar for miVac SpeedTrap
1
MCK-00000-Y00
System Connection kit for connection of pump and/or cold trap to concentrator, complete with 2.5m ½" tube, tube cutter, power lead to control pump & catch pot for pump
1
CRT-10000-200
Cart with two shelves suitable for all systems.
1
VAP-TRAP0-100
Vapour trap for neutralisation of ammonia or acid vapours, complete with all connections. Requires neutralising solution
1
NH3-REF00-100
Ammonia neutralising solution, 4x 500ml
1
ACD-REF00-100
Acid neutralising solution, 4 x 500ml
1
Vapour Traps
04-5057 Issue 1-17 – October 2008
Page 19 of 22
miVac Series
Part Number
Description
D of Q
Rotors for miVac Duo and DNA DRC-15EPP-048 *
48 x 1.5ml Eppendorf tube rotor (supplied as std with DNA system)
1
DRC-15EPP-084
84 x 1.5ml Eppendorf tube rotor
1
DRC-05EPP-120
120 x 0.5ml Eppendorf tube rotor
1
DRC-MIXEP-048 *
24 x 0.5ml & 24 x 1.5ml & 24 x 2.0ml Eppendorf tube rotor
1
DRC-50CCT-008
8 x 50ml Conical Based Centrifuge tubes (28mm x 115mm)
1
DRC-15CCT-012
12 x 15ml Conical Based Centrifuge tubes (17mm x 120mm)
1
DRC-18150-006
6 x 18mm by 150mm tall glass tubes rotor
1
DRC-16100-028
28 x (16 x 100mm) tubes
1
DRC-13100-032
32 x (13 x 100ml) tubes
1
DRC-01275-040
40 x 12mm by 75mm tall glass tubes rotor
1
DRC-01075-068
68 x (10 x 75ml) tubes
1
DRC-15V45-048
48 x (15 x 45mm) vials
1
DRC-12V40-078
78 x (12 x 40mm) vials
1
DRC-28V60-014
14 x (28 x 60mm) scintillation vials (20ml)
1
DRS-00000-200
Swing rotor to accept 2 microtitre plates (deep or shallow well)
1
BRS-STK00-004
Qty 4 Stackers for swing rotor to allow stacking of up to 3 shallow well plates per swing, increasing rotor capacity to 6
1
* Can be double stacked if using 1.5ml tubes Rotors for miVac Quattro QRC-15EPP-200
200 x 1.5ml Eppendorf tube rotor
1
QRC-50CCT-036
36 x 50ml Conical Based Centrifuge tubes (28mm x 115mm)
1
QRC-15CCT-072
72 x 15ml Conical Based Centrifuge tubes (17mm x 120mm)
1
QRC-18150-040
40 x 18mm by 150mm tall glass tubes rotor
1
QRC-16100-100
100 x 16mm by 100mm tall glass tubes rotor
1
QRC-01275-200
200 x 12mm by 75mm tall glass tubes rotor
1
QRS-00000-400
Swing rotor to accept 4 microtitre plates (deep or shallow well)
1
BRS-STK00-016
Qty 16 Stackers for swing rotor to allow stacking of up to 5 shallow well plates per swing, increasing rotor capacity to 20
1
BRS-STK00-004
Qty 4 Stackers for swing rotor to allow stacking of up to 2 deep or shallow well plates per swing, increasing rotor capacity to 8
1
Contact your Distributor for pricing and availability. Page 20 of 22
04-5057 Issue 1-17 –October 2008