GETINGE
ProSeal Plus and Premium User Manual V3.2
User Manual
36 Pages
Preview
Page 1
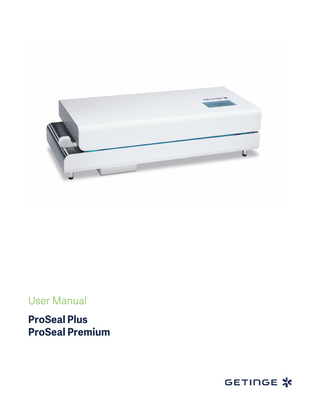
User Manual ProSeal Plus ProSeal Premium
Contents 1 Copyright ... 4 2 Validation ... 4 3 Safety regulations ... 5 3.1 Before use ... 5 3.2 Intended use ... 5 3.3 External equipment ... 5 3.4 Danger of electric shock ... 5 3.5 Damage to the sealer ... 6 3.6 Contamination of sterile goods ... 6 3.7 Hot surface ... 6 4 Installation ... 7 5 Sealer overview ... 8 6 Operating instructions ... 9 6.1 Switching on the sealer ... 9 6.2 How to seal ... 9 6.3 Change pouch preset ... 10 6.4 Change pouch settings manually ... 11 6.5 Slow pouch feed ... 11 6.6 Reverse function ...11 6.7 Printer Activation (Premium model only) ... 12 6.8 Change user-defined print parameters ... 12 6.9 Batch counter ... 13 6.10 Information ... 14 7 General settings ... 15 7.1 Login ... 15 7.2 Change date ... 15 7.3 Change time ... 16 7.4 Change language ... 16 7.5 Change standby time ...16 7.6 Change configured pouch presets...17 7.7 Change alarms ... 17 7.8 Internal printer configuration ... 18 7.9 External printer configuration ... 19 7.10 Internal/External printer user text configuration ... 19 7.11 Printer text spacing option ... 20 7.12 Change sealer ID ... 20 7.13 Save log ... 21 7.14 Information ... 21 2
GE TINGE • US ER MANUAL PRO S E AL V 3 . 2
8 T-DOC connectivity (Premium model only)
... 22
8.1 Netcom settings... 22 8.2 Netcom Network settings for T-DOC ... 22 8.3 Netcom Proxy settings ... 23 8.4 Netcom Information ... 24 8.5 T-DOC Devices ... 24 9 Service ... 25 9.1 Preventive maintenance ... 27 9.2 Replacing ink cassette ... 26 9.3 Cleaning instructions ... 26 10 Troubleshooting guide ... 29 10.1 Error codes ... 30 11 Technical data ... 35 11.1 Specifications ... 35 11.2 Description IN-/OUTPUT ... 35
History Version Status
Date
2.9
18-07-17
3.0
14-01-2019
3.1
11-02-2019
3.2
13-03-2019
GE TINGE • US ER MANUAL PRO S E AL V 3 . 2
Comment
◦◦◦◦ ◦◦ ◦◦ ◦◦
Added history table. Updated expiry date setting, as it is now part of the pouch presets. Updated for fan and changes in configuration of Plus sealer. Updated with feedback Getinge Draft, formatting to be changed to new Getinge format.
3
1 Copyright These instructions may only be given to third parties with the written consent of GETINGE. All documents are protected by copyright. The passing-on and copying of documents, including extracts and the communication or use for gain of their contents is not permitted, except by express consent. Infringements are punishable and will lead to claims for damages. We reserve all rights to exercise the provisions of commercial copyright law.
Warranty and Liability We accept liability within the terms of the stated warranty obligations for errors and omissions, to the exclusion of further claims. We reserve the right to make technical changes to the sealer covered by this instruction manual, for the purpose of further development. We accept no liability for damage and operational disturbances arising from incorrect operation, failure to observe these instructions, or improper repairs. Only original spare parts and accessories approved by GETINGE may be used. GETINGE accepts no liability for damage resulting from the use of non-approved spare parts and accessories. The drawings and graphics are not to scale.
Explanations Important instructions given in the technical documentation are indicated as follows:
Warning
Useful information
2 Validation Validation of the sealing process according ISO 11607-2 is necessary to ensure repeatable and consistent seal quality of packed instruments to be sterilized. ISO 11607 Part 2 describes validation steps and is applicable to industry, to health care facilities, and wherever medical devices are packaged and sterilized.Validation enables the user to find the best sealing parameters for different types of packaging with the onsite used sealing device. ProSeal sealing devices are validatable according ISO 11607 Part 2 and tested with different packaging materials. Please contact your local Getinge organization or authorized dealer for further information.
4
GE TINGE • US ER MANUAL PRO S E AL V 3 . 2
3 Safety regulations These instructions must be read and strictly complied with.
3.1 Before use
○○Users must familiarize themselves with the instructions in this manual before using the ProSeal sealer.
3.2 Intended use The ProSeal sealers are designed to be used only for sealing of sterilization packaging in compliance with EN 868-5 and ISO 11607-1.
○○ Sterilization Rolls and Pouches made of medical grade paper/film ○○ Sterilization Rolls and Pouches made of Tyvek/film The ProSeal sealer is not able to seal the following materials:
○○ PE packaging
Do not seal materials that can release toxic or flammable gasses when being heated. There are more materials which are not intended to be used with the ProSeal sealer. If you have any doubt, please contact your GETINGE supplier/dealer.
○○ The sealer may only be used for its intended purpose, in accordance with the generally
recognized rules of technology and the industrial health and safety regulations. It must not be used if it has any defects that might be dangerous to employees or third parties.
○○ The sealer can only be used indoors. ○○ The sealer may only be used under supervision. ○○ The sealer may only be used by trained personnel. 3.3 External equipment
○○ All equipment connected to the Ethernet or USB port shall be reinforced insulated from mains. 3.4 Danger of electric shock
○○ The sealer may not be opened by unauthorized personnel in order to prevent injury through electric shock or the transport mechanism.
○○ Only an authorized technician or a specialized dealer may undertake servicing work on the sealer.
GE TINGE • US ER MANUAL PRO S E AL V 3 . 2
5
3.5 Damage to the sealer
○○ If the packaging material becomes trapped, it must not be pulled out of the sealer. This would damage the sealer.
○○ The sealer is not suitable for sealing Polyethylene (PE) bags. The sealer may be damaged if an unsuitable material is used.
○○ The reverse button must not be used to feed packaging material into the sealer from the right. 3.6 Contamination of sterile goods “Danger of patient infection”
○○ If the pressure of the pressure rollers is set incorrectly, the seam will not be bacteria-tight. ○○ The user must set the recommended sealer temperature for each packaging type to ensure
proper seal quality. Recommended sealing parameters are given by packaging manufacturer and listed in their Instruction for Use.
○○ Validation of sealing process including sealing parameters is highly recommended to achieve consistent and repeatable seal quality.
○○ If the temperature is too low, the seam will be incomplete or weak. ○○ If the temperature is too high, the package will be difficult to peel open. Paper fibres may be released and contaminate the sterile goods.
○○ Released paper fibres may result in patient infection. 3.7 Hot surface
○○ When the printer (Premium model only) has been running for some time, the print head will be hot. Avoid touching the print head when changing the ink ribbon.
○○ When the housing feels hot, please contact your GETINGE supplier/dealer.
6
GE TINGE • US ER MANUAL PRO S E AL V 3 . 2
4 Installation Position the sealer as required. Make sure the appliance inlet is always within reach.
○○ Plug the mains cable into the socket at the back of the sealer. ○○ Equipment should always be connected to a properly grounded mains socket. ○○ Check that the voltage and frequency of the supply are according to the specifications (chapter 11.1).
○○ Plug the mains lead into the power socket. ○○ The ProSeal sealer is now installed. ○○ We advise to calibrate and validate the sealer during installation. For further information regarding installation and validation we advise to read the GETINGE validation documentation and/or contact your local GETINGE organization or authorized dealer.
GE TINGE • US ER MANUAL PRO S E AL V 3 . 2
7
5 Sealer overview
Front view sealer
Rear view sealer
Top view sealer
8
GE TINGE • US ER MANUAL PRO S E AL V 3 . 2
6 Operating Instructions The ProSeal sealers are able to seal sterilization packaging in compliance with EN 868-5 and ISO 116071. The sealer is not suitable for sealing PE bags. Validation of the sealing process according ISO 11607-2 is recommended to ensure consistent and repeatable seal quality. See Validation chapter 2, page 5. Damage to the sealer See section 3.5, page 7
6.1
Switching on the sealer
○○ Set the power switch at the back of the sealer to (I). The display supplies information on the heating up process.
The large temp is the actual temperature; the temperature below with symbol is the set temperature. Wait until the sealer has reached the set temp. During heat-up of the sealer the light at the front of the sealer will blink. When the set temp is reached the light at the front of the sealer will change to solid blue and there will be a short audio signal. The sealer is ready to operate.
6.2
How to seal
○○ Adjust the feeding guide and select the preferred distance. The guide adjusts the distance of the seal to the top part of the pouch and can be set from 0 to 30mm
○○ Feed the pouch to the machine, the sensor will recognize the entry and the sealer will start automatically.
○○ Hold and support the pouch when it is being transported. The light at the front will follow the pouch through the sealer giving visual indication that the pouch is being sealed correctly (Premium model only).
GE TINGE • US ER MANUAL PRO S E AL V 3 . 2
9
○○ A support table can be put in front of the sealer to enable faster sealing without the need to hold the pouch.
Check the seal
After first sealing, the seal should be checked visually for any gaps or wrinkles. Gaps in the seal could be caused
by too low pressure or temperature settings. Wrinkles or melting of film layer could be caused by too high temperature settings. Recommended sealing parameters of each packaging should be followed and are listed in packaging manufacturer’s instruction for use.
6.3
Change pouch preset
This function only allows for selecting the preffered configured pouch presets. The presets can be configured in the configuration menu (chapter 7.6, page 18).
Press Menu Press Pouch presets
Select preferred Pouch preset and press Save
10
GE TINGE • US ER MANUAL PRO S E AL V 3 . 2
6.4
Change pouch settings manually
Press Menu Press Pouch presets
Press Manual and change Temp, Speed and/or expiration days with “+” and “-“. Press Save to exit
6.5
Slow pouch feed
For easy handling of big packages the Slow pouch feed function can be activated. The belt will start at a lower speed providing the user extra comfort in feeding the pouch into the sealer. The speed will automatically increase when the pouch is moving through the sealer. The sealer will automatically return to normal speed setting after sealing one pouch.
Press Slow button on main screen
6.6
Reverse function
When material is jammed in the sealer the pouch can be reversed by the reverse function. The transport mechanism runs in the opposite direction and the material can easily be removed. The sealer will automatically stop the reverse function.
Press Reverse button on the main screen GE TINGE • US ER MANUAL PRO S E AL V 3 . 2
11
“Damage to the sealer” See section 3.5, page 7
6.7
Printer Activation (Premium model only)
This option is to activate the Internal and/or External printer. The printer will print configured parameters in a preset order. The printer needs to be activated by pushing the Printer button on the main screen. To deactivate the printer push the Printer button again. The printer, internal and/or external, needs to be enabled in the configuration menu (chapter 7.8, 7.9, page 19). If the printer is disabled the Printer button will not be available on the main screen.
Printer activated Printer deactivated
6.8
Change user-defined print parameters
The user can change the printed User ID, User text and Lot number. Which parameters and in which order the parameters are printed can be configured in the configuration menu (chapter 7.8, 7.9, page 19).
Press Menu Press Printer
Push Edit button Adjust text and push OK to save. Press Close to return to main screen. For user text there are 2 options. A free text can be typed or preconfigured texts can be used and selected by typing the number of the desired configured text followed by pressing the OK button. Texts can be configured in the configuration menu (chapter 7.10, page 20).
12
GE TINGE • US ER MANUAL PRO S E AL V 3 . 2
Free text typing can be done by removing the current text with the backspace button and type the desired text with the keyboard. After typing the text needs to be saved by pressing OK. The typed text will now be printed.
Important
○○ Behind every symbol selected for printing there are data that were previously entered and confirmed.
○○ When the packaging material is fed into the sealer, the paper side must be facing down. 6.9
Batch counter
Use Batch counter to count number of sealed pouches*. In the menu the following can be set:
○○ Batch limit; to set the desired number of seals for a batch, set to 0 to disable the batch counter. ○○ Batch counter; to reset or modify number of counted pouches.
Press Menu. Press Batch counter.
Press edit to change Batch Counter and / or Batch limit.
Batch information is displayed in the main screen.
Batch text turns red and sealer Beeps, when Batch limit is reached.
After new seal, Batch count resets.
*When sealer is in T-DOC command mode, Batch counter is disabled.
GE TINGE • US ER MANUAL PRO S E AL V 3 . 2
13
6.10 Information For information about the sealer:
Press Menu Press Information Information Parameters:
○○ Service telephone number ○○ Software version ○○ Date, Time ○○ Unique ID ○○ Sealer name ○○ Status ○○ Temperature upper, lower ○○ Pressure ○○ Speed (During sealing the actual speed will be displayed, configured speed can be checked at pouch presets Chapter 6.3, page 11)
○○ Sensors active (1+2+3 should be active at the beginning of the sealing)
14
GE TINGE • US ER MANUAL PRO S E AL V 3 . 2
7 General settings 7.1
Login
The adjusting of configuration settings is protected with a login password. Authorized personnel can log in with the Service login entering the password.
Press Menu Press Service login
Type login password (8729) Press OK to log in
7.2
Change date
Press Menu Press Configuration
Press Date Adjust setting with “+” and “-“ buttons. Pressing Close will save the settings.
GE TINGE • US ER MANUAL PRO S E AL V 3 . 2
15
7.3
Change time
Press Menu Press Configuration
Press Time Adjust setting with “+” and “-“ buttons. Pressing Close will save the settings.
7.4
Change language
Press Menu Press Configuration
Press Language Press Close to return to main screen.
7.5
Press Edit and select preferred language in the menu.
Change standby time
Press Menu Press Configuration 16
GE TINGE • US ER MANUAL PRO S E AL V 3 . 2
Press Standby Adjust setting with “+” and “-“ buttons. Pressing Close will save the settings. Important: To switch off Standby time, select 0 min.
7.6
Change configured pouch presets
Press Menu Press Configuration
Press Pouch presets Adjust setting with “+” and “-“ buttons
Press Pouch 1, 2, 3 or 4.
Press Edit to change pouch name. Enter pouch name. Press OK to save.
7.7
Change alarms
Press Menu Press Configuration GE TINGE • US ER MANUAL PRO S E AL V 3 . 2
17
Press Alarms Adjust setting with “+” and “-“ buttons Pressing Close will save the settings
Important
○○ The Pressure Limit alarm is triggered by the difference between measured pressure and the pressure set point
7.8
Internal printer configuration
Press Menu Press Configuration
Press Printer Press Internal printer
To enable the internal printer select On button. Up to 9 parameters (internal) and 14 parameters (external) can be configured to be printed at the same time (depending on pouch width). The print order is defined by selecting the parameter at the preferred position (1st, 2nd etc.). Push Edit button and change to the preferred parameter.
18
GE TINGE • US ER MANUAL PRO S E AL V 3 . 2
Parameters:
7.9
○○ Seal date ○○ Seal time ○○ Seal temperature ○○ User ID ○○ User Text ○○ Expiration date ○○ Sealer Serial number ○○ Lot Number ○○ Seal Pressure
External printer configuration
The configuration of the external printer is the same as for the internal printer (chapter 7.8).
7.10 Internal/External printer user text configuration
Press Menu Press Configuration
Press Printer Press User Texts
Select User texts number with “+” and “-“ buttons. Press Edit.
Change configured text. Press OK to save.
99 User texts can be configured and stored.
GE TINGE • US ER MANUAL PRO S E AL V 3 . 2
19
7.11
Printer text spacing option
This option provides the possibility to stretch/compress the printed text.
Press Menu Press Configuration
Press Printer Press Options
Select Dot spacing with “+” and “-“ buttons. To increase text width increase the Dot spacing number. Press Close to save setting.
7.12 Change sealer ID
Press Menu Press Configuration
Press Sealer ID Change sealer ID. Press OK to save.
20
GE TINGE • US ER MANUAL PRO S E AL V 3 . 2