Owners Manual
66 Pages
Preview
Page 1
4434957 Diego manual - Rev AC-2_Diego Manual 2 7/17/12 9:53 AM Page 5
Diego® & PK diego® System Owner’s Manual Manufactured by/Customer Service USA:
Gyrus ACMI, Inc. 136 Turnpike Road Southborough, MA 01772 USA Tel:
901 373 0200 800-773-4301 Fax: 901 373 0220 800-757-2942
Authorized European Representative:
Gyrus Medical Ltd. Fortran Road St. Mellons Cardiff CF3 OLT United Kingdom Tel: +44 (0) 29 2077 6300 Fax: +44 (0) 29 2077 6301
CAUTION: Federal Law (USA) restricts this device to sale by or on the order of a Physician.
4434957 Diego manual - Rev AC-2_Diego Manual 2 7/17/12 9:53 AM Page 6
DIEGO® SYSTEM TABLE OF CONTENTS Page Warnings and Cautions... 1 System Description... 2 Indicated Use... 3 System Layout... 4 System Description... 8 System Set Up Instructions... 10 Blade and Burr Set-up... 13 Suction/Irrigation Set-up... 16 Cleaning and Sterilization... 17 Sterilization Recommendations... 20 Otologic Handpieces & Burrs Cleaning & Sterilization... 21 Maintenance... 24 Troubleshooting... 25 Repairs... 28 Warranty... 28 Symbols... 29
i
4434957 Diego manual - Rev AC-2_Diego Manual 2 7/17/12 9:53 AM Page 7
PK DIEGO® SYSTEM TABLE OF CONTENTS Page Introduction... 31 System Description... 31 PK Diego® Blade Description... 32 System Layout... 33 System Setup... 38 Using PK Diego®... 40 Troubleshooting... 44 Specifications... 45 Error and Fault Codes... 47 Symbols... 47 Maintenance... 48 Yearly Checklist for Technical Personnel... 49 Warnings and Cautions... 51
ii
4434957 Diego manual - Rev AC-2_Diego Manual 2 7/17/12 9:53 AM Page 8
Warnings and Cautions • Federal law restricts this device to sale by or on the order of a physician. • When unplugging the unit, do not pull on the power cord itself. This may damage wiring inside the cord. Pull the connector housing only. • When disconnecting the handpiece, do not pull the cord itself. This may cause damage to the internal wiring. Pull on the connector housing only. • Do not clean by ultrasonic means! Use of ultrasonic cleaning equipment may damage the handpiece and will void the product warranty. • Always remove blade/burr before sterilization of the handpiece. • To provide adequate cooling, where appropriate, for the blade/burr, to prevent accumulation of unwanted materials in the surgical site, and to prevent abnormal wear of the cutting surfaces, be certain to periodically irrigate the surgical site and the tip of the blade/burr and ensure that suction (at least 127mm hg vacuum) is flowing whenever the instrument is running. • Set pump flow so that irrigation is seen at the surgical site. (The flow of irrigating solution must exceed the level of suction.) • Avoid the use of chemical cleaning agents that might damage the silicone used in this instrument. Use a non-residue type cleaner, preferably isopropyl alcohol, or a solution of 10% mild detergent and 90% water. • Do not autoclave the handpiece unless it is thoroughly clean. • Follow cleaning instructions and use recommended brushes. • Visually inspect to ensure that no tissue, fluid, or blood has contacted the inner surfaces. • Mains disconnect device is unplugging cord. Position system so unplugging power cord is easily accessible. • The handpieces listed in this manual are for use with Gyrus ACMI, Inc. - ENT Division blade and burr attachments only. • Do not use sterile packaged items (blades, burrs, suction/irrigation tubing, trigger switch) if package seal is torn or broken. • Do not attempt to disassemble the handpiece. Failure to observe this caution will void the product warranty. • To mount the Diego controller to an IV pole, use the following height parameters. When the top of the IV pole is set to 72 inches, the top of the controller should not exceed 40 inches. When the top of the IV pole is set to 68-1/2 inches, the top of the controller should not exceed 58-1/2 inches. • Diego passed IEC 601-1-2 testing; however, do not place the Diego controller in direct contact with electrosurgery equipment or near any equipment that may emit electromagnetic fields or radio frequency. If interference is encountered, move/locate devices farther apart from each other. • To avoid risk of electrical shock, the equipment must be connected to a supply mains with protected earth. • Grounding reliability can only be achieved when this equipment is connected to an equivalent receptacle marked “HOSPITAL ONLY” or “HOSPITAL GRADE” • Neuromuscular stimulation of tissue may occur • No modification of this equipment is allowed.
Diego® System Manual
1
4434957 Diego manual - Rev AC-2_Diego Manual 2 7/17/12 9:53 AM Page 9
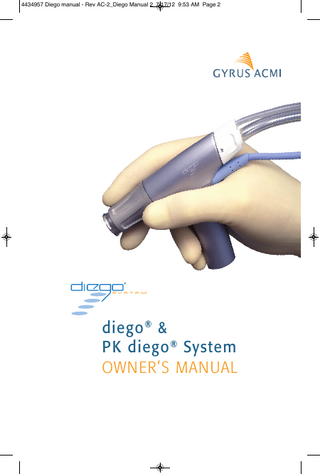
System Description The Diego Powered Dissector & Drill System from Gyrus ACMI, Inc. - ENT Division is comprised of a console, optional powered handpieces, footswitch, tubing set and hospital grade power cord. Console –Provides power and functionality to the specified Diego and Otologic handpieces. In addition, a peristaltic irrigation pump is integrated into the controller unit to facilitate local irrigation. Footswitch – The footpedal’s loop style base allows for easy “no-look” identification, orientation and movement under the table. Lights are incorporated on the pedal for easy orientation in a darkened operating room. Footswitch allows the user to operate the Diego handpiece in the traditional way. Diego also provides the option of handpiece actuation. Handpiece – The handpiece accepts a range of one-time use cutting blades, and tissue removal and drilling burrs. The handpiece's shape takes into account the comfortable neutral hand position and is designed to reduce "cord drag" to optimize balance and reduce fatigue. The handpiece includes a proprietary fluid control design that retards contact of bodily fluids from soiling the inner surfaces of Diego. The handpiece also allows the user to aim the cutting window of the blade circumferentially with minimal arm motion. Diego uses Diego blades and burrs from Gyrus ACMI, Inc. - ENT Division. Otologic handpiece styles are available in addition to Diego, including the Stapes drill, and Viper Straight or Angled handpieces. All are lightweight and designed to provide balanced power. One-Time-Use Tubing Set – The disposable tubing set combines suction and irrigation tubing into one component. The tubing set snaps into place, and works in tandem with the fluid control design to speed set-up and cleaning. The tubing set is discarded at the end of the procedure. The Viper high-speed drill uses a separate tubing set that does not include suction. Under normal conditions, blades and burrs may come in contact with the patient. PK blades are type BF applied parts.
Diego® System Manual
2
4434957 Diego manual - Rev AC-2_Diego Manual 2 7/17/12 9:53 AM Page 10
Indicated Use The Diego Powered Dissector System The Diego Powered Dissector System’s intended use is the cutting and removal of bone and tissue in general ENT, Head & Neck, and Otoneurologic procedures. Sinus applications would embody Ethmoidectomy, Sphenoethmoidectomy, Polypectomy, Septoplasty, and procedures such as the removal of septal spurs, Antrostomy, Frontal Sinus Trephination and irrigation, Frontal Sinus Drill-out, Endoscopic DCR and Trans-sphenoidal procedures. Nasopharyngeal/Laryngeal procedures would comprise Adenoidectomy, Laryngeal lesion de-bulking, laryngeal polypectomy, tracheal procedures and tonsillectomy. Head & Neck procedures would encompass soft tissue shaving, Rhinoplasty (narrowing of the bony vault and revision of the bony pyramid), removal of fatty (adipose) tissue (Lipodebridement) in the maxillary and mandibular regions of the face, and acoustic neuroma removal. Otology procedures would include Mastoidectomy and Mastoidotomy. Additionally, an irrigation pump is integrated into the controller unit to provide irrigant to the surgical site in conjunction with the procedures.
Diego Handpiece The Diego handpiece is intended for general nose, throat, and head & neck procedures. All Powered Dissector handpieces are intended to be used with the Gyrus ACMI, Inc. - ENT Division disposable sinus Powered Dissector blades and burrs. The equipment can be used in endoscopic or traditional methods of surgery. This equipment is not intended for use in Arthroscopy.
Stapes/Viper Handpiece The Stapes and Viper Handpieces are for use in otologic and otoneurologic procedures only. All Stapes and Viper handpieces are intended for use with Gyrus ACMI, Inc. - ENT Division burrs only.
Transport and Storage Conditions Parameter Ambient Temperature Range Relative Humidity Range (Non-condensing) Atmospheric Pressure Range
From 0º C 30% 500 hPa
Power Ratings 100 - 120/220 - 240 V AC, 50/60 Hz, 2 A.
Diego® System Manual
3
To 50º C 90% 1060 hPa
4434957 Diego manual - Rev AC-2_Diego Manual 2 7/17/12 9:53 AM Page 11
System Layout Diego Powered Dissector Console 70339000 Front Panel
1 2
3
4
5 6
8 9
7 10 11
12 13
1. Power On/Standby Switch
2. Maximum Handpiece RPM Display
3. Handpiece Speed Adjustment Control Switches 5. Actual Handpiece RPM Display
4. Active Handpiece Selection Switches
7. Footswitch Operating Mode Switches (constant & variable) 9. Irrigating Pump Flow Rate Control Switches / Display 11. Footswitch Input Connector 13. Irrigation Tubing
Diego® System Manual
6. Handpiece Operating Mode Switches (forward, reverse, oscillate) 8. Irrigating Pump On/Off Switch 10. Irrigating Pump Prime Switch 12. Handpiece Input Connectors
4
4434957 Diego manual - Rev AC-2_Diego Manual 2 7/17/12 9:53 AM Page 12
System Layout (cont.) Diego Powered Dissector Console 70339000 Rear Panel
1
2 3
1. IV Attachment Clamp
2. Grounding Post
3. Power Input Connector
Diego® System Manual
5
4434957 Diego manual - Rev AC-2_Diego Manual 2 7/17/12 9:53 AM Page 13
System Layout (cont.) Diego Powered Dissector Handpiece 70338010 70339001
6
3
2
1
4
5
1. Blade/Burr Engagement Collet
2. Nose Cone (revolving action)
3. Housing
4. Strain relief boot
5. Power Cord
6. Dual Lumen Suction & Irrigation Tubing Set, disposable (with snap-on connector)
Diego® System Manual
6
4434957 Diego manual - Rev AC-2_Diego Manual 2 7/17/12 9:53 AM Page 14
System Layout (cont.) Diego Powered Dissector Footswitch 70338011
1
2
3
1. Mode Change Button
2. Lighted Footpedal
3. Toe Loop
Diego® System Manual
7
4434957 Diego manual - Rev AC-2_Diego Manual 2 7/17/12 9:53 AM Page 15
System Description Maximum Handpiece RPM Display This is a 5 segment, LED display to indicate the maximum attainable RPM of the active handpiece.
Actual Handpiece RPM Display This is a 5 segment, LED display to indicate the actual RPM of the active handpiece.
Handpiece Speed Limit Adjustment Control Switches The plus and minus button controls-located on the front of the console on either side of the maximum speed display-allow the user to set the upper speed limit in either constant or variable mode.
Handpiece Operating Mode Switches The Diego Powered Dissector & Drill System operates the Diego Powered Dissector handpiece, Gyrus ACMI, Inc. - ENT Division Viper straight and angled drills, and the Gyrus ACMI, Inc. - ENT Division Stapes drill. Switches are provided on the front panel to control the mode of the active handpiece. If the handpiece does not support a mode, the switch shall not allow selection of that mode. The following modes are available: Powered Dissector Drill(s)
Oscillate, Forward & Reverse Forward & Reverse
Active Handpiece Selection Switches An LED display indicates which handpiece is active, as determined by the selector switches.
Footswitch Operating Mode Switches Changes the footswitch function from constant to variable.
Irrigating Pump The irrigation pump is a rotary type, peristaltic pump designed to drive irrigating solution to the surgical site via the Powered Dissector blade/burr or Viper mastoid drill handpiece. The irrigating pump is located on the side of the unit.
Irrigating Pump On/Off Switch The irrigation pump can be turned on/off by the power switch located on the front of the console as indicated by the LED light.
Diego® System Manual
8
4434957 Diego manual - Rev AC-2_Diego Manual 2 7/17/12 9:53 AM Page 16
Irrigating Pump Prime Switch To facilitate easy setup of the irrigation pump, a prime switch is provided that allows continuous pump operation to fill all tubing and/or handpiece with irrigant.
Irrigating Pump Flow Rate Control Switches/Display The flow rate of the pump is displayed on the front panel of the controller using a vertical bar-graph type display. The flow rate of the pump can be adjusted by pressing the (+) increase or (-) decrease switches located on the front panel. The pump is on the side of the unit.
Diego® System Manual
9
4434957 Diego manual - Rev AC-2_Diego Manual 2 7/17/12 9:53 AM Page 17
System Set-Up Instructions System Components Description Console & Power Cord Diego Handpiece
Cat. No. 70339000 70338010 70339001
Otology Drill Handpieces Synergy Viper Straight Synergy Viper Angled Synergy Stapes Footswitch Accessories Diego System Bifurcated Suction/Irrigation Tubing Irrigation Bag Spike Assembly for Mastoid Drill Handpiece Cleaning Kit Powered Dissector Mastoid and Stapes Drill
70338009 70325512
Power Cord for use in the U.K. Power Cord for use in Continental Europe Power Cord for use in Australia
70231054 70231055 70231056
70338030 70338031 70338032 70338011 70338003 70338007
A visual inspection should be completed prior to each use of the system. Examine the handpiece power cord for damage, such as nicks and cuts. DO NOT USE THE HANDPIECE IF THE POWER CORD IS DAMAGED. Verify the blade or burr is in good condition. DO NOT USE A BLADE OR BURR IF IT IS NOT IN PROPER WORKING ORDER. Test the chucking mechanism by engaging and removing a blade/burr several times. Verify that the system is operating properly by connecting the handpiece and footswitch and then running the system in the appropriate modes.
Diego® System Manual
10
4434957 Diego manual - Rev AC-2_Diego Manual 2 7/17/12 9:53 AM Page 18
Console Step 1 a) Connect the power cord into the port on the back of the console and into the appropriate power outlet. b) Press the Power On/Standby switch. All displays will turn on, then go off. The Power light will remain illuminated. Step 2 Connect the desired handpiece. The handpiece default mode illuminates, and the button for the selected handpiece (1 or 2) illuminates. NOTE: Maximum RPM shows the default handpiece setting. Actual RPM shows 0. Step 3 Connect the footpedal into the plug labeled as follows. The footpedal lights on both the console and footswitch illuminate. NOTE: If the handpiece is not first connected, only footswitch lights illuminate.
Step 4 a) The irrigating pump flow rate control display illuminates flow display defaults. NOTE: When using the Stapes drill handpiece, the pump is not available. b) You may now adjust the flow by pressing the + or - buttons. (See icons below.) (To ensure irrigation of the surgical site, the flow of irrigating solution must exceed the level of suction.)
c) Prime the pump by pressing the PRIME button. The flow display will show this. Footswitch The Diego single-pedal footswitch (Catalog No. 70338011) allows for operation in both variable and constant modes, depending on the console setting. Footswitch lights will illuminate when the footswitch is connected. Handpiece(s) Active Handpiece Handpieces can be connected to the controller by aligning the indicator mark on the plug with the corresponding indicator mark on the console input port and pushing until it clicks. Switches provided on the front panel select the active handpiece. Pressing the switches changes the active handpiece to the other connected handpiece.
Diego® System Manual
11
4434957 Diego manual - Rev AC-2_Diego Manual 2 7/17/12 9:53 AM Page 19
Handpiece(s) (Cont.) IT IS VERY IMPORTANT THAT THE INDICATOR MARKINGS ARE PROPERLY ALIGNED. If the alignment is incorrect, you will not be able to connect the handpiece with the console and the handpiece will not operate. Stapes
Viper
70338032
70338030 70338031
15,000 12,000 5,000 Table 1–Supported Handpieces
44,000 -
70339001 SPEED (Maximum RPM) Forward & Reverse Mode Oscillate Mode
Diego® System Manual
12
4434957 Diego manual - Rev AC-2_Diego Manual 2 7/17/12 9:53 AM Page 20
Blade and Burr Set-up (Powered Dissector) The Diego Handpiece (Sold separately from console) The Diego Powered Dissector handpiece (Catalog No. 70338010, 70339001) is a lightweight and powerful handpiece specifically designed for use with the Diego console, and performs to the parameters listed in Table 1. In order to operate the handpiece, chuck a single use disposable blade/burr into the chucking mechanism (one of 8 available positions). Diego includes a revolving blade chucking feature, allowing the user to orient the blade window manually. Once securely chucked, the user can manually orient the blade window orientation by rotating the nose cone left or right.
Powered Dissector Blades and Burrs Diego Powered Dissector blades/burrs are provided sterile and are single-use disposable instruments. Their hubs are designed to fit only the Gyrus ACMI, Inc. - ENT Division Diego Powered Dissector handpieces. There are various patterns, including straight, curved, smooth blades, serrated blades, and burrs.
Powered Dissector Blade and Burr Engagement A Powered Dissector blade or burr may be positioned in each of 24 different positions on Diego. The window position may be changed intraoperatively by rotating the nose cone. To engage the Powered Dissector blades/burrs: 1. Pull the sliding collet back. 2. Rotate the hub until the key aligns on the chucking mechanism. 3. Insert the plastic driver hub of the blade/burr into the handpiece until it stops completely. 4. Release the collet and firmly push the blade/burr into the handpiece until the collet springs back into its original position. 5. Pull slightly on the shaft of the blade/burr to verify engagement. 6. If the blade/burr pulls out, repeat steps 1-5. To disengage the Powered Dissector blade/burr: 1. Pull the sliding collet back. 2. Pull the blade/burr out of the handpiece. NOTE: Since the Powered Dissector blade/burr is a two-piece configuration, it is possible that the inner component may remain in the handpiece when the outer component is removed. If this happens, simply pull the inner component out. The chucking mechanism will not engage the inner component alone. The blades, burrs and tubing sets are one-time use disposable items. These items should be replaced after each surgery. Disposal of these items should comply with local hospital regulations for disposable items. Diego® System Manual
13
4434957 Diego manual - Rev AC-2_Diego Manual 2 7/17/12 9:53 AM Page 21
Burr Set-up (Otologic Drills) Viper Handpieces: (Sold separately from console) There are 2 Viper handpieces: Angled (70338030) and Straight (70338031). The handpiece power cord attaches through a custom strain relief for anti-rotation and anti-pullout, and attaches to the console with a quick release connecor. Hybrid ceramic bearings are used for decreased friction and corrosion resistance. The burr chucking mechanism features a locking ring with no external button to eliminate accidental release of the burr. Each handpiece has replaceable irrigation tubing that is secured to the power cord with quick release connectors. This tubing has a male luer connector.
Stapes Handpiece: (Sold separately from console) There is one stapes handpiece: (70338032) The handpiece power cord attaches through a custom strain relief for anti-rotation and anti-pullout, and attaches to the console with a quick release connector. The burr chucking mechanism incorporates a sliding collet. Hybrid ceramic bearings are used for decreased friction and corrosion resistance. The shaft is bent at a 15º angle to maximize visualization of the operative site.
Viper / Drill Burr Engagement: THE VIPER HANDPIECES WILL WORK ONLY WITH THE VIPER/MASTOID BURRS. THE STAPES HANDPIECE WILL WORK ONLY WITH THE STAPES BURRS. NOTE: ALL VIPER/MASTOID BURRS COME STERILE AND ARE INTENDED FOR ONE USE ONLY. STAPES BURRS ARE NON-STERILE AND CAN BE RE-USED, AFTER STERILIZATION. The Viper drill has a burr locking ring for engaging and disengaging burrs. When this locking mechanism is open the burrs will not engage. The locking ring must be closed in order to engage the burrs.
Viper / Mastoid burrs are engaged as follows: 1. Lock the locking ring by rotating it forward until it stops turning. 2. Insert the notched end of the burr into the nosecone of the handpiece. 3. Rotate the burr back and forth, and pull in and out slightly until you hear and feel a click. 4. Tug slightly on the burr. If it does not pull out, it has engaged. If it pulls out, repeate the above procedure. Another indicator of burr engagement is a ring around the shank of the burr. If this ring is visible after burr insertion, the burr is not properly engaged. 5. If the burr still does not engage, pull it out of the nosecone, rotate the bur one-quarter turn, and repeat the initial procedure again.
Diego® System Manual
14
4434957 Diego manual - Rev AC-2_Diego Manual 2 7/17/12 9:53 AM Page 22
The stapes handpiece has a sliding collet burr engagement mechanism. This grooved collet is located just behind the angled shaft of the nosecone. Engage the Stapes Burrs as follows: 1. Pull back on the sliding collet. 2. Hold the collet in place and insert the burr into the nosecone. 3. Release the sliding collet. 4. Gently tug outward on the burr. If it does not pull out, the burr has engaged. If it does pull out, repeat the burr engagement procedure.
DO NOT OPERATE THE HANDPIECE IF THE BURR IS NOT PROPERLY ENGAGED. If the burr is not properly engaged, the drill will not cut and the drive components may be damaged. THE DRILL HANDPIECES ARE DESIGNED FOR USE ONLY WITH GYRUS ACMI BURRS. No other burrs will engage or function with these handpieces. ALL GYRUS ACMI CUTTING BURRS ARE DESIGNED TO CUT IN THE FORWARD DIRECTION. The diamond burr functions equally well in forward or reverse.
Viper / Mastoid burrs are changed as follows: 1. Loosen the locking ring one-half to one full turn. IT IS RECOMMENDED THAT THE CONSOLE BE TURNED OFF PRIOR TO BURR REMOVAL. 2. Remove the burr. BURRS, PARTICULARLY CUTTING BURRS, MAY BECOME VERY HOT DURING USE. Exercise caution when removing burrs. 3. Lock the ring by rotating it forward until it stops turning. 4. Repeat the burr engagement procedure.
Stapes burrs are changed as follows: 1. Pull back on the sliding collet. 2. Remove the burr and hold the collet open. 3. Insert the new burr 4. Release the collet.
Diego® System Manual
15
4434957 Diego manual - Rev AC-2_Diego Manual 2 7/17/12 9:53 AM Page 23
Suction/Irrigation Set-up Suction/Irrigation Tubing Assembly Installation (Powered Dissector) 1. Inspect sterile package to assure that sterility has been maintained. 2. Remove tubing from package using appropriate sterile technique. 3. Center the tubing into the pump assembly located on the side of the console as shown on page 4, then turn the knob. When the knob handle is at the 3 o’clock/9 o’clock position, the pump is closed and ready for use. THE TUBING SHOULD NOT BE STRETCHED, NOR SHOULD THERE BE ANY SLACK. 4. Connect the spike end to a standard I.V. bag. Connect the integrated suction tube to the suction canister. Push the tubing connector into the connection port on the rear (proximal) end of the Diego handpiece until a palpable “click” is felt. Suction and irrigation is now ready to use. No additional attachment to the blade is necessary (To ensure irrigation of the surgical site, the flow of irrigating solution must exceed the level of suction.)
Suction/Irrigation Tubing Assembly Installation (Otologic Drills) Repeat steps 1 - 3 4. Connect the spike end to a standard I.V. bag. The Viper drill is provided with an attached irrigation tube with male Luer lock. Connect the two irrigation lines by inserting the male Luer lock into the female Luer lock and secure by twisting. (To ensure irrigation of the surgical site, the flow of irrigating solution must exceed the level of suction.)
Diego® System Manual
16
4434957 Diego manual - Rev AC-2_Diego Manual 2 7/17/12 9:53 AM Page 24
Cleaning and Sterilization Important Guidelines for Cleaning Thorough cleaning and rinsing is vital to reprocessing reusable medical devices. Effective cleaning must be carried out to achieve proper decontamination. All cleaning should be performed in a manner designed to minimize exposure to bloodborne pathogens. Reusable medical devices should be kept moist immediately after use until cleaning. Devices capable of disassembly must be disassembled prior to cleaning. Thorough cleaning and rinsing should be carried out as soon as possible. Manual cleaning with appropriate brushes should be done while the instrument is being rinsed (if applicable). The purpose of cleaning and rinsing is to remove all adherent visible soil and to reduce particulate matter, microorganisms and pyrogens. Furthermore, thorough rinsing is necessary to remove any residual cleaning agents from the medical devices that could protect microorganisms from destruction and reduce the lethality of the sterilization process. Medical devices that will be stored between cleaning and decontamination should be dried with low linting, non-abrasive soft cloth to prevent microbial contamination that could result from wet instruments. Console and Footswitch Wipe the outside of the console and footswitch using a soft wipe and isopropyl alcohol. Cleaning Agents and Equipment Detergents
Proteolytic enzymatic detergents with a pH range between 6.0 and 8.0 should be used. These detergents have nonionic surfactants. Detergents should be used at the concentration level recommended by the manufacturer. Note: Undiluted detergents and ones with pHs greater than 8.0 can strip the coloration from metal instruments.
Water
The quality of water should be carefully considered for use in preparing enzymatic detergents and for rinsing in the cleaning procedure. Water hardness is a concern because deposits left on medical devices may result in ineffective cleaning and decontamination. Deionized water can help prevent discoloration and staining associated with mineral residues found in tap water.
Sterile isopropyl alcohol prep pads Soft Cloths Cleaning Brushes
Used for cleaning console and footswitch. For drying handpiece. Diego Powered Dissector Cleaning Kit (70338009) and the Synergy Drill Cleaning Kit (70325512) are both available from Gyrus ACMI, Inc. ENT Division at 1-800-773-4301.
Diego® System Manual
17